Wednesday, September 30, 2009

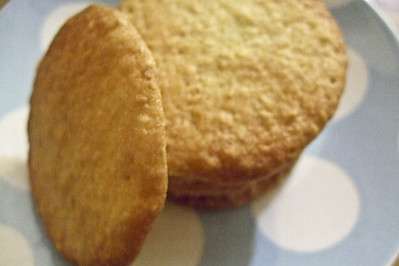
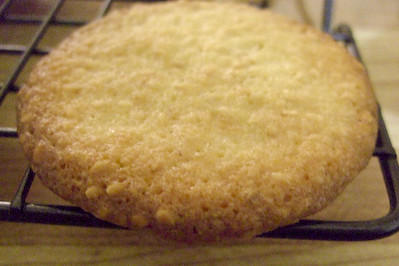
Sesame Crisps


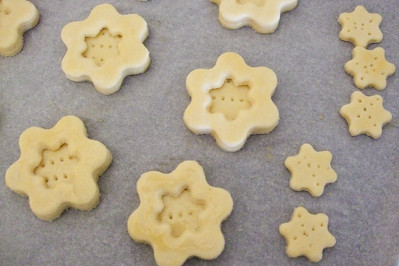
After hours of rolling puff pastry from scratch one weekend, and then the intense stress that led up to my first attempt at macarons the weekend after, a quick and simple recipe like these sesame crisps is exactly what appeals to me. These crunchy, light biscuits have a wonderful nutty flavour from the toasted sesame seeds and are perfect with a cup of tea. I only had white sesame seeds, but black sesame seeds would work fantastically as well. The important part about this recipe is making sure you toast the sesame seeds just right, so they have a lovely toasty flavour but aren't burnt.

I love how satisfying these are for the snack-monster in me, they were so easy and quick that I didn't mind quickly throwing them in the oven after making a spring lamb dinner. Usually I'm so lazy that I can only ever be bothered to make a nice dinner or bake up something sweet, but not both on the same night. But the best thing about biscuits is they require minimal effort, ingredients that I almost always have in my kitchen, and hardly any washing up. So while my love of baking grows and leaves me willing to spend hours and hours in the kitchen, I still love easy peasy cookies like these because I know in my early baking days this is something I would have made over and over whenever I was craving something to nibble on. You know what I mean right?

Sesame Crisps
(from Le Cordon Bleu Complete Step-by-Step)
90g butter, softened
140g sugar
1 tsp vanilla essence
1/4 tsp salt
1/4 tsp baking powder
1 medium egg
100g plain flour
8 tsp sesame seeds (black and/or white)

Preheat oven to 180 degrees C. Line or grease a large baking sheet. Toast sesame seeds in a small frying pan over medium-low heat for 1-2 minutes, stirring and shaking the pan often to prevent burning, until the seeds are lightly browned.
Using an electric mixer on medium speed, beat the butter, sugar, vanilla, salt and baking powder together until well combined. Add egg, beat until well combined. Using wooden spoon, stir in flour and baking powder until well combined.

Stir in toasted sesame seeds. Drop dough by rounded teaspoons, about 7-8cm apart, onto baking sheet. Bake biscuits about 8 minutes, until set and edges are golden.

Remove baking sheet from oven; let biscuits cool on sheet for about 30 seconds to set slightly. Using a spatula, transfer to wire racks to cool ompletely. Repeat with remaining biscuit dough. Store biscuits in tightly covered containers.

Print Friendly and PDF

Sunday, September 27, 2009

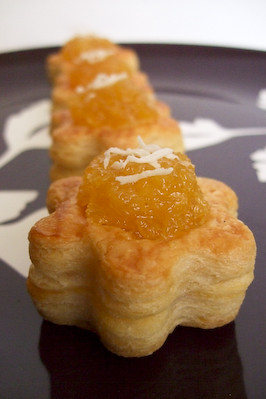
Pineapple Jam & Coconut Vols-au-Vent - Daring Bakers Sept 2009


If you had told me a year ago that I would soon have my own food blog I wouldn't have believed you for one single second. If you told me six months ago that I would be taking part in the Daring Bakers' challenges I would have laughed in your face. I could barely bake a plain yellow cake back then, and I used to read all the Daring Bakers' posts in complete awe of all the amazing creations that these talented bakers came up with. But the last few months (thanks to some healthy nagging from Lisa and Karen) I've been working up the courage to join and now I'm so glad that I finally did.

The September 2009 Daring Bakers' challenge was hosted by Steph of A Whisk and a Spoon. She chose the French treat, Vols-au-Vent based on the Puff Pastry recipe by Michel Richard from the cookbook Baking With Julia by Dorie Greenspan.

I was simultaneously thrilled and freaked out after finding out we would be making puff pastry from scratch for my first ever challenge. It's always something I've wanted to try making but the fairly long instructions and all that rolling and turning was slightly intimidating for a messy baker like myself who has had some disasters with pastry in the past. But the great instructions and Steph's extra tips, plus this wonderful online video of Julia Child and Michel Richard making the puff pastry, were incredibly useful and made the whole process a lot less scary. Besides the need for patience while chilling the dough, I found the recipe very straightfoward and the dough was wonderfully easy to work with. In fact, at one point as I was making a turn and was having so much fun that I started giggling deliriously and yelling "I love baking!". My boyfriend backed out of the kitchen slowly with a nervous look in his eye.

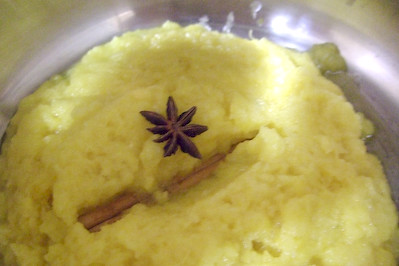
At first I was planning to do a savoury vols-au-vent but then I realised that pineapples were coming back into season here. I've been wanting to make Malaysian pineapple tarts for the longest time, and I thought the sticky, fragrant pineapple jam (stewed with cinnamon and star anise) would be a lovely match for these light, buttery puff pastry cases. For a twist, and to balance out the intense sweetness of the jam, I first filled them with a bit of pastry cream flavoured with coconut milk and then topped it off with the jam.

The puff pastry turned out beautifully flaky and layered, though on the edges of my cases the rise was slightly hindered due to the crappy plastic cutters that I used. Even so, the texture and taste were even better than I had hoped, and I think it may be hard for me to ever go back to using frozen puff now! I was also excited to find out my pineapple jam recipe tasted just like how I remembered, and these sweet, bite-sized vol-au-vents are a great little treat for an afternoon tea.

Pineapple Jam & Coconut Vols-au-Vent
Yield: 1/3 of the puff pastry recipe below will yield about 8-10 1.5" vols-au-vent or 4 4" vols-au-vent
Well-chilled puff pastry dough (recipe below)
egg wash (1 egg or yolk beaten with a small amount of water)
For the pineapple jam:
2-3 not very ripe pineapples
1 cinnamon stick
Star anise
300g caster sugar
For the coconut pastry cream:
1 cup coconut milk
3 large egg yolks
1/4 cup cornflour
1/4 cup sugar
Optional: shredded coconut for decoration

Skin pineapples, cut both ends off and remove the 'eyes' by slicing diagonally underneath them, following each of the spiralling line of eyes from the top to the bottom of the pineapple. This is something I used to find horribly tedious, but gets pretty easy with some practice. (Unfortunately it also means that I'm the one who gets stuck with the job of chopping them up whenever we buy them now.) Grate the pineapples in a circular motion, this helps to reduce the fibrous texture. Drain the juice from the grated pulp using a sieve (and save the juice to drink of course!) for 10 minutes.

My two pineapples yielded 1 1/2 cups of pulp, if you end up with more or less feel free to vary the amount of sugar in the recipe accordingly. Place pulp, 1 cinnamon stick and 1 star anise in a medium saucepan and boil over medium heat for 30 minutes to reduce the water content, stirring frequently to prevent burning. When the mixture looks dry, add the 300g of sugar, stirring constantly until it is mixed through. Reduce the heat slight and cook slowly, stirring very regularly until the jam is thick in consistency and dark golden in colour.

Pour the jam straight into warmed glass jars and cover immediately. I made this the night before baking my vols-au-vent, but this jam can be stored for months in the fridge.

Using a knife or metal bench scraper, divided your chilled puff pastry dough into three equal pieces. Work with one piece of the dough, and leave the rest wrapped and chilled.

On a lightly floured surface, roll the piece of dough into a rectangle about 1/8 to 1/4-inch (3-6 mm) thick. Transfer it to the baking sheet and refrigerate for about 10 minutes before proceeding with the cutting.

(This assumes you will be using round cutters, but if you do not have them, it is possible to cut square vols-au-vents using a sharp chef’s knife. As you can tell, I used flower-shaped cutters, since Malaysian pineapple tarts are traditionally made with flower or crinkle shaped biscuits) For smaller , hors d'oeuvre sized vols-au-vent, use a 1.5" round cutter to cut out 8-10 circles. (This is the size I made)For larger sized vols-au-vent, fit for a main course or dessert, use a 4" cutter to cut out about 4 circles. Make clean, sharp cuts and try not to twist your cutters back and forth or drag your knife through the dough. Half of these rounds will be for the bases, and the other half will be for the sides. (Save any scrap by stacking—not wadding up—the pieces…they can be re-rolled and used if you need extra dough. If you do need to re-roll scrap to get enough disks, be sure to use any rounds cut from it for the bases, not the ring-shaped sides.)

Using a ¾-inch cutter for small vols-au-vent, or a 2- to 2.5-inch round cutter for large, cut centers from half of the rounds to make rings. These rings will become the sides of the vols-au-vent, while the solid disks will be the bottoms. You can either save the center cut-outs to bake off as little "caps" for you vols-au-vent, or put them in the scrap pile.

Dock the solid bottom rounds with a fork (prick them lightly, making sure not to go all the way through the pastry) and lightly brush them with egg wash. Place the rings directly on top of the bottom rounds and very lightly press them to adhere. Brush the top rings lightly with egg wash, trying not to drip any down the sides (which may inhibit rise). If you are using the little "caps", dock and egg wash them as well.

Refrigerate the assembled vols-au-vent on the lined baking sheet while you pre-heat the oven to 400ºF (200ºC). (You could also cover and refrigerate them for a few hours at this point.)

Once the oven is heated, remove the sheet from the refrigerator and place a silicon baking mat (preferred because of its weight) or another sheet of parchment over top of the shells. This will help them rise evenly. Bake the shells until they have risen and begin to brown, about 10-15 minutes depending on their size. Reduce the oven temperature to 350ºF (180ºC), and remove the silicon mat or parchment sheet from the top of the vols-au-vent. If the centers have risen up inside the vols-au-vent, you can gently press them down. Continue baking (with no sheet on top) until the layers are golden, about 15-20 minutes more. (If you are baking the center “caps” they will likely be finished well ahead of the shells, so keep an eye on them and remove them from the oven when browned. I didn't use the caps, but ate them like they were popcorn hahaha!)

Remove to a rack to cool. Cool to room temperature.

For the pastry cream, combine 1/4 cup sugar and and 3 egg yolks in a medium mixing bowl using a wooden spoon. Gradually add cornflour to the mixture until it forms a smooth, pale paste and then set aside. Heat coconut cream in a small saucepan very gradually on medium-low heat until nearly boiling. Remove saucepan from the heat and slowly pour into egg/sugar mixture, whisking constantly to prevent it from curdling. Return entire mixture to the saucepan on medium heat and whisk until the mixture becomes very thick and difficult to stir. Take care not to overheat or the coconut milk can split and make the cream very greasy (don't stress if this happens, it's still usable).

Remove from heat and allow pastry cream to cool to room temperature, covering the surface with cling film to prevent a skin forming on the top. When cooled, pipe pastry cream into vols-au-vent cases and then top each with a teaspoon of pineapple jam. Top with a small pinch of shredded coconut.

These vols-au-vents are best served on the same day that you bake them, so if you are not planning to eat them straight away, prepare and assemble the vols-au-vent cases and then store them in the freezer until needed (bake from frozen, egg-washing them first). The pastry cream can be prepared up to 3 days in advance, and as mentioned earlier, the jam can be made months in advance if you wish.

Michel Richard’s Puff Pastry Dough
(From Baking with Julia by Dorie Greenspan)
Yield: 2-1/2 pounds dough
2-1/2 cups (12.2 oz/ 354 g) unbleached all-purpose flour
1-1/4 cups (5.0 oz/ 142 g) cake flour
1 tbsp. salt (you can cut this by half for a less salty dough or for sweet preparations, which I did)
1-1/4 cups (10 fl oz/ 300 ml) ice water
1 pound (16 oz/ 454 g) very cold unsalted butter
plus extra flour for dusting work surface

Mixing the Dough:
Check the capacity of your food processor before you start. If it cannot hold the full quantity of ingredients, make the dough into two batches and combine them.

Put the all-purpose flour, cake flour, and salt in the work bowl of a food processor fitted with a metal blade and pulse a couple of times just to mix. Add the water all at once, pulsing until the dough forms a ball on the blade. The dough will be very moist and pliable and will hold together when squeezed between your fingers. (Actually, it will feel like Play-Doh.)

Remove the dough from the machine, form it into a ball, with a small sharp knife, slash the top in a tic-tac-toe pattern. Wrap the dough in a damp towel and refrigerate for about 5 minutes.

Meanwhile, place the butter between 2 sheets of plastic wrap and beat it with a rolling pin until it flattens into a square that's about 1" thick. Take care that the butter remains cool and firm: if it has softened or become oily, chill it before continuing.

Incorporating the Butter:
Unwrap the dough and place it on a work surface dusted with all-purpose flour (A cool piece of marble is the ideal surface for puff pastry) with your rolling pin (preferably a French rolling pin without handles), press on the dough to flatten it and then roll it into a 10" square. Keep the top and bottom of the dough well floured to prevent sticking and lift the dough and move it around frequently. Starting from the center of the square, roll out over each corner to create a thick center pad with "ears," or flaps.

Place the cold butter in the middle of the dough and fold the ears over the butter, stretching them as needed so that they overlap slightly and encase the butter completely. (If you have to stretch the dough, stretch it from all over; don't just pull the ends) you should now have a package that is 8" square.

To make great puff pastry, it is important to keep the dough cold at all times. There are specified times for chilling the dough, but if your room is warm, or you work slowly, or you find that for no particular reason the butter starts to ooze out of the pastry, cover the dough with plastic wrap and refrigerate it . You can stop at any point in the process and continue at your convenience or when the dough is properly chilled.

Making the Turns:
Gently but firmly press the rolling pin against the top and bottom edges of the square (this will help keep it square). Then, keeping the work surface and the top of the dough well floured to prevent sticking, roll the dough into a rectangle that is three times as long as the square you started with, about 24" (don't worry about the width of the rectangle: if you get the 24", everything else will work itself out.) With this first roll, it is particularly important that the butter be rolled evenly along the length and width of the rectangle; check when you start rolling that the butter is moving along well, and roll a bit harder or more evenly, if necessary, to get a smooth, even dough-butter sandwich (use your arm-strength!).

With a pastry brush, brush off the excess flour from the top of the dough, and fold the rectangle up from the bottom and down from the top in thirds, like a business letter, brushing off the excess flour. You have completed one turn.

Rotate the dough so that the closed fold is to your left, like the spine of a book. Repeat the rolling and folding process, rolling the dough to a length of 24" and then folding it in thirds. This is the second turn.

Chilling the Dough:
If the dough is still cool and no butter is oozing out, you can give the dough another two turns now. If the condition of the dough is iffy, wrap it in plastic wrap and refrigerate it for at least 30 minutes. Each time you refrigerate the dough, mark the number of turns you've completed by indenting the dough with your fingertips. It is best to refrigerate the dough for 30 to 60 minutes between each set of two turns.

The total number of turns needed is six. If you prefer, you can give the dough just four turns now, chill it overnight, and do the last two turns the next day. Puff pastry is extremely flexible in this regard. However, no matter how you arrange your schedule, you should plan to chill the dough for at least an hour before cutting or shaping it.

Print Friendly and PDF

Monday, September 21, 2009

Mandarin & Lavender Cream Pots with Pashmak


There's a lot of mandarins around at the moment. I adore them, their light citrus flavour is just perfect for baking and their juice happens to be the 'secret' ingredient for my favourite cupcake recipe. I had an abundance of mandarins thanks to a huge sack of them that we grabbed straight off the tree at A's family home. I also had a ton of chocolate pashmak leftover from my pupcakes, and I thought: citrus and chocolate? Always a great combination!

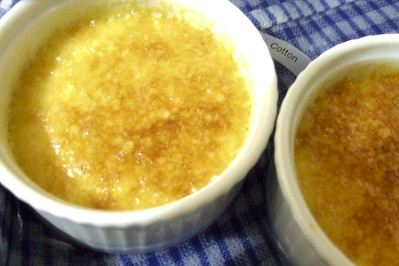
I'm trying my hardest to steer away from the heavy puddings and cakes that I love to make during Winter, now that Spring has finally sprung. This is pretty great for Spring, especially when it's chilled; it's light and zesty, somewhere between a creme caramel and a lemon delicious. And the fluffy chocolate flavoured pashmak goes so well with it. My special little twist was a touch of lavender, rather than using mandarin liqueur like the original recipe. I think it gives it that extra touch of Spring, more for the scent than the flavour, so everything is very subtle and soft.

Mandarin & Lavender Cream Pots
(Adapted from Stephanie Alexander's recipe from A Cook's Companion)
2 large mandarins (I used low-seed Honey Murcotts)
1/2 cup water
1 cup sugar
2 cups cream
1/2 cup caster sugar
2 eggs
2 egg yolks
Edible lavender or lavender essence
Optional: Persian fairy floss (pashmak), I used chocolate flavoured (Note: For those who have been asking, I picked up some from The Essential Ingredient. You can also buy it from Middle Eastern grocery stores and online.)

Preheat oven to 160 degrees C. Remove zest from mandarins with a vegetable peeler and cut into a fine julienne Place in a saucepan of cold water, about a cup, and bring to the boil. At the same time in a separate saucepan heat the 1/2 cup of water with the cup of sugar and stir until the sugar dissolves. Remove from the heat and then set aside. Drain zest and bring to boil in more cold water again. Drain and simmer zest in sugar syrup for 5 minutes. Drain once more.

Add zest to cream and slowly bring to scalding point. Cover and set aside to infuse and cool.

Juice mandarins and measure. You need 4 tablespoons. Whisk juice, caster sugar, eggs, eggs yolks and 1/4 tsp of lavender essence (or 1 tsp of lavender flowers). Whisk in cooled cream. Strain mixture into a large bowl, pressing well to extract every drop of flavour from the zest.

Pour mixture into 6 x 100ml porcelain moulds and stand in a baking dish lined with a tea towel Pour in hot water to come halfway up the sides of the moulds and bake for 20 minutes, until just set.

Allow to rest for a few minutes in the water bath, then remove and cool completely.


Serve warm or (my personal preference) refrigerate for several hours or overnight and then serve cold and topped with chocolate persian fairy floss.

If you prefer to serve it hot, the pashmak will just melt not long after you put it on top of the pots, so you might be better off sticking to the original recipe and serving it with a splash of liqueur, but I really loved it cold. It was smooth and so creamy, but it didn't feel too rich or heavy.

So even though I would have loved to whip up a mandarin pudding or cake of some sort, the change of season compels me to change with it. It was still incredibly delicious and satisfying, but refreshing rather than hearty. I will miss the winter puds, but I'm also looking forward to all the great desserts that the warmer weather will inspire :)

Print Friendly and PDF

Saturday, September 19, 2009

Tan Viet, Cabramatta


Why hello, crispy skin chicken of my dreams. Where have you been all my life?

To finish off my little Cabramatta series (for now!), Lili, Betty, Leona and I stopped by Tan Viet for their famous crispy skin chicken. We were so full of food, after stuffing ourselves at Bau Truong and eating some other sweets which I'll talk about later, but we were determined to fit in some of this chicken. It must be good, their logo is a huge yellow chicken and there was a huge line of people coming out of the restaurant for most of the day. Lucky for us, by about 2pm we were able to walk straight in and get a table. The waiters seemed a little bemused that we were only ordering one plate of chicken and a side of grilled pork, but we didn't care, it was exactly what we wanted.

The air in the restaurant is thick with the smell of deep frying chicken and grilled meats. Almost every table has a plate of dark golden chicken. It doesn't take long before our fullness is forgotten and our mouths are watering in anticipation. We sip the cheap tea (which I always find so thirst quenching, I don't know why) and have a giggle at the 'engrish' menu, 'Cash only, no effpot!' and 'Criskin chicken' (though maybe this one was just their cute branding?).

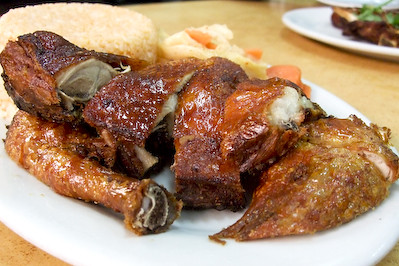
Com Ga Da Don - 'Criskin Chicken & Tomato Rice' ($10.00)
The service is lighting fast and before we know it we have a steaming hot plate of crispy skin chicken which looks so damn good. The photos are taken in a hurry and we dig straight in. Ohhh yep, it tasted as good as it looked. The skin was uber crispy, crackling as your teeth sunk through it and giving way to the perfectly moist meat. My mouth is watering just thinking about it. We may have been doing some serious stomach stretching at this point but it was so worth it.

*drool*
The tomato rice that comes with it is pretty good, definitely better than a lot of the ones I have had in the past. I find a lot of places do a really terrible job with the tomato fried rice, it's always too bland and dry. This one has a decent amount of flavour and goes well with the chicken. We don't finish it, not when we could save the stomach space for the grilled pork that we got on the side. For just a few dollars, how could we resist?

Side serving of grilled pork ($4.00)
The pork is also quite crispy and moist on the outside, though it looks and tastes very different to the grilled meat at Bau Truong. I think if I remember correctly (sorry it was a while ago!) we detected some sort of herb or spice on the surface. It was very moist and delicious, but the chicken was still the stand out.

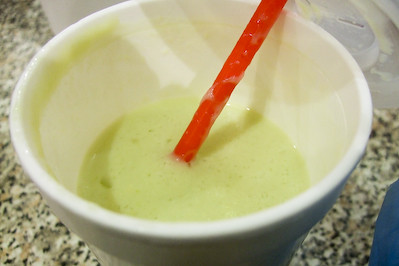
Oh and did I mention we had spent the whole day eating a ton of other things? I'm starting to feel sorry for my stomach. A huge lunch was followed by a small amount of wandering around and then we stopped by kaysone sweets to get me my durian shake that I was so determine to try for the first time. To make things a little more exciting, I got a shake that had both durian and avocado mixed into it. A huge splash of sweetened condensed milk and a load of crushed ice is blended into the fruit, and it's heavenly. It was a surprise how moreish it was, even the durian wary among us didn't think it tasted too bad. It was incredibly rich though, even though I enjoyed each mouthful I felt increasingly full as I made my way through the cup. I think over the space of an hour I only managed about half of it before I had to admit defeat.

Durian and avocado shake
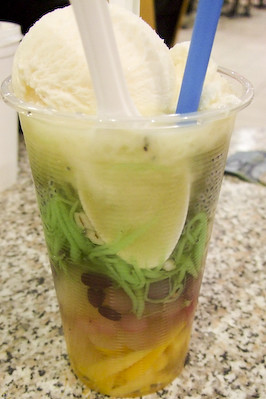
Lili was hoping to get a rainbow combination drink and we were more than willing to share one with her :) We found a great place which made the drink with a scoop of icecream and sweetened condensed milk rather than coconut milk. I actually preferred this to the coconut milk version, which I found made it far too rich. Barley, pandan jelly works, pink glutinous rice balls, red bean, palm seeds and jackfruit turned out to be a great combination and my favourites were definitely the glutinous rice balls and the jackfruit.

Ahh Cabramatta, how I love thee. Rest assured, I will be back soon.

Tan Viet
Shop 2-3, 100 John St

Cabramatta NSW 2166

(02) 9727 6853

Mon-Sun: 9am-7pm

Tan Viet Noodle House on Urbanspoon

Kaysone Sweets

Shop 4, 59-61 Park Road

Cabramatta, Sydney

(02) 9755 5759


Check out my other Cabramatta posts:

- Bau Truong (Goat curry, custard apple shakes, crispy sticky rice)
- Phu Quoc and a general walk around Cabramatta (Vietnamese spring rolls, custard cakes, pandan waffles, mooncake, flowering tea and rainbow drinks)

Print Friendly and PDF

Tuesday, September 15, 2009

Chocolate Cake with a Zumbo Salted Caramel Twist


In case you haven't noticed, I am not a neat baker. 'Rustic' is about as kindly as you can describe my decorating style. It's just how I am, no matter how hard I try to be neat and precise and pretty with my presentation, I end up with either 'rustic' or 'freeform'. As a child I could never colour inside the lines, my handwriting was totally inconsistent and my hair was always out of place. So it comes as no surprise to me that layer cakes are an enemy of mine when it comes to baking. I can never get those perfectly straight, clean and neat layers with a smooth layer of icing between and on top. My kitchen usually ends up covered in cake cut offs and random extra blobs of icing that have been slung off my spatula in frustration.

When I heard Regex Man's birthday was coming up I immediately asked him what cake he would like me to bake him. His reply: "Chocolate cake, with chocolate icing." My shoulders slumped ever so slightly and I asked hopefully, "Anything else?"

"Chocolate sprinkles!"

This may come as a surprise, but chocolate is not one of my favourite cake flavours. Are you gasping in shock? I don't know why, I think I prefer my cakes lighter and fluffier than the plain chocolate cakes you usually get (though I totally LOVE chocolate mousse cakes). So I wasn't too excited about baking this cake, until I decided to make things a little bit more exciting with an element of Adriano Zumbo's now famous chocolate mousse cake which was featured on Masterchef. I have never been game to try making the entire Zumbo cake, but I decided almost as soon as I saw the recipe was up on the website that I would definitely be borrowing 1 or 2 elements in another cake. This seemed like the perfect opportunity to spice up an old-fashioned chocolate cake with a layer Zumbo's salted caramel.

It was easy to choose a chocolate cake recipe. Nigella's old-fashioned chocolate cake was easy and look delightfully moist since it was full of sour cream. In theory it sounded super easy since you just bake two half cakes and sandwich them together with icing and cover with more icing. So all I had to do was substitute the icing in the middle for caramel. Sounds so easy, right? The only thing is, I forgot that it's me we're talking about here, and I can't colour inside the lines. The cakes turned out great, and the icing was perfect. But as I was assembling the cake all hell broke loose. I lifted a cake layer up to my face to have a quick sniff, since I was a little worried I had burnt the top, and the whole cake slid out of the tin and started falling towards my face. I managed to catch it (partly with my face) but it cracked in two. Noooooooooooooooooooooooooooooo.

So I tried to compose myself and kept saying "It's okay, it's cool! You can just cover it with icing and no one will know!" So I placed the two cracked halves on top of the salted caramel and bottom cake layer. And then I started covering it with chocolate icing. This should have been easy peasy but I am slow and fiddly and the icing started to harden before I had smoothed it out, and then the two broken pieces started falling down the sides of the cake, and caramel started leaking out through the icing and OH MY GOD it was starting to look like a poo. I eventually got it sort of smoothish, though a bit messy on the sides, but I was like "No worries, I can cover the sides with sprinkles!", but the sprinkles made it look like a hairy poo. Much swearing ensued as I frantically tried to scrape the sprinkles off and re-smooth the sides. CHOCOLATE SPRINKLES EVERYWHERE.

Anyway. I sort of managed to get it smooth, but it was so plain except for some sprinkles down the bottom. It still sort of looked poo-like, so in a panic I topped it with some raspberries I had in my freezer. It looked okay until the next day, when they defrosted and got all wet, and made it look like the cake was bleeding. Sigh. Anyway, the cake was cut and eaten and enjoyed, and honestly it was really tasty and the salted caramel layer was perfect for it. So I will give you the recipe because I am sure you are not as much of a messy slob as I am. Though a warning, it's terribly bad for you, I would limit yourself to one slice (or two if you're the birthday boy/girl)!

Old-Fashioned Chocolate Cake with a Salted Caramel Layer
(cake adapted from Nigella's recipe and caramel from Adriano Zumbo's chocolate mousse cake recipe)
For the salted caramel:
150g caster sugar
30g glucose
60g water
110g cream
3g gelatine leaves (or powdered gelatine if you can't get it)
60g butter unsalted
2g sea salt flakes

For the cake:
300g plain flour
300g caster sugar
1.5 tsp baking powder
3/4 tsp bicarbonate of soda
60g best-quality cocoa
250g soft unsalted butter
3 large eggs
3 tsp real vanilla extract
225ml sour cream

For the icing:
75g unsalted butter
175g best quality dark chocolate, broken into small pieces
300g icing sugar
1 tbsp golden syrup
125ml sour cream
1 tsp real vanilla extract

Prepare the caramel layer the night before; Heat cream. Place sugar, glucose, water in a saucepan, cook to caramel colour. This is the part where I am notorious for taking it off the heat too early, so this time I was very patient and waited until I got the deep brown colour I was looking for, while stirring it regularly to stop it burning.

Deglaze sugar with cream (add it gradually and stir vigorously to stop it from bubbling over). Add gelatine (I dissolved my powdered gelatine in a tiny amount of hot water before adding it). Cool to 50°c. Add butter and sea salt flakes and blitz, then place in a silicon mould (or a greased and lined springform tin) of the same size as the one you will be baking your cake layers in, and freeze overnight.

Note: The caramel layer in this photo is double the amount specified, I halved it after seeing how thick it was!
Take everything out of the fridge so that all the ingredients can come to room temperature. Preheat the oven to 180°C and line and butter two 20cm sandwich tins with removable bases. (I used my 21cm spring form tin for all of these)

Place flour, sugar, baking powder and bicarb, cocoa, butter, eggs, vanilla and sour cream – into a food processor and process until you have a smooth, thick batter. If you want to go the long way around, just mix the flour, sugar and leavening agents in a large bowl and beat in the soft butter until you have a combined and creamy mixture. Now whisk together the cocoa, sour cream, vanilla and eggs and beat this into your bowl of mixture.

Divide this batter, using a rubber spatula to help you scrape and spread, into the prepared tins and bake until a cake tester, or a thin skewer, comes out clean, which should be about 35 minutes, but it is wise to start checking at 25. Also, it might make sense to switch the two cakes around in the oven halfway through cooking time. I actually split the amounts in the cake recipe in half and baked the two cakes separately since I only have one tin in the size that I wanted to make. The amounts I have given are for a thick birthday cake, but if you prefer a slightly less enormous cake, follow the amounts in Nigella's original recipe.

One of the broken halves. Sob!
Remove the cakes, in their tins, to a wire rack and let cool for 10 minutes before turning out of their tins. Don’t worry about any cracks as they will easily be covered by the icing later.

To make this icing, melt the butter and chocolate in a good-sized bowl either in the microwave or suspended over a pan of simmering water. Go slowly either way: you don’t want any burning or seizing. While the chocolate and butter are cooling a little, sieve the icing sugar into another bowl. Or, easier still, put the icing sugar into the food processor and blitz. This is by far and away the least tedious way of removing lumps. (I followed the food processor way, I love how easy this was!)

Add the golden syrup to the cooled chocolate mixture, followed by the sour cream and vanilla and then when all this is combined whisk in the sieved icing sugar. Or just pour this mixture down the funnel of the food processor on to the icing sugar, with the motor running. When you’re done, you may need to add a little boiling water – say a teaspoon or so – or indeed some more icing sugar: it depends on whether you need the icing to be runnier or thicker; or indeed it may be right as it is. It should be liquid enough to coat easily, but thick enough not to drip off.

Choose your cake stand or plate and cut out four strips of baking parchment to form a square outline on it (this stops the icing running on to the plate). Then sit one of the cakes, uppermost (ie slightly domed) side down. Remove the caramel layer from the freezer and place on top of your bottom cake layer. If it is too large you can place it on some baking paper and cut around the edge of the caramel with a very sharp knife to its desired shape though it will soften and get very sticky so be careful!

Sit the other cake on top, normal way up, pressing gently to sandwich the two together. Spoon half the icing on to the top of the cake and spread it in a swirly, textured way (though you can go for a smooth finish if you prefer, and have the patience (which I did not have)). Spread the sides of the cake with the remaining icing and leave a few minutes till set, then carefully pull away the paper strips.

Optional: Decorate with sugar flowers, berries and/or chocolate sprinkles. Please don't do what I did and use frozen raspberries. I knew they didn't work but I was desperate!

In the end, I think Regex Man was very pleased with his cake. And he was very kind to ask me if I wanted to take a photo of the insides after he cut it :) Haha I seem to be training my friends and family well! Everyone loved the caramel layer, including me. The cake was moist and icing was delicious and the right texture I was looking for. The important part was definitely using really good quality cocoa and chocolate. Obviously layer cakes are still not my friend, I can't even manage two layers! But you never know, things may get better with practice ;)

Happy Birthday Regex Man!

Print Friendly and PDF