Thursday, December 31, 2009

Raspberry, Lychee & Pink Moscato Granita

granitaaa
It's New Year's Eve! And what better way to toast the new year than with a refreshing, boozy dessert? This may be the simplest recipe I've ever posted on this blog, it's even easier than ice kacang, though a little more time intensive. But so pretty!
granitaaa
I have had a lot of bad luck when it comes to New Year's Eve. The one I remember the most is getting food poisoning from some dodgy chicken rice while up at Genting Highlands (a casino/theme park in Malaysia) when I was a little tween, and ended up spending the entire night and some of the morning throwing up. And then there's all the other years where epic plans have been made, only to fall apart at the last second. So in recent years I've kept it quiet, planned very little and kept my expectations low. I also don't do New Year's resolutions, they never work out well for me.
While I was trying to think of a nice dessert to make for A & I, I realised I didn't want anything fancy, or complicated, or anything that needed assembling or heating at the last minute. This is the perfect thing for a New Year's Eve party, it's so easy and only has three ingredients, but has a fabulous colour and flavour, and a little bit of booze. It's a nice refreshing way to wash down any greasy party food you might feel like eating first. Serve it in some cocktail glasses, or shot glasses if you just want to use it as a palate cleanser, or in big plastic cups with fat plastic straws if you want to serve it as a slushie! Yep, granita is just a fancy word for a slushie ;) (Unfortunately I only had my cheapo wine glasses in my apartment for the photos!)
granitaaa
Raspberry, Lychee & Pink Moscato Granita
400g frozen raspberries
1 can lychees in syrup
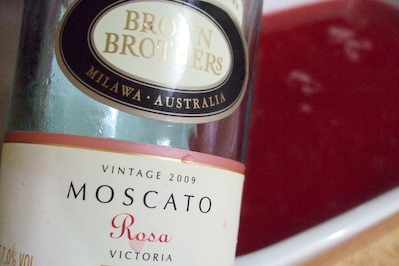
1 bottle Pink Moscato or any sweet sparkling white or rose
granitaaa
Place raspberries and the sugar syrup from the lychee can in a medium saucepan and bring to the boil, stirring regularly. Finely dice half the lychees and add it (plus any juices that might escape during chopping) to the saucepan. Reduce the heat and simmer for about 5 minutes. Strain mixture into a bowl using a fine sieve or a piece of muslin.
granitaaa
Um...Just realising this photo looks a bit gruesome...
Pour mixture into a wide, shallow freezable tray or container (make sure you clear your freezer so it has a enough space for the container to sit flat) and add the whole bottle of wine and quickly stir together. I used pink moscato because it's that lovely girly pink and has a very sweet, floral flavour which matches well with the lychee and raspberry.
granitaaa
Place in the freezer and at intervals of about 30 mins or so, use a fork to mash up any large crystals of ice that form in the dish. The further apart your intervals, the coarser the texture of your granita will be.
granitaaa
Keep doing this until the mixture is completely frozen, and use your fork to 'fluff' up the granita. (I fell asleep before it completely froze, so my granita was very very coarse. But it still works!) Before serving, use your fork to 'fluff' up the granita once more, then serve topped with fresh fruits or more of the canned lychees. I had wanted to serve mine with fresh lychees and raspberries, but I never seem to find them when I need them.
granitaaa
Happy New Year!! Have a fun (but not tooooo boozy) night and I'll see you next year :)
Print Friendly and PDF

Thursday, December 24, 2009

A Very Coconutty Christmas - Coconut & Citrus Snowman Cake and Coconut Jam Thumbprint Cookies

coconutsnow-4
Christmas is here! It's just hours away from us in Sydney, and I can't believe how quickly it has crept up on me. I'm very pleased with the amount of Christmas baking I've managed to squeeze in this year, with the mini gingerbread houses, fruit mince slice, Christmas tree cupcakes and my gingerbread igloo. It feels weird to be finally at the end of my Christmas-themed baking, and it will be hard to snap out of decorating everything in red, white and green!
coconutsnow-2
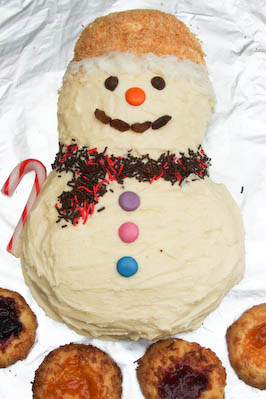
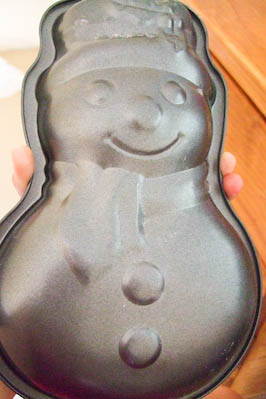
So, for my final Christmas baking post of the year, I'm sharing the two recipes that I baked up just in time for Christmas. I don't like doing things at the last minute, so of course the obvious choice for a dessert would be cakes and cookies. Citrus and coconut cakes, shaped like snow men thanks to a cute little cake tin I picked up with my Mum. The cake is super easy and is coated in the most luxurious salted buttercream, a genius idea for a buttercream that the most awesome Karen from Citrus and Candy was kind enough to share with me. She made this salted buttercream with a rich butter cake for the Sydney bloggers' Xmas party, and as soon as I tasted that sexy, sexy buttercream, I knew I had to try it for myself.
thumbprint-1-3
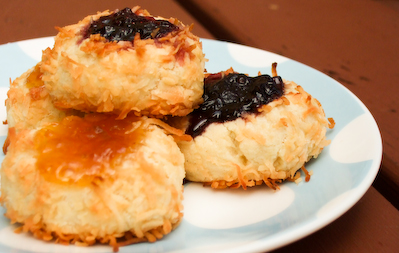
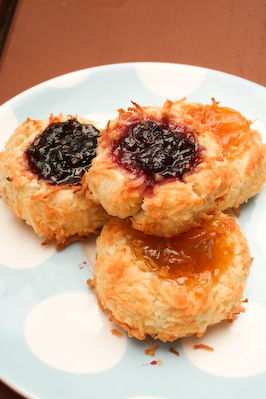
And for the cookies, a recipe from the Barefoot Contessa for coconut thumbprint cookies. I hadn't really watched her show much, but my Mum LOVES her and when I saw these cookies on her show I thought they were just perfect for Christmas day. They look like cute little jam centred snow balls, with a melt-in-your-mouth shortbread dough and lovely smelling toasted coconut. My mum practically crowed with delight when she heard I was making these cookies.
coconutsnow
Citrus Coconut Butter Cake
(adapted from Lemon Coconut Cake from the Essential Baking Cookbook)

1 1/2 cups (185g) self raising flour
1/2 cup (45g) desiccated coconut
Zest of 2 lemons
Zest of 1 lime
1 cup caster sugar
125g butter, melted
2 large eggs
1 cup (250ml) milk

Citrus & Candy's Salted Buttercream
250g salted butter (I used Girgar)
400-500g icing sugar, sifted
table salt to taste
coconutsnow-7
Preheat oven to 180 degrees C. Lightly grease a deep 20 cm round cake tin and line with baking paper(I split the batter in two and filled two greased and dusted with flour snow man shaped cake tins).
coconutsnow-8
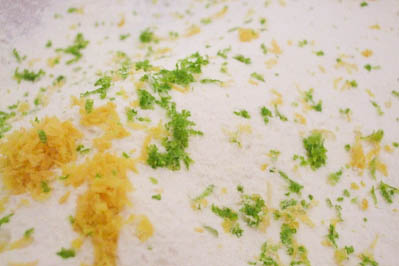
Sift the flour into a large bowl and add the coconut, zest, sugar, butter, eggs and milk. Mix well with a wooden spoon until smooth. Pour into the tin(s) and smooth the surface.
coconutsnow-9
Bake for 40 minutes, or until a skewer comes out clean when inserted in the centre of the cake. Leave the cake in the tin for 5 minutes before turning onto a wire rack to cool completely
coconutsnow-10
Beat butter until light and fluffy with an electric beater. Gradually add icing sugar, beating to combine until the icing reaches your desired texture (stiff enough not to run but smooth enough to spread easily). Add extra salt if needed and beat to combine, I added about 1/4 tsp extra.
coconutsnow-11
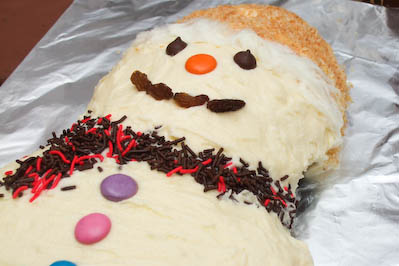
To make the snow man cakes: spread icing over the cake evenly, smoothing with a spatula. Decorate with toasted coconut, sprinkles and candy.
coconutsnow-12
For the decorations I used chocolate and strawberry sprinkles for the scarf, smarties for the buttons and an orange smartie for his nose :)
coconutsnow-13
Sultanas for his mouth, choc chips for his eyes and I toasted some desiccated coconut under the grill for 5 minutes for his beanie, I then finished it off with a fluffy hem using vanilla pashmak (persian fairy floss). I loved how completely straightforward the baking and decorating for this cake was, it meant that I could do it with as little stress as possible, which was such a relief on a stinking hot and rushed day. The cake came out of the oven golden brown with a fluffy interior, with the rich aroma of coconut and citrus zest. I actually made two snowmen, and one of them cracked in half because I picked it up before it had cooled! Nothing that couldn't be fixed with a bit of buttercream though. The buttercream was to die for, thank you so much Karen!
coconutsnow-15
Right, on to the thumbprint cookies. Though I think in Australia they'd probably be known more as jam drop cookies. With the coconut it made them seem like a hybrid of jam drop biscuits and coconut macaroons. The thing that makes these biscuits SO good is the obscene amount of butter in them. I'm not going to beat around the bush, there is nearly half a kilo of butter in one batch of these biscuits. But remember the recipes makes quite a lot of biscuits, and then do what I do and lock this information into the carefully guarded space in your brain which I like to call the butter vault, where I happily forget the amount of butter that I put into all the desserts I make.
thumbprint-1
But all that butter really does make a difference. These biscuits are amazing, they literally melt in your mouth. The combination of the fluffy, buttery shortbread with toasted coconut and jam is just the perfect thing to go with a warm Christmassy drink. I jazzed them up a little with some fancy jams, cherry and blueberry, as well as the usual apricot. I love my jam.

Jam & Coconut Thumbprint Cookies
(recipe by Ina Garten, Barefoot Contessa Family Style)
455g unsalted butter, softened
1 cup sugar
1 tsp pure vanilla extract
3 1/2 cups plain flour
1/4 tsp salt
1 large egg, beated with 1 tbsp of water for egg wash
200g shredded coconut
Jam of your choice, I used cherry, blueberry and apricot
thumbprint-1-6
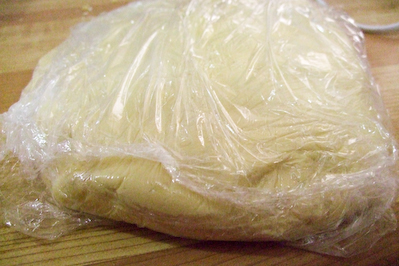
Preheat oven to 180 degrees C. Cream butter and sugar together with an electric mixer until are just combined and then add the vanilla and beat to combine. Sift flour and salt in a separate bowl and then gradually add to the butter and sugar, with the mixer on low speed. Mix until the dough starts to come together. Dump mixture on a floured surface and roll together into a flat disk. Wrap in clingfilm and refrigerate for 30 mins.
thumbprint-1-7
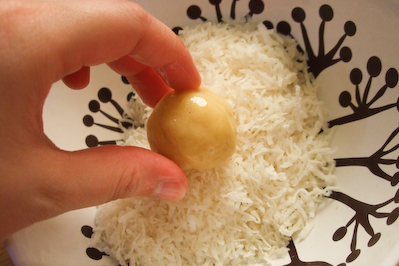
Roll the dough into 1 1/4 inch balls (I made mine a tiny bit smaller, maybe around an inch), dip each ball into egg wash and then roll in coconut.
thumbprint-1-8
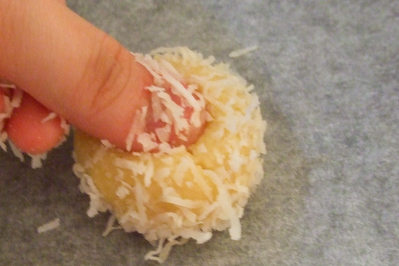
Place on a lined baking tray and press a light indentation into the top of each with your finger. Drop a quarter teaspoon of jam into each indentation.
thumbprint-1-9
thumbprint-1-10
Bake for 20-25 minutes, until the coconut turns golden brown. Cool and serve.
thumbprint-1-11
The two recipes on these post definitely highlight the reason why I love cakes and cookies so much, they are so devilishly rewarding for minimal effort. These biscuits are the perfect post-Christmas lunch nibble, and I hope that A's family will love them with their cups of tea. I just won't mention how much butter is in them...
thumbprint-1-2
This might not be my last post for the year, but just in case, I want to wish everyone a very Merry Christmas and a Happy New Year! Starting my blog this year has been a truly amazing, rewarding experience, and to every single person who even bothered to spend a second on this little blog, thank you so so much, you're the best. Bring on 2010!

xx Steph :)
Print Friendly and PDF

Wednesday, December 23, 2009

Gingerbread Igloo - Daring Bakers Dec 2009

gingerbreadigloo-25
The December 2009 Daring Bakers’ challenge was brought to you by Anna of Very Small Anna and Y of Lemonpi. They chose to challenge Daring Bakers’ everywhere to bake and assemble a gingerbread house from scratch. They chose recipes from Good Housekeeping and from The Great Scandinavian Baking Book as the challenge recipes.

When I saw that the challenge for December was Gingerbread Houses I had two immediate thoughts. The first was, "What a fabulous Christmas challenge!" and the second was something along the lines of "BAHHH!!!" because I had JUST finished making my very simple, children-friendly mini gingerbread houses. A lot of my friends urged me to just save my mini houses and present them as my completed challenge for this month, but that didn't feel right. The whole point of those mini ones was their simplicity, and there was no challenge there for me. I wanted to be more daring! So I decided to have a little fun...
gingerbreadigloo-4
I struggled for the first week deciding what to do. I have mentioned time and time again that I am a messy baker, so I knew that I couldn't expect myself to come up with a delicate masterpiece or anything. Then Asian Gaga semi-jokingly said to me 'Make a gingerbread igloo!', to which I paused and then replied 'YOU ARE A GENIUS!'.
gingerbreadigloo-2
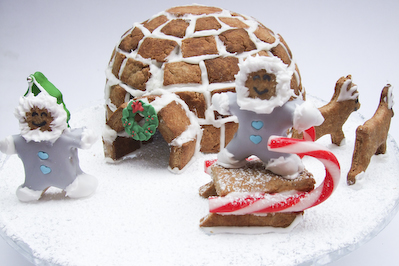
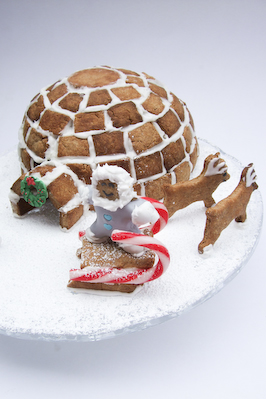
Now, I could have gone the lazy, more sane way about this and just done a whole piece of gingerbread moulded around a bowl. But where is the fun in that?! I was going to really make an igloo. From scratch. From blocks of gingerbread rather than blocks of ice. And it was going to work dammit! AND there would be little gingerbread eskimos! With furry collars! On sleighs!
gingerbreadigloo
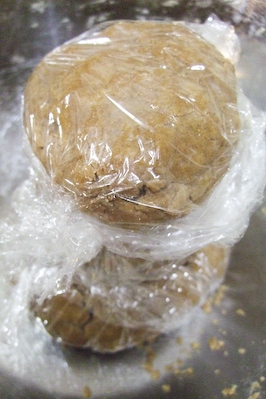
My friends looked at me like I was crazy. They couldn't understand why I would attempt something so messy if I was already such a messy baker. But that's part of the fun of being a Daring Baker right? To challenge yourself to do something you wouldn't have done otherwise? So I plowed on with my plans, and though they weren't very well formed, I started. I used Y's recipe for the gingerbread, but I had a few issues with it at first. I think I must have added wayyyy too much flour, because the dough was super dry and wouldn't come together at all, but I've been in that situation enough that I didn't panic, and just kept adding water until it came together. I also split it up into about 5 separate portions, to make it easier to work with my hands and get the right amount of moisture in the dough. Even so, after being in the fridge overnight, the dough was like a rock, so I took it out and let it soften for a few hours before I started to work with it.
gingerbreadigloo-24
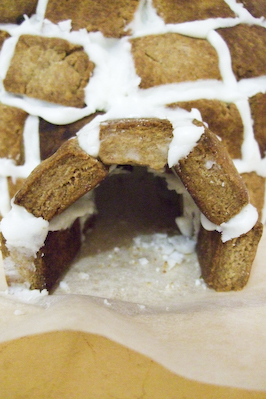
The dough wasn't too friendly to me, the scraps didn't take well to being re-rolled and so a lot of my little gingerbread tiles for the igloo had ugly cracks in them. But I wasn't too fussed, I'm not a perfectionist. Overall, the very firm gingerbread made it easier to carve into nice pieces that fit into the igloo, without having to worry about it crumbling. I did make the big mistake of leaving big gaps at the front, making it much messier-looking than the back, because I assumed I would be covering it up with the front 'tunnel' entrance. I stupidly did not think about the fact that the tunnel entrance would only go so high, so that is why it looks all wonky right above the entrance.
gingerbreadigloo-5
Y's Recipe:
Scandinavian Gingerbread (Pepparkakstuga)
(from The Great Scandinavian Baking Book by Beatrice Ojakangas)
1 cup butter, room temperature [226g]
1 cup brown sugar, well packed [220g]
2 tablespoons cinnamon
4 teaspoons ground ginger
3 teaspoons ground cloves
2 teaspoons baking soda
½ cup boiling water
5 cups all-purpose flour [875g]
(See end of post)
Royal Icing:
1 large egg white
2 cups icing sugar
gingerbreadigloo-10
1. In a large bowl, cream the butter and sugar until blended. Add the cinnamon, ginger and cloves. Mix the baking soda with the boiling water and add to the dough along with the flour. Mix to make a stiff dough. If necessary add more water, a tablespoon at a time. Chill 2 hours or overnight. (I had to add about 5 extra tablespoons of water, and even so the dough was still very stiff the next day)
gingerbreadigloo-11
2. Cut patterns for the house, making patterns for the roof, front walls, gabled walls, chimney and door out of cardboard. (I didn't need to do this)

3. Roll the dough out on a large, ungreased baking sheet and place the patterns on the dough. Mark off the various pieces with a knife, but leave the pieces in place. (I didn't need to do this either)
gingerbreadigloo-13
4. I rolled out the dough on a floured bench, roughly 1 cm thick (which allows for fact that the dough puffs a little when baked), cut required shapes and transferred these to the baking sheet. Any scraps I saved and rerolled at the end. (I used a ruler to cut rows of 2cm x 3cm blocks)
gingerbreadigloo-14
5. Preheat the oven to 375'F (190'C). Bake for 12 to 15 minutes until the cookie dough feels firm. After baking, again place the pattern on top of the gingerbread and trim the shapes, cutting the edges with a straight-edged knife. (I trimmed a few bricks to have edgest slanting inwards, to make it easier to fit them together as they started to curve inwards close to the top of the igloo) Leave to cool on the baking sheet.
gingerbreadigloo-15
Now, you can build up your igloo around a foil covered bowl if it makes it easier for you, but I only used the bowl to get a good idea of how many gingerbread tiles I would need to construct my igloo. Once I had the right size for my base, I removed the bowl because I was scared of it getting stuck to the royal icing and all kinds of drama trying to lift the igloo off the bowl later.
gingerbreadigloo-16
Beat egg white with an electric beater until soft peaks form and then gradually add the icing sugar. Put mixture in a piping bag and pipe royal icing along the edges of some gingerbread bricks and stick them together to form the base. Leave to dry until it is just set.
gingerbreadigloo-17
Pipe royal icing on one edge and the bottom of your tiles, and slowly build up your igloo, curving the tiles more inwards the higher it gets. Closer to the top it will be harder to make your tiles sit at the correct angle while the icing is still well, so I used a wooden skewer as a strut to hold it in place until the icing set. The more it angles inwards, the more you will need to alternate regular tiles with those that you have carved with the angled sides earlier. Any gaps are easily filled with more icing. When it gets to the top, it should be almost angled parallel to the floor you won't be able to fit another layer of bricks in. Cut a circle of gingerbread from the remaining dough that will fit in nicely at the top, bake and then cement in using royal icing.
gingerbreadigloo-18
To make the door, just glue together several pieces in an arch at the base of the igloo. You don't need to leave a gap for the entrance on the main part of the igloo if you don't want to. I actually removed a brick from the base after I decided where my entrance was going to be, which was risky!
gingerbreadigloo-21
Use the remaining gingerbread dough (there should be a bit less than half left) to cut out extra decorations for your igloo. I cut out some reindeer...
gingerbreadigloo-19
So that they could pull a sleigh which I built out of mini candy canes and some pieces of gingerbread. I tried to curve up one end of the base of the sleigh by baking it against the side of a baking tray but it wasn't very obvious once it came out of the oven.
gingerbreadigloo-20
I also cut out gingerbread men which I decorated with 'frilly' royal icing to make a fur coat, easily done using a small star tip on my piping bag, black food colouring for the face and I added some of the black to the royal icing for the body so they could have cute little grey outfits :D
gingerbreadigloo-6
I also added a couple extra bits, a sugar wreath for the entrance (which you might recognise from the mini gingerbread houses) and a gingerbread christmas tree decorated with green and white royal icing. I wish I had saved some of my christmas tree cupcakes to decorate this with!
gingerbreadigloo-7
I served it on a cake platter dusted with lots of icing sugar, which makes the perfect snowy setting, and even better if you accidently leave tracks in the 'snow' to make it look like footprints!
gingerbreadigloo-8
Thank you so much to Anna and Y for picking this wonderfully fun challenge for this month. I was so tired after constructing my igloo that I got really lazy with decorating it for the photos, so it's a fair bit uglier than I wanted. I wish I could redo it and move the entrance to the other side of the igloo where I had tiled the gingerbread much more neatly! But you get the general idea of what I was going for, right? :) Merry Christmas everyone!

P.S. For those who are wondering, I don't think I'll be eating it! I definitely should have added more water or butter to the dough, because it's very very dry and does not make great eating unfortunately :( But you might have better luck with the recipe than I did. However if you do want a gingerbread that I would definitely eat you can try the recipe for my other gingerbread houses!
Print Friendly and PDF

Wednesday, December 16, 2009

Christmas Tree Cupcakes

xmastreecupcakes-2
You didn't think I would do all this Christmas baking and not do cupcakes, did you? Shame on you if you did! These Christmas tree cupcakes were the first thing I decided to make when I was planning my Christmas baking schedule. If this crazy year of blogging has taught me anything, cutely decorated cupcakes are an easy way to bring a smile to almost anyone's face. I can pretty much bake cupcakes with my eyes closed nowadays, when I'm making them I just go into auto-pilot. Which is good, since it means I have more energy leftover to decorate my cupcakes. In the beginning I would be so stressed from the baking part alone that I would be completely over it by the time it came to decorate them, and would just slop some icing on top.
xmastreecupcakes
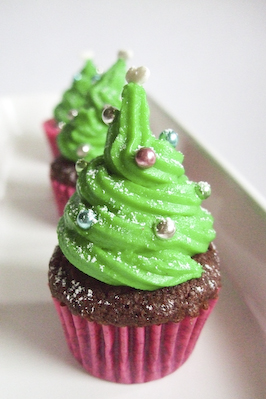
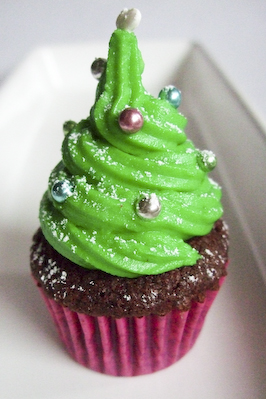
These little Christmas tree cupcakes are chocolate cakes topped with peppermint icing. Don't be scared by the massive heap of icing on top, these are just mini cupcakes, the same ones that I used to make my ice cream cone cupcakes, so the photos make them look a lot bigger than they actually are. I love using Nigella's choc cake recipe since it is so easy and guarantees a super moist chocolatey cake. The mint buttercream turned out a slightly more lurid green than I expected, but I couldn't bring myself to add any more food colouring to make it darker. It's not too rich though, just a little morsel to decorate a table (and to snack on later!)
xmastreecupcakes-4
I made these mini Christmas tree cupcakes for Asian Gaga. I originally promised to bake her a ton of my chocolate peppermint creams for Christmas, but when I finally came to do it, I got completely sidetracked by this idea for cupcakes. Anyway I think it's more special :) And chocolate & peppermint is always a fabulous combination in my opinion. I know there are some people out there who don't like it, so you could change the icing to pandan flavoured (switching the peppermint essence for pandan essence) and the cake could be changed to coconut flavour (using this recipe).
xmastreecupcakes-5
I loved using the cachous for decorating, don't you think they look just like Christmas tree baubles? They're a little hard on the teeth, so if you prefer you could replace them with the usual colourful sprinkles. I topped each of them with a little white sugar heart, but I wish I could have gotten something star shaped instead!
xmastreecupcakes-7
Christmas Tree Cupcakes
(cake recipe adapted from Nigella Lawson's Old Fashioned Chocolate Cake)
100g plain flour
100g caster sugar
1/2 tsp baking powder
1/4 tsp bicarb soda
20g Dutch process cocoa powder
85g unsalted butter, softened
75g sour cream
1 large egg
1 tsp vanilla extract

125g unsalted butter, softened slightly
2 1/2 cups icing sugar
1 tsp peppermint essence
Green food colouring
Silver/Multi-colour cachour and/or other sprinkles for decorating
xmastreecupcakes-9
Preheat oven to 180 degrees C. Place flour, sugar, baking powder, bicarb soda, cocoa, butter, egg, vanilla and sour cream into a food processor and pulse until all the ingredients come together and you have a smooth, thick batter. Spoon the batter into a lined mini muffin tray (about 3/4 full) and bake for about 10 minutes or until a skewer comes out clean and the cake springs back slightly under your finger when you press it gently. Remove from the tray and cool completely on a wire rack.
xmastreecupcakes-10
When cakes are cool, beat butter at high speed with an electric mixer until light and fluffy. Sift icing sugar into bowl, add peppermint essence and green food colouring. Add the green colouring as you fold everything together using a spatula, so that you can adjust the shade of green. I think I ended up adding about 1/4 tsp of colouring. Add more icing sugar if you think the icing is not stiff enough.
xmastreecupcakes-11
Pipe icing in a spiral to make it look like the tops of Christmas trees (hopefully with slightly more skill than me...mine were a bit wonky).
xmastreecupcakes-12
Decorate the 'trees' with your cachous and sugar sprinkles, or whatever you want! Leave out to set for about 30 mins, and then serve dusted with icing sugar or store in an airtight container.
xmastreecupcakes-13
Makes about 24 little Christmas tree cupcakes.
xmastreecupcakes-6
I brought some of these into work today, though they got a bit bashed up on the train trip here. Don't ask me why, but we have a stash of those plastic googly eyes at work, so I couldn't resist giving one of my trees a little bit of extra personality. Don't worry I didn't let anyone accidently eat the eyes!
xmastreecupcakes-14
Hello Mr. Tree!
Print Friendly and PDF