Sunday, March 28, 2010

Hot Cross Scones

hotcrossscones
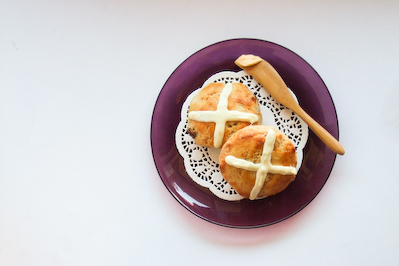
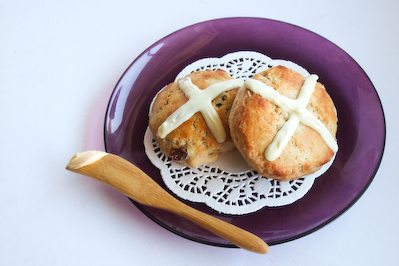
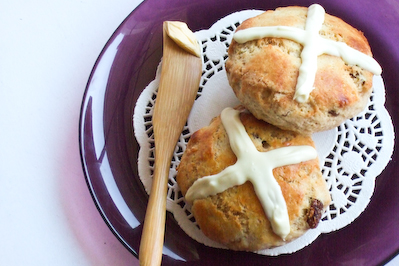
I decided very early this year that I wasn't going to bake hot cross buns. I made them successfully last year, which was rather exciting since it was my first time using yeast, but I didn't have the energy to do it this year. Plus I just got my itch to bake bread out of the way. But I still wanted to do something similar and this was the perfect cheat's version of a hot cross bun. You'll be burning your tongue as you impatiently taste test these straight out of the oven, because they smell so good while they're baking!
hotcrossscones-8
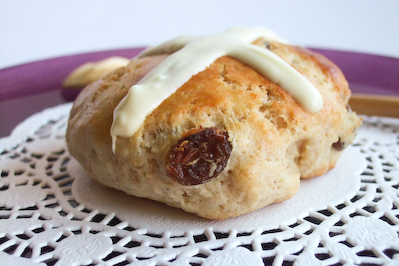
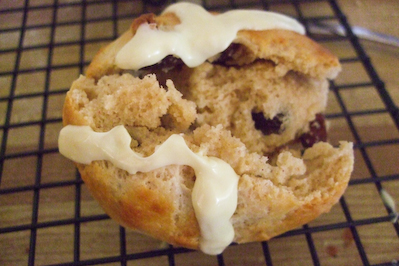
I have waxed lyrical about scones and how easy they are to make, and these babies are no different. Super moist straight out of the oven with a hint of spices and lots of juicy sultanas, they are as close as you're going to get to a hot cross bun in scone form. And there's no yeast, so no long waiting times for proving, and no kneading. These even got the tick of approval from the boy, who tends to find scones completely dull.
hotcrossscones-5
I tried a couple of different experiments while coming up with this recipe. My first attempt was a variation of the CWA scone recipe that I love, but the texture of the cream scones didn't produce a hot cross scone I was satisfied with - it was too fluffy and not buttery and crumbly enough. So I went with a butter & milk combination (and buttermilk to make them super moist), and they turned out just right, with a pretty golden surface. The crosses are made from white chocolate, which give it a lovely richness. I even spread some of the leftover chocolate over the scones while I ate one, which was totally evil (and totally awesome). But they taste great on their own, fresh out of the oven.
hotcrossscones-6
I know there's nothing quite like a fresh, fluffy traditional hot cross bun, trust me I am a HUGE fan of them. But these weren't a bad substitute for someone who was far too lazy to knead bread and just wanted to whip up something quickly for brunch. I will definitely be making them again. I hope everyone has a great Easter break, I will be spending mine celebrating A's birthday, with plans to construct a slightly insane cake that will probably end in disaster. I'll let you know how it turns out!
hotcrossscones-7
Hot Cross Scones
(makes about 6 large scones)
220g self raising flour
pinch of salt
1/2 tsp ground cinnamon
1/8 tsp allspice (if you don't have it, substitute with more cinnamon)
75g butter, softened
70g caster sugar
70g sultanas or currants
1 large egg
2 tbsp (40ml) buttermilk
100g white chocolate
hotcrossscones-11
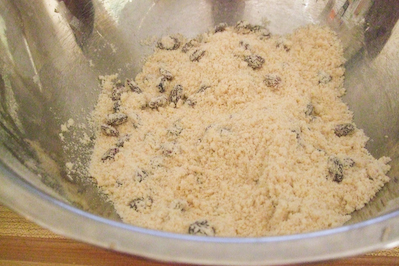
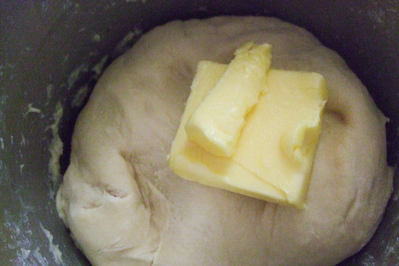
Preheat oven to 220 degrees C. Sift flour, salt, cinnamon and allspice into a large mixing bowl. Add butter and using your fingertips, rub the butter into the flour until it resembles breadcrumbs. Stir in the sugar and sultanas.
hotcrossscones-10
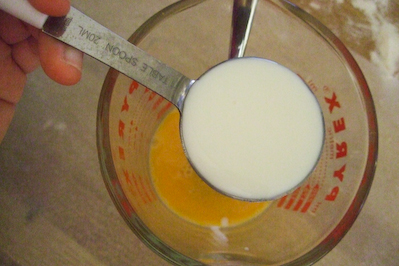
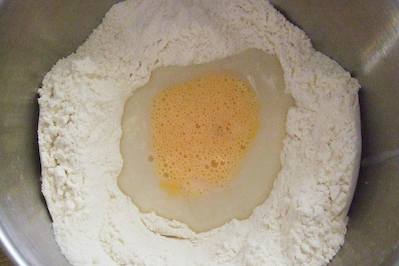
Lightly beat the egg and the buttermilk together in a small bowl. Using a palette or butter knife, gradually pour the egg mixture into the mixing bowl, gently cutting into the mixture until it starts to come together. Use your hands to bring the dough together into a ball and then turn out on to a lightly floured surface.
hotcrossscones-12
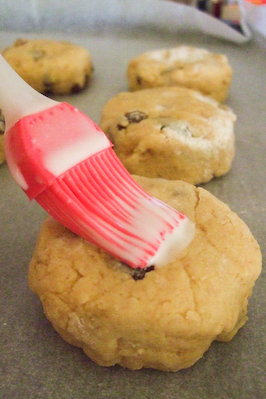
Pat the dough into a flat disc about 4cm thick and use a scone cutter (or a round glass dusted with flour) to cut out your scones. (Mine is around 5cm diameter) Carefully pat any scraps together into a ball and use cutter to form scone with remaining dough. Brush the tops of the scones with the leftover buttermilk.
hotcrossscones-13
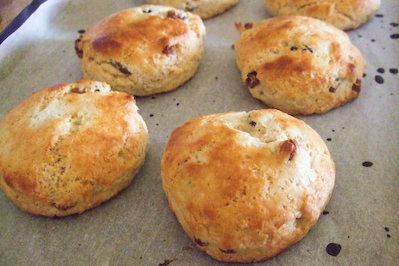
Place scones on a lined baking tray and bake for 10-12 minutes, or until golden brown on top. Time will vary depending on the size of your scones and your oven. When ready, remove from oven and place immediately on a wire rack to cool.
hotcrossscones-14
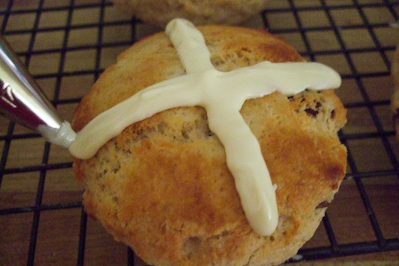
While the scones are baking melt the white chocolate in a heatproof bowl either over a double boiler or carefully in a microwave. Place in a piping bag and when the scones have been out of the oven for a few minutes, pipe a white chocolate cross over the top of each scone.
hotcrossscones-15
hotcrossscones-16
Serve immediately with butter or (if you want to be a bit naughty) some leftover melted white chocolate. But don't use too much or it will overpower the flavour of the scone. Scones can be stored in an airtight container and warmed up in the microwave but are best eaten when fresh.
hotcrossscones
Print Friendly and PDF

Wednesday, March 24, 2010

Chicken Salad with Buttermilk Chive Dressing

buttermilksalad-9
A quick post for the middle of the week, and oh my god it's savoury. AND healthy. What's going on??? I wouldn't normally post about a salad, but I felt compelled to share this one with you because it took me about 5 seconds to prepare and it was so tasty and pretty healthy too. I like to think of it as my 'leftovers salad', which is where I throw together whatever I have in my fridge in the hope that it resembles a meal. It's great for when you have leftover roast or BBQ chicken from dinner the night before.
buttermilksalad-2
There's obviously nothing mind blowing about the salad itself; just baby spinach, chicken and corn, but the dressing is good part. I always end up with leftover buttermilk from baking and other than making pancakes and scones, I don't have many uses for it. Buttermilk is kind of magical though. It's thick and creamy and anything that you bake with it turns out super moist. But it's low fat! And it works awesome in a salad dressing, making it a great replacement for those ultra fatty creamy dressings without any loss of flavour. As Tomred wisely said to me once, it's all about the dressing.
buttermilksalad-5
Chicken Salad with Buttermilk & Chive Dressing
1 1/2 cups Shredded chicken breast (or whatever leftover meat, or tuna)
1 bunch/bag baby spinach (or whatever salad greens you prefer)
1 cup sweet corn kernels, cooked (fresh or frozen)
(Basically you can throw in whatever leftovers you like)

For the dressing:
225ml buttermilk
2 tbsp freshly chopped chives
2 tbsp white vinegar
1 tbsp low fat mayonnaise
1/4 tsp sea salt
1/4 tsp freshly ground pepper
buttermilksalad-11
These instructions are so easy I feel silly: place all the ingredients for the dressing in a bowl and whisk to combine, adjust to taste if necessary. Place all the remaining salad ingredients in a large bowl and toss with dressing. Top with extra freshly cracked pepper. Enjoy!
buttermilksalad-10
Edit: OH I nearly forgot! It's my blog's 1st birthday today!! Yay! Happy Birthday little blog :) I think a cake is in order....
Print Friendly and PDF

Sunday, March 21, 2010

Finger Bun Bites

fingerbun-4
I usually hate high humidity. A lot. I grew up in Malaysia, the home of high humidity, and it was the bane of my existence. As a nerdy 14 year old, my pet peeve was stepping out of an air-conditioned place into the sticky night air, and having my glasses mist up immediately, blinding me instantly. I hated my glasses almost as much as the humidity when I was 14. But even now, after so many years when I should have gotten used to it, the humidity still gives me the shits. I get extremely cranky when the air is hot and heavy, much to the amusement of those around me. Apparently short, cranky people look funny. BUT. I do know one good thing about these hot sticky days. While they are almost the worst possible conditions for macaron baking, and are generally not too pleasant for having the oven on, they are perfect conditions for bread making. The warmth means you can prove your dough for the minimum amount of time and your dough will rise quickly and as perfectly as expected. So on one particularly humid day, I had the itch to make bread. And what better bread to make than the humble finger bun?
fingerbun-3
I LOVE finger buns. Fat, fluffy and pillow soft finger-shaped bread rolls, usually with sultanas in the dough, which are slathered in thick icing and topped with sprinkles, cinnamon or coconut. It's the ultimate Aussie treat to leave any child with a sticky face and hands, and on an intense sugar high. It beats a boring, greasy old doughnut any day in my opinion. I got caught up in the idea of making smaller versions of these huge finger buns, that you could quickly pop into your mouth. Usually when I get the craving for one of these I'll grab one from Baker's Delight and then gorge myself and feel incredibly sick afterwards, such is my lack of self control. I always like the idea of shrinking down the portion sizes of any dessert, it makes it easier to share and easier to stop yourself from going nuts and pigging out.
fingerbun-8
While searching for the perfect bun recipe for these finger bun bites, I happened to stumble upon this fantastic looking Japanese-style sweet bun dough recipe. I absolutely adore the light, fluffy texture of these sweet buns that you get from Asian bakeries, and I thought it might be interesting to try it with a finger bun. The recipe also uses an interesting technique I've never tried before, where you prepare a water-roux mixture to add to the dough, which is meant to give the bread some springiness. I adapted the recipe slightly, since I took some of the effort out by using my dough hook attachments on my hand mixer rather than hand kneading. If you don't have dough hooks, feel free to follow the original recipe instructions. One thing I would recommend you invest in is a thermometer, so that you can make your water roux just right, and also check that your wet ingredients are lukewarm and not too hot so that they won't kill the yeast. I use this IKEA meat thermometer for all my low (less than 130 degrees C) measurements, and a glass sugar thermometer (which only costs about 10 bucks) for all my high temperature measurements. It takes a lot of stress out of many cooking and baking processes and it's so cheap!
fingerbun-11
The recipe turned out just as I'd hoped, the dough was light and fluffy, almost cloud-like. Unfortunately I over-baked them slightly, so they turned out a bit drier and harder than I would have liked, but I did attempt some full sized buns which turned out amazing. So my advice to you if you do try the recipe is to make sure you don't over-bake them! I did half of the dough with sultanas (the ones with the white icing and sprinkles), and the other half plain (with pink icing and dessicated coconut). In hindsight, I think the best combination would have been to have all of them with sultanas AND coconut. I brought these along to Lex's trial run for the Time Out Taste Test, where he fed us the most awesome bah kuh teh, pork belly, scallops and celeriac mash. Thanks Lex!! I felt very spoilt. But I ate so much of Lex's dinner, I was completely stuffed by the time dessert was on the table. Also, with sticky date pudding and chocolate marquise to choose from, I didn't want to touch the finger bun bites! They were better saved for morning tea at work the next day, to help everyone get over their Monday-itis. I would love to try that bread recipe again with some Asian style fillings, but they did work pretty well as finger bun dough.
fingerbun-7
Sticky Finger Bun Bites
(adapted from this Japanese-Style Sweet Bun recipe)
325g bread flour (I found Lighthouse brand Bread & Pizza dough at the supermarket, not sure how important it is that you use this type of flour)
100g plain flour
35g milk powder
75g caster sugar
3/4 teaspoon salt
1 sachet (7g or 2 1/2 tsp) instant dry yeast
1 egg, lightly beaten
150ml (approx.) lukewarm water, adjust as necessary
40g butter, room temperature, cubed
25g (just under 2 tbsp) bread flour
125ml (1/2 cup) water

1 tbsp caster sugar + 2 tbsp warm milk, for glazing
Approx 500g icing sugar
Warm milk, around 1/4-1/2 cup, adjust as necessary
Dessicated coconut
Sultanas (approx 100 g)
fingerbun-12
Prepare the water-roux:
Combine 125ml water with 25g bread flour in a small saucepan. Cook over low to medium heat, stirring continuously until it reaches 65 degrees C. It should have thickened into a paste by this stage. Remove from the heat and cover saucepan with clingfilm. (If you don't have a thermometer, cook until it starts to thicken and then cook for about another minute before removing from the heat) This water roux can be kept in the fridge for up to a day in an airtight container, but do not use if it has turned grey in colour.
fingerbun-14
Prepare the bun dough:
Sift bread flour, plain flour, milk powder, caster sugar and salt into a large mixing bowl. Add instant dry yeast and mix well. Form a well into the centre and add egg and lukewarm water roux and mix in. Then, with an electric mixer and dough hooks on low speed, gradually add just enough lukewarm water to form into a slightly sticky, soft dough. Knead with dough hooks on about medium high speed for 10 minutes until smooth and elastic.
fingerbun-15
Knead in butter using dough hooks on high speed until well combined. The dough should be quite sticky and very elastic and will stretch like chewing gum when pulled.
fingerbun-16
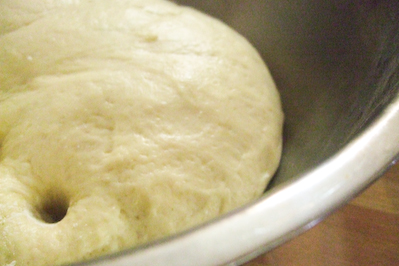
Form into a ball and place in a large, greased bowl and cover with cling film. It should double in size (should take about 1 hour in warm weather, longer in winter months). Optimum room temperature for this first prove is 28°C with a humidity of 75%. To test if the dough has risen properly, dip a finger into bread or plain flour and poke down into the centre of the dough as far as your finger will go and pull out again – the hole should remain if it is ready. If the dough springs back, then it is not ready, continue to prove further.
fingerbun-17
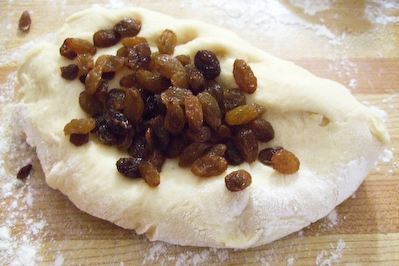
Punch down, (add sultanas at this point if you want) knead briefly and form into a ball. Using your hands, form small balls of dough for the finger bun bites, approximately 3cm in diameter (try to keep any sultanas in the dough hidden under the surface of the balls, as they will expand in the oven). Place balls on 2-3 lined baking sheets, about 5cm apart and cover with clingfilm. Leave to double in size again (about 1 hour in warm weather, longer in winter months). Optimum room temperature for this final prove is 38°C with a humidity of 85%.
fingerbun-18
Bake in preheated 190°C oven for about 10-13 minutes, or until light golden brown.
fingerbun-19
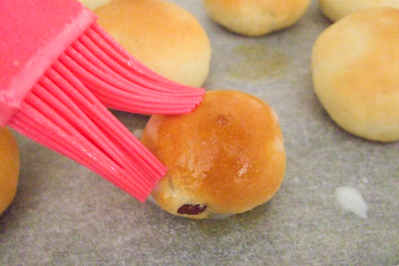
When buns are nearly ready, dissolve caster sugar in warm milk. Remove buns from the oven and while still on the tray, brush the tops with the sweet milk glaze. Place to cool on a wire rack.
fingerbun-20
Sift icing sugar and gradually add warm milk until you it forms a very viscous, thick white paste. I found it was easier to add milk until it was too runny and then add additional sifted icing sugar to make it as thick as I want. It is thick enough when it can be spooned thickly onto the buns without dripping down the sides. Add any food colour you might want, and then cover each finger bun bite thickly in icing and dip the top into a bowl of dessicated coconut or sprinkles.
fingerbun-21
Leave to set on wire rack. Store in an airtight container, best eaten within a day but can also be stored in fridge for a couple of days and warmed up slightly in the microwave before eating.
fingerbun-2
Print Friendly and PDF

Tuesday, March 16, 2010

Mini Grasshopper Pies

grasshopper-12
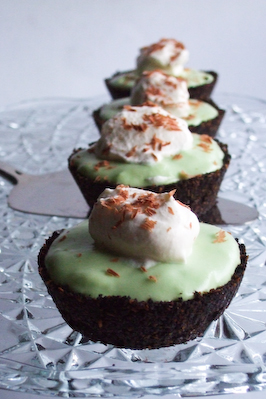
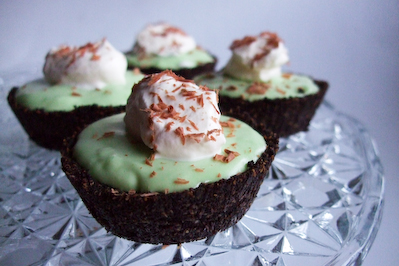
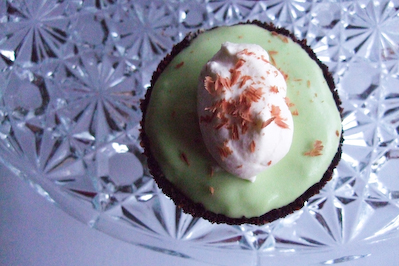
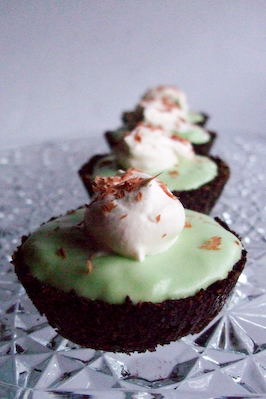
Apparently, the only thing I can pay attention to when I watch movies and TV shows is the food. This time, I was watching a past episode of Glee (*sigh* I miss Glee!) and there was grasshopper pie. Here in Australia, we don't get grasshopper pie and most people haven't heard of it. The mere mention of the name raised suspicious eyebrows and wrinkled noses when I mentioned it. Apparently my friends now think that I'm insane enough to put real grasshoppers in my desserts, which is kind of great. But I loved the sound of this pie, with its chocolate biscuit crust and a fluffy, marshmallow-like peppermint filling. Also, they were appropriately green, just in time for St Patrick's Day!
grasshopper-2
I've always loved the combination of peppermint and chocolate. But I get the feeling it's a combination that you either hate or love. And I've come across some people who just can't stand it, but most people I know adore it. I think this may be one of the best ways to enjoy the combination, apart from after dinner mints, mint choc chip ice cream and these chocolate peppermint creams. The filling is light and super fluffy, like a peppermint cloud! And the biscuit base nicely compliments the filling in taste and texture.
grasshopper-11
I decided to test out a Martha Stewart recipe, after doing a bit of research on the grasshopper pie. It seemed appropriate to be using a Martha recipe for some reason. But I wasn't too happy with the texture and flavour of the filling, and was also trying to figure out the best chocolate biscuits to use for the base. I've made quite a few changes in my recipe, taking out the fresh mint since I felt it gave it a really leafy green flavour which I wasn't fond of. But feel free to follow her recipe if you think you'd like the taste of the fresh mint. I tried using Oreos for the base, as well as Choc Ripple biscuits, and both turned out delicious, but I think I prefer the Oreo base.
grasshopper-7
OMG it's a teeny tiny slice of pie with a teeny tiny spoon!
This dessert is usually made as a full size pie, in a big pie dish, but I liked the idea of making little individual portions, it's always easier to share and there's a nice ratio of filling to crust :) Oh and an extra note for those who are wondering, it's going to be pretty quiet on the restaurant review front. I really haven't been eating out much, in an attempt to save money and calories, and am thinking about phasing out reviews from my blog completely. Thoughts? Comments?
grasshopper-5
Mini Grasshopper Pies
(loosely adapted from this recipe, makes approx 10 small pies)
1 pack of Oreo cookies, filling removed (or substitute with Choc Ripple biscuits, enough to fill 1 1/2 cups when crushed)
1/2 cup dessicated coconut
65g unsalted butter, softened
2/3 cup + 3/4 cup whipping cream
3 eggs
1/8 cup sugar
2 tbsp creme de menthe (can replace with 1-2 tsp peppermint essence and a few drops of green food colouring)
1 tsp peppermint essence
1 tsp pure vanilla extract
4g powdered gelatine (approx 1.5 tsp)

Preheat oven to 180 degrees C. Crush chocolate biscuits finely in a plastic bag, or in a food processor. Add dessicated coconut and butter and pulse in processor until it comes together, it should feel like moist dirt. (If you don't have a food processor, just stir together in a large mixing bowl to combine)
grasshopper-10
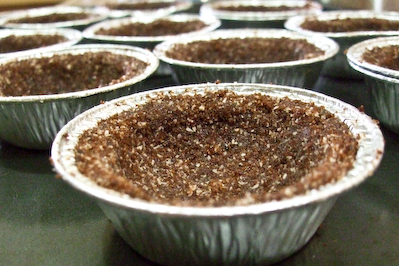
Press mixture firmly into individual foil tart shells, or you could also try using a greased muffin tray but you might have issues removing the crusts later. Bake in oven for about 10 minutes, make sure it does not burn. Remove from the oven and leave to cool, it should set once it cools.
grasshopper-14
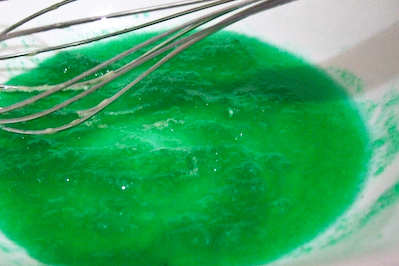
Place 2/3 cup of cream in a small saucepan with peppermint essence and vanilla. Bring to the boil over medium heat and then set aside to cool. Beat remaining 3/4 cup cold cream until stiff peaks form and store in the refrigerator for later. Place creme de menthe in a heatproof bowl and sprinkle gelatine over the top to allow it to soften. Place egg yolks and sugar in another heatproof bowl and whisk until the sugar has dissolved.
grasshopper-19
Prepare an ice bath and set aside. Carefully pour warm cream mixture into creme de menthe bowl, whisking to combine. Place this bowl over a pan of simmering water, whisking constantly for about a minute or two, until the mixture is hot and all the gelatine is dissolved.
grasshopper-17
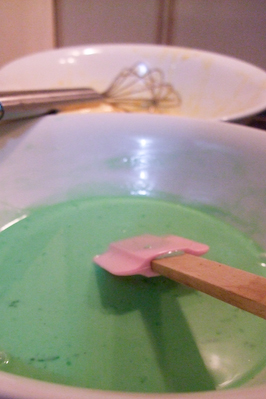
Whisking constantly, pour hot cream mixture in a steady stream into the bowl of egg yolks. Place this bowl over the double boiler and continue whisking for approximately 10 minutes. The mixture should be thick and frothy. Transfer bowl to the ice bath and continue whisking, the mixture should thicken further and be quite viscous. Stir in 1/3 of the cold whipped cream until combined, and then gently fold in the remaining whipped cream. At this point if you want your mixture to be a bit less runny before placing in pie crusts, place in the fridge for about 5-10 minutes. Spoon mixture into pie crusts and then chill in the fridge for about an hour, or until it sets.
grasshopper-16
When ready to serve, remove from tart foils, and top with chocolate shavings. Optionally, you can top with some extra whipped cream.
grasshopper-3
Have a great St Patrick's Day tomorrow everyone!
grasshopper-9
Print Friendly and PDF

Tuesday, March 9, 2010

Blueberry & Lemon Shortcake

shortcake
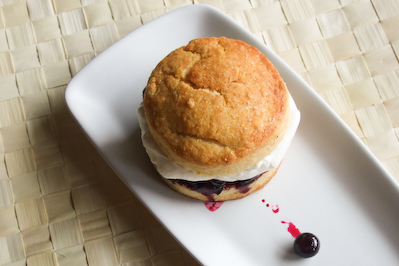
There are plenty of things that make me feel better when I am sick. And since I am currently suffering from some sort of mysterious bug, I am clinging to those comforting things like crazy. In case you didn't already guess, scones is one of them. But this isn't really a scone. It's a shortcake, which seems to be a very confused dessert. I've seen it made with scone/biscuit bases, sponge cake and somtimes even pastry. But for me, I always imagine it as being closer to a scone than anything else. With loads of freshly whipped cream.
shortcake-3
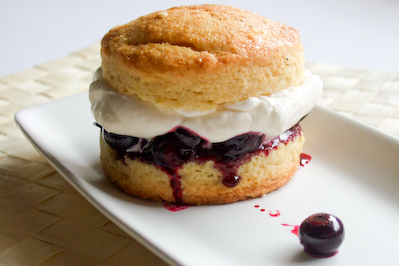
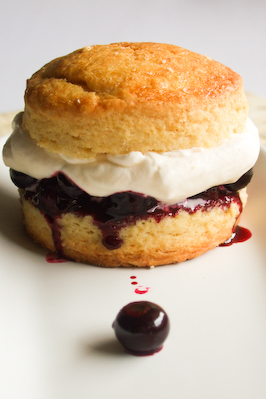
So how did this blueberry shortcake come about? Why not a regular old strawberry shortcake? Well I was sitting in bed watching an old Gilmore Girls episode (another comfort thing which makes A's eyes roll with the super girly fast talking) and they were going on and on about blueberry shortcakes. And it sounded really darn appealing to me. Plus I had a huge stash of super cheap fresh blueberries that I picked up from the supermarket. The only thing that made it complete for me was the addition of a ton of lemon zest to the dough to give it a little zing. Oh and in case you are wondering, that stray blueberry wasn't some sort of attempt at food styling, it just rolled off my spoon as I was placing it on top of the shortcake and so I shrugged and went, "Meh, it will do."
shortcake-4
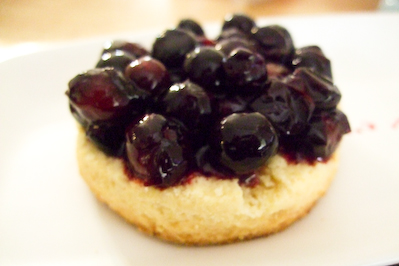
As crazy as it sounds, baking scones, or something close to scones makes me feel better when I'm sick. I've done it so much I can do it stress-free and without any extra thought. It's almost therapeutic. And these shortcakes turned out just as I'd hoped, golden and buttery, the lovely scent of lemon, and they just melted in your mouth. With a perfect sweet blueberry topping, made extra fun by the fresh berries that went POP! in your mouth as they burst, and LOTS of freshly whipped cream. The texture of the cakes was actually quite different to a scone in the end, much richer and crumbly rather than fluffy, halfway to a shortbread. It might not actually cure any illnesses but it does leave you feeling all warm and fuzzy.
shortcake-2
Blueberry & Lemon Shortcakes
(adapted from this recipe, makes approx 8)
2 cups plain flour
1 tbsp baking powder
2 tbsp caster sugar
1/4 tsp salt
115g cold unsalted butter, cubed
3/4 cup pure cream (whipping cream)
1 lemon
1 cup (approx 3 punnets) fresh blueberries (or frozen)
1 tbsp caster sugar
1 tbsp honey
Extra pure cream for topping
shortcake-18
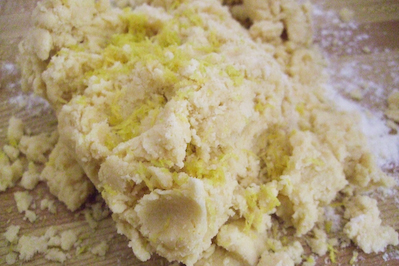
Preheat oven to 220 degrees C. Zest lemon. Sift flour, baking powder, sugar (2 tbsp) and salt together in a large mixing bowl. Add cold butter and use your fingertips to rub together until it is combined into a sandy mixture with some large lumps of butter. Using your hands or a butter knife to combine, gradually add the cream until most of the dry mixture is just moistened. Turn out onto a lightly floured surface and sprinkle the lemon zest over the top. Lightly knead the dough until it just comes together.
shortcake-16
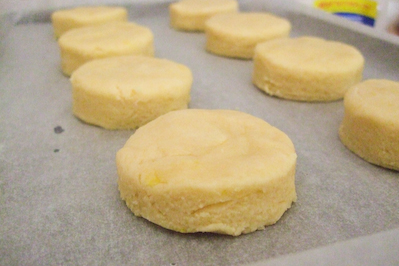
Pat the dough into a round about 1.5-2cm thick then use a cutter to cut out your portions. I used a 6cm scone cutter. Place on a lined baking sheet and brush the tops of the cakes with some extra cream. Bake for approximately 12-14 minutes, or until the tops are lightly browned and the dough is set. Cool on a rack.
shortcake-15
While cakes are cooling, place blueberries, honey, caster sugar and the juice from the lemon in a small saucepan and cook on medium heat until the blueberries just start to burst open. Remove from the heat and allow to cool and thicken slightly (I placed mine in the fridge to cool it down quicker). Slice shortcakes in half and then spoon the blueberry mixture over the top.
shortcake-10
Dollop some freshly whipped cream on top and serve with the other half of the shortcake on top. Shortcakes (unassembled) can be stored in an airtight container overnight, but is best eaten fresh. Blueberry mixture can be stored overnight in the fridge.
shortcake-5
Print Friendly and PDF