Pages

Sunday, August 29, 2010

PB&J Cookies/Fairy Bread Biscuits

pbj_fairy_cookie-7
You call that that a sandwich cookie? THIS is a sandwich cookie.

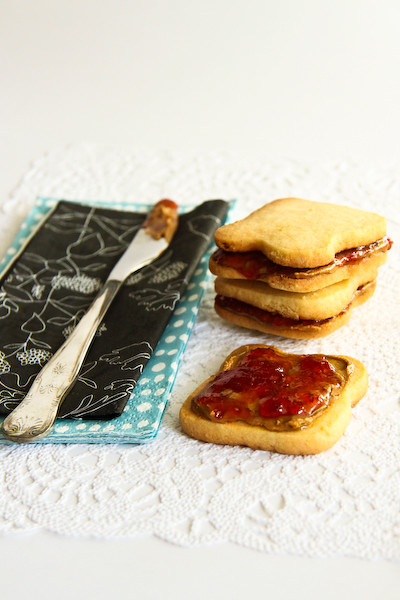
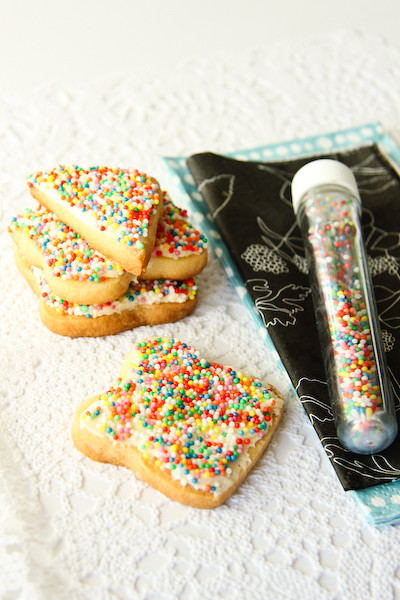
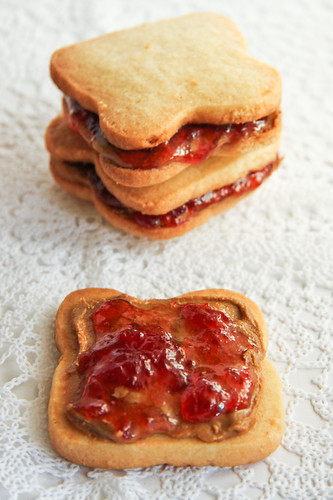
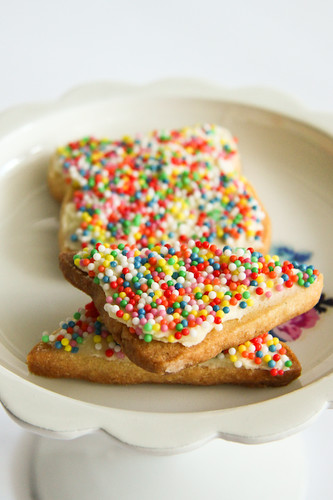
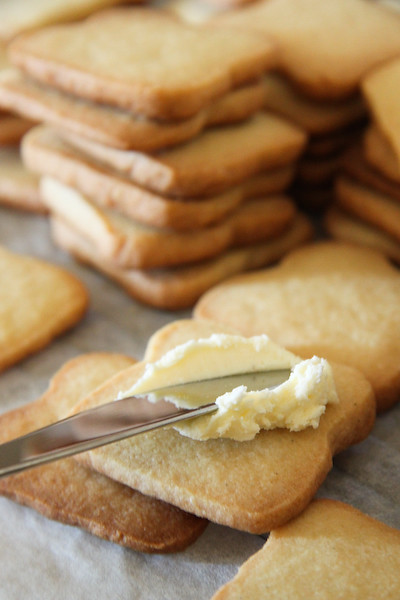
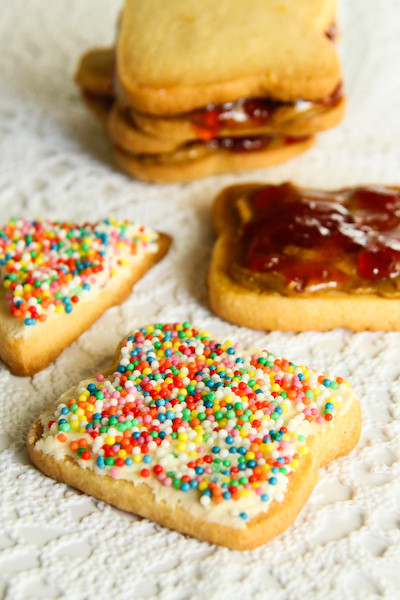
I don't know if it's been done before, but this very simple idea had to be done as soon as it came to me. Sugar cookies shaped into teeny tiny bread slices and made to look like sanwiches? The possibilities were endless...and so darn cute! My initial plans for BLT cookies were put on hold for something a bit simpler, so I could first check that the cookies would look enough like bread slices. So I made some teeny tiny peanut butter and strawberry jam sandwich cookies. And fairy bread ones! For those unfamiliar with fairy bread, it's a fabulous treat that takes me straight back to birthday parties from my childhood, slices of white bread covered in butter and multicoloured sprinkles.
pbj_fairy_cookie-5
I whipped out Martha's trusty sugar cookie recipe for this; it's very easy to handle and holds its shape without turning out rock hard. Though it's freezing cold in Sydney at the moment, so I had no problem with the butter in my dough melting. If you're doing this on a warm day, I'd definitely recommend sticking your dough in the fridge every now and then to keep it cool so it doesn't get greasy. It was so fun forming my cookie dough into mini 'bread loaves' and then slicing them up. They expand a tiny bit while baking, but less so the longer you chill the dough for. My house was filled with the wonderful smell of baked sugar cookies, and they came out looking so cute! It's best to take them out when they are still quite pale in the centre, as they tend to cook a bit further while they cool on the tray. I thought about dipping the edges of the cookie in chocolate to make it look more like it had a crust, but it wasn't worth it effort.
pbj_fairy_cookie-2
Taste-wise, they are awesome. The fairy bread ones are made with a simple butter icing, which is delish! Definitely on the sweet side, but I love the novelty and I think kids would too. I have a thing for miniature food. And really, white bread is so full of sugar so it's not that different to a sugar cookie. I definitely preferred the open sandwich cookies to the closed ones, there was just wayy too much cookie when they are sandwiched together. But sandwiching does make transporting a lot easier, I ended up with jam and sprinkles everywhere. Feel free to just make the cookies and fill them with your own 'sandwich fillings'. Can't wait to try lots of different versions now!
pbj_fairy_cookies-7
PB&J Cookies/Fairy Bread Biscuits
(adapted from Martha Stewart's sugar cookie recipe, makes approx 60 cookies or 30 sandwiched cookies - feel free to halve recipe)
600g sifted plain flour (approx 4 US cups)
1 teaspoon baking powder
1/2 teaspoon salt
225g unsalted butter, room temperature
400g granulated sugar (approx 2 US cups)
2 large eggs
2 teaspoons pure vanilla extract

For PB&J cookies: peanut butter (or a substitute), jam of your choice
For Fairy Bread biscuits: sprinkles (100s & 1000s to us Aussies), 100g salted butter, 200-250g icing sugar

Sift flour, baking powder, and salt into a bowl. Place butter and sugar in the bowl of an electric mixer fitted with the paddle attachment. (If you're like me and don't have a paddle attachment, a regular mixer works fine on high speed, scraping the bowl down with a spatula every now and then) Mix on medium speed until pale and fluffy. Mix in eggs and vanilla. Reduce speed to low. Gradually mix in flour mixture. The mixture should form a soft & easy to handle, but not sticky dough. Divide dough into quarters; use your hands to roll each quarter into a rectangular block, about 4cmx5cm thick. (If the dough gets too soft, chill it for 10 mins so that it firms up) Using your thumbs and forefingers, pinch along the middle of the top and the two sides to form indents along the length of the block, so that the dough resembles a bread loaf. (See photo below) Keep the bottom of the block flat. Wrap in clingfilm and refrigerate until firm; at least 1 hour or overnight.
pbj_fairy_cookies-coll
Preheat oven to 180 degrees C and line baking sheets with baking paper. Remove dough from the fridge and use a sharp knife to slice 0.4cm slices of 'bread'. Slice them thinner if you plan on sandwiching two slices together in your final cookies. Place on baking sheet, leaving at least 3cm between each cookie. While you are slicing up your dough, place your prepared sheets of sliced cookies in the fridge to stay cool. Bake for 15-18 minutes, until edges turn golden. Let cool on baking sheets on wire rack.
pbj_fairy_cookies-14
When completely cool, spread peanut butter & jam on the cookies, sandwiching two together if you prefer, or you can keep them open. If you are making the fairy bread biscuits, remove butter from fridge 30 mins before starting. Beat butter with an electric mixer on high until it is fluffy and pale. Sift icing sugar in, beating to combine. You can keep adding icing sugar until it reaches your desired consistensy. Spread thinly over biscuits and dip into sprinkles. Can be stored for several days in an airtight container.
pbj_fairy_cookies-5

Sunday, August 22, 2010

Baked Cinnamon Doughnuts

baked_cinnamon_doughnuts-5
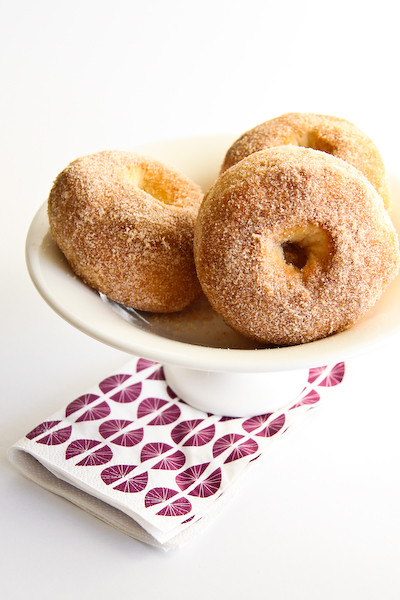
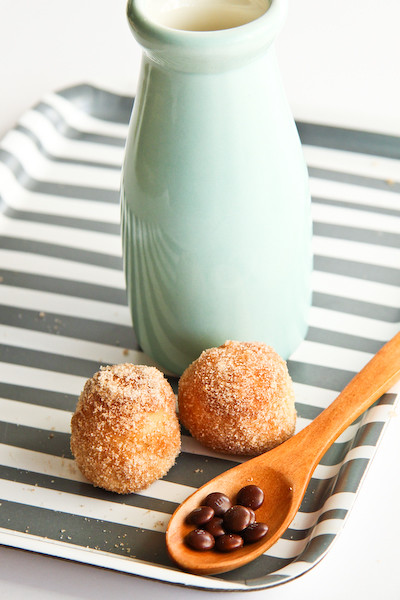
Deep fried dough; it's that delightfully evil combination of carbs, sugar and oil. Usually I am very controlled with my doughnut intake. As delicious as they are, the amount of guilt that comes with consuming all that heavy deep-fried carbness always outweighs the positives. So when I came across this baked cinnamon doughnut recipe, I had to give it a go. Would it satisfy my doughnut cravings without the guilt and the hassle of deep-frying at home?
baked_cinnamon_doughnuts-3
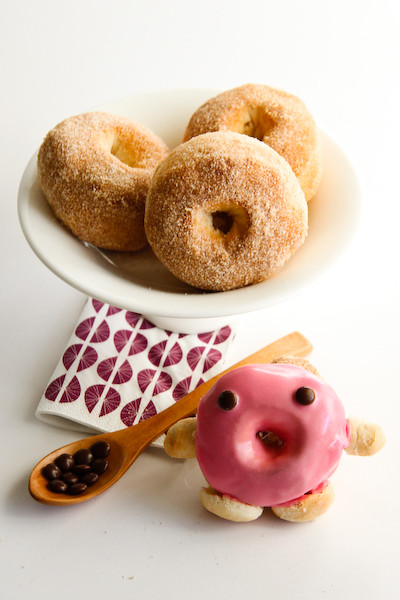
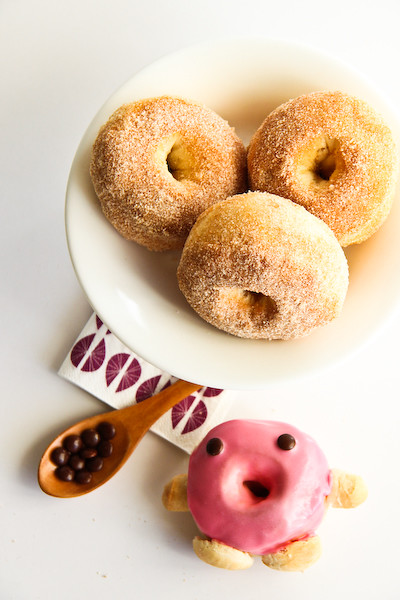
The answer was undoubtably YES. Obviously they are not exactly the same in texture, baking will not completely recreate the golden exterior doughnut that deep-frying does. The flavour was spot on with that lovely crunchy cinnamon sugar coating on the outside and the super fluffy innards. After the doughnuts had cooled they were quite hard on the outside, but a quick 10-20 second zap in the microwave turned them super soft and super doughnut-like. If anything I would suggest keeping them in the fridge overnight and then zapping them in the microwave before serving because it gives them that perfect soft texture.
extra_gum_ad
Screencap from this youtube video of the Extra gum ad
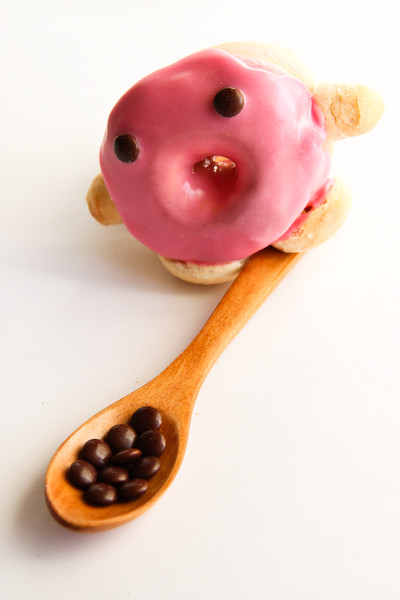
Do you like the little pink doughnut dude? Those of you in Australia might recognise him from the Extra gum commercial with all the animated food running around (not sure if they've used this ad in other countries). I loved the doughnut in this ad when it first came out, but he's been a bit overused since. Since it was my first time making doughnuts, I couldn't resist recreating this little fella. Isn't he adorable? He's covered with a thick strawberry icing, mini M&M eyes and his arms and legs are made from chopped up doughnut holes stuck in with toothpicks. The toothpicks are a little bit of a choking hazard, so if you wanna make these guys to serve you might want to think of a safer way of attaching the arms and legs. But isn't he adorable?!
baked_cinnamon_doughnuts-4
RAWRRRR!!!!
Speaking of the doughnut holes, they were just as great to eat as the regular doughnuts. For those who can't be bothered making doughnut shapes or would prefer to portion control and only have little doughnuts, just use the smaller cutter to make lots of these little doughnut holes. I couldn't stop popping these little babies into my mouth while I was pottering around the kitchen!
baked_cinnamon_doughnuts-2
These baked doughnuts are a great healthier alternative to their evilly good deep-fried cousins. Obviously they are still not very healthy with all that sugar, but they definitely satisfy those cravings for a warm cinnamon doughnut. Unfortunately the texture is a little too hard once they cool, so they really need to be heated in the microwave and served warm. I don't know if I will have the heart to eat my little doughnut guy :(
baked_cinnamon_doughnuts
Baked Cinnamon Doughnut
(recipe adapted from Taste, makes 12)
1 cup full cream or reduced-fat milk
15g unsalted butter, melted
400g plain flour
1 1/2 teaspoons instant dried yeast
1/4 cup (50g) caster sugar
1/2 teaspoon ground cinnamon

For cinnamon doughnuts:
35g melted butter
1/2 cup (44g) caster sugar
1 tsp ground cinnamon

Optional strawberry doughnut men decorations:
1 cup icing sugar
1/4 tsp strawberry essence
Pink food colouring
Milk
Brown mini m&ms
Toothpicks (or a safer alternative)

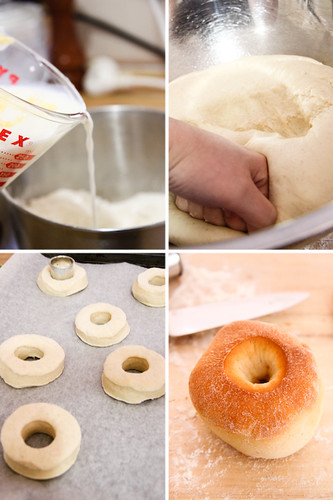
Place milk in a heatproof, microwave-safe jug. Microwave on medium-high (75%) for 30 to 40 seconds or until heated through (do not allow to boil). Stir in melted butter and set aside.

Sift flour into a large mixing bowl. Stir in yeast, sugar and cinnamon. Make a well in the centre. Add milk mixture. Mix to form a soft dough. Turn out onto a lightly floured surface. Knead for 10 minutes or until smooth and elastic (or if you are lucky enough to have a mixer with dough hooks like me, beat using dough hooks on high for 5-7 mins).

Place dough in a lightly oiled bowl. Cover with plastic wrap. Set aside in a warm place for 1 hour or until doubled in size. Line 2 baking trays with baking paper. Using your fist, punch dough down. Turn out onto a lightly floured surface. Knead until smooth. Roll dough out until 2cm thick. Using a 6.5cm cutter, cut 12 rounds from dough. Using a 3cm cutter, cut circles from the centre of each round. Place doughnuts (and doughnut holes), 5cm apart, on prepared tray. Cover with lightly greased plastic wrap. Set aside in a warm place for 30 minutes or until doubled in size.
baked_cinnamon_doughnuts-coll
Meanwhile, preheat oven to 180°C. Cook doughnuts for 10 to 12 minutes or until golden brown and cooked through. For cinnamon doughnuts combine sugar and cinnamon in a bowl. Brush doughnuts with remaining butter. Dip in sugar mixture, shaking off excess.
If you can be bothered making the little doughnut dudes, sift icing sugar in a bowl and add strawberry essence and food colouring. Gradually stir in milk, 1 tsp at a time until the icing is smooth and thick and does not flow too quickly. Dip one side of the doughnuts in the icing and place on a wire rack to set. If you icing is too runny either add more icing sugar or chill it until it is the right consistency. Before the icing is completely set on the doughnuts, place m&m 'eyes' on them. Using the doughnut holes, slice these up using a sharp knife and insert toothpicks into them and attach to doughnut to form arms and legs.

Serve doughnuts while still warm, or can be stored in an airtight container in the fridge and warmed up in the microwave for 10-20 seconds before serving. Avoid serving cold.
baked_cinnamon_doughnuts-6

Sunday, August 15, 2010

Tomislav's Apple Crumble

tomislav_apple_crumble-7
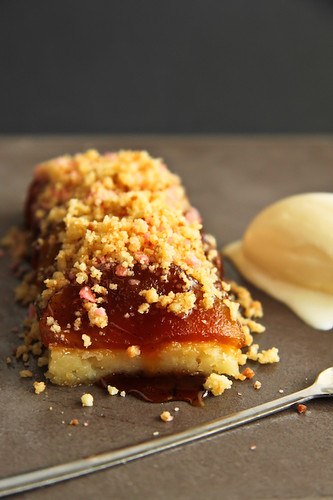
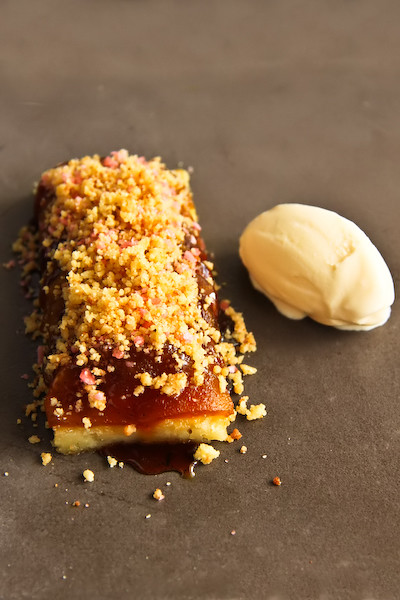
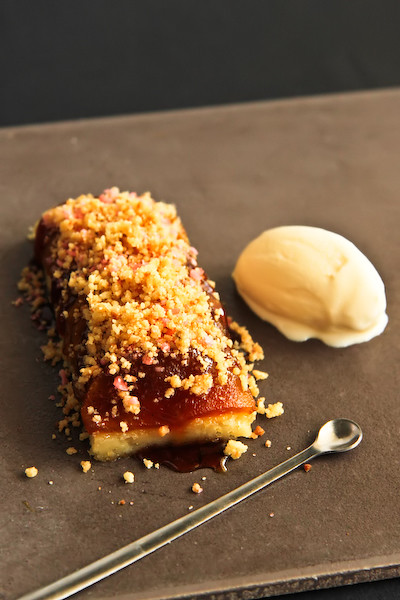
I always enjoy a challenge. Especially when it involves popping candy. As soon as I saw Helen's review of Tomislav, the apple crumble dessert with macadamia sponge and clotted cream ice cream immediately caught my eye. I have a special place in my heart for crumbles. And this was a crumble with popping candy! Unfortunately I've been too busy/poor/sick to eat out much recently, but when George from Wasamedia offered to share the recipe for this amazing dessert so that I try and recreate it at home, I couldn't say no.
tomislav_apple_crumble-2
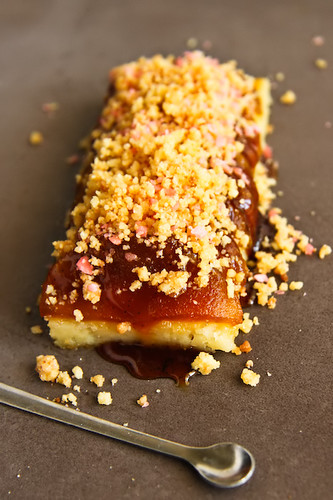
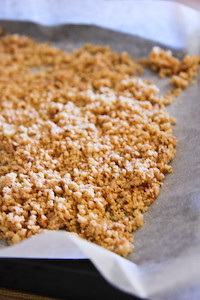
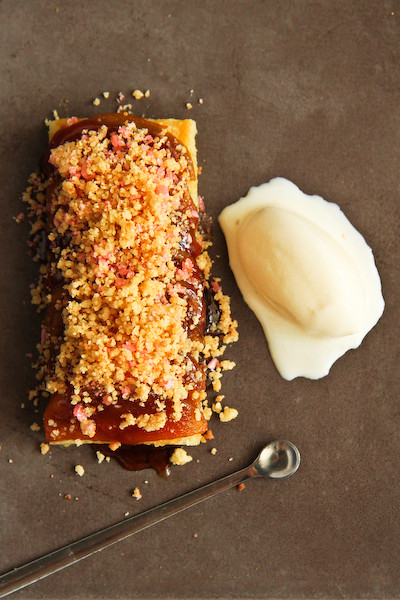
I love love love the idea of mixing popping candy into an apple crumble. There's always such a sense of whimsy when popping candy is involved. A fun twist on a traditional dessert like this is just what you would expect from chef Tomislav Martinovic, whose impressive experience includes previously working with Heston Blumenthal. The apple crumble dessert served at the restaurant keeps the popping candy well hidden within the crumble, but unfortunately for me the only popping candy I could get my hands was the strawberry flavoured kind, which was bright pink and a little hard to conceal.
tomislav_apple_crumble-3
The recipe I was given provided some interesting hurdles to overcome, since the instructions included the use of a Thermomix and a Pacojet. Errr...yeah unfortunately I don't have either of those stashed away in my kitchen cupboards (I swear I would kill for either of them). And I was allergic to the macadamia sponge. So a fair bit of improvisation was involved, and I can pretty much guarantee my homemade version was nowhere near as good as the real one would be. But it was worth a shot!
tomislav_apple_crumble-4
I have to admit I was a little lazy. I don't have an ice cream maker, nor did I have the energy to make it, so the ice cream in my photos is just some plain store-bought French vanilla ice cream. But I will include the recipe for the ice cream in case you feel like attempting it. I replaced the macadamias in the sponge cake recipe with pine nuts, and processed them with my food processor to get a fine meal. The sponge went pretty flat thanks to my stupid temperamental oven (same reason I had so many dramas when I was making madeleines recently), but it still tasted really delicious. My favourite part is definitely the crumble mixture with the popping candy, it's so buttery, crunchy and crackling! I was happy to eat the leftover curmble mixture just with some vanilla ice cream, it was so good!
tomislav_apple_crumble-5
Tomislav's Apple Crumble with Macadamia Sponge, Spiced Caramel Sauce & Clotted Cream Ice Cream
(serves approx 4, adapted from an original recipe by Tomislav Martinovic)
For the Clotted Cream Ice Cream:
250ml whole milk
250ml single cream
40g caster sugar
75g egg yolks
4g milk powder
2 vanilla pods

Combine milk, sugar cream and milk powder and bring to the boil. Let to infuse for 30 minutes. Add to the yolks and pass through a chinois or fine sieve Let mixture mature for 24hours. Churn in ice cream maker according to manufacturers instructions.

For the Crumble Mix:
60g butter, cold
30g sugar
60g almond meal
30g flour
Popping candy (I used Cottees Star Dust from the ice cream topping section of my supermarket)

Rub together in a bowl until mixed and crumbly. Spread out on a lined baking sheet and bake in an 170 degrees C oven until golden brown. Cool completely and store in the fridge until ready to serve.
tomislav_apple_crumble-8tomislav_apple_crumble-9
tomislav_apple_crumble-10tomislav_apple_crumble-11
For the Sponge:
75g macadamia nuts (I replaced these with pine nuts)
100g icing sugar
250g (yes, grams) pouring cream
100g plain flour

30g egg whites, room temp
10g sugar

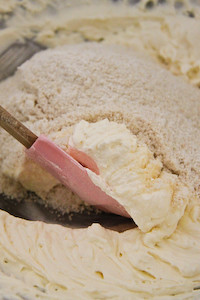
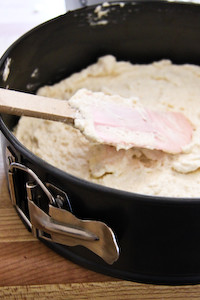
Pulse nuts in a food processor until it forms a fine meal. Add icing sugar and pulse a few more times to combine. (Original recipe calls for you to process nuts and regular sugar in Thermomix) Sift nut mixture with plain flour. Using an electric mixture, whip cream to stiff peaks. Also with an electric mixer, beat eggs whites to soft peaks then gradually add sugar and continue to beat until egg whites are very stiff, white and glossy. Working very quickly, fold dry mixture into whipped cream until nearly combined, then add egg whites and fold again. Pour mixture into a lined 20cm round springform tin with a removable base. Bake at 180 degrees C for 25-30 minutes or until the cake is cooked through and golden on top. Avoid opening the oven while it is baking as this will make the cake collapse.

For the spiced apples:
125g sugar

250ml white wine
65g sugar
2 Granny Smith apples, peeled, cored and roughly chopped into slices
1 vanilla bean or 1 tsp vanilla bean paste
2 cinnamon quills
1/2 tbsp cloves

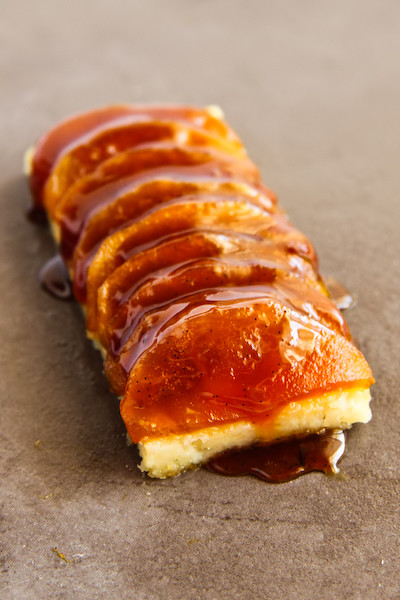
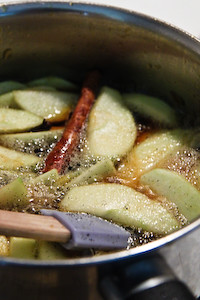
With the 125g of sugar make a fairly dark caramel by heating the sugar on medium high heat in a medium saucepan. Then add all other ingredients, including the apples, bring it to the boil and set aside to infuse for a further 30 mins. Strain off all ingredients and poach chopped apples (on low–medium heat) till just soft. (I admit I was lazy and just continued to poach the apples in the caramel sauce and then strained them out when they were ready).

When you are ready to serve:
Portion the macadamia sponge and heat in the oven at 180 degrees for
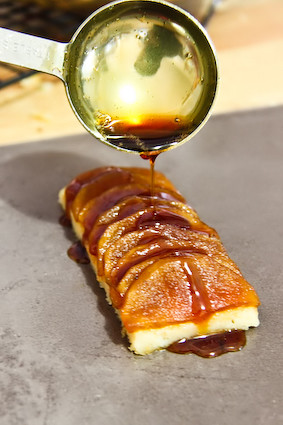
one minute. Heat the apples in a saucepan over medium heat until sauce reduces to a caramel (takes approximately 3-4 mins, I found my mixture a little too sour cos of the wine I used so I added more sugar) Add equal quantities of popping candy in a bowl with the crumble mix (one tablespoon each). Place the sponge on a plate, put apples & sauce on top, then crumble mix and ice cream on the side. Serve immediately.
tomislav_apple_crumble-12
I'm the first person to admit that one-plate desserts with multiple elements is definitely not my forte, I prefer to leave this to those who are more talented. However, even with my mishaps and lazy shortcuts I think I came up with a pretty good tribute to the original dish. So give it a go if you're interested and are not as lucky as us Sydney-siders who can go try the real thing. It is surprisingly less time consuming to make than it looks, but I think that next time I will save my energy and go try it in the restaurant instead ;)
tomislav_apple_crumble-6
Thanks to George from Wasamedia & Chef Tomislav Martinovic for sharing this recipe.

Tomislav
2/13 Kirketon Road,
Darlinghurst NSW 2010

(02) 9356 4535
Tues-Sat: 6pm-10pm

Wednesday, August 11, 2010

'Beer & Nut' Brownies

beer_nut_brownies-7
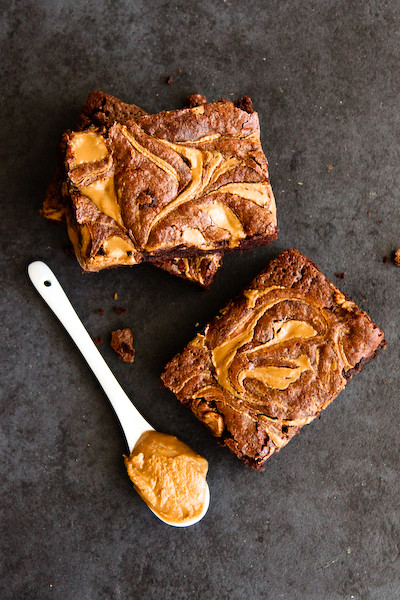
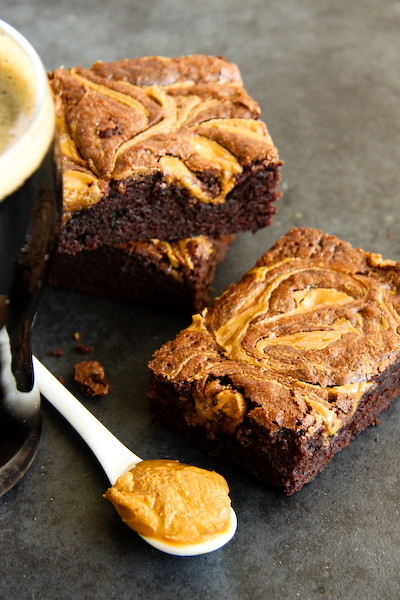
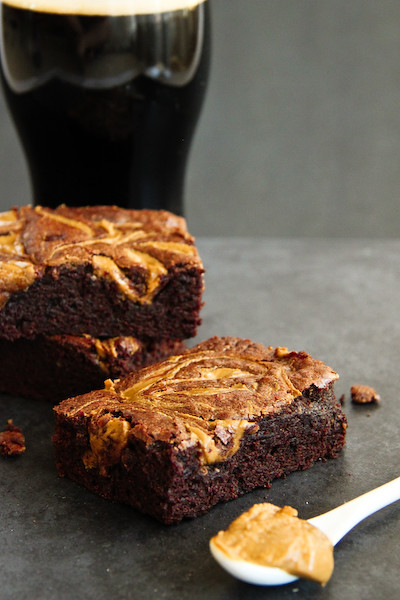
The classic combination of beer and nuts, how could you say no to that? Well...I could, since I can't eat nuts and I'm not a huge beer drinker. (Don't hate me!) But the concept of a 'Beer & Nut' themed recipe has been on my to-do list for some time now. Originally I had planned to do something for the Gourmet Rabbit article but then realised it wasn't very representative of who I was, for the reasons I mentioned before. So I put it on the backburner, and I'm so glad I did because the idea evolved into these Chocolate Stout and Peanut Butter Swirl Brownies. These are damn good brownies. So good, I think that even non-sweet inclined guys would enjoy them (if only because there will be leftover beer and nuts for them to finish off).
beer_nut_brownies-4
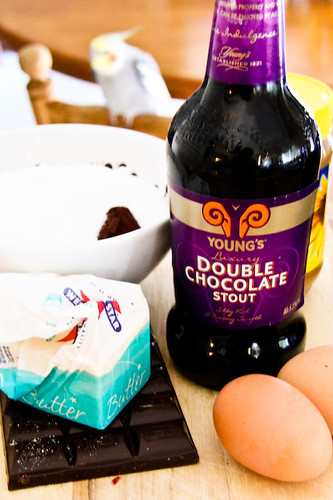
I had previously heard a lot about using chocolate stout in desserts, including Chris on the first season of masterchef using it for his beeramisu. I managed to pick some up at Dan Murphy's, but it wasn't so easy to find it at my local bottleshops. If you aren't able to get your hands on chocolate stout, I'm sure any regular stout will work just as well. To be honest, the flavour of the stout is incredibly subtle in these fudgy chocolate brownies, you can smell it and taste it quite easily when they are fresh out of the oven but after a night in the fridge it only gave the brownies a tinge of earthy flavour in the aftertaste. Feel free to play with the proportions of chocolate, flour, cocoa powder and beer if you think you might want a stronger beer flavour in these brownies.
beer_nut_brownies-6
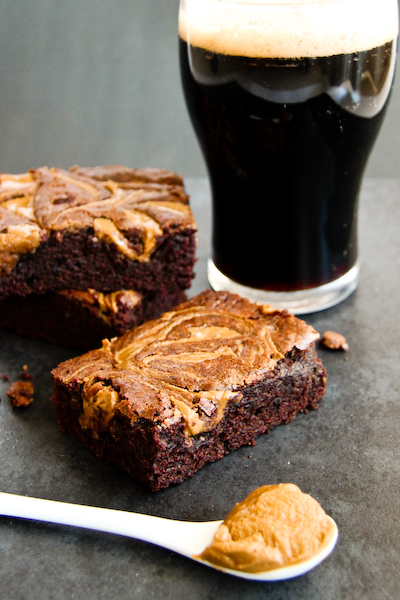
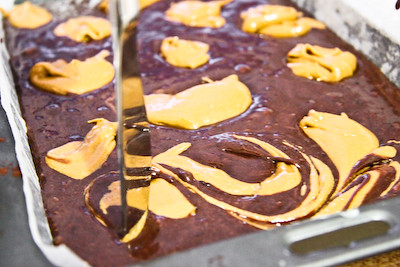
Obviously I couldn't use real peanut butter, since I wanted to taste these brownies myself, so I used a substitute which I'm sure is completely interchangable with the real thing. I used a smooth version, but if you like your peanut butter crunchy, go for it! You could even sprinkle some crushed peanuts into your batter if you want some added texture. The saltiness and stickyness of the peanut butter is a fantastic contrast to the rich moist chocolate. And it makes such pretty swirls on top!
beer_nut_brownies-10
The best part about this recipe is that it doesn't end up being too rich or to heavy. The use of half cocoa powder and half melted chocolate lightens it up, but make sure you use a good dutch processed cocoa powder and a semi-sweet chocolate, unless you like your dark chocolate really bitter. Don't overmix your batter, and don't overbake your brownie. You want it to stay moist and fudgy in the middle with a crisp top. If in doubt, take your brownie out earlier rather than later, you can always put it back in for a bit longer if it is too wet. And try your hardest to wait until they are completely cool before taking it out of the tin and tucking in, it helps them keep their shape. But I admit, I didn't have much self-restraint and was snacking on the edges not long after it was out of the oven.
beer_nut_brownies-8
Chocolate Stout and Peanut Butter Swirl Brownies
(serves approximately 20)
125g semisweet chocolate
100g butter
100ml chocolate stout (or regular stout if unavailable)
2 eggs
3 tbsp dutch process cocoa powder, sifted
75g plain flour
190g caster sugar
160g peanut butter (smooth or crunchy, your preference, I had to use a peanut butter substitute due to allergies)
beer_nut_brownies
Can you see a curious cockatiel looking on?
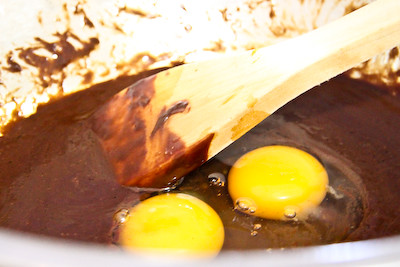
Preheat oven to 160 degrees C. Grease very well and line the bottom and two long sides of a 20x30cm slice/brownie tin. Let the baking paper hang over the long edges, it will make it easier to lift brownie out later. Break up chocolate into small pieces and chop up butter into 1cm cubes and place in a heatproof bowl. Heat over a saucepan of boiling water, or very carefully in 30 sec bursts in the microwave. Stir and set aside to cool for a few minutes. Sift cocoa powder, sugar and flour into a large mixing bowl. Add melted ingredients, chocolate stout and eggs to the dry mixture and stir with a wooden spoon until just combined. Take care not to overmix or the brownies will be tough. Pour into prepared tin.
beer_nut_brownies-2
If peanut butter is coming out of the fridge, you may need to heat it gently in a small saucepan to make it less viscous. Using a teaspoon, place dollops of peanut butter over the surface of the brownie mix. Using a round-bladed knife, swirl peanut butter into the brownie mix. Bake for 22-25 mins, or until a skewer inserted into the centre comes out with a few moist crumbs attached.
beer_nut_brownies-3
Remove from the oven and place tin on a wire rack. Cool completely in tin before removing and cutting into squares. Can be stored overnight in an airtight container in the fridge.
beer_nut_brownies-5

Sunday, August 8, 2010

(Double) Rainbow Malt Cake

doublerainbowcake
Double rainbow all the way across the sky!
I think this may be my favourite cake of all time. I will use any excuse to whip up a fun cake, and a friend leaving my work was definitely a very good reason. For those of you unfamiliar with the double rainbow meme that took the internet by storm not too long ago, it all started with this video of a guy tripping out over a double rainbow, which went viral and spawned awesome remixes like the double rainbow song which is even more hilarious than the original video and scarily catchy. You can read more about it here. After finding out about it through Suze & Billy, I had the song stuck in my head and then infected all my friends at work with it. They totally hated me for a couple of days there, hahaha.
doublerainbowcake-7
Wowow Omigawwwd...
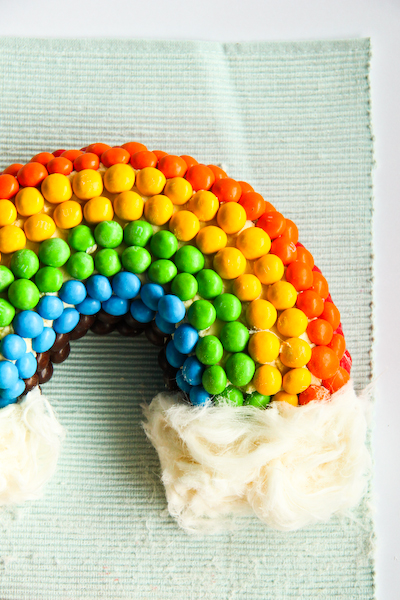
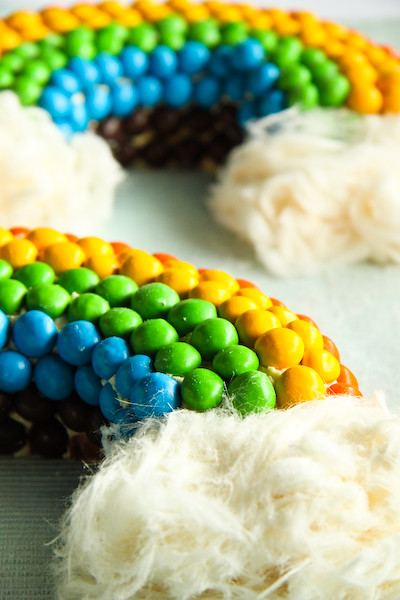
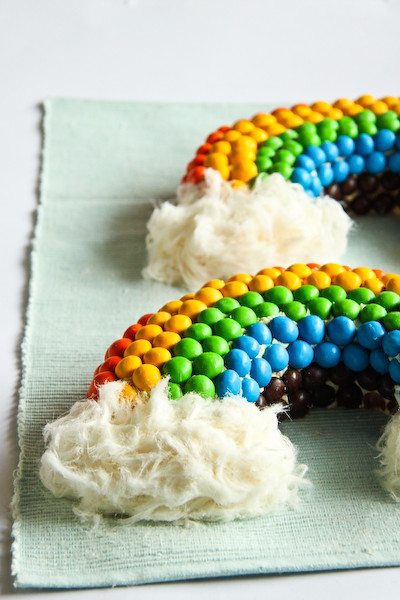
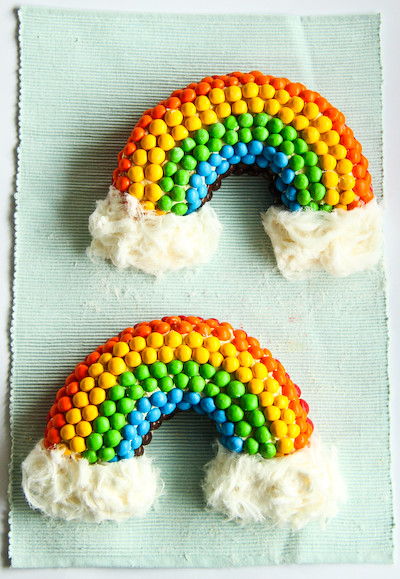
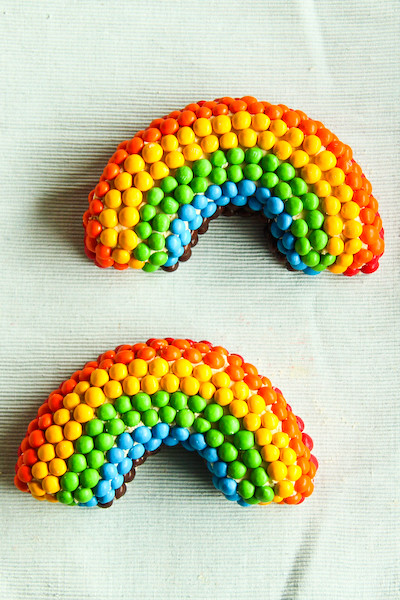
So what's in this crazy cake? Well I've been seeing a lot of gorgeous Malteser cakes on other blogs recently and was keen to try it out. And then I thought, what if I replace the maltesers with crispy m&ms, the dark chocolate ganache with white chocolate and decorate it like rainbow...a double rainbow? OMIGAWD. I practically ran home to make it. I thought about using Nigella Lawson's recipe but ended up adapting Poires au Chocolat's gorgeous looking recipe. The cake is flavoured with Horlicks (unfortunately I had to use Ovaltine which made it look a bit darker) and has a beautiful rich, malty flavour.
doublerainbowcake-9
So intense...
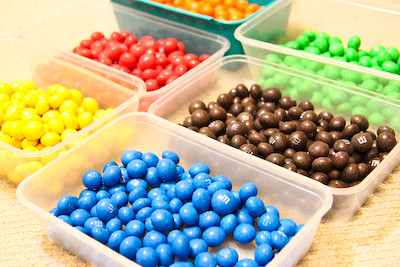
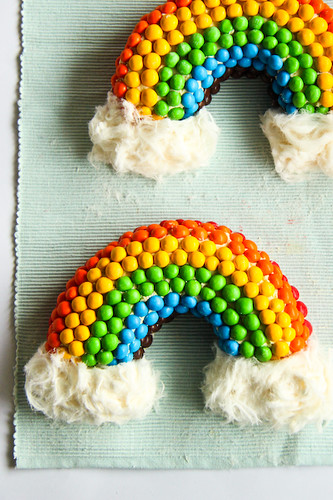
About 5 packets of crispy m&ms went into these cakes, I'm not sure if they're readily available everywhere but for those who dont know, they are just m&ms with a tiny crispy malt centre, which I thought was the perfect colourful substitute for the maltesers. It was a pain to separate all the m&ms into their different colours, but totally worth it! I thought the cakes looked a little plain on their own and was kicking myself for not getting some white marshmallows to use as clouds on the bottom. But I had something even better - vanilla persian fairy floss to make perfect fluffy clouds!
doublerainbowcake-2
What does this mean??
Of course my silly captions will make no sense to anyone who hasn't seen the internet meme but as a standalone cake it's still great! I think kids would totally love it. You could probably even try replacing the horlicks with milo if you wanted a more chocolatey flavour. And we know how awesome milo tastes in cake. I reduced the sugar in the cake since the white chocolate ganache is a fair bit sweeter that dark chocolate. I was sooooooooo close to splitting my ganache while I was whipping it so it's slightly grainier than I wanted. But still good.
doublerainbowcake-6
Heehee this cake just makes me grin from ear to ear. It's so colourful and fun. If you can't get your hands on crispy m&ms I'm sure regular ones will do, but the crispy ones are the best to match the malt flavour of the cake. I made the cake one night and then made the icing and decorated it the night after, so it was really easy and not too time consuming. However I would probably recommend icing the cake on the same day you bake it, I found my cake went a bit hard from being in the fridge on its own overnight.
doublerainbowcake-4
I only wish I had one of those chiffon cake tins (like a flat bottom bundt tin) so that I could haved baked the cake with a hole in the centre rather than cutting out the centre. If I had been less lazy I would have used the leftover m&ms and ganache and made mini rainbow cakes out of the centre piece. Most fun cake ever ♥!!!
doublerainbowcake-8
Double Rainbow Malt Cake
(adapted from Poires au Chocolat's Malteser Layer Cake)
195g self-raising flour
195g butter, room temperature
150g caster sugar
105g Horlicks (or Ovaltine)
1 tsp baking powder
3 eggs
60ml milk
60ml boiling water

300g white chocolate
300ml pouring cream
5-6 packets of crispy m&ms (can be replaced with regular or maltesers)
Optional: Marshmallows or persian fairy floss (pashmak) for cloud decoration (available from gourmet supermarkets)
doublerainbowcake-10
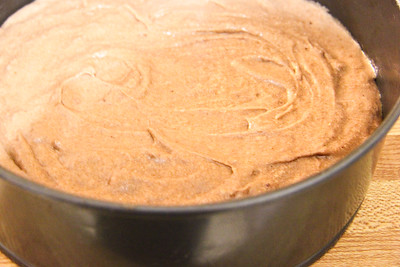
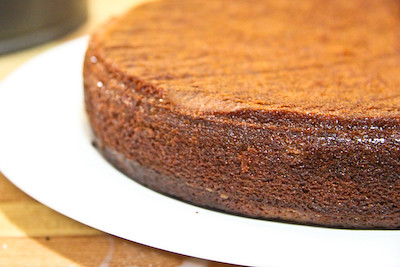
Preheat oven to 180 degrees C. Grease and line the bottom of a 20cm round springform tin (you can also use a chiffon cake tin or bundt pan if you don't want to waste the middle). Cream butter and sugar together until light and fluffy. Add eggs one at a time, beating well after each addition. Sift flour, baking powder and Horlicks together and then fold gently into the mixture until nearly combined. Add milk and fold again, then add water and fold once more. Quickly spoon mixture into cake tin and bake for 30-35 minutes or until a skewer inserted into the centre comes out clean. Remove and cool in tin for 10 minutes, then place on a wire rack to cool completely.
doublerainbowcake-12
Break the chocolate up into small pieces and put into a bowl. Heat the cream then pour over the chocolate. Leave for a few minutes and then mix in. Chill until it just reaches below room temperature and then beat with an electric mixer on medium speed until it thickens and holds its shape (take care not to over beat or mixture will split, if it does, reheat mixture until it melts and then whip again). I've found that it's too easy to split the white chocolate ganache, so I'd probably recommend just chilling the ganache in the fridge until it's thick but still pourable, if it runs off the surface too easily then it is not cool enough.
doublerainbowcake-13
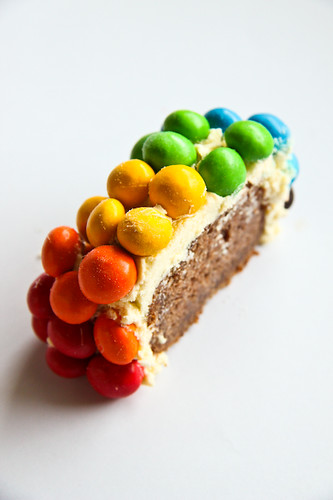
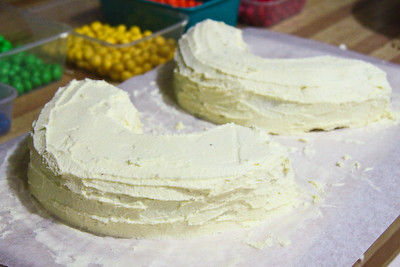
Cut a circle out of the centre of the cake using an 7-8cm round cutter and cut the cake in half to form the rainbow shapes. Using a spatula or palette knife, spread ganache over the cakes, covering completely. While icing is still sticky, arrange m&ms over the top of the ganache. Chill for 10 minutes before serving. Can be stored overnight in the fridge.
doublerainbowcake-11
doublerainbowcake-3
doublerainbowcake-5
SO BRIGHT, SO VIVID...

Tuesday, August 3, 2010

Blueberry Cheesecake Macarons

blueberrycheesecakemacs-2
I went missing last week, from the internet and from the world in general. But I'm back! It was a rough week, I was struck down with an incredibly nasty virus that refused to go away, so I could do nothing but lie in bed and wait to get better. Everyone realised how sick I was when they saw I didn't have the energy to bake. It was sucky. It's so nice to be healthy again.

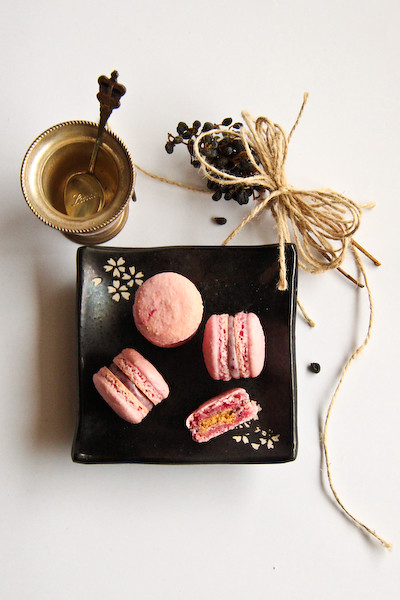
Things don't seem to be going as planned recently, I've had the idea for this macaron flavour running around my head for the last month, and I had all the ingredients ready but only just got the chance to experiment with it. I wanted to make blueberry cheesecake flavoured macarons, with a cream cheese and blueberry filling, and possibly incorporating the cheesecake crust into it somehow. The first experiment was a disaster. I was still on cold & flu meds and a little out of it, and my macaron shells ended up neon blue after I tipped in half a container of food colouring. The sight of bright blue shells with a purple filling made me completely nauseous, so I threw the whole thing out and went back to bed.
blueberrycheesecakemacs-3
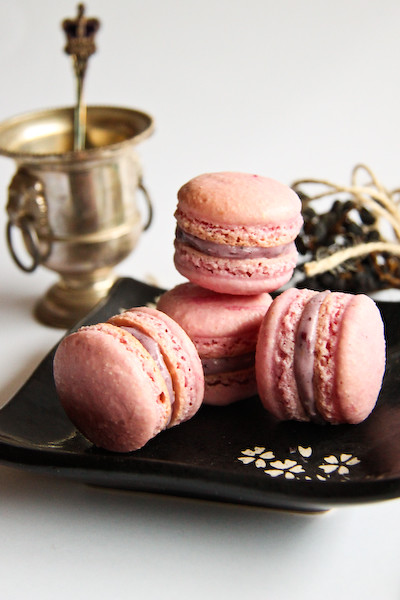
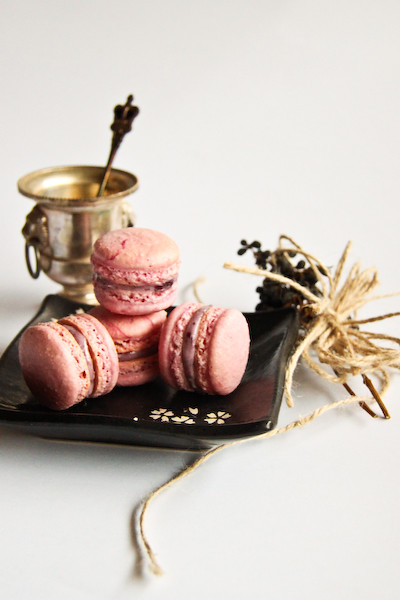
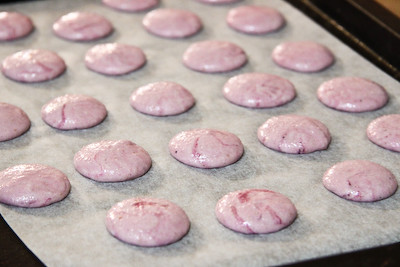
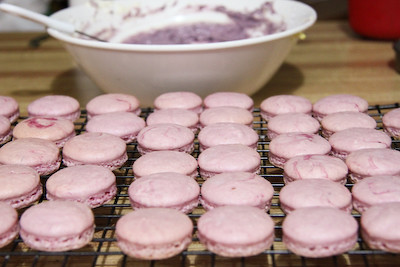
Now I'm still on the mend and much more clear headed, but things still didn't quite work out exactly like I had hoped. Maybe it was because I was out of practice or a little out of it from the illness, but my shells turned out bumpy and ugly and rather than having a pretty purple swirl they just looked unfinished and pale pink. I set the oven too high so the shells were a bit hard and hollow. And my tastebuds are still a little off, so I asked A to help me taste while I was making the blueberry cream cheese filling. That...was a bad idea. It went something like this:
Me: How is it?
A: It needs more lemon zest.
Me: *adds more* What about now?
A: Maybe a bit more lemon zest.
Me: Now?
A: Good.
Me: Does it taste like blueberry cheesecake?
A: No, it tastes like lemon.

Hmph.
blueberrycheesecakemacs
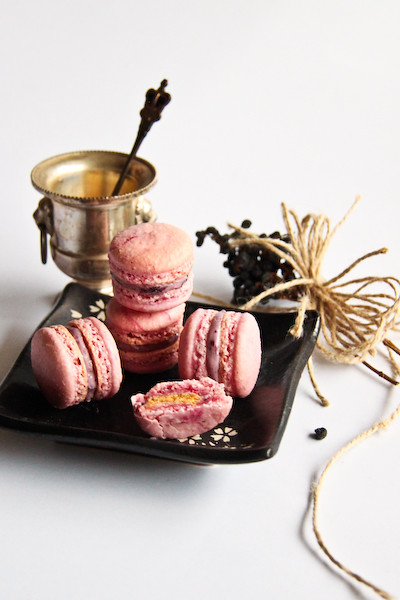
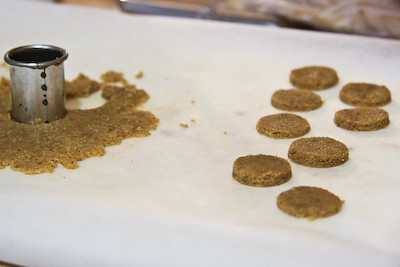
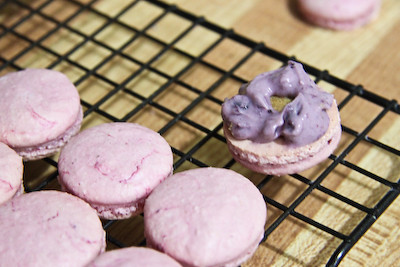
So they didn't really taste like blueberry cheesecake, but that was my fault. I reckon someone out there can take this recipe and adjust it to taste and make it taste just like blueberry cheesecake. I ended up incorporating the cheesecake crust into it by creating tiny thin little disks of crust out of digestive biscuits & butter. The filling is delicious, even though mine was very lemony and not very blueberry...-y. I think it may be because I used this wild blueberry jam, since it's the wrong time of year for fresh blueberries and I was worried frozen ones would be too watery. Next time I will have to try it with fresh ones and I'm sure that will taste closer to blueberry cheesecake. These definitely aren't the prettiest macarons I've ever made but they are very moreish. The disk of cheesecake crust and cream cheese ensure that the macaron is not too sweet, and has a slightly drier texture than some of my previous macaron recipes. The important thing is, they taste really good.
blueberrycheesecakemacs-4
Blueberry Cheesecake Macarons
(makes 20-25 macarons, depending on the size they are piped)
100g digestive biscuits/graham wafers
50g butter, melted

100g aged egg whites (you can use fresh eggs too, just make sure they are room temperature. I always use fresh these days, and zap it in the microwave on defrost for 10 seconds)
110g almond meal, dried in a cool (100 degrees C) oven for 5 minutes and sifted
200g icing sugar
50g caster sugar
Optional: 1 tsp powdered egg whites (available from The Essential Ingredient)

100g cream cheese, softened
1 cup icing sugar
2 tbsp blueberry jam OR 1/4 cup fresh blueberries
1/4 tsp lemon zest

Place digestive biscuits in the food processor and crush to a fine crumb. Gradually add melted butter until the crumbs start to stick together nicely (you may not need all the butter, I only used about 40 grams in the end). Place mixture on a piece of baking paper and flatten into a tightly packed layer that is about 2mm thick. Using a 1.5cm cookie cutter, cut out small rounds of this packed crust. You will need about 20-25, one for each macaron. Place in the fridge to set while you prepare your macs.
blueberrycheesecakemacs-5
Line two baking sheets with baking paper. Place icing sugar in food processor and pulse for a minute to remove any lumps. Stir in almond meal and pulse a few times to combine. Place in a large mixing bowl. Using an electric mixer, beat egg whites and egg white powder in a medium mixing bowl until the egg white powder dissolves and it reaches soft peaks. With the mixer on high speed, gradually add sugar and beat until it reaches stiff peaks.
blueberrycheesecakemacs-6
Add meringue (and powdered food colouring) to your dry mixture and mix, quickly at first to break down the bubbles in the egg white, then fold carefully as the dry mixture becomes incorporated and it starts to become shiny again. Take care not to overmix, the mixture should flow like lava and a streak of mixture spread over the surface of the rest of the mixture should disappear after 30 seconds to a minute. Place in a piping bag and pipe rounds of about 3cm diameter on lined baking sheets or silicon baking mats. Gently rap your baking sheets on your bench top to remove any extra bubbles from your piped shells.
blueberrycheesecakemacs-7
Preheat your oven to 140-150 degrees C (temperature varies depending on your oven). Leave shells on bench to dry for about an hour, so that when you press the surface of one gently it does not break. Place on top of an overturned roasting tray or another baking sheet if they are not professional grade. Bake for 13-15 minutes, depending on the size of your shells. Remove from the oven and cool on the tray for a few minutes, then gently remove from the sheet and place on a wire rack to cool completely.
blueberrycheesecakemacs-8
Beat cream cheese until light and fluffy. Add icing sugar and beat until combined. Add blueberries/blueberry jam and lemon zest and beat in lightly. You may need to chill it for a bit if it is runny. When you are ready to fill your macarons, place a disk of cheesecake crust on a macaron shell and surround the disk with some cream cheese filling, then sandwich with another macaron shell. Refrigerate overnight. Can be stored in the fridge in an airtight container for several days.