Thursday, October 28, 2010

Flying Saucer Macarons

flying_saucer_macarons
It's so frustrating when things don't turn out as good as you hoped.

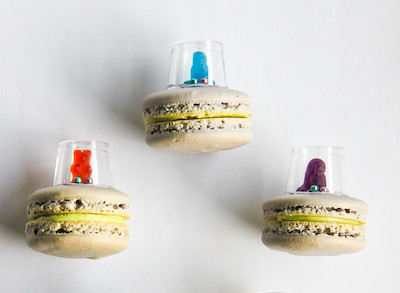
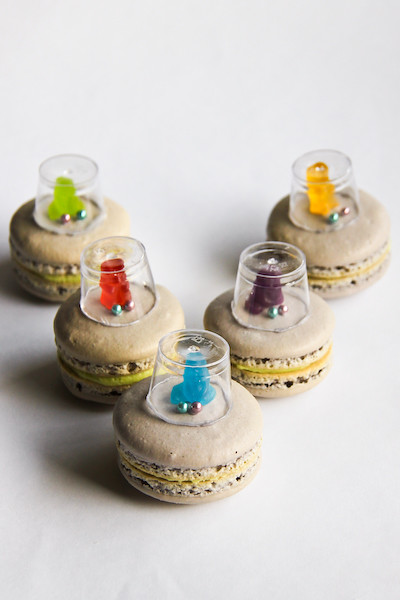
I fail a lot in the kitchen, especially when I'm experimenting and coming up with new recipes. Things just don't go to plan, the decorations or the photography (or both in this case). But this is one particular failure I felt like sharing with you because I'm in love with the idea. I was randomly chatting with Tomred when he helped me come up with this awesomely cute idea for a Halloween macaron - Alien Spaceship Macarons.
flying_saucer_macarons-3
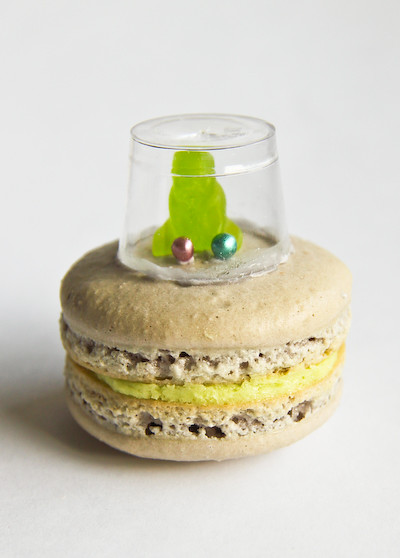
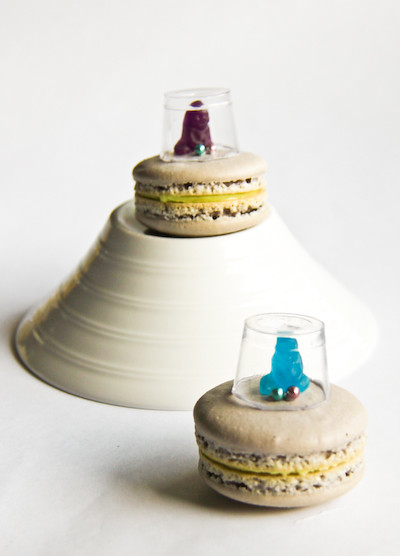
Shells coloured grey so they look like flying saucers, gummy bears on top as the aliens and a clear plastic dome on top! Squee!! Oh and little metallic cachous for the controls. Unfortunately I made some silly mistakes and was lacking resources so the result was macarons that look nothing like flying saucers :( But I had to share the idea with you. It's frustrating to spend money and time on an idea that doesn't work out like you hoped. But we all have to make mistakes and learn from them sometimes!
flying_saucer_macarons-4
I really should have piped the macarons in an oval shape instead of rounds. And I wish I could have found rounder plastic caps to use for the domes on top (I used plastic shot glasses cut in half). But the gummy bears and jelly babies as the aliens was pretty darn cute :) It would have been cool to find something to use as little legs on the bottom of the macs too. I used my basic macaron recipe with a lime butter icing and it's such a shame the look of them isn't quite right because the macarons themselves were perfect in texture and flavour. I don't think I can be bothered trying again with better props but if anyone can, go for it! Hope everyone has a fun Halloween this weekend!
flying_saucer_macarons-2
Print Friendly and PDF

Sunday, October 24, 2010

Blueberry Buttermilk Cake & Chocolate Honey Ganache

blueberries-6
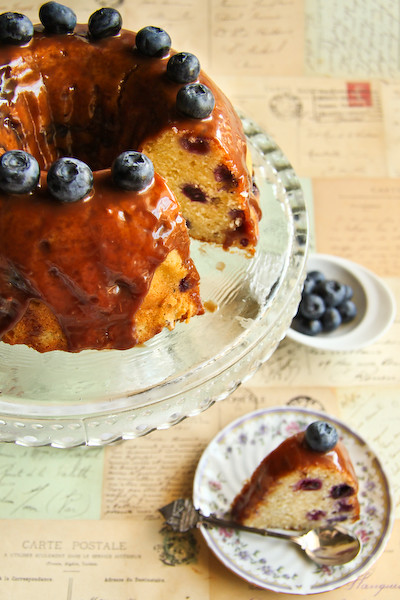
This week has been all about inspiration, impatience and cake. I have been lacking inspiration in the baking department. You know I love to bake up something wacky and cute, but I hate to force myself to think of something when I am just not in the mood. It never results in anything as fun as the ideas that come naturally and unexpectedly. So I took my foot off the baking pedal for a few days. Then I decided I need to make a cake. I've had an intense craving for a simple, lovely cake. As Karen rightly mentioned, life should have more afternoon teas and more cake.
blueberries-2
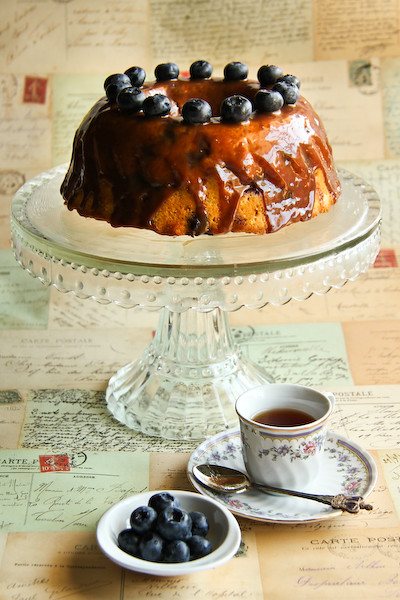
And I've been very impatient this week. I am impatient to get home from work every night, and so eager to begin my holiday which is less than two weeks away. And I was too impatient to wait for my Milk Chocolate Honey Ganache to cool before I slathered it all over this beautiful Blueberry Buttermilk Cake. It looks a little thin here, but after I took these photos I poured on another layer of ganache and it was perfection.
blueberries-3
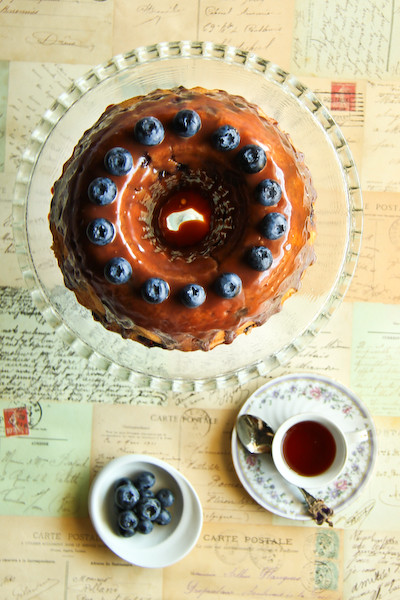
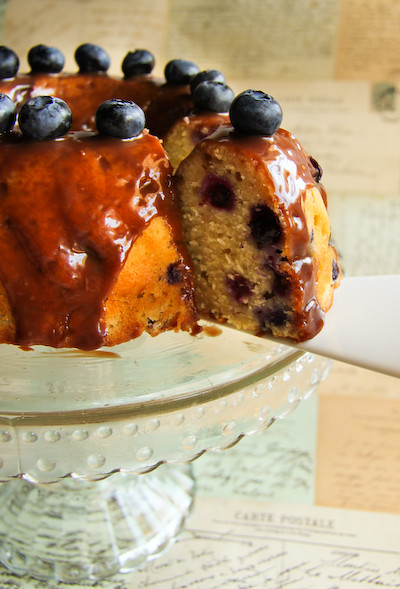
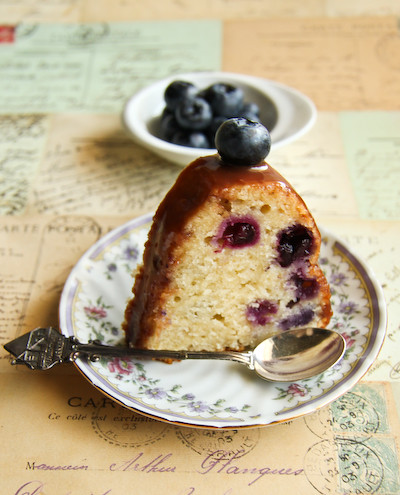
The buttermilk cake is based off a great picnic cake recipe from Gourmet Traveller. It's a lovely tea cake, with a nice crumb and so amazingly moist (Hi Suze!). I didn't realise that the original recipe gave you a batter that makes about 3 standard cakes, so I had to split it up and make several different cakes. But my favourite was the bundt cake, if only because it had the hole in the centre which acted like a perfect little bowl to catch all that ganache. Because in the end, the star of this cake is the ganache. (I've adjusted the quantities listed below so that it will hopefully make the right amount of batter for the cake pictured)
blueberries-8
I used some Lindt milk chocolate rather than my usual dark chocolate, I loved the colour it gave the ganache - it almost looked like caramel. The milk chocolate and honey combination was lovely and surprisingly not too sweet. Feel free to swap it for a semi-sweet chocolate if you're a fan of the darker chocolates, but I like that the milk chocolate is a little different.
blueberries-4
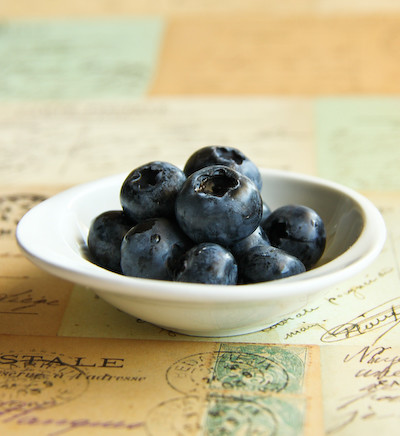
I had to use blueberries for this cake. There's a ridiculous amount of them around Sydney at the moment and I couldn't resist stocking up on fresh punnets. But for those who aren't lucky enough to have them around, the frozen ones are fine for the batter. But it was great having lots of fresh ones over the top of the cake, and they are so purdy ;)
blueberries-7
Blueberry Buttermilk Cake with Milk Chocolate Honey Ganache
(adapted from this Gourmet Traveller recipe, makes one bundt cake or two small round cakes)
165g softened butter
200 g (nearly 1 cup) caster sugar
2 eggs
1/2 tsp vanilla bean paste or 1/2 scraped vanilla bean pod
Finely grated rind of 1 lemon
200g plain flour, sieved
100 gm (2/3 cup) self-raising flour, sieved
1/3 tsp bicarbonate of soda, sieved
A pinch of salt
230 ml (nearly one cup) buttermilk
125g (1 punnet, approx 1 cup) blueberries, fresh or frozen (and thawed)

200ml pouring cream
200g milk chocolate, broken into smaller pieces
6 tbsp honey
Optional: fresh blueberries to decorate

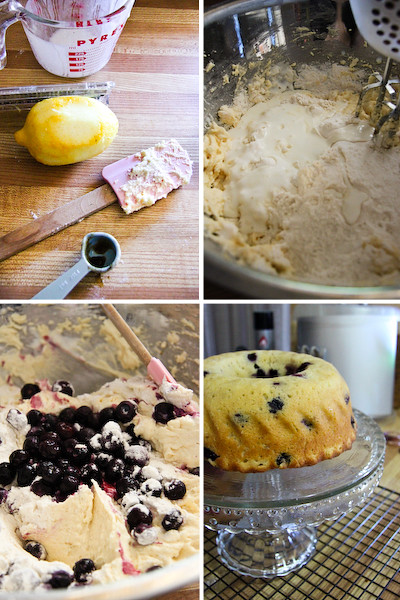
Preheat oven to 160C and butter a bundt tin (I used a 20cm diameter pan with high sides, if using a smaller tin you may need two tins or halve the quantity of batter). Beat butter and sugar in an electric mixer until creamy. Add eggs one at a time, then add vanilla seeds and lemon rind. Meanwhile, sieve flours and bicarbonate of soda into a bowl with a pinch of salt. With mixer on low speed, add half the flour mixture, then half the buttermilk. Repeat, then spoon mixture into cake tin. Smooth top, then bake until cake is golden and an inserted skewer withdraws clean (45-50 minutes, less if using a flatter pan). Cool in tin for 10 minutes, then invert onto a rack and cool completely.
blueberries-14
Prepare the chocolate honey ganache; place cream and honey in a small saucepan on medium heat. Bring just to the boil and then take off the heat and add chocolate to hot mixture. Leave for a minute to allow chocolate to melt, then stir until mixture is smooth. Set aside to cool completely and chill in the fridge until cold and thick. Pour over the top of cake and decorate with extra fresh blueberries. Serve immediately. Can be stored in an airtight container overnight, best eaten on the day.
blueberries-5
Print Friendly and PDF

Sunday, October 17, 2010

Mango Pudding

mango_pudding5
Fresh mango. It's one of the best things about summer. It's weird that I don't love summer and I prefer cooler weather. I spent most of my life next to rainforests and deserts. But I hate it when it gets ridiculously hot. I hate humidity. I hate catching stuffy trains with no air-conditioning and having my legs stick to the plastic seats. I hate trying to fall asleep when it's too hot. But summer means that mangoes are in season. Mangoes are one of my favourite fruits.
mango_pudding_filtered
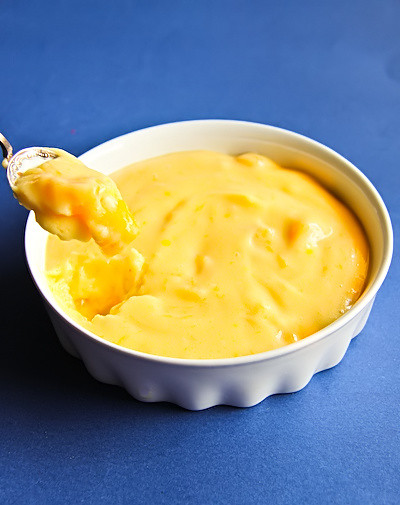
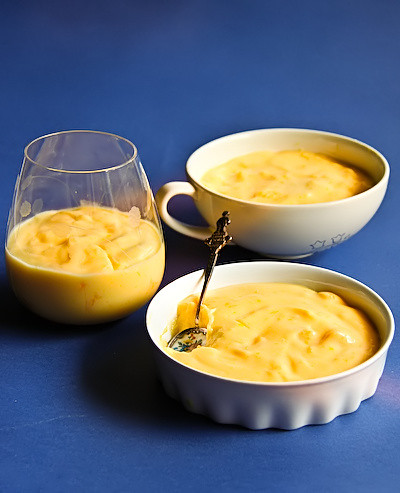
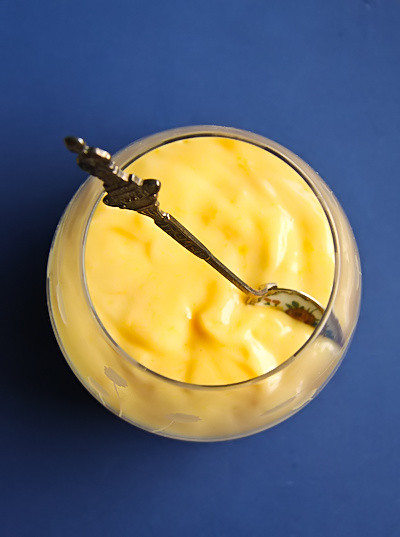
So I thought I would share this super easy recipe for making mango pudding. My brother mentioned it to me after seeing it on Food Safari not too long ago, it caught his interest because the recipe used melted mango ice cream to make the pudding. It's a ridiculously easy recipe, it almost feels like cheating. I found my pudding turned out a little too creamy because I used Weis Mango & Cream ice cream, I think that next time I will make it using a mango sorbet and perhaps a little bit of vanilla ice cream. But it's smooth and creamy with lots of chunks of fresh mango through it. It's one reason to look forward to summer this year.
mango_pudding-4_filtered
Mango Pudding
(recipe from Food Safari)
1 cup water
6 tsp powdered gelatine
3/4 cup caster sugar
1 litre soft mango ice cream
75ml evaporated milk
1 cup crushed ice
1 large mango, peeled seeded and diced

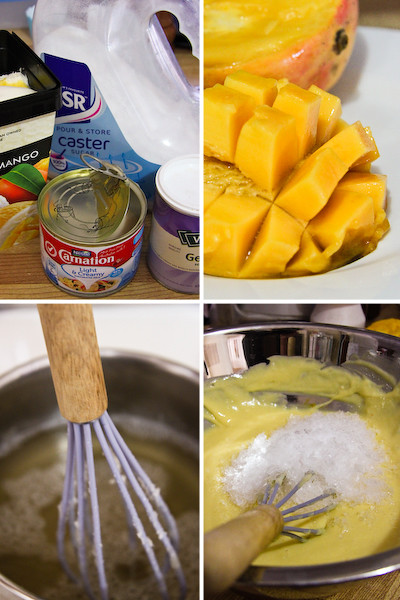
Remove ice cream an hour before starting to allow it to soften. Place water in a small saucepan and bring to the boil on medium heat. Mix sugar and gelatine together and then gradually stir into the boiling water. Stir over medium heat until thick and syrupy - 5 to 10 minutes. Slowly pour into a large heatproof mixing bowl. Add mango ice cream and stir until smooth, then add evaporated milk, crushed ice and diced mango pieces and stir together.
mango_pudding-9
Pour mixture into individual serving glasses or bowls. Chill in the refrigerator until set, at least two hours.
mango_pudding-3_filtered
Print Friendly and PDF

Tuesday, October 12, 2010

Worms in the Mud Pies

wormsinmudpie-13
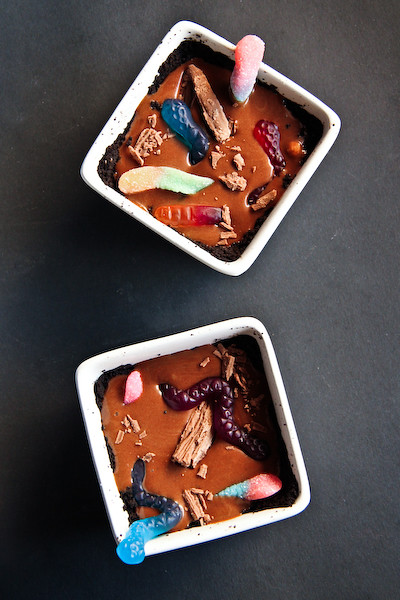
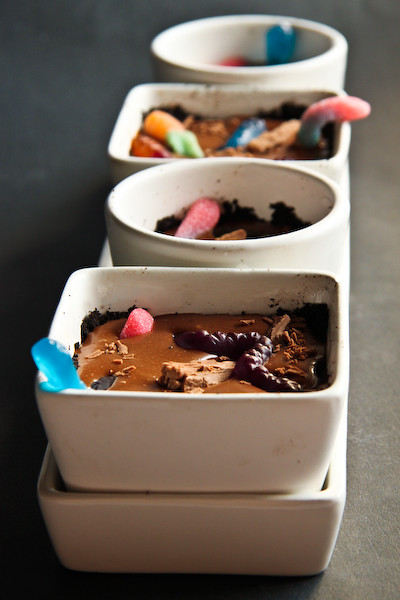
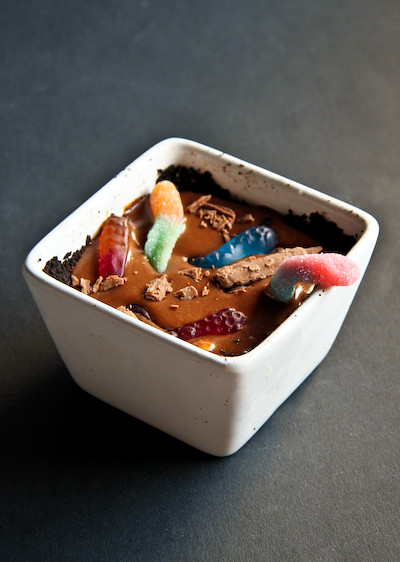
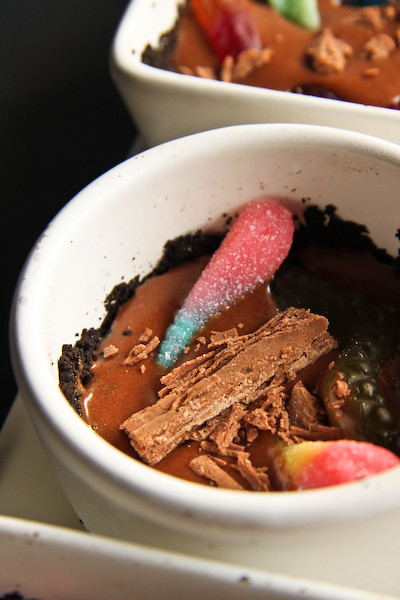
That doesn't look too appetising does it? Well it's actually really yummy. It's something that's super easy and fun to make for Halloween, cos it's a little bit gross looking and it's full of sugar. And chocolate. It's another idea that I got from my guilty pleasure girly TV show. Chocolate pie with an oreo cookie crust and gummi worms. It's mud pie, with worms! Ewww..but yum!
wormsinmudpie-3
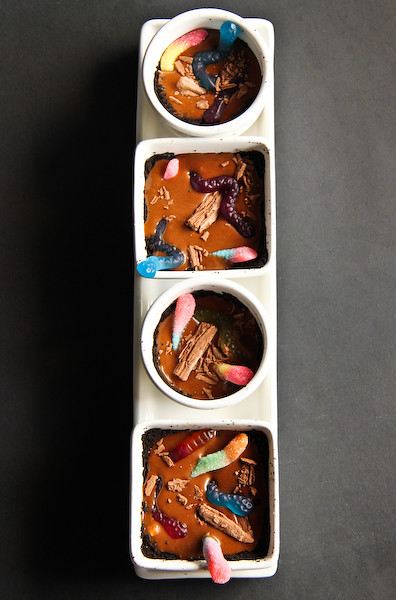
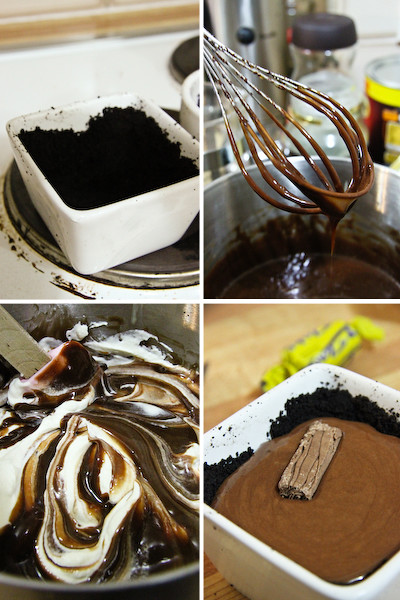
You could do this as one big pie, or do individual serves like me because I suck at cutting neat slices of pie and it's easier to share. There's very little baking involved, just a lot of stirring to make sure you don't get lumps in the chocolate custard. The oreo crust is a little fiddly, but it doesn't need to be neat - the messier it looks, the more it looks like dirt!
wormsinmudpie-4
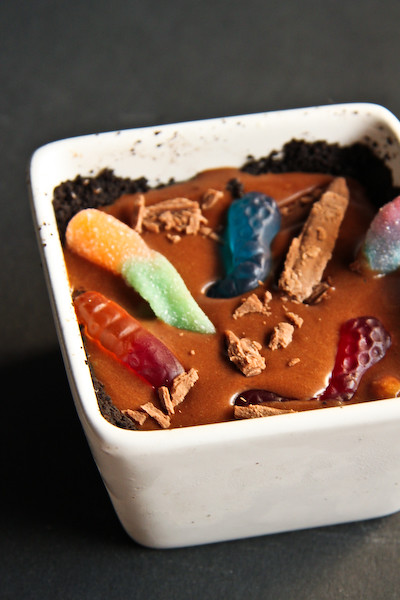
The most fun part is in the decorating. I grabbed a whole bunch of snakes and sour gummi worms, don't they look all squishy and slimy coming out of the mud? And I broke up some pieces of Flake chocolate to look like logs and bits of broken wood. This is something you could get your kids to help you decorate. Feel free to go crazy with it - maybe some green jelly to look like slime?
wormsinmudpie-2
As for how it tastes, the chocolate cream filling is silky and light, the buttermilk helps to cut through any bitterness. I actually found my mixture was quite sweet, so you could reduce the sugar by a quarter cup or so if you don't want to make people too sugar high. I love oreo pie crusts, the less you pack it together the better since the baking will set the crust well and if it's too tightly packed it will be hard to break through with a fork. If you want a more elegant, non-Halloween themed dessert, just take out the gummi worms and it's deliciously impressive.
wormsinmudpie-6
Worms in the Mud Pie
(makes one large pie or can be split into 4-6 individual serves, adapted from this chocolate cream pie recipe)
1 1/2 cups Oreo Cookie Crumbs (about 1 1/2 packets of Oreos, white centres removed and crushed)
115g (1 stick) butter, melted
1 cup caster sugar
3/4 cup pouring cream, plus 1/2 cups
3/4 cup buttermilk
3 1/2 tbsp cornstarch
A pinch of salt
4 egg yolks
4 ounces (115g) good-quality semisweet chocolate, finely chopped
1 tbsp butter
1 tsp vanilla extract
3/4 tbsp icing sugar
To decorate: Gummi worms (snakes), Flake chocolate

Preheat oven to 190 degrees C. Combine cookie crumbs and butter well and press into a single pie dish or 4-6 individual dishes. Bake in oven for 10-15 minutes to set the crust, then remove from the oven and set aside to cool.

In a small saucepan combine sugar, 3/4 cup cream, buttermilk, cornstarch and pinch of salt, and whisk until smooth. Place over medium-high heat and bring to a boil, whisking from time to time for the sugar and cornstarch to dissolve and the mixture thickens, about 5 minutes. Continue cooking at a low boil for an additional 5 minutes, whisking constantly.
wormmudpie
In a mixing bowl, beat the egg yolks lightly. Pour 1/2 cup of the hot mixture into the egg yolks and whisk thoroughly. Pour the egg yolk mixture back into saucepan with the remaining hot mixture and whisk over the heat until thoroughly combined and very thick, 1 to 2 minutes. Pour the mixture into a mixing bowl, and whisk in the chocolate, butter and vanilla. Continue whisking until thoroughly combined (mixture will be very thick). Cover the mixture with plastic wrap placed directly on the surface and refrigerate until cooled to room temperature, about 30 minutes.

Place the 1/2 heavy cream in a chilled mixing bowl and add the icing sugar. Beat until stiff peaks form. Gently fold the whipped cream into the cool chocolate pudding mixture, then spoon the chocolate mixture into the prepared pie crust. Using gummi worms and chocolate, decorate the top of the pie. Refrigerate until set, at least 4 hours. Can be stored for a couple of days in the fridge.
wormsinmudpie-5
Print Friendly and PDF

Thursday, October 7, 2010

Piggy Macarons

piggy_macarons-9
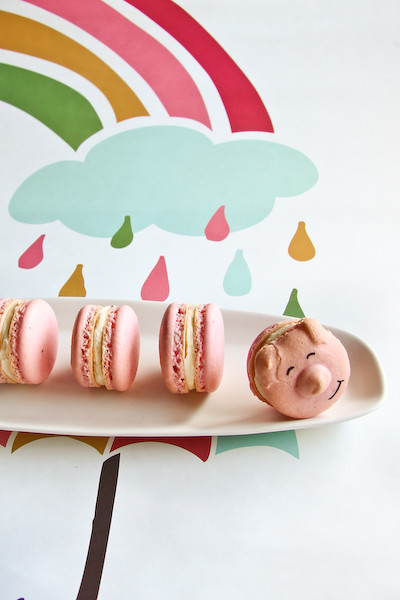
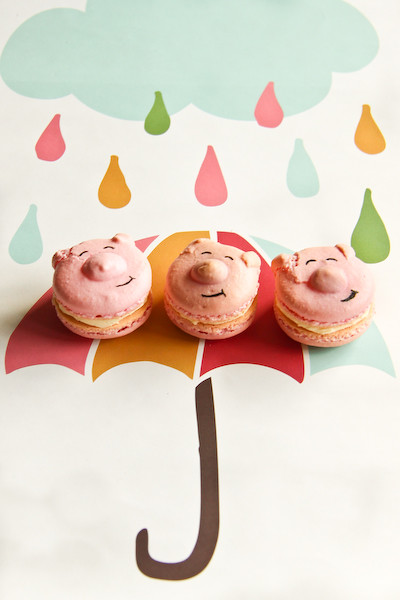
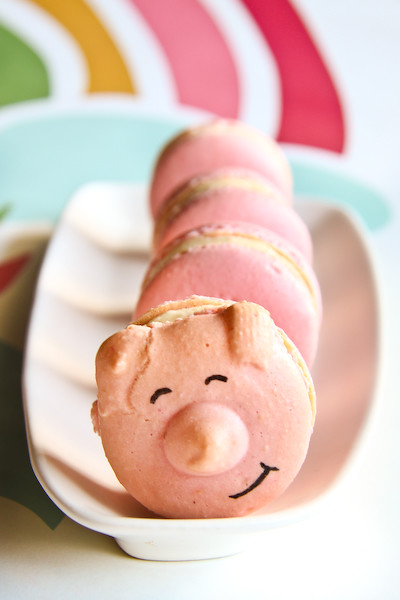
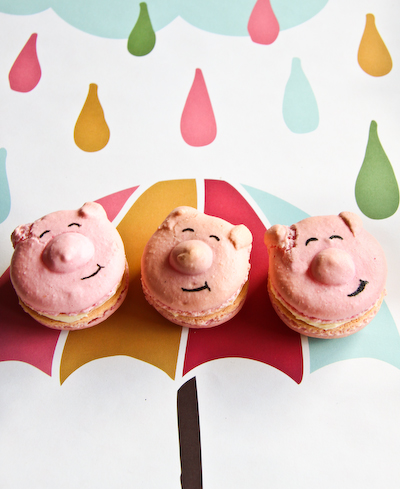
Oh my GAASH, it's a little piggy! On a macaron! He's so cute I couldn't eat him. No really, I haven't eaten any of the the little piggy faces, I had to taste test one that didn't have a face on it. I've had a break from baking macarons lately, I was starting to get a little sick of it and I don't want to bake up boring macarons. Doughnut Macarons - definitely not boring. Plain macarons with chocolate ganache - pretty boring, unless you put them on top of a triple-triple chocolate cake. But I could feel my interest waning so I took a break...until the piggies came along. Sure they're only filled with a simple vanilla bean icing, but who needs complicated flavours when they've got fat widdle noses and ears?
piggy_macarons-8
These adorable little piggy macarons nearly didn't see the light of day. I originally thought up this idea with the intention of making a special little post for Leona on her birthday. Piggy macarons for Pigged-Out, hehe geddit?! I'd seen the sweet piggy buns from Chef's Gallery but hadn't seen it done on a macaron yet. As per usual, things did not go to plan. I thought it would be so simple. My first attempt was over before it even started, so there was no way I'd be able to give them to her in person. Then I was hoping to get them done in time to post them up on my blog on Sunday for her actual birthday...but I ended up with horrible cracked piggy macaron faces. Poor mutilated piggies. I gave it one more go and enough of them were decent (though you can still see some cracks). Make them at your own risk! I think the cracking tends to happen if you don't let the surface of the macaron dry enough before piping on the nose and ears, and if you use your finger to mess around with it like I did.
piggy_macarons-3
Piggy Macarons
(makes approximately 10-15 fairly large macarons)
100g aged egg whites (you can use fresh eggs too, just make sure they are room temperature. I always use fresh these days, and zap it in the microwave on defrost for 10 seconds)
110g almond meal, dried in a cool (100 degrees C) oven for 5 minutes and sifted
200g icing sugar
50g caster sugar
Optional: 1 tsp powdered egg whites (available from The Essential Ingredient)

Vanilla butter icing:
100g unsalted butter, cut into small pieces
200g icing sugar, sifted
1/2 tsp vanilla bean paste

To decorate: liquid black food colouring (available from the supermarket) or edible ink pens

Line two baking sheets with baking paper. Place icing sugar in food processor and pulse for a minute to remove any lumps. Stir in almond meal and pulse a few times to combine. Place in a large mixing bowl. Using an electric mixer, beat egg whites and egg white powder in a medium mixing bowl until the egg white powder dissolves and it reaches soft peaks. With the mixer on high speed, gradually add sugar and beat until it reaches stiff peaks.

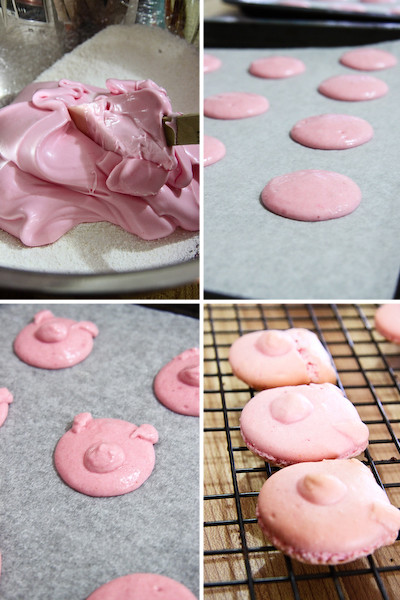
Add meringue (and powdered food colouring) to your dry mixture and mix, quickly at first to break down the bubbles in the egg white, then fold carefully as the dry mixture becomes incorporated and it starts to become shiny again. Take care not to overmix, the mixture should flow like lava and a streak of mixture spread over the surface of the rest of the mixture should disappear after about 30 seconds. Place in a piping bag and pipe rounds of about 4cm diameter on lined baking sheets or silicon baking mats, leaving a small amount of mixture leftover in the piping bag for decorating your piggy faces (around 1/4 cup) Gently rap your baking sheets on your bench top to remove any extra bubbles from your piped shells.
piggy_macarons-14
Leave shells on bench to dry for about 30 mins to an hour, so that when you press the surface of one gently it does not break. Carefully pipe on the piggy noses into the middle of the half the piped macaron shells using a narrow round piping tip. Using a wide, flat piping tip, pipe on the little piggy ears, starting from the edge of the macaron. Take care not to disrupt the dried surface of the piped macaron rounds or it will be more likely to crack in the oven. If you can be bothered you can pipe little squiggles (for piggy tails) on the half of the macarons that will end up being the backs to the piggy face macarons.

Preheat your oven to 140-150 degrees C (temperature varies depending on your oven) and dry piped macaron shells on bench for a further 30 mins to an hour. Place on top of an overturned roasting tray or another baking sheet if they are not professional grade. Bake for 13-15 minutes, depending on the size of your shells. Remove from the oven and cool on the tray for a few minutes, then gently remove from the sheet and place on a wire rack to cool completely.
piggy_macarons-7
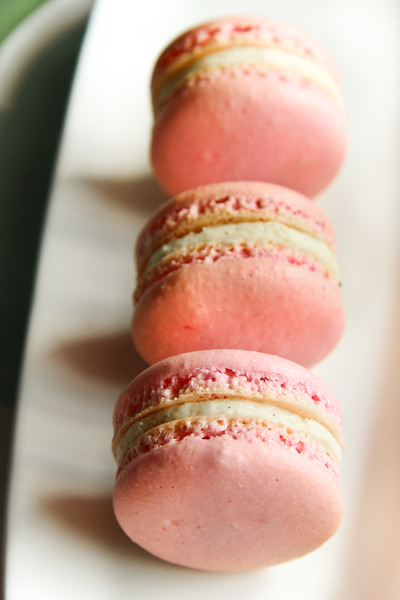
To prepare the butter icing, remove butter from the fridge 30 minutes before starting. Beat butter on high speed with an electric mixer until light and fluffy. Add icing sugar and vanilla bean paste until smooth and fluffy. Using a knife or spoon, sandwich between macaron shells, using one piggy decorated shell and one plain shell. Using the black food colour and a wooden skewer, draw on the eyes and mouth of the piggies. Leave to dry and then refrigerate overnight. Can be stored in an airtight container in the fridge for several days. Serve at room temperature.
piggy_macarons-4
So Happy Birthday Leona! I hope you like these little piggies, I'm just sad I wasn't able to successfully bake them and give them to you in person before your actual birthday!

P.S. I think I should mention something about Tumblr. I am incredibly flattered whenever I get any link backs due to people sharing my photos on Tumblr, though sometimes I do think that the way that some people credit their sources on there is questionable (especially when they copy and paste my recipes without including a text link *cough*). But others do it properly and have lovely pages like Just Be Splendid. As a way of saying hi to all those people on Tumblr who are sharing my photos, I just started one myself: http://raspberricupcakes.tumblr.com/ There's not much there at the moment, at some point I might start putting photos up there. And maybe if you plan on sharing one of my posts on Tumblr you can let me know and I will reblog it. Share the love ;)
Print Friendly and PDF

Monday, October 4, 2010

Banoffee Blondies

banoffee_blondies-3
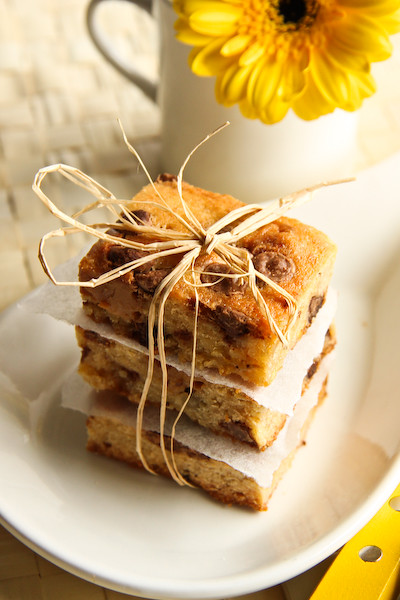
Food blogging can be an expensive hobby. Especially because of the baking. I always have a never-ending supply of butter, flour, eggs and at least 4 types of sugar. I'm always on the look out for random props. I have accumulated a lot of...crap. I end up with with random things like spoon rests, too many bananas, extra cream, a can of dulce de leche and a huge jar of chocolate sauce in my fridge. But this time it was kind of great because I got home at 9pm one night last week, stared at all the crap and decided to bake these banoffee blondies.
banoffee_blondies-13
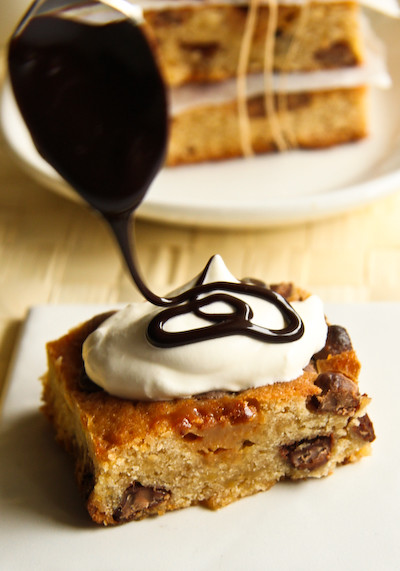
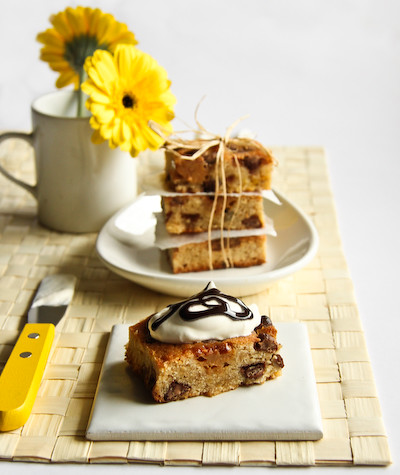
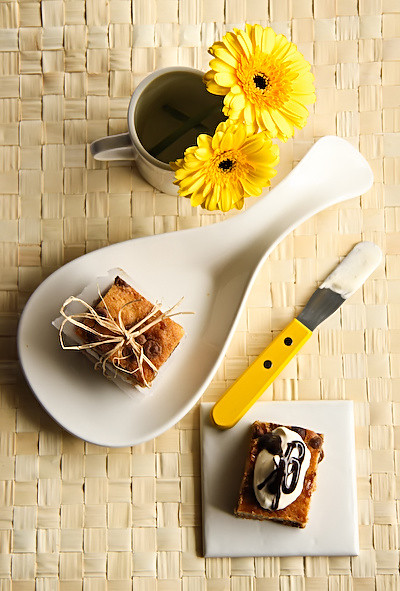
I've always wanted to try making blondies, they're just brownies without the chocolate. I know that sounds like you're taking the best part of the brownie away, but think of it more like a delicious, buttery, brown sugar slice. So I used a recipe for regular blondies with chocolate chips, and added banana and dulce de leche. Then I served it with whipped cream and chocolate sauce. Banoffee blondies. Like banoffee pie, but in slice form. All I can say is...OMG.
banoffee_blondies-4
It was an incredibly easy recipe to whip up, as I mentioned I got home at 9pm and these were done an hour later. I was a little peeved because the original recipe said to bake it for 40 minutes, but I forgot that I used a wider pan so it was a lot thinner. Luckily I decided to check on the blondies after 20 minutes and they were neeeeearly overcooked. Fortunately they hadn't dried out, the banana helps keep these from drying out easily. As per usual I was too impatient to wait for it to completely cool before having a taste test. A spoon into the corner of the pan let me know that this was even better than I had hoped and not too rich or sweet.
banoffee_blondies-2
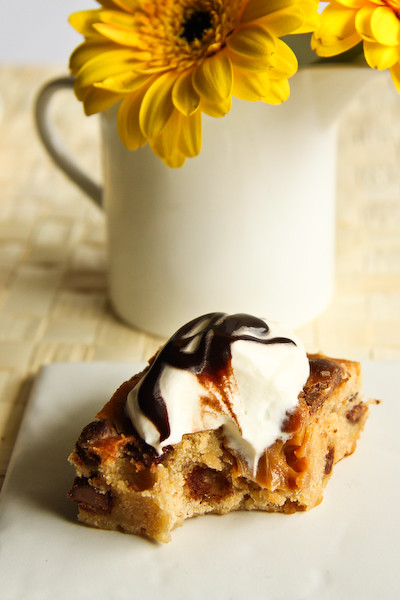
So I was taking photos of these blondies...dolloping whipped cream on top...drizzling a little chocolate awesomesauce on top...and after getting some close ups of that piece of blondie, I couldn't take it anymore. I took a big bite out of it. I tried to keep taking photos, but that one bite had completely distracted me. I gave up and ate the whole thing.
banoffee_blondies-6
Banoffee Blondies
(adapted from Martha's Choc Chip Blondies, makes approx 20)
115g (1 stick) unsalted butter, melted
1/2 cup (110g) packed light-brown sugar
1/3 cup sugar
1 large egg
1 tsp pure vanilla extract
1/2 cup ripe banana, mashed (about 1 medium banana)
1 cup (130g) plain flour (spooned and leveled)
1 tsp salt
1 cup chocolate chips (I used milk, but you can use semi-sweet too)
1/4 cup dulce de leche
Optional: Whipped cream, chocolate awesomesauce (recipe here) to serve

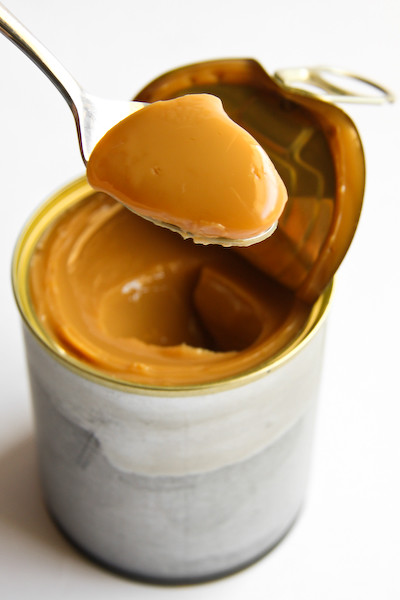
If you are making dulce de leche, take one unopened can of sweetened condensed milk and remove any labels from the can. Place in a medium saucepan and fill with water until it is at least halfway to three-quarters of the way up the side of the can. Cover with a lid and place on medium-high heat and boil for two hours. Make sure you check on the water level regularly, topping up the water so that the level is always at least halfway up the side of the can. DO NOT let the water run out or the can will explode. After two hours, carefully remove can from the boiling water and set aside to cool completely. Can be refrigerated unopened until ready for use. It is best to whip the dulce de leche with an electric mixer to make it light and smooth.
dulce
Preheat oven to 180 degrees C. Brush a 17x27cm slice/brownie tin (or an 8-inch square baking pan) with some melted butter; line pan with a piece of baking paper, leaving a 2-inch overhang on two sides. Butter paper.

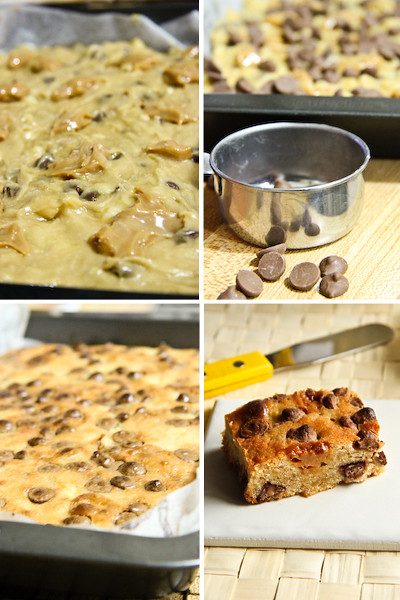
In a large bowl, lightly whisk butter and sugars until smooth. Whisk in egg and vanilla and mashed banana. Add flour and salt; stir just until moistened (do not overmix). Fold in 1/2 cup of chocolate chips. Transfer batter to prepared pan; smooth top. Use a teaspoon to place dollops of dulce de leche over the top of the batter. Sprinkle with remaining chocolate chips.
banoffee_blondie
Bake until top is golden brown and a toothpick inserted into the center comes out clean, mine took 20-25 minutes but Martha says around 40 mins, so it depends on what pan you use. Set pan on a wire rack, and let cool completely. Using parchment overhang, lift cake from pan and transfer to a cutting board; cut into 20 pieces. Store blondies in an airtight container at room temperature, up to 2 days. Serve topped with whipped cream and chocolate sauce (or chocolate flakes).
banoffee_blondies_filtered
Print Friendly and PDF