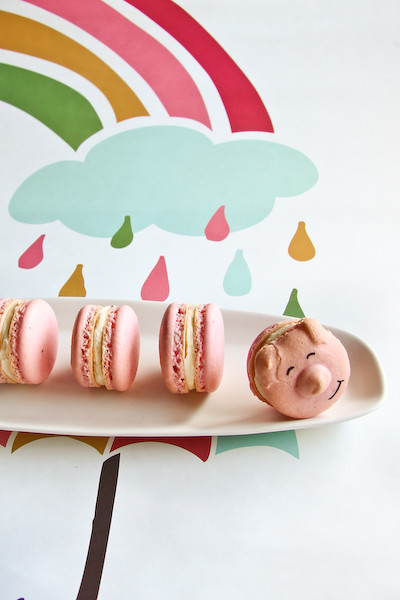
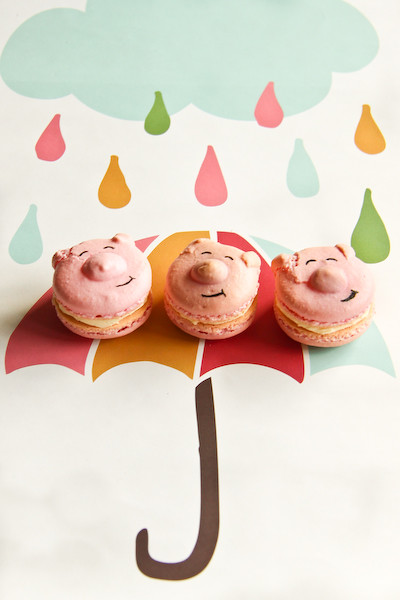
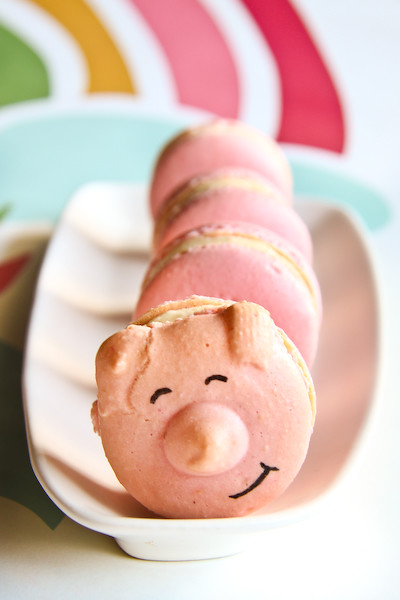
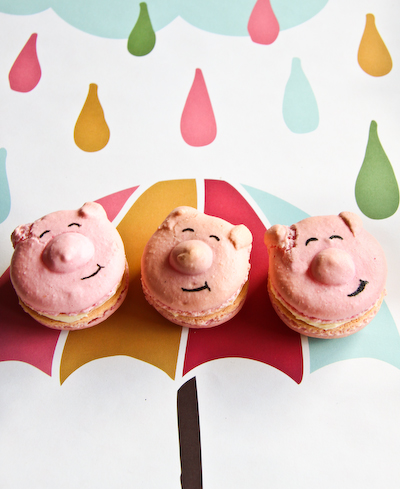
Oh my GAASH, it's a little piggy! On a macaron! He's so cute I couldn't eat him. No really, I haven't eaten any of the the little piggy faces, I had to taste test one that didn't have a face on it. I've had a break from baking macarons lately, I was starting to get a little sick of it and I don't want to bake up boring macarons. Doughnut Macarons - definitely not boring. Plain macarons with chocolate ganache - pretty boring, unless you put them on top of a triple-triple chocolate cake. But I could feel my interest waning so I took a break...until the piggies came along. Sure they're only filled with a simple vanilla bean icing, but who needs complicated flavours when they've got fat widdle noses and ears?
These adorable little piggy macarons nearly didn't see the light of day. I originally thought up this idea with the intention of making a special little post for Leona on her birthday. Piggy macarons for Pigged-Out, hehe geddit?! I'd seen the sweet piggy buns from Chef's Gallery but hadn't seen it done on a macaron yet. As per usual, things did not go to plan. I thought it would be so simple. My first attempt was over before it even started, so there was no way I'd be able to give them to her in person. Then I was hoping to get them done in time to post them up on my blog on Sunday for her actual birthday...but I ended up with horrible cracked piggy macaron faces. Poor mutilated piggies. I gave it one more go and enough of them were decent (though you can still see some cracks). Make them at your own risk! I think the cracking tends to happen if you don't let the surface of the macaron dry enough before piping on the nose and ears, and if you use your finger to mess around with it like I did.
Piggy Macarons
(makes approximately 10-15 fairly large macarons)
100g aged egg whites (you can use fresh eggs too, just make sure they are room temperature. I always use fresh these days, and zap it in the microwave on defrost for 10 seconds)
110g almond meal, dried in a cool (100 degrees C) oven for 5 minutes and sifted
200g icing sugar
50g caster sugar
Optional: 1 tsp powdered egg whites (available from The Essential Ingredient)
Vanilla butter icing:
100g unsalted butter, cut into small pieces
200g icing sugar, sifted
1/2 tsp vanilla bean paste
To decorate: liquid black food colouring (available from the supermarket) or edible ink pens
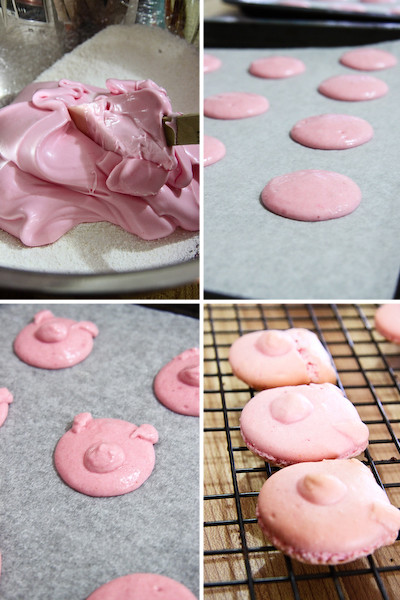
Line two baking sheets with baking paper. Place icing sugar in food processor and pulse for a minute to remove any lumps. Stir in almond meal and pulse a few times to combine. Place in a large mixing bowl. Using an electric mixer, beat egg whites and egg white powder in a medium mixing bowl until the egg white powder dissolves and it reaches soft peaks. With the mixer on high speed, gradually add sugar and beat until it reaches stiff peaks.
Add meringue (and powdered food colouring) to your dry mixture and mix, quickly at first to break down the bubbles in the egg white, then fold carefully as the dry mixture becomes incorporated and it starts to become shiny again. Take care not to overmix, the mixture should flow like lava and a streak of mixture spread over the surface of the rest of the mixture should disappear after about 30 seconds. Place in a piping bag and pipe rounds of about 4cm diameter on lined baking sheets or silicon baking mats, leaving a small amount of mixture leftover in the piping bag for decorating your piggy faces (around 1/4 cup) Gently rap your baking sheets on your bench top to remove any extra bubbles from your piped shells.
Leave shells on bench to dry for about 30 mins to an hour, so that when you press the surface of one gently it does not break. Carefully pipe on the piggy noses into the middle of the half the piped macaron shells using a narrow round piping tip. Using a wide, flat piping tip, pipe on the little piggy ears, starting from the edge of the macaron. Take care not to disrupt the dried surface of the piped macaron rounds or it will be more likely to crack in the oven. If you can be bothered you can pipe little squiggles (for piggy tails) on the half of the macarons that will end up being the backs to the piggy face macarons.
Preheat your oven to 140-150 degrees C (temperature varies depending on your oven) and dry piped macaron shells on bench for a further 30 mins to an hour. Place on top of an overturned roasting tray or another baking sheet if they are not professional grade. Bake for 13-15 minutes, depending on the size of your shells. Remove from the oven and cool on the tray for a few minutes, then gently remove from the sheet and place on a wire rack to cool completely.
To prepare the butter icing, remove butter from the fridge 30 minutes before starting. Beat butter on high speed with an electric mixer until light and fluffy. Add icing sugar and vanilla bean paste until smooth and fluffy. Using a knife or spoon, sandwich between macaron shells, using one piggy decorated shell and one plain shell. Using the black food colour and a wooden skewer, draw on the eyes and mouth of the piggies. Leave to dry and then refrigerate overnight. Can be stored in an airtight container in the fridge for several days. Serve at room temperature.
So Happy Birthday Leona! I hope you like these little piggies, I'm just sad I wasn't able to successfully bake them and give them to you in person before your actual birthday!
P.S. I think I should mention something about Tumblr. I am incredibly flattered whenever I get any link backs due to people sharing my photos on Tumblr, though sometimes I do think that the way that some people credit their sources on there is questionable (especially when they copy and paste my recipes without including a text link *cough*). But others do it properly and have lovely pages like Just Be Splendid. As a way of saying hi to all those people on Tumblr who are sharing my photos, I just started one myself: http://raspberricupcakes.tumblr.com/ There's not much there at the moment, at some point I might start putting photos up there. And maybe if you plan on sharing one of my posts on Tumblr you can let me know and I will reblog it. Share the love ;)


Super cute!!
ReplyDeleteThough, kinda feel that not having bacon incorporated somehow in the filling was a bit of a missed opportunity. Still looks like they would taste awesome all the same :)
These are soooo freaking cute! Have I mentioned that you're a genius? :)
ReplyDeleteWow - they look too cute to eat! love how you come up with all these ideas!
ReplyDeleteHoly cow, that's adorable
ReplyDeleteThese look amazing. I struggle just trying to make macarons! And you've made these cute little piggy ones! wow!
ReplyDeleteOMG, so cute! LOL. Leona is a very lucky girl!
ReplyDeleteStephie!!! those are soooo darn cute!!!! I want them for my birthday too!! wink wink nudge nudge! xx ps love your colourful rainy backdrop!
ReplyDeleteSo freaking cute!!! Can't get over it!! And the rainbow paper makes it just that much better!!
ReplyDeleteMacaron piggies. Whoa, nelly. Genius. They are of course incredibly super awesomely awesome, but... you gotta eat em! ;)
ReplyDeleteAll I can say is, I love them, I love them, I love them!!!
ReplyDeleteomg they are the cutest things ever, and I can't believe you drew on the facial expressions with just a skewer! these are amazingly beautiful - they make me smile just looking at them!
ReplyDeleteI am dying from cute omg - how did you even think to EAT them?!! The pigs are smiling at me through the screeeeen - you're amazing :D
ReplyDeleteomg they're so cute! i don't think i'd be able to bring myself to eat them either :)
ReplyDeletethey are freaking adorable!!! hahaha oink!
ReplyDeletethese little piggies are just adorable!
ReplyDeletegreat job once again, im always amazed by your creativity with macarons!
This is so cute & genius! Well Done! *Two thumbs up*
ReplyDeletePIGGIES!!!!!! Awww you are a freaking genius. What an awesome gift for Leona! xx
ReplyDeleteAwww, those are so cute! Leona must be jumping with glee! XD
ReplyDeleteThanks one million for the recipe, just on the way to the supermarket! This will be definitely my weekend homework!!!!!!!!
ReplyDeleteSo cute! And so creative as usual =)
ReplyDeleteI'd have the same problem eating these guys due to them being soooo adorable!
Awww, me lovez your piggies!
ReplyDeleteNo really, I have this strong desire to have one as a pet?
Ahhh, but for the meat-eaters guilt!
I never thought I'd say this but that sure is another reason to love pork! Well done on the macarons. So creative.
ReplyDeleteSo adorable! Love this idea!
ReplyDeleteThese are the cutest macarons I have ever seen! You have magic hands. ;D
ReplyDeletethese are adorable! you know what I'd do? I'd make the backs with curly tails. Piggy butt marcarons!
ReplyDeleteAnna - check what I wrote in the recipe. I actually wanted to but decided not to risk it because of the cracking issues I'd had previously :) But I definitely wanted to!
ReplyDeleteIt's the little piggy ears that are so cute. And the quirky smile that says 'Eat me if you dare!'
ReplyDeleteStephhhhhhhhh these are absolutely amazing I love it so much thanks for making this little post in thought of my bday. xx
ReplyDeleteOMG I LOVE YOUR TUMBLR!! I swear your photos are like looking through a food magazine.
omg those are frickin adorable. wish i had ur creative ideas :)
ReplyDeleteFirst the doughnuts, now the piggies!! You're killing me with cuteness. Nice work.
ReplyDeleteOH MY GOD!!!!! SO adorable!!! I love these! Thanks for making me smile.
ReplyDeletewow, they are soooo adorable! i love them!
ReplyDeleteOMG, how cuteee :)))) Like these little piggies:)
ReplyDeletegreets from BFC
In. Total. Awe. Words can't even capture... I posted a link on ediblecrafts.craftgossip.com. Wow. LOVE!
ReplyDeleteOMG These are sooo cute! As you can see from my handle, I love pigs!! I have to find someone to make these for me ...
ReplyDeleteThese are the most adorable macaroons I have ever seen!!! They are gorgeous and your photos are the best ever as well!! They look completely magical with the cute background. (What is the background?) You have the greatest imagination and creativity.
ReplyDeleteSeriously, SO CUTE!!!
ReplyDeletethese creations are simply stunning!
ReplyDeleteLOVE them! Don't think I would be able to eat them either ;0)
ReplyDeleteAwww Steph these are painfully adorable!!! Well done :D
ReplyDeleteNice meeting you yesterday, by the way :) xxx
squeeeee i just wana hug em! so cute1
ReplyDeleteabsolutely adorable!! i'm religiously reading through your macaron posts to make sure i'm well prepared for making my first batch -i think you've quite mastered the art of making the macaron!
ReplyDeleteomg woman! is there anything you can't do?? the only thing missing is a nice bow tie.
ReplyDeleteOink Oink!! How cute!! Next up, angry bird?
ReplyDeleteOMG - macaron magician!
ReplyDeleteOMG These are Briiiiliant! Beyond clever and adorable!
ReplyDeleteOh these are so adorable!
ReplyDeleteMacarons are already such a hard thing to bake...and you made faces on them??? wow!!! in Awe :)
ReplyDeleteadorable!
ReplyDeleteoh my goodness~ they are so CUTE!!!
ReplyDeleteThese are absolutely cute and what a fun way to have a macaron.
ReplyDeleteTHESE ARE GENIUS! *squeal*
ReplyDeletethese are so adorable, very beautiful macarons you have there!
ReplyDeleteSteeeeeph omg these are the cutest!!!
ReplyDeleteOMG sooo cute! I love piggies.
ReplyDeleteThese are so cute! Great idea!
ReplyDeletethese are SOOOOOO cute, sorry i'm echoing everyone else! but i love them! great idea! i'm going to try to make these too!
ReplyDeleteSimon @ the heart of food - Hahaha well I was too busy just trying to get the faces to work to think about making a complicated filling.
ReplyDeleteLisa - Haha :D I'm no genius, just a nutjob!
gastronomous - THanks so much!
Lily - Hee hee thank yoU!
Leah - Thank you! Trust me it took a lot of failed macs to get to this point!
billy @ a table for two - :) Thanks!
the dainty baker - Aww well you birthday is ages away! Hee thanks it's from Kikki K!
Betty @ The Hungry Girl - Heehee thank you babe!
Conor @ Hold the Beef - :D Haha true. I gave them to other people to eat!
Lisa - Aww thank you! xx
Helen (Grab Your Fork) - Heehee thank you! Yeah the skewer and food colouring trick has been very handy! I'm not so good with fiddly things and it makes it a lot easier ;)
Margaret Tran - Haha I know, I felt bad! :) Thank you!
Jacq - Heehee i know right? I had to save one to give to leona but it was more to look at rather than to eat!
hannah {thepastrykook} - Thank you!
Gianna @ TheEmptyFridge - Aww thanks so much!
Flaming Pot - Thank you!
Karen @ Citrus and Candy - :) I'm just glad she liked them!
Island - :) Thanks! I think she liked them :)
colores - Oh good luck! I had so many issues with cracking on these!
mademoiselle délicieuse - Thanks so much Rita!
Anonymous - Hahahah! Have a piggy as a pet or a piggy macaron? ;)
Trissa - Heehee the reasons are endless! Mmm bacon
Stef - Thank you! :)
Patricia Scarpin - Thanks so much!
OohLookBel - Heehee I always draw my piggies with floppy little ears :)
Leona @ pigged-out - So glad you liked them Leona! Hope you had a good bday :) Aww shucks!
Chelle - Aww I'm sure you have just as great ideas!
Nicole - Heehee thanks so much!
delicieux - :) Thank you! Always happy to make others smile
Lucy - Thanks! x
bigFATcook - Thanks!
Chic Cookies - Whee thanks! Love it when you link me :)
gourmetpigs - Hehehe yay for piggies!
Gourmet Getaway - Aww thank you! The background is actually wrapping paper from Kikki K! Seems like a shame to use it once for wrapping paper, works great as a background!
Flirting with Flour - Thanks!
thang @ noodlies - Thank you!
Chele - Hehehe I know, not when they're smiling up at you like that!
Ladybird - Aw thank you! Lovely to meet you!
chocolatesuze - Just don't sit on them, cos I did that and totally squished one :( felt so bad!
panda - Oh good luck! Feel free to ask me any questions you have about making macs!
linda - Aww bow ties! That would be super cute.
Ellie (Almost Bourdain) - hahaha don't know if I can do angry birds!
Tina@foodboozeshoes - :) heehee thanks!
diaryofamadhausfrau.com - Thanks so much!
Samantha Angela @ Bikini Birthday - Thanks!
Amelia PS - It's not so bad once you get the hang of it! ;) Thank you!
++MIRA++ - Thanks!
JanJan @ Cooking for My Love - Thank you :) <3
Jo - All macarons should be fun or quirky in some way!
charisbittensmitten - Heehee thank you!
thepleasuremonger - Thanks!
Trisha - :D Thank you!
anna - Thanks! I love piggies too :)
Cherry - Thank you!
heavenwildfleur - Thanks! Haha I love all the comments I get :) Hope they turn out for you!
Just perfect
ReplyDeleteso adorable! .. ive failed so many times with making macarons the taste is always nice but rising if the macaron is what i have trouble with! ..
ReplyDeletewith your recipe i managed to get the perfect lift without them spreading even ... BUT when they came out of the oven .. they sank down :( any idea why??
oh and i absolutely love your site!
Hi Anonymous - are you referring to the feet? I've often struggled with the feet of my macaron shells collapsing after they come out of the oven. It usually means that the shells need to be baked for a bit longer, you need to make sure the feet are competely dry and not sticky when they come out of the oven. You may need to adjust your temperature a bit lower to achieve this without over-baking the macs. The only other tip I could give you is to ensure your egg whites are whipped to the correct stiffness :) Hope that helps!
ReplyDeleteThanks a lot for this! those piggies are too adorable.. *.*
ReplyDeleteWe just featured your adorable piggies on our new Fab Finds Friday!
ReplyDelete"... dry for a further 30 mins to an hour." Does this mean drying the oven?
ReplyDeleteNo sorry, I should have been clearer. It means drying the piped macaron shells, following on from a previous instruction 'Leave shells on bench to dry for about 30 mins to an hour'. I'll clarify that in the recipe now.
DeleteThank you! I'm gonna try this recipe soon. But is it a very crucial step? Does it mean drying the shells on the bench again or drying it in the oven? Thanks! ^_^
ReplyDeleteIt is an incredibly crucial step. If the shells are not dried properly, especially for these piggy ones, it is more than likely that cracks will form on the shells when you bake it. And it's drying it on the bench again, as you do with all macarons. If you're not experienced with baking macarons I definitely would recommend attempting some plain macarons shells before trying ones with extra decorations like these.
DeleteHello, I am a fellow Malaysian and I've tried your recipe more than 7 times already and I loved this so much. But it was only 90% perfect as I faced the most frustrating and annoying problem; the macarons turned brown no matter what.
ReplyDeleteWhen I bake medium sized Macs at 150 celcius at the bottom of the rack for 25 minutes, they were baked and delicious. but they got browned. Another time I tried is I tried 140 celcius and its the same.
Another time I tried was when I place a baking tray on the highest rack to prevent it from browning at 150 C again (my oven has three racks, the lowest, the medium and the highest rack to slot the trays) and the colour turned out decent but it is undercooked and its sticking to the pan eventhough I left it out to cool for more than 10 minutes.
May I know what have I done wrong? Im planning to bake some for people to eat yet the colour turns alot of people off (originally lilac macarons, but it browned to a grey colour) and it frustrates me to no end.
Thank you in advance! :)
Hi Adele, there is no right or wrong temperature or timing when it comes to macs. Every oven is totally different, and you need to adjust the temperature and timing to suit your oven. From what you've described, 140 celcius in your oven is still too high for your macs. Try reducing your oven temp by 5 degrees and baking it for longer. If they are undercooked and sticking to the pan then just keep baking them until you can lift them off the baking paper. To be honest I don't even look at the time when I bake macs anymore, I bake them until their feet are dry enough that they are easy to remove from the baking tray. If your oven temp is low enough then you will be able to bake them for long enough without them going brown. I always put my macs on the middle rack with a double baking tray. I also use a non-fanforced oven with coils that are only on the base. If you are able to control which coils your oven uses you can try experimenting with that. I hope that helps!
Delete