Sunday, February 27, 2011

Orange Choc Chip Buttermilk Cookies

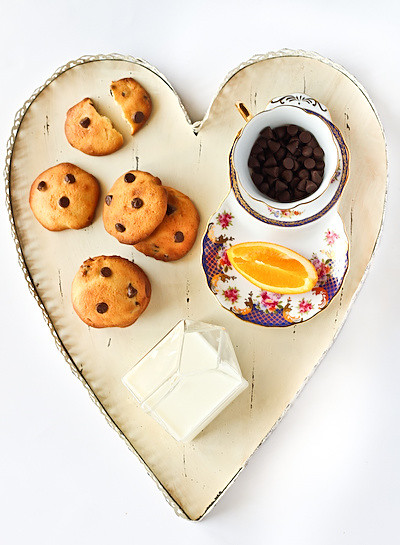
orange_choc_cookies_filtered
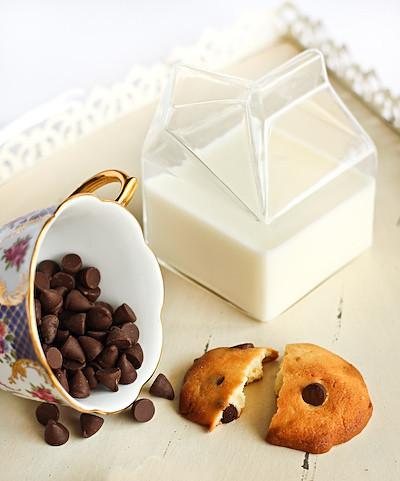
Chocolate Chip Cookies.

They are my ultimate comfort food, especially the home baked ones. Nothing beats the smell of freshly baked cookies, it's like a hug. For your nostrils. Okay that sounds weird, but hopefully you know what I mean. Right now, I'm home alone for the first time in ages and looking forward to curling up on the couch with a glass of milk and a plate of warm, gooey cookies. Sure, my mild lactose intolerance will make me regret it later, but it will totally be worth it.
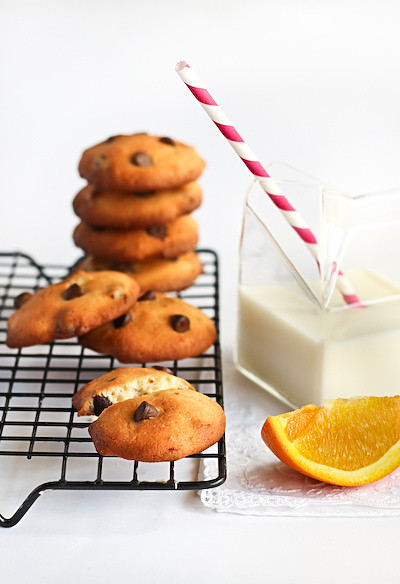
orange_choc_cookies-3_filtered
These cookies were whipped up after searching the internet for good recipes to use up my leftover buttermilk. I came across these lemon glazed buttermilk cookies on Epicurious, but I didn't feel like lemon cookies. I needed a chocolate chip cookie fix! So I went with the classic combination of orange and chocolate. Dark chocolate, it always has to be dark chocolate chips for me.
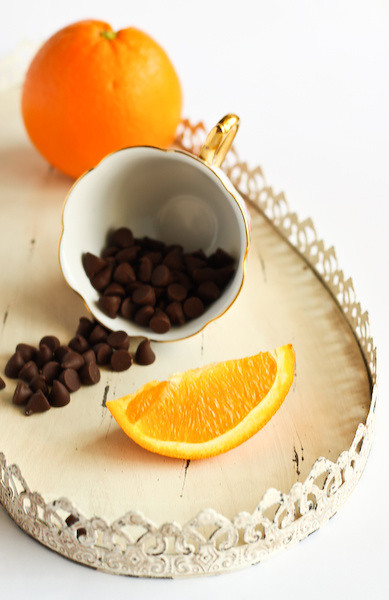
orange_choc_cookies-7_filtered
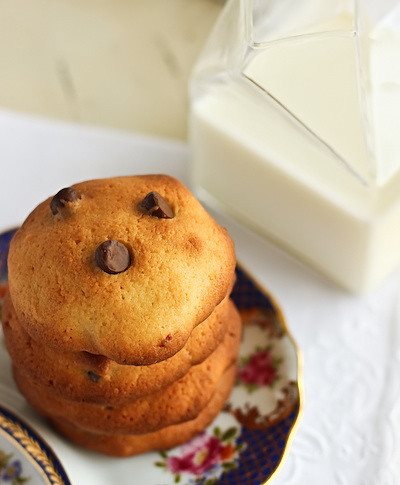
These cookies are not going to be for everyone. The texture is very different to a regular chocolate chip cookie. The buttermilk makes them soft and fluffy in the middle, more like a cake than a biscuit. If you bake the outside until it's all lovely and golden, you'll still have a nice crunch on the outside. But if you like your choc chip cookies super crunchy, these aren't for you.
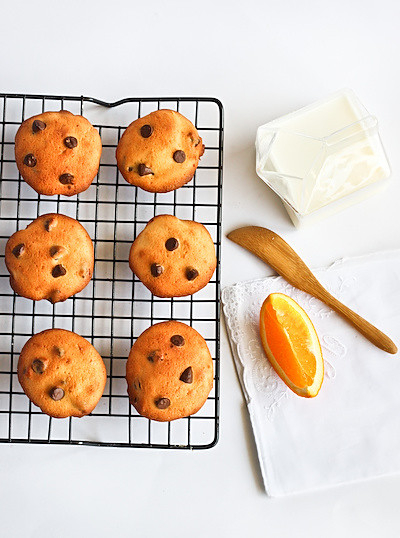
orange_choc_cookies-2_filtered
Personally, I usually prefer crunchy choc chip cookies over chewy ones. But these ones are nearly their own category of texture, they're not quite chewy and not quite hard, more like a cake cookie. I think I like them a lot, I'll let you know after I've pigged out on the rest of the batch :P The orange zest in the cookies makes them so fragrant, it's the perfect addition to the light cookie dough. Even better when you bite into them and find a pocket of melty dark chocolate.
orange_choc_cookies-6_filtered
I actually baked these cookies a little longer than the original recipe called for, I wanted them to have a bit more colour and crunch. It worked out pretty well I think, the buttermilk stops them from getting too dry, so don't get scared and take them out of the oven too early. This is a great easy recipe to use up any buttermilk you might have leftover in your fridge, especially because you can adjust the recipe amounts depending on how much buttermilk you've got leftover. But I demand you eat at least some of them when they are still warm not long after you've finished baking them.
orange_choc_cookies-5_filtered
Orange Choc Chip Buttermilk Cookies
(adapted from this Buttermilk Cookie recipe from Gourmet, makes approx 30 cookies)
3 cups (approx 450g) plain flour
zest of 1 orange, approx 1 tbsp
1/2 tsp baking soda
1/2 tsp salt
170g (1 1/2 sticks) unsalted butter, softened
1 1/2 cups (approx 340g) caster sugar
2 large eggs
1 tsp pure vanilla extract
2/3 cup well-shaken buttermilk
1 cup dark chocolate chips

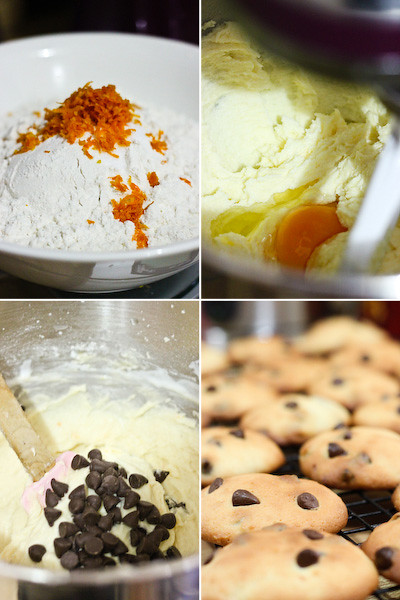
Preheat oven to 180°C (350°F) with rack in middle. Line two large baking sheets with baking paper. Whisk together flour, zest, baking soda, and salt. Beat together butter and sugar in a large bowl with an electric mixer until pale and fluffy. Add eggs 1 at a time, beating well after each addition, then beat in vanilla. Mix in flour mixture and buttermilk alternately in batches at low speed, beginning and ending with flour mixture, until smooth. Fold in chocolate chips.
orange_choc_cookies-16
Drop level tablespoons of dough about 1 1/2 inches apart onto baking sheets. Sprinkle a few extra chocolate chips over each cookie to pretty them up :) Bake, 1 sheet at a time, until cookies are puffed and golden, 13 to 15 minutes per batch. Cool cookies on sheets for 1 minute, then transfer cookies to racks. Best eaten warm, store in an airtight container in the fridge and then microwave for 20 seconds before serving.
orange_choc_cookies-4_filtered
Print Friendly and PDF

Tuesday, February 22, 2011

Mint Chocolate 'Aero' Cake

mint_aero_cake-2
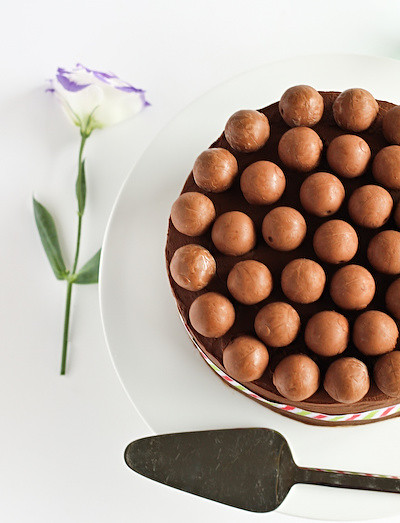
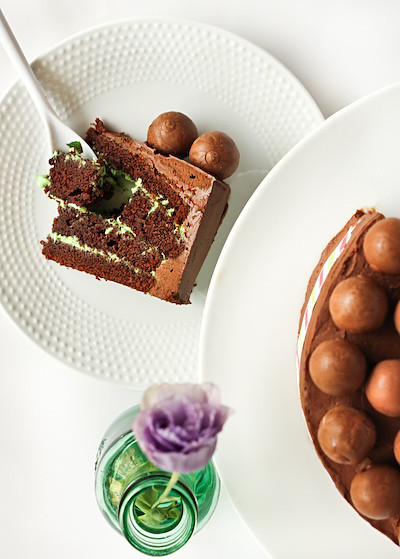
A gigantic chocolate cake is a really nice thing to come home to. Even if it's one that's been thrown together quickly, or one that's taken a days preparation, it's so good when you can dig into a big slice of that gooey, rich homemade goodness. I'd been playing with the idea of making a Mint Chocolate themed dessert for a while, something that reminded me of one of my favourite candy bars; mint Aero. Ever since I saw this great idea for a 'bubble-wrap mousse' from Taste, I knew I wanted to adapt it for my mint Aero dessert. I experiment a little-had a slight failure with small cups of green mint & white chocolate mousse topped with maltesers, and decided it wasn't pretty enough. Eventually I decided it needed to be a giant, four-layered chocolate cake, reminiscent of the triple-triple chocolate cake which was an undeniable hit.
mint_aero_cake-4
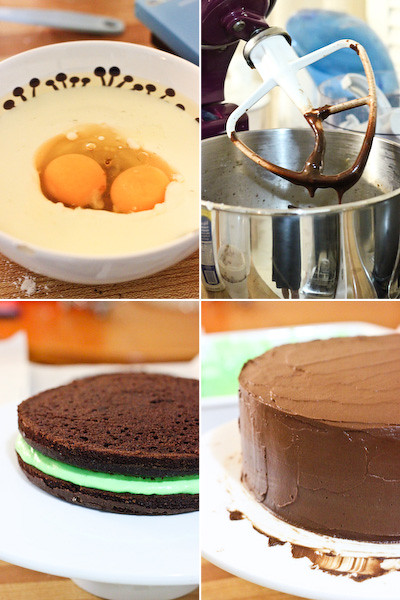
So it seemed simple enough, I baked up my usual chocolate cake recipe, and used the Taste recipe for the white chocolate mousse and added a bit of peppermint. After a day of chilling, I was ready to put everything together. The cakes were neatly sliced up into 4 layers, and I started to sandwich the mousse in between them. And then all hell broke loose. In hindsight, I really should have known better. The mousse recipe was never really meant to be used inside a cake. It started turning into mint chocolate SOUP, and started oozing out the sides and soaking into the cake, making the layers collapse around the edges. I really should have used a much more well-set mousse that used gelatine or something. So much fail was going on in my kitchen. I was certain if I waited any longer to do something the top half of the cake was going to slide right off the stand.
mint_aero_cake
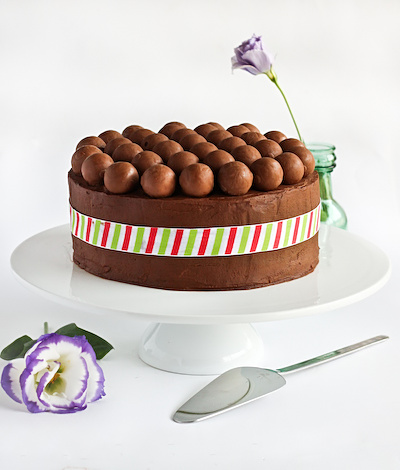
It was tempting to throw the towel in, as I frantically scooped up the leaky mint chocolate soup of the cake by the handful. At this point I said, "F*** it, I did a night's worth of prep baking and used up all these ingredients, I'm going to turn this into an edible cake even if it friggin' kills me!". So I whipped up a batch of dark chocolate ganache. It's a good philosophy for the kitchen; if there's a problem, throw some ganache at it. And so my ugly fail cake was hidden under a thick layer of luscious chocolate ganache.
mint_aero_cake-5
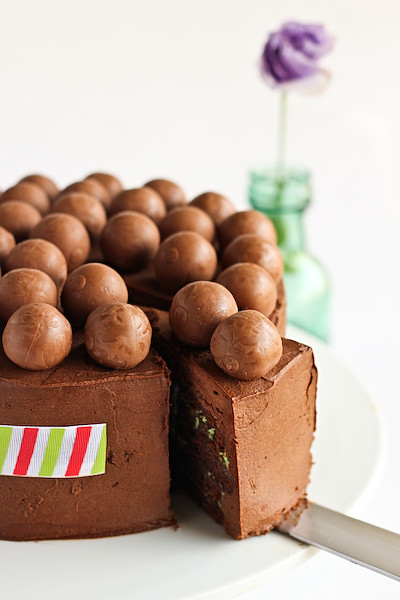
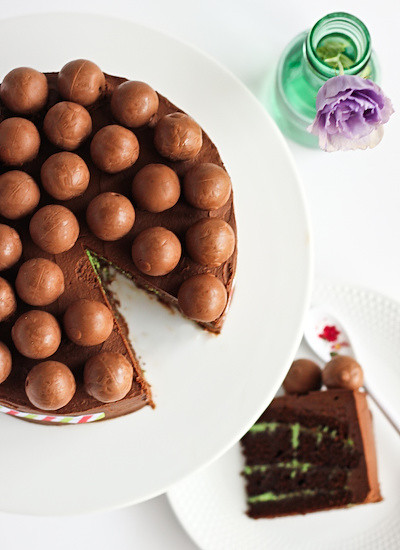
Somehow, the cake did not collapse under it's own weight. By the time I was putting the ganache on, I was extremely cranky and swearing loud enough for my neighbours to hear, so I didn't even bother trying to make it smooth. And then while topping it off with Lindt chocolate balls (as inspired by the Taste recipe) I realised I didn't have enough of the chocolates and had to run down to Coles for more. I hate when that happens. And when I woke up this morning to take photos, it was pitch black. I HATE WHEN THAT HAPPENS. So my day was deprived of chocolate cake, but at least I had something to look forward to when I got home. I cut a slice out of the cake, dreading the mess that was hidden inside...yeah...the lovely flavoured bright green filling had pretty much disappeared and the cake was a little denser than usual, but it still tasted great. And I still love the idea, which is why I'm posting the recipe. I will just never ever use that mousse as the filling again, EVER.
mint_aero_cake-6
Mint Chocolate 'Aero' Cake
(adapted from Ina Garten's Beatty's Chocolate Cake recipe, serves 10-12)
Butter, for greasing the pans
275g (1 3/4 US cups) plain flour, plus more for pans
500g (2 US cups) sugar
75g (3/4 US cups) good cocoa powder
2 teaspoons baking soda
1 teaspoon baking powder
1 teaspoon salt
240ml buttermilk, shaken
120ml vegetable oil
2 extra-large eggs, at room temperature
1 teaspoon pure vanilla extract
1 cup freshly brewed hot coffee

For the mint chocolate mousse filling:
I am not including the recipe I used because it was completely inappropriate for this cake. I'd recommend a gelatine based mousse (maybe like this one), a mint buttercream or adapt the dark chocolate ganache recipe below using white chocolate + peppermint essence & green food colouring

Preheat the oven to 180 degrees C. Butter 2 19cm round cake tins. Line with parchment paper, then butter and flour the pans.

Sift the flour, sugar, cocoa, baking soda, baking powder, and salt into the bowl of an electric mixer fitted with a paddle attachment and mix on low speed until combined. In another bowl, combine the buttermilk, oil, eggs, and vanilla. With the mixer on low speed, slowly add the wet ingredients to the dry.

With mixer still on low, add the coffee and stir just to combine, scraping the bottom of the bowl with a rubber spatula. Pour the batter into the prepared tins and bake for 35 to 40 minutes, until a cake tester comes out clean. Cool in the tins for 30 minutes, then turn them out onto a cooling rack and cool completely. Wrap in cling film and chill for at least 3 hours or overnight. If making a mint chocolate mousse for the filling, prepare this and chill for at least 3 hours or overnight.
mint_aero_cake-12
For the chocolate ganache:
450g (approx 1 pound) dark chocolate (I used 70% cocoa Lindt)
600ml (2 1/2 cups) pouring cream
Optional: 3x150g boxes of Lindt chocolates to decorate

Break up chocolate into small pieces and place in a large mixing bowl. Slowly bring cream to just to the boil in a medium saucepan. Remove from the heat and cool for a couple minutes. Pour hot cream over chocolate and set aside to cool for 10 minutes. Mix cream and chocolate together until smooth using a whisk, then cool until it reaches room temperature. Using an electric mixer, beat mixture until it is shiny, fluffy and just holds its shape (take care not to overmix or mixture will split, remelt and rebeat mixture if this happens).

When ready to assemble, use a long serrated knife to slice your two cakes into half (or leave them as two thicker layers if you wish). Sandwich cake layers with a layer of green mint chocolate filling. Crumb coat the outside of your cake with dark chocolate ganache, then use the rest of the ganache to ice your cake. Make sure to work quickly or ganache will set. Decorate top of cake with Lindt chocolates. Chill for at least an hour before serving, run a knife under hot water before slicing up.
mint_aero_cake-3
Print Friendly and PDF

Tuesday, February 15, 2011

Green Tea Cheesecake Bites

green_tea_cheesecake-3_filtered
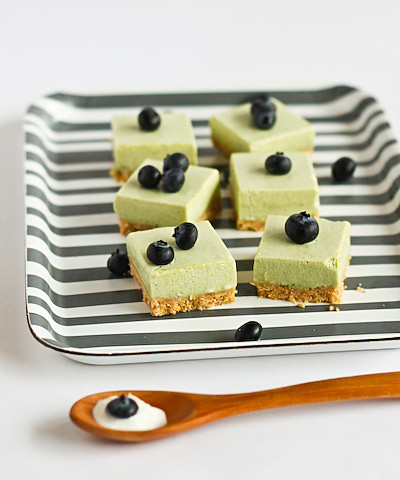
I am firmly of the belief that cheesecake is the answer to a bad Monday. Or at least that's what I'd like to believe, so that I have an excuse to eat more cheesecake. The only problem about a bad Monday is that it usually takes all the energy out of you and makes you less likely to turn the oven on when you get home. But for these Matcha Cheesecake Bites that is totally fine, because there is no baking involved. No baking + you get to eat cheesecake at the end of it? Score!
green_tea_cheesecake-5_filtered
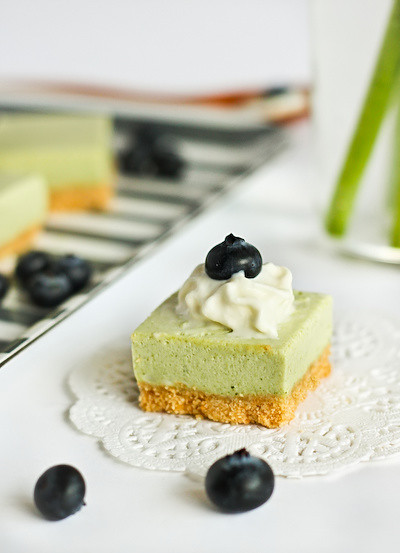
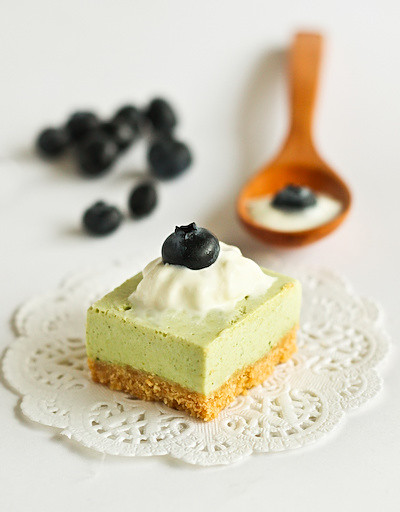
Matcha powder is not the easiest thing to get your hands on in Sydney, I usually have to go to a Japanese supermarket or buy it online. But my brother recently bought me a big tub of it and it seemed like the perfect flavour for these chilled cheesecake bites I wanted to make. I was tempted to make the cheesecake crust out of Ginger Nut biscuits, but decided to go with plain biscuits instead, to let the subtle green tea flavour shine.
green_tea_cheesecake-2_filtered
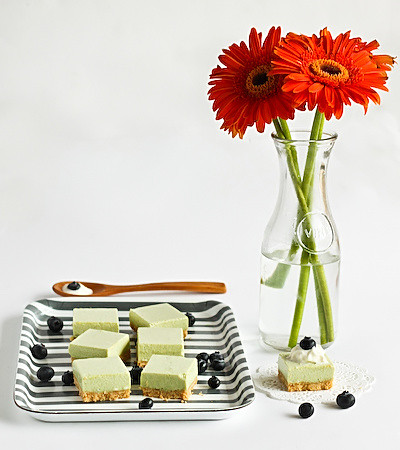
I'm not entirely happy with how the photos turned out for these Cheesecake Bites, which is usually the case when I am rushing around first thing in the morning, getting ready for work and trying to choose props while half asleep. But I still wanted to share this recipe with you because it was so easy and delicious and something that I am sure to make again. The cheesecake filling is so light and not too sweet, and goes perfectly with crunchy biscuit crust. And it all comes in perfect bite sized portions.
green_tea_cheesecake-9_filtered
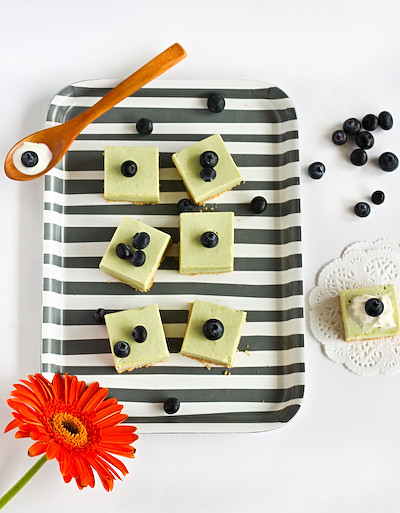
It's very obvious from my photos that I suck at cutting things into equal portions. But not everything needs to be perfect right? And these tasted so good that I didn't care if they were super ugly. Fresh blueberries are super cheap at the moment, so they were the perfect topping for these. The very light bitter flavour of the Japanese green tea was offset by the sweet blueberries. A sploge of extra whipped cream doesn't hurt either ;)
green_tea_cheesecake-6_filtered
No Bake Green Tea Cheesecake Bites
(adapted from this Green Tea Cheesecake by Dessert First, makes approx 20 squares)
200g Arnotts Nice biscuits (or any other plain sweet biscuits)
100g unsalted butter, melted
150ml pure (whipping) cream
170g cream cheese, softened
1/3 cup caster sugar
100ml milk
1 1/2 tsp matcha powder (adjust to taste, I like mine a bit stronger)
1 1/2 tsp powdered gelatin
Optional: Fresh blueberries or strawberries and extra whipped cream for topping
*Note You can increase the proportion of filling to crust if you have a deeper/different sized pan. I'm planning to make this again with 1.5x the amount of filling.

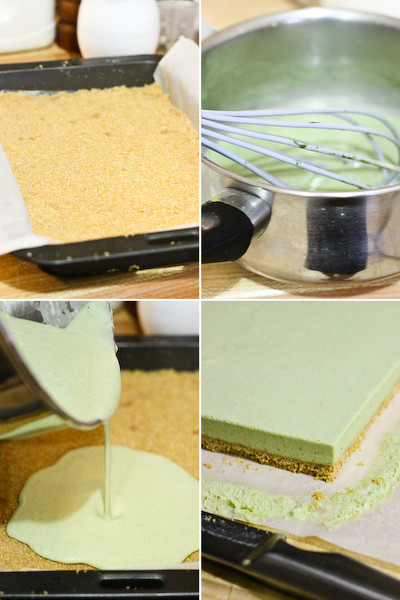
Grease a 17x27cm slice/brownie tin and line with baking paper, ensuring that two ends of the paper hangs over the edges of the tin. Place biscuits in a food processor and process to a fine crumb (alternatively smash biscuits up in a ziploc bag). Stir in melted butter and process until combined. Press tightly into a thin single layer in prepared tin and chill for at least 30 minutes. Beat cream in a mixing bowl until it reaches soft peaks. Place cream cheese in a separate large mixing bowl and beat until smooth. Add sugar and beat until combined. Place gelatin in a small separate bowl with 2 tbsp cold water to soften it.
greenteacheesecake
In a small saucepan, heat milk until it just comes to a boil, remove from heat then whisk in green tea powder to dissolve. Add softened gelatin and whisk again to combine. Ensure there are no lumps. Add warm milk mixture to cream cheese and beat until smooth. Fold in whipped cream and then pour mixture over crumb layer. Chill for at least 3 hours or overnight.

Remove from fridge and slice into equal sized squares. Top with fresh whipped cream and/or berries and serve chilled. Can be stored for two days in the refrigerator.
green_tea_cheesecake-8_filtered
Print Friendly and PDF

Thursday, February 10, 2011

Banana Smoothie Cupcakes

banana_smoothie_cupcakes-4_filtered
I'm always filled with a sense of nostalgia when baking cupcakes. They were pretty much the first thing I ever learnt to bake on my own, and it was a painful learning process. I am not a patient person, and making cupcakes look pretty (and taste great) takes a certain amount of patience. You need to try and spoon the mixture into the cupcake papers without it dribbling everywhere. You need to bake them to the right consistency (in my early days I was always a nervous baker who yanked them out before they were done, which led to sad, floury cupcakes). You need to get your icing to the right consistency. Then you need to wait for the cakes to cool completely or your icing will melt as soon as you pipe it on. I was never willing to wait long enough to do these things properly.
banana_smoothie_cupcakes
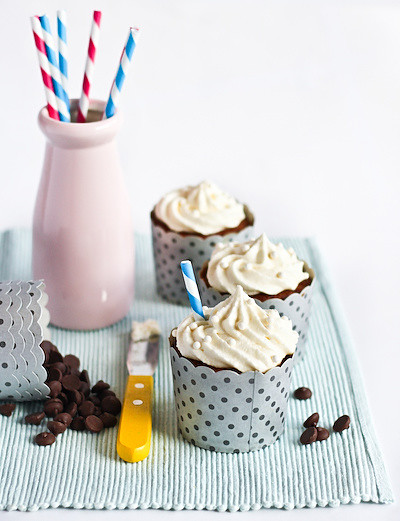
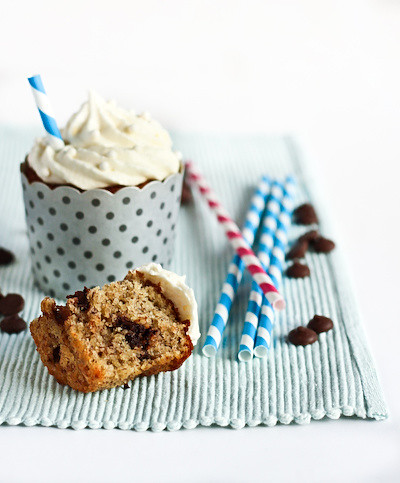
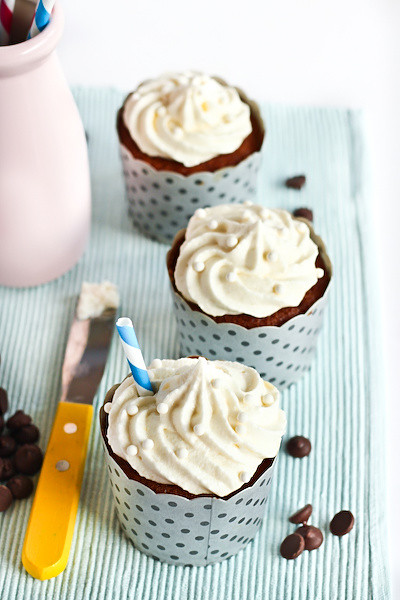
I had to remind myself about these points while baking these cupcakes. I still managed to dribble cupcake batter all over the place, and my icing decided to be extra runny and refused to hold its shape. But I got there in the end. These are REALLY AMAZING CUPCAKES. I've been craving yoghurt like crazy this summer, something I hardly ever eat. So I've been buying buckets of it, and this recipe uses it well. I love a good banana smoothie, and the banana & yoghurt icing on these cupcakes tastes just like it. I'm completely infatuated with the recipe I used for the banana cake, it's so light and fluffy but not the least bit dry thanks the yoghurt and gooey dark chocolate chips. AND all you need to do is throw all your ingredients in a food processor (or a big mixing bowl). My favourite kind of recipe.
banana_smoothie_cupcakes-2_filtered
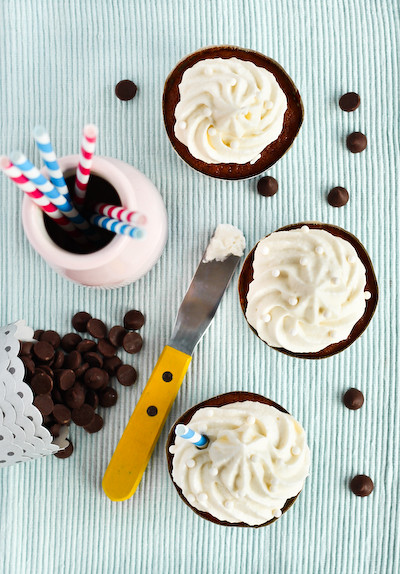
As I mentioned earlier, the icing was a total pain in the bum. Originally it only had an icing sugar and butter base, but the yoghurt and banana made it very runny and it was never going to pipe nicely no matter how long I whipped or chilled it. So I panicked and whimpered and managed to smush icing into my hair, and then decided to turn it into a buttercream by heating up some egg white and sugar and whipping it into the mixture. After 20 minutes of whipping and chilling and adding butter and yelling "STOP BEING RUNNY!" at it, I eventually got a semi-pipable mixture. Sigh. So I've written down the recipe as it eventually ended up, because it tastes pretty good, but feel free to omit the egg white and see if you can get the ratios right.
banana_smoothie_cupcakes-6_filtered
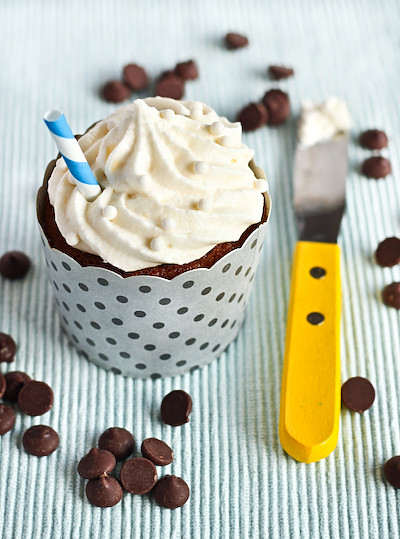
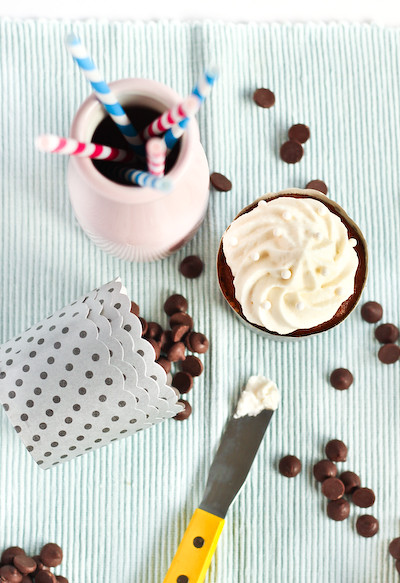
The main reason I chose this recipe is because it might be the last time I have bananas in the house for a while, since prices are expected to sky-rocket. This cake is definitely one for the banana lovers. I've started to hate putting straws in my cupcakes because it always leads to so many confused questions (Is it edible? Is there something to suck up the straw?), but I couldn't resist (just one) because these are my favourite paper straws. And the papers (kindly donated by Tomred) are so cute aren't they?? Macarons may be the new cupcake, but I'll still take a good cupcake over a mac any day.
banana_smoothie_cupcakes-7_filtered
Banana Choc Chip 'Smoothie' Cupcakes
(adapted from a banana cake recipe from Taste, makes 12 large cupcakes)
125g butter, at room temperature
315g (approx 1 1/2 cups) caster sugar
1 1/4 cups mashed overripe banana (about 3 medium bananas)
2 eggs
1 tsp vanilla extract
100ml plain yoghurt
225g (1 1/2 cups) self-raising flour
1/2 tsp bicarbonate of soda
1/2 cup chocolate chips (I used dark chocolate)

For the banana yoghurt icing:
1 egg white,
3 tbsp caster sugar
125g butter, room temperature
1/4 cup plain yoghurt
1 ripe medium banana
Juice of 1/2 lemon
3 cups icing sugar, sifted
Optional: sprinkles or sugar balls & straws to decorate

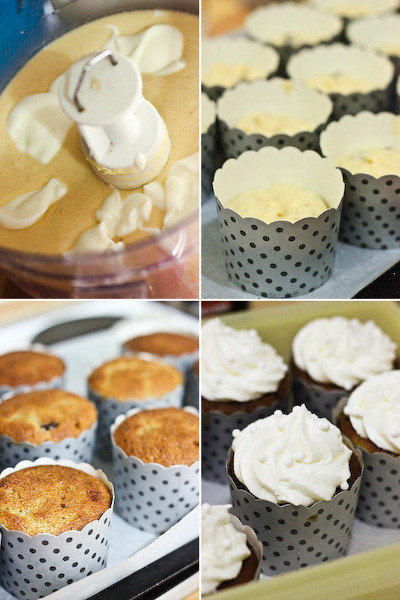
Preheat oven to 180°C. Line a cupcake tray with papers. Place the butter, sugar, banana, eggs and vanilla in the bowl of a food processor, and process for 2 minutes or until well combined. Add the yoghurt and process until combined. (If using an electric mixer instead, beat ingredients in a mixing bowl until combined)

Add the flour and bicarb soda, and process until just combined. Fold in chocolate chips and spoon mixture into cupcake papers, filling them 3/4 full. Shake the pan to settle the mixture. Bake in oven for 20-30 minutes (depending on the size of your cupcakes) or until a skewer inserted into the centre comes out clean. Set aside in the pan for 10 minutes to cool slightly, before transferring to a wire rack to cool completely.
bananasmoothiecupcakes
To prepare the icing, whisk caster sugar and eggwhite in a heatproof bowl over a pot of simmering water until it reaches 70 degrees C (160 degrees F). Pour mixture into a large bowl and whisk with an electric mixer until cooled and thick, about 5 minutes. Add butter, 1 tbsp at time, beating to combine. Mash banana with lemon juice in a separate bowl and strain to remove lumps. Add banana, yoghurt and icing sugar to mixing bowl and beat until smooth. You may need to chill your mixture to achieve the desired consistency. Place in piping bag and pipe over the top of cupcakes. Can be stored for several days in an airtight container in the fridge.
banana_smoothie_cupcakes-3
Print Friendly and PDF

Tuesday, February 8, 2011

Peach Melba Macarons

peach_melba_macarons-5_filtered
Last week was not fun. Sydney sweated through a record breaking heatwave, including the hottest night in its recorded history. Mother Nature and I are no longer on speaking terms. I know I should be used to the hot weather by now, Sydney always has scorcher days and I have lived in places with desert or tropical climates. But I still hate it. I turn into a batshit crazy grumphead. Especially because the heat means that it's too hot to even look at my oven. When it's 42 degrees C inside my house, all I can do is drape myself over our tiny portable air-conditioner and bark at anyone who tries to bother me.
peach_melba_macarons_filtered
So when the cool change FINALLY came, I couldn't wait to get back into the baking. My Mum is visiting, which is always awesome, and she picked up a whole tray of delicious smelling yellow peaches. I knew I had to use them in a dessert of some sort. I tossed around a few options; peach pie, peaches and cream, peach cobbler, and the classic peach melba. But since I was craving macarons, I thought I might mix it up and make a macaron with all the lovely flavours of a peach melba.
peach_melba_macarons-2_filtered
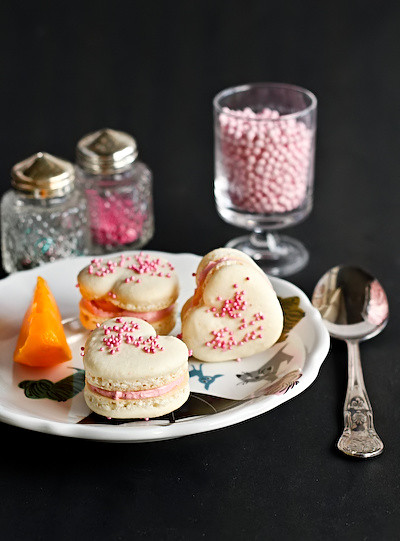
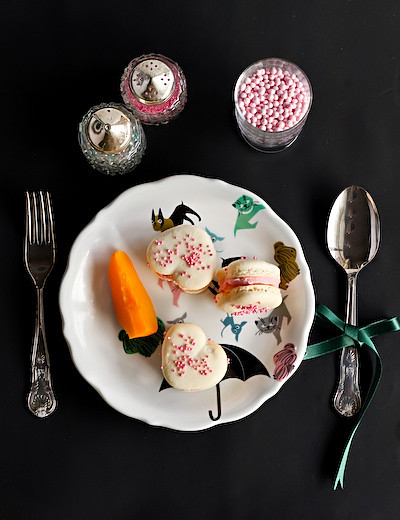
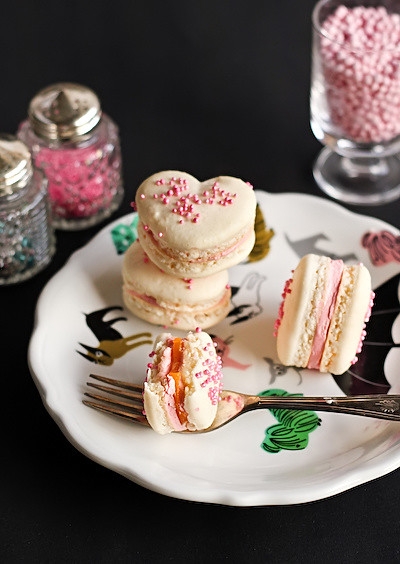
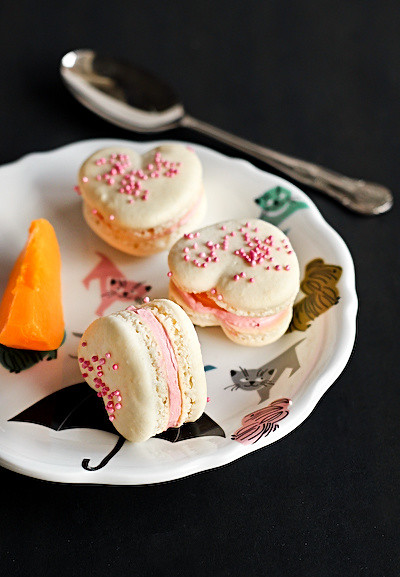
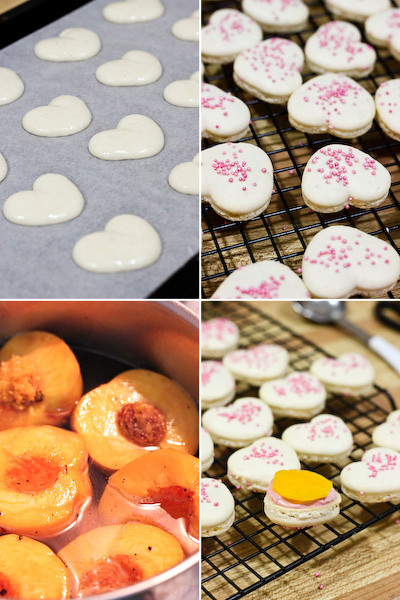
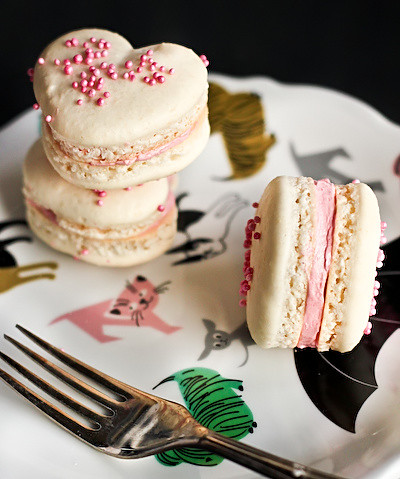
My Peach Melba Macaron consists of a regular macaron shell, a raspberry and vanilla bean buttercream and a super thin slice of fresh peach which has been poached in a vanilla bean sugar syrup. I'm usually opposed to any kind of poaching (poached pears make me sad), but I have to say that this really makes these peaches even better. I love the different textures in this macaron, the crisp outer shell, the chewy inside, the luscious buttercream and a little bite in the fruit. Peach and raspberry really do work magically together. The heart shaped macarons were hard to resist, it's coming up to Valentine's Day after all. They are a bit of a bitch to pipe, I tried a few weeks ago and failed miserably, but I think I might be getting the hang of it. If you are feeling lazy, you can try making these macarons with just the raspberry buttercream. It's really worth it, I was eating the buttercream on its own. So good.
peach_melba_macarons-4_filtered
Peach Melba Macarons (Peach with Raspberry & Vanilla Bean Buttercream)
(makes 16 medium macarons, peaches adapted from this recipe)
For the macarons:
100g aged egg whites (you can use fresh eggs too, just make sure they are room temperature. I always use fresh these days, and zap it in the microwave on defrost for 10 seconds)
110g almond meal, dried in a cool (100 degrees C) oven for 5 minutes and sifted
200g icing sugar
50g caster sugar
Optional: 1 tsp powdered egg whites (available from The Essential Ingredient), pink sprinkles to decorate

For the peaches:
250ml (1 cup) water
150g caster sugar
2 tsp lemon juice
1 vanilla bean pod
2 peaches (I used yellow peaches)

For the raspberry vanilla bean buttercream:
1 large egg white
1/4 cup caster sugar
90g (about 6 tbsp) unsalted butter, room temperature
1/2 tsp vanilla bean paste or seeds scraped from 1/2 vanilla bean pod
1/2 cup fresh or frozen (and thawed) raspberries
(If you're new to making Swiss meringue buttercream, these wonderful tutorials from two of my favourite bloggers will help)

Line two baking sheets with baking paper. Place icing sugar in food processor and pulse for a minute to remove any lumps. Stir in almond meal and pulse a few times to combine. Place in a large mixing bowl. Using an electric mixer, beat egg whites and egg white powder in a medium mixing bowl until the egg white powder dissolves and it reaches soft peaks. With the mixer on high speed, gradually add sugar and beat until it reaches stiff peaks.

Add meringue (and powdered food colouring) to your dry mixture and mix, quickly at first to break down the bubbles in the egg white, then fold carefully as the dry mixture becomes incorporated and it starts to become shiny again. Take care not to overmix, the mixture should flow like lava and a streak of mixture spread over the surface of the rest of the mixture should disappear after about 30 seconds. Place in a piping bag and pipe on lined baking sheets or silicon baking mats. To pipe the hearts I used a 1cm round piping tip and piped fat 'V' shapes. Gently rap your baking sheets on your bench top to remove any extra bubbles from your piped shells. Top with sprinkles if you wish to use them.

Preheat your oven to 140-150 degrees C (temperature varies depending on your oven).Leave shells on bench to dry for about 30 mins to an hour, so that when you press the surface of one gently it does not break. Place tray on top of an overturned roasting tray or another baking sheet if they are not professional grade (this helps with the heat distribution). Bake for 13-15 minutes, depending on the size of your shells. Remove from the oven and cool on the tray for a few minutes, then gently remove from the sheet and place on a wire rack to cool completely.
peach_macarons
To prepare the poached peaches, place the water, sugar, lemon juice, and vanilla pod into a saucepan and heat gently to dissolve the sugar. Bring the pan to the boil and let it bubble away for about a few minutes, then turn the heat down to a fast simmer.

Cut the peaches in half, and if the stones come out easily then remove them, if not then you can get them out later. Poach the peach halves in the sugar syrup for about 2 to 3 minutes on each side depending on the ripeness of the fruit. Test the cut side with the sharp point of a knife to see if they are soft, and then remove them to a plate with a slotted spoon. Peel off their skins and let them cool (then you can remove any remaining stones). Cut into thin slices.

To prepare the buttercream, puree raspberries, strain to remove seeds and set aside. Whisk together egg white and sugar in a large heatproof bowl. Clip a candy thermometer to side of bowl. Set bowl over a pan of simmering water, and whisk until mixture reaches 160 degrees F and sugar has dissolved, about 5 minutes.

With a mixer fitted with the whisk attachment, beat egg white mixture on high speed until cooled and thick, about 5 minutes. Reduce speed to medium, and add butter, 1 tablespoon at a time, beating until incorporated after each addition. If mixture is runny at this point, refrigerate for 10 minutes and then continue beating until it starts to hold its shape. Beat in raspberry puree and vanilla bean. Use buttercream to sandwich macarons, with a slice of peach in the middle of each. Place in the fridge overnight in an airtight container. Can be stored in fridge for several days, bring to room temperature before serving.
peach_melba_macarons-3_filtered
Print Friendly and PDF