Wednesday, March 30, 2011

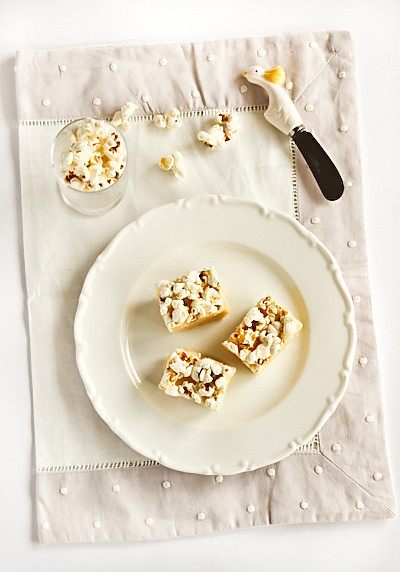
Popcorn Fudge

popcorn_fudge-19
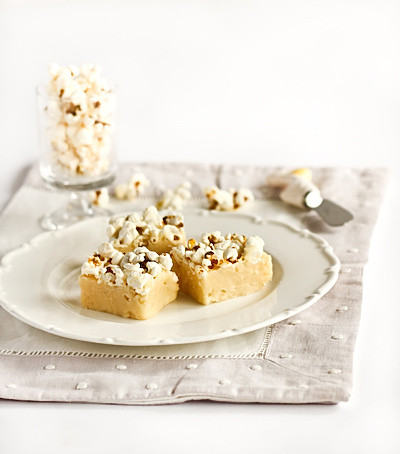
That's right. I went there. I told myself I was going to give up on the idea of putting popcorn in a dessert, after several failed attempts and so many other popcorn dessert recipes floating around the internet. But here's what happened; I was making regular old vanilla fudge for A's birthday and I got bored. He didn't want cake. He asked for lasagne, so I made that for him. But as per usual I couldn't resist making something sweet for afterwards. He doesn't like most desserts, but he really likes fudge. Not chocolate fudge, just regular vanilla fudge. So I figured I'd make it for him even though it didn't excite me much.
popcorn_fudge-15
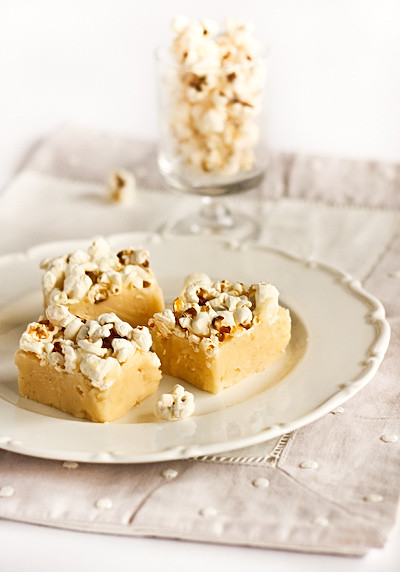
I started making the fudge, and just happened to be making a batch of fresh popcorn for myself at the same time. I looked at my fudge recipe, and then I looked at my popcorn. YES! It had to be done. I infused the cream with some popcorn and topped off the fudge with more popcorn. It was fantastic. Why had I never thought of this before?! A might have inhaled a ridiculously large portion of lasagne for his early birthday dinner, but when I waved this under his nose he couldn't resist a couple of pieces. After all, it was a deadly combination of two of his favourite snacks. We've been addicted to popcorn recently, (the proper stuff not that awful microwave crap), and the flavour sort of reminded me of the batches of caramel popcorn I sometimes make. Yum.
popcorn_fudge-18
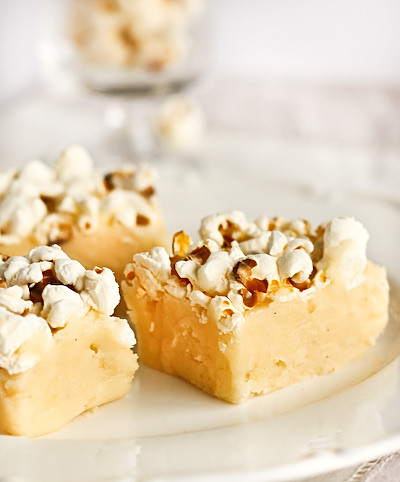
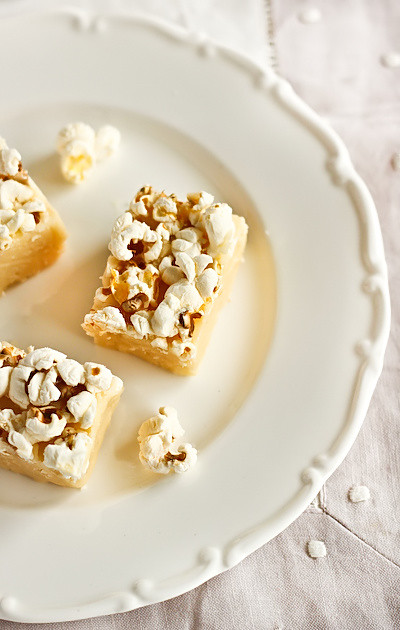
I've tried quite a few fudge recipes in the past, with varying results. The usual problem I have is that I have trouble getting the fudge to set at the right texture, it's usually a little too soft, a little too chewy. But this recipe was a little more complicated, so I crossed my fingers and gave it a go. Luckily the texture was perfect (ilu Martha). I also threw in some vanilla bean because I had a bit leftover, but feel free to skip it. It's deliciously rich, with the a lightness and crunch from the popcorn. I didn't salt the popcorn on top, but I imagine that would be great for those of you who like the sweet/salty combination in your desserts.
popcorn_fudge-2
Popcorn Vanilla Bean Fudge
(adapted from this vanilla fudge recipe)
15g (1 tbsp) cold unsalted butter, plus more for pan
1 1/2 cups pouring cream
3 cups sugar
1/4 cup liquid glucose or light corn syrup
1/4 teaspoon salt
1 tsp pure vanilla extract or vanilla bean paste
1/2 cup popping corn kernels, popped

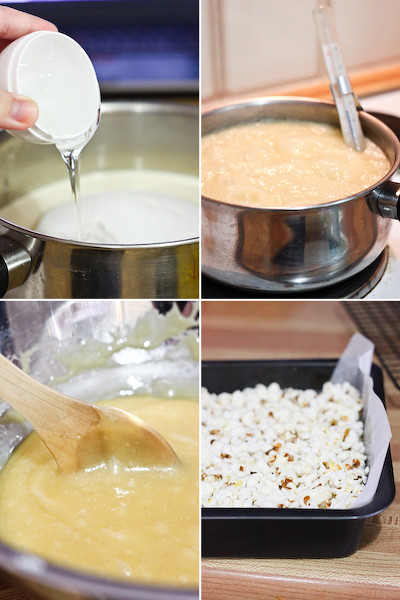
Grease an 20cm square baking pan; line with parchment paper, allowing a 3cm overhang. Grease parchment paper, and set aside. Put butter into a large bowl, and set over a wire rack; set aside. Gently heat cream in a large saucepan with 3/4 of the popped popcorn (set some aside to top off the fudge). Simmer for about 10 mins but do not allow the mixture to come to the boil. Strain mixture. Put popcorn cream, sugar, glucose, vanilla and salt into a medium heavy saucepan.

Cook over medium-low heat, stirring constantly, until sugar has dissolved, about 10 minutes. Raise heat to medium. Bring mixture to a boil, washing down sides of pan with a wet pastry brush to prevent sugar crystals from forming. Attach a sugar thermometer to pan; continue to cook, without stirring, until mixture registers 238 degrees F(115 degrees C, soft-ball stage), 10 to 15 mins.

Immediately pour mixture into bowl with butter (do not scrape out the bottom of the pan). Attach thermometer to bowl. Let mixture cool, undisturbed, until it registers 110 degrees F (43 degrees C), about 1 1/2 hours.
popcorn_fudge-12
Remove thermometer. Transfer bowl to a work surface. Using a wooden spoon, begin to gently stir mixture.Continue to stir, gradually increasing speed until mixture thickens, lightens in color, and loses its sheen, 4 to 5 minutes.

Pour into prepared pan. Using a small offset spatula, quickly spread fudge to sides of pan, and smooth top. Sprinkle an even layer of (lightly salted) popcorn over the top of the fudge. Let fudge cool in pan on a wire rack, about 1 hour. Cover with plastic, and refrigerate untilcompletely set, about 8 hours. Run a sharp knife around nonparchment sides to loosen; lift fudge out. Cut into small square pieces (it's rich so the smaller, the better).
popcorn_fudge-13
Happy Birthday A! Love you long time.
Print Friendly and PDF

Tuesday, March 22, 2011

Spiced Apple Cupcakes with Maple Buttercream

spiced_apple_maple_cupcakes-2
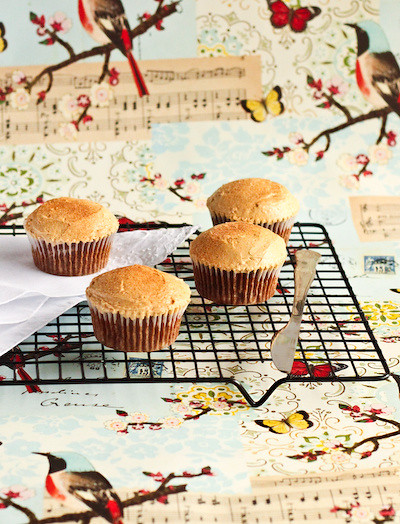
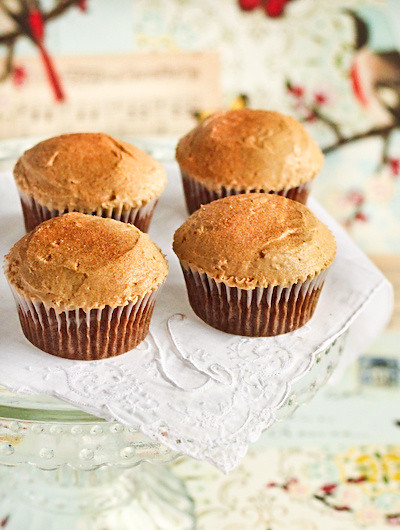
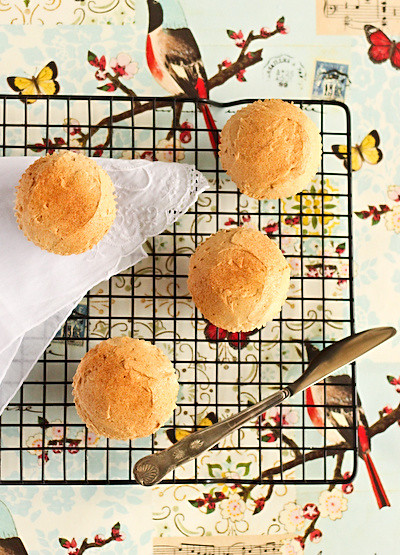
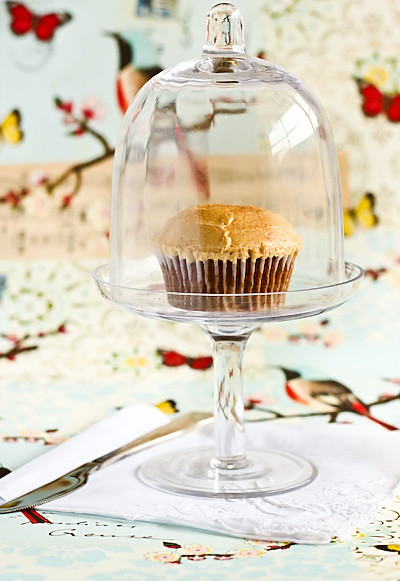
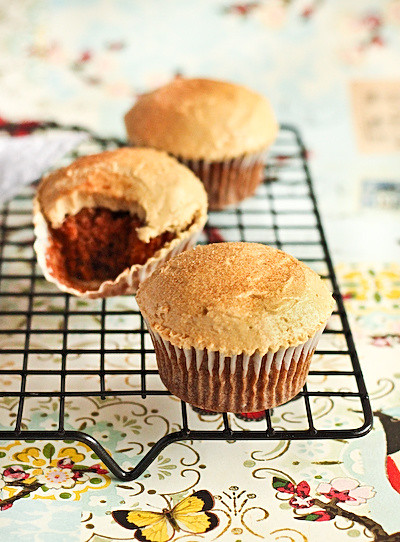
I know I said the blog would be quiet this month, but I was suffering serious baking withdrawals last night and I had to whip something up. It just wasn't right to only have TWO measly blog posts for the entire month! I love blogging. So after a bit of rummaging around the kitchen, I managed to scrounge up enough ingredients to make these simple cupcakes. They certainly won't win any awards for being the prettiest thing you'll ever bake, but they sure are derrricious!!
spiced_apple_maple_cupcakes-3
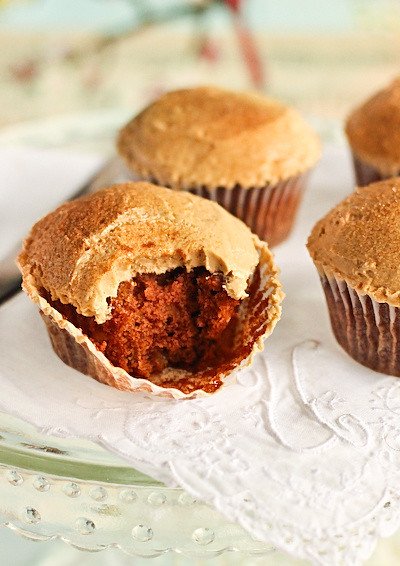
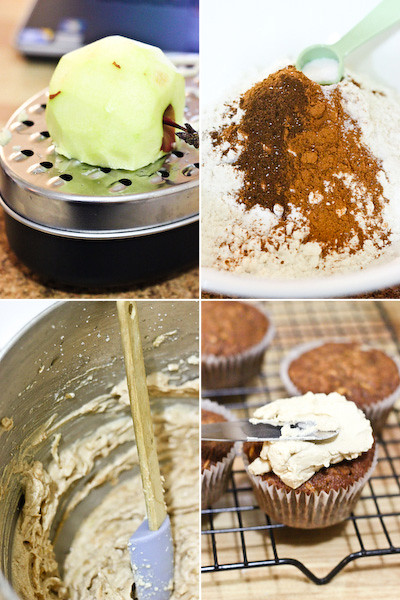
The cakes are full of apples, cinnamon and a little bit too much all spice (I adjusted the amount for the recipe below). I love how the spices gave the cake such a rich brown colour. The maple syrup buttercream is based on the one I have been using wayyy too often recently. I've only started making this buttercream since I got my Kitchenaid, Lady Mix-a-Lot, so I completely understand if it seems like too much effort for a cupcake icing and you just want to do a simple one with butter, icing sugar and maple syrup. I won't judge.
spiced_apple_maple_cupcakes-13
This cupcake isn't as sweet as you would expect. The maple syrup is the only thing that really brings a lot of sweetness, as the brown sugar seemed to subdue sweetness of the buttercream. If you want you can put a whole cup of sugar in the cake batter instead of just 3/4 cups. But I quite like the lightness of these cakes, it lets the flavour of the maple syrup sing and the aftertaste of all the spices linger, so you're sitting there in a happy haze of cinnamon. Which seems like a very appropriate state to be in as Autumn approaches in the southern hemisphere.
spiced_apple_maple_cupcakes-4
When I woke up this morning to take photos, I saw how dark it was and I cried. Okay not really, but I wanted to. Then I fumbled around the house trying to find the light switch and tripped and fell into a big pile of glass bottles waiting to be recycled. I don't seem to be improving my coordination, but at least I didn't slice anything open this time. And then I realised I would have to take my photos at ISO1600 and I wanted to cry again. And now (4 hours later) it's sunny outside. Where was the light this morning?? Damn you Sydney!!!
spiced_apple_maple_cupcakes-5
Spiced Apple Cupcakes with Maple Syrup Buttercream
(makes 12 cupcakes, adapted from this recipe)
2-3 medium apples, peeled then coarsely grated (about 2 cups), I used Fuji but I'd recommend a baking apple like Granny Smiths
3/4 cup caster sugar
60g unsalted butter, softened
1 cup plain flour
1/2 tsp salt
1 tsp bicarb soda
1 1/2 tsp ground cinnamon
1/8 tsp all spice
1 tsp pure vanilla essence
1 egg

For the buttercream:
1/2 cup packed brown sugar
3 egg whites
150g unsalted butter, softened
4 tbsp maple syrup
Optional: Cinnamon sugar, to dust
(If you're new to making Swiss meringue buttercream, these wonderful tutorials from two of my favourite bloggers will help)

Preheat oven to 180 degrees C (350 degrees F) and line a cupcake tin with papers. Mix together flour, bicarb, salt, cinnamon and all spice in a bowl and set aside. Using an electric mixer on high speed, beat butter and sugar together until pale and fluffy in a large mixing bowl, about 5 minutes. Continue beating on high speed and add vanilla and the egg, beating until combined. Beat in grated apple, don't freak out at this point if the mixture looks slight weird and curdled. With your mixer on low speed, gradually add flour mixture until just combined. Spoon mixture into lined tin, filling papers 3/4 full. Bake in the oven for 18-20 mins, or until cupcakes are cooked through (test with a skewer) and brown on top. Remove from the oven and cool in tin for 5 minutes, then remove from tin and cool completely on a wire rack.
spiced_apple_cupcakes
Prepare the buttercream, place egg whites and sugar in a medium heatproof bowl and whisk together. Place over a small saucepan of simmering water, attach a sugar thermometer and continue to whisk until the mixture reaches 160 degrees F (70 degrees C). Remove from heat and transfer to a large mixing bowl and whisk with an electric mixer on high until cooled and thick, about 3 minutes. Continue whisking on high, adding a tablespoon of butter at a time until it is combined. Add maple syrup and whisk until combined. If the mixture is runny at this point, chill for about 5 minutes and then beat until stiff. (The mixture may look split after taking it out of the fridge, but keep whisking and it should come together) Spread or pipe over cooled cupcakes and if you wish, sprinkle some cinnamon sugar over the top of the buttercream. Can be stored in an airtight container for about 2 days.
spiced_apple_maple_cupcakes-7
Print Friendly and PDF

Monday, March 14, 2011

S'more Chocolate Pots

smores_choc_cups-2_filtered
I have a confession to make; I'm a little obsessed with s'mores. You should count yourself lucky that I've managed to hold out for over a year since my S'mores Cheesecake. There have been so many times when I've been brainstorming dessert ideas and have wanted to s'more it up a little. There's something about the combination of textures and varying levels of sweetness when you put melted chocolate, biscuit and toasted marshmallow together. Or maybe it's just because my inner pyromaniac wants me to get the blowtorch out more often ;)
smores_choc_cups_filtered
If I was being really honest, allowing myself to handle a dangerous piece of equipment like a blowtorch is a really bad idea. I am one of the most uncoordinated people I know. When I was younger I would fall out of bed all the time, walk into corners, open doors onto my head, fall up stairs, trip on smooth surfaces, and manage to cut myself on any sharp pointy thing available. The first time I visited A's house, I took 2 steps into his garden and tripped down the steps and scraped my knee. When I was holidaying in Thailand we were wading in a shallow bay and I managed to find the ONLY rock in the entire area covered in sharp oyster shells and step backwards onto it without looking. It has gotten better over time, or at least I thought it had until last week. Apparently using a blunt knife to get an avocado seed out when you're half asleep is a very bad idea. Knives tend to slip and go all the way through fingers. Yes, all the way through. Ow.
smores_choc_cups-3_filtered
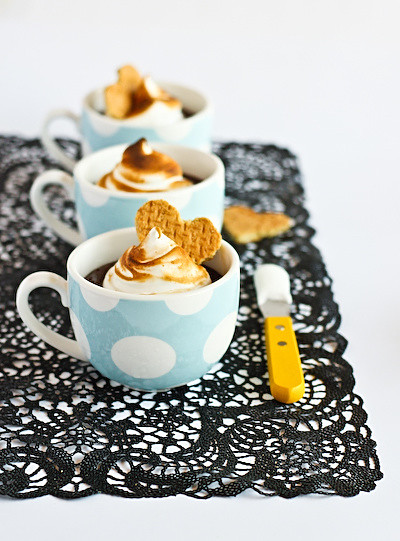
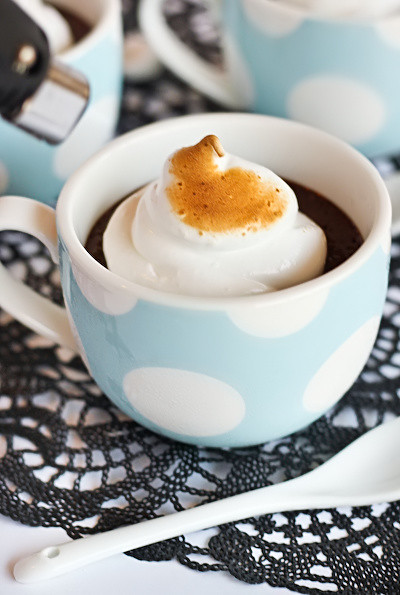
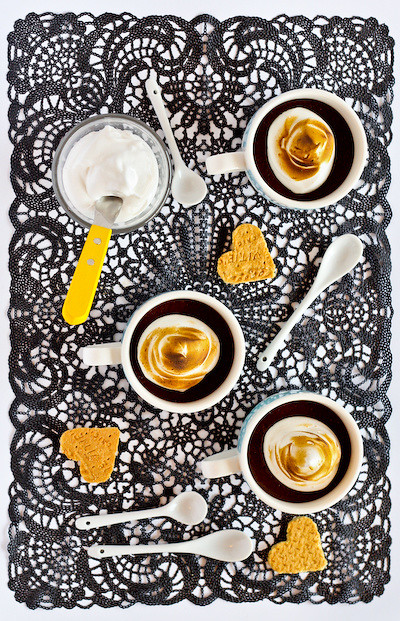
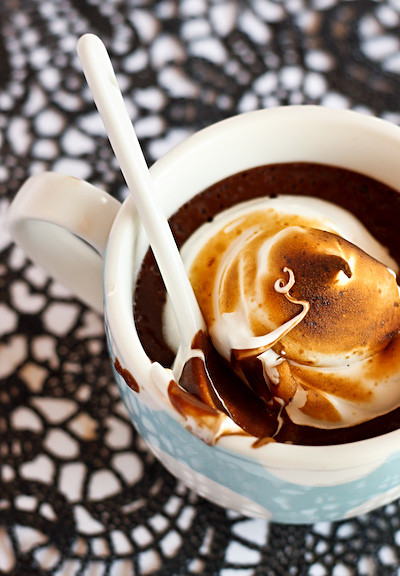
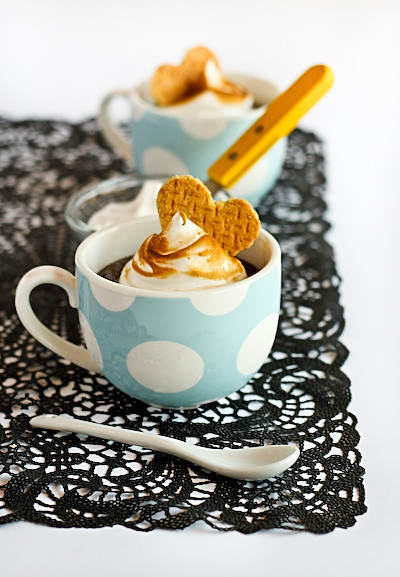
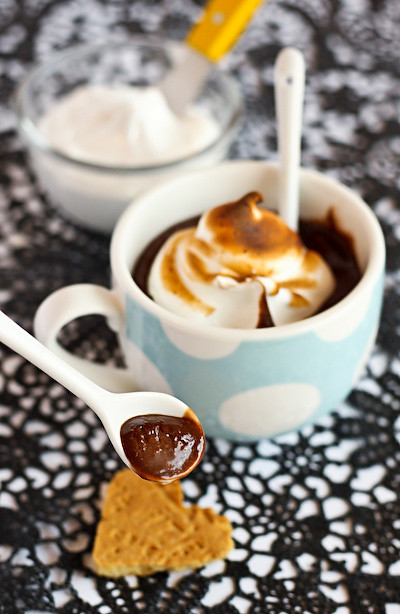
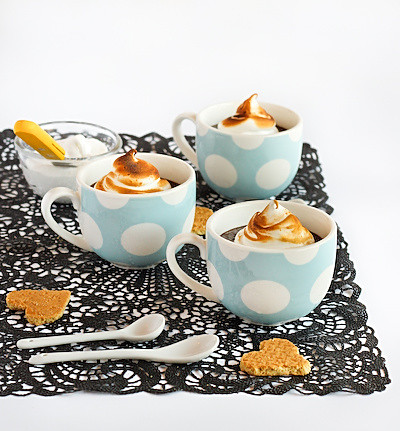
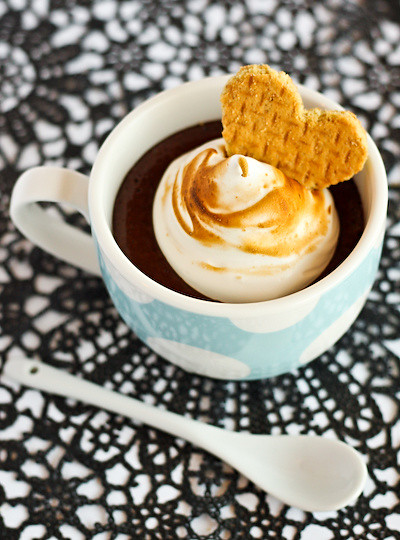
The only thing that really has bugged me about my recent bout of uncoordination is that it's stopped me from baking, since getting flour all around the cut seemed like a bad idea. But A was a smart cookie and bought me some gloves so that I could whip up this dessert that I've been thinking about all week. I finally gave in to my cravings and came up with these S'more Chocolate Pots. Rich, creamy dark chocolate pot de cremes minus the booze to make them kid-friendly, topped with a cloud of homemade marshmallow fluff which was torched to give it a lovely toasty outside. And some biscuits for dipping into it of course!
smores_choc_cups-5_filtered
Originally I had planned to make my own Graham crackers, but I decided to keep things simple and bought some digestives instead. I hardly ever feel like making desserts that take more than one day of preparation. But imagine how cute your own homemade Graham cracker spoons/soldiers would be with this! This dessert isn't the same without the biscuit part, it helps to mellow the intensity of the sweetness. Make sure you have lots of extra biscuits handy to serve with these!
smores_choc_cups-8_filtered
To be honest the tea cups I used in the photos were way too big for such a rich, decadent dessert, and I was left with a lot of leftover marshmallow icing, which I plan to spoon over these cups once I make it through the top layer. If I was to do this for a party, I would probably do tiny individual portions of chocolate in shot glasses, with the homemade graham cracker spoons. Seriously, how freaking adorable would that be? This rich dessert made slightly bitter thanks to the dark chocolate and hint of coffee is the perfect match for the light, sweet marshmallow fluff. And please make the fluff yourself, it tastes so much better than the supermarket stuff.
smores_choc_cups-6_filtered
S'more Chocolate Pots
(adapted from this Gourmet Traveller recipe, and this Martha Stewart recipe, serves 6-10 people depending on the size of your serving cups)
200g dark chocolate (64.5% cocoa solids), melted
300ml pouring cream, whisked to soft peaks
2 tbsp freshly brewed coffee
3 egg yolks
55 gm (1/4 cup)caster sugar

For the marshmallow fluff:
3 egg whites
165g (3/4 cup) sugar
1/4 tsp cream of tartar
1 tsp pure vanilla essence

To serve: Graham crackers/digestive biscuits, or you could try making your own, cut into shapes or crumbled over the top

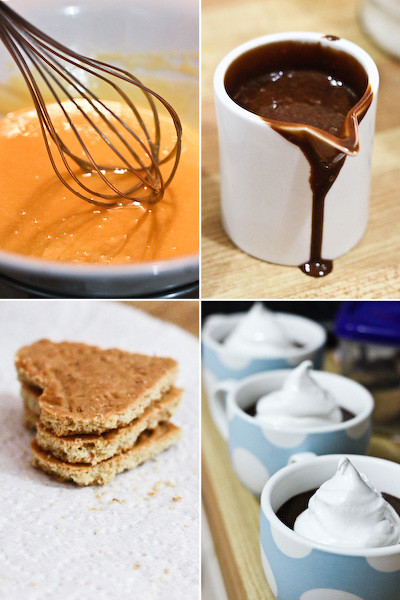
Heat chocolate, cream and coffee in a heatproof bowl placed over gently boiling water, stirring occasionally, until chocolate has melted and mixture is smooth. Whisk egg yolks and sugar in a separate heatproof bowl placed over simmering water for 5 minutes or until thick and pale. Combine chocolate and egg yolk mixture in the bowl of an electric mixer and whisk on high for 5 minutes or until mixture is thick and cool. Pour into serving cups and chill in the fridge for at least two hours or until set.
smores_choc_pots
Place egg whites, sugar, and cream of tartar in a heatproof bowl. Set over a saucepan with simmering water. Whisk constantly until sugar is dissolved and whites are warm to the touch, about 3 to 4 minutes. Remove from heat and whisk with an electric mixer, starting on low speed, gradually increasing to high, until stiff, glossy peaks form, 5 to 7 minutes. Add vanilla, and mix until combined. Spoon/pipe a generous amount over the tops of chocolate pots. Use a blowtorch or the grill of your oven to toast the top of the icing. Serve with biscuits.
smores_choc_cups-7_filtered
I am a little irked with this set of photos, but I'm going to blame the disappearing light which made me rush around and my finger injury making it hard to hold the camera steady rather than my crappy photography skills! P.S. Don't be like me and be so impatient that you can't wait til the chocolate pots are set before sticking your spoon in. Also, just a warning that the blog might be a little bit quiet for the next few weeks as I'll have little time to bake, which fills me with guilt. And I'm feeling super guilty about the fact that I haven't replied everyones comments in FOREVER. But as per usual if anyone has any direct questions I'll do my best to reply them as soon as possible. You guys always cheer me up with your sweet comments!
smores_choc_cups-18_filtered
Print Friendly and PDF

Sunday, March 6, 2011

Pumpkin & Ginger Beer Scones

pumpkin_gingerbeer_scones-3_filtered
I understand that scones are not for everyone. They don't excite people the way that gooey chocolate desserts, cupcakes loaded with a mountain of icing or colourful macarons seem to. I'm sorry to those people, because I had to make scones this weekend. I had a pretty bad week last week and rather than having a major meltdown, making scones seemed like a better option. Plus I've been craving scones like crazy, ever since I baked some CWA scones a few weekends ago for an afternoon tea. And honestly, I can't improve on that recipe much so I knew that I had to do something a little different if I wanted to post a new scone recipe.
pumpkin_gingerbeer_scones-2_filtered
The two scone recipes which have been on my to-do list for a long time are lemonade scones and pumpkin scones. I've had many recommendations from readers to replace the milk in the CWA scones with lemon for an even lighter, fluffier scone. But then I thought, who needs lemonade when you can use ginger beer? Lisa did it and they looked awesome. But as I wandered through the supermarket I found myself hovering around the pumpkins. My Mum used to make the most amazing pumpkin scones, so good you could eat them on their own. Unfortunately for all of us, she lost the scrap of paper that the recipe was scrawled on, along with a whole bunch of other recipes :(
pumpkin_gingerbeer_scones_filtered
It didn't take much searching to come across this pumpkin scone recipe on Gourmet Traveller. It looked fantastic, similar to the ones my Mum used to make. But ever since making the CWA scones, I realised how much I love the fluffy texture of cream-based scone recipes. So rather than using the GT recipe, I thought I'd try to come up with my own cream-based version. And since I had already bought the ginger beer, I figured I'd try and combine that in, along with some ginger and nutmeg. Pumpkin and spices always work great together in my opinion.
pumpkin_gingerbeer_scones-4_filtered
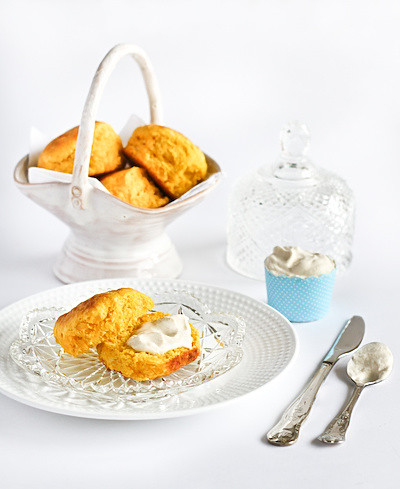
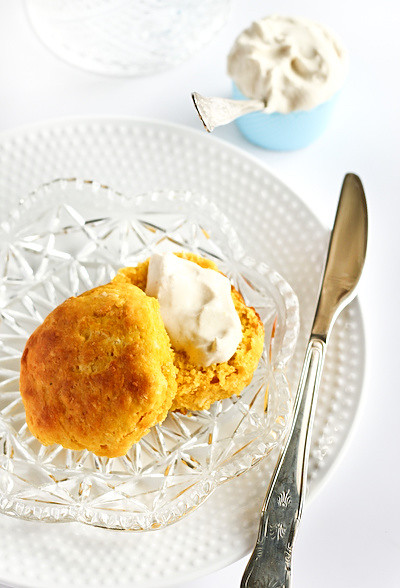
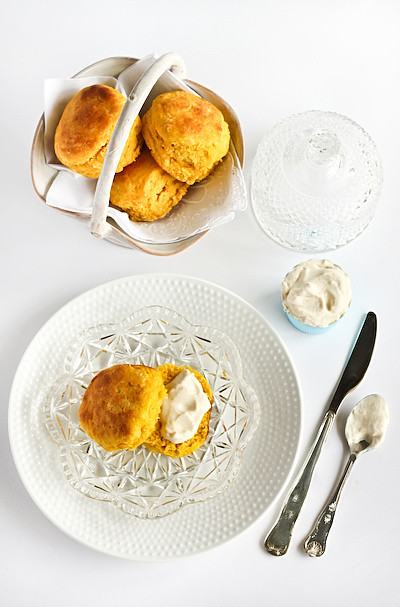
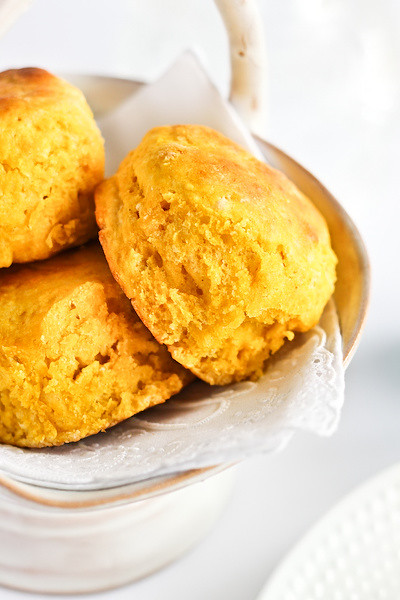
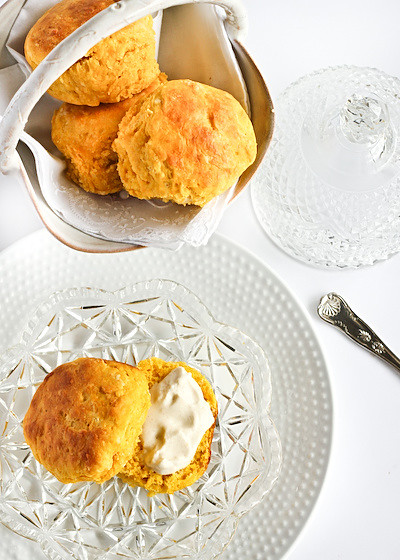
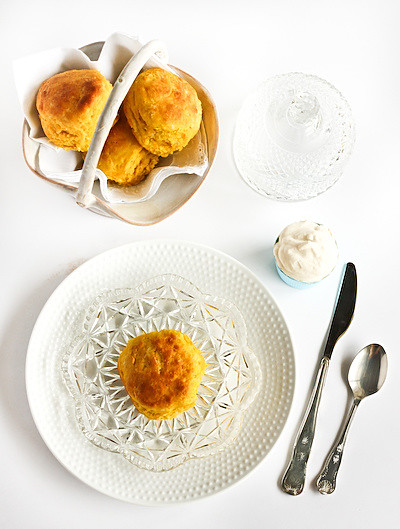
It didn't go so well at first, since I was experimenting and just randomly throwing ingredients into a mixing bowl. My first batch had wayyyy too much liquid and were so sloppy that they didn't even form a proper dough. But I think I got the proportions right on the second go, gradually adding the ginger beer until the dough came together without being sticky. And they rose beautifully in the oven, with a super light, airy texture and great colour from the pumpkin. The ginger beer and spices only add a hint of flavour and hardly any sweetness, so I still felt comfortable eating these with strawberry jam and whipped cream. Though I couldn't resist adding a bit of cinnamon and icing sugar to the cream when I whipped it, which was AMAZING and reminded me of the pumpkin pancakes with cinnamon butter that I made not too long ago. But not everyone has my insane sweet tooth and these would be just as good with some salted butter. I kinda love this mish-mash of all my favourite scone recipes, but if you prefer the traditonal pumpkin scone then feel free to try the Gourmet Traveller version.
pumpkin_gingerbeer_scones-5_filtered
Pumpkin & Ginger Beer Scones
(loosely based on this Gourmet Traveller recipe, makes 10-12 scones)
2 cups self-raising flour, sifted
1/2 cup icing sugar, sifted
2 tsp ground ginger
A pinch of fresh nutmeg
1/2 cup cream
1/2 cup pumpkin puree (I used 250g of the Kent variety, chopped into cubes and steamed until tender, then mashed and strained)
1/2 cup ginger beer
Milk, for brushing

Optional: 1 cup whipping cream, 1 tsp ground cinnamon & 1/2 cup icing sugar sifted, whipped together to serve

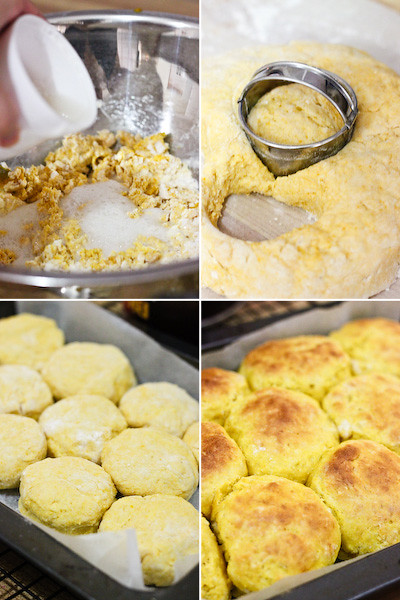
Preheat oven to 220-230 degrees C. Sift flour, icing sugar, nutmeg and ginger together in a large mixing bowl. Form a well in the centre and add cream and pumpkin puree. Using a flat bladed knife, begin to cut wet ingredients into dry ingredients. Gradually begin to add ginger beer until there is enough to form a soft dough. The mixture should hold together but not be sticky. You may not need to use all the ginger beer, I left out about 1 tbsp.
pumpkin_gingerbeer_scones-col
Working quickly and gently, gather dough together on a floured surface. Try to handle the dough as little as possible, using lightly floured hands to stop dough sticking to you, and pat the dough into a rectangle about 2-3cm thick. You can lightly knead the dough with your hands for a smoother appearance but overknead it and your scones will be tough and hard. Cut out rounds using a 5-6cm scone cutter (push the cutter into the dough, don't twist) and place next to each other in a lined/greased heavy based baking dish that has sides (scones baked close together will rise higher and thus be lighter). Brush tops with milk then bake for 12-15 minutes, or until scones are cooked through and golden on the top. Remove from the oven and cool on a wire rack for 5 minutes, then cover with a tea towel (to stop them going hard) until you are ready to serve. Serve warm with butter, or jam & cinnamon whipped cream.
pumpkin_gingerbeer_scones-6_filtered
Print Friendly and PDF