Pages

Tuesday, April 26, 2011

Rainbow Rice Krispies Treats

rainbow_rice_krispie_treats-15
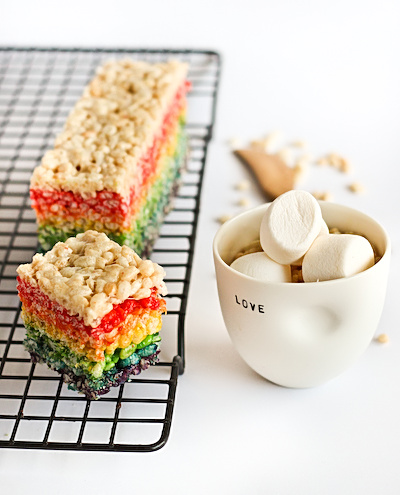
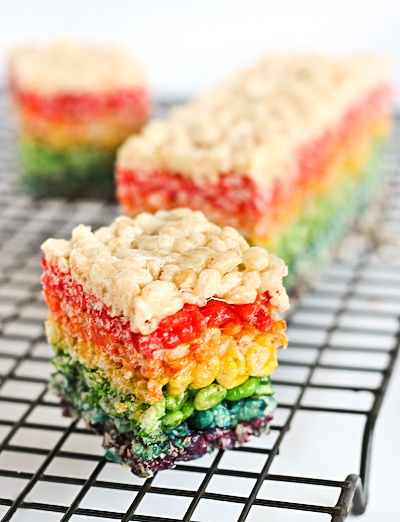
Don't ask me what madness led to this. All I know is, I had a huge bag of marshmallows to use up (kindly donated by Frickin'LaserBeam Man) and an urge to do something with rainbows. Again. Since I've used up my s'mores quota for the moment I felt the need to make some Rice Krispies Treats! (Or Rice Bubble Bars/LCMs for the Aussies. I still don't know what LCMs stands for...) So why not make them all the colours of the rainbow?! And as I was stirring up a pot of bright purple melted marshmallow all I could think was, 'This is so disgusting.' What can I say, I'm in a crazy baking phase.
rainbow_rice_krispie_treats-2
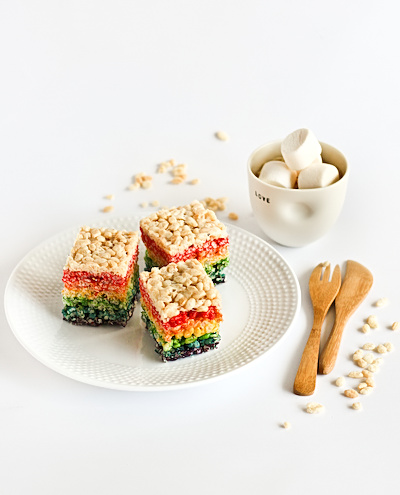
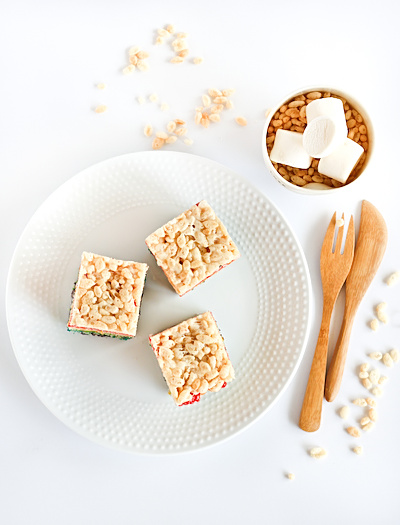
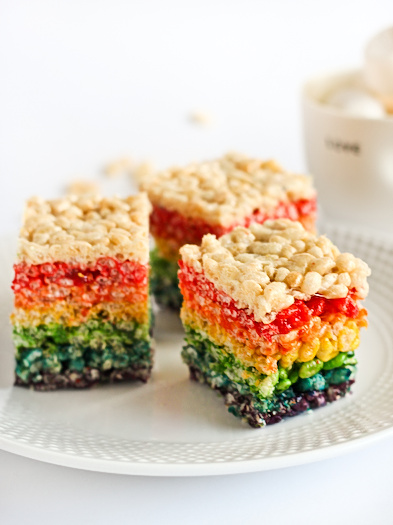
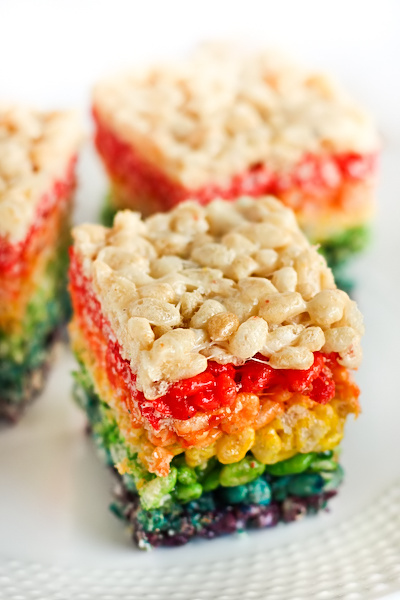
I'd seen other versions of rainbow rice krispies squares, but all the different colours were usually mixed together. I wanted to do something different, by creating super thin layers of each colour stuck on top of each other. And the best part, hiding it under a layer of regular old plain rice krispies so if you looked from the top (see above photo), you'd be none the wiser. Then you cut into it and...
rainbow_rice_krispie_treats-4
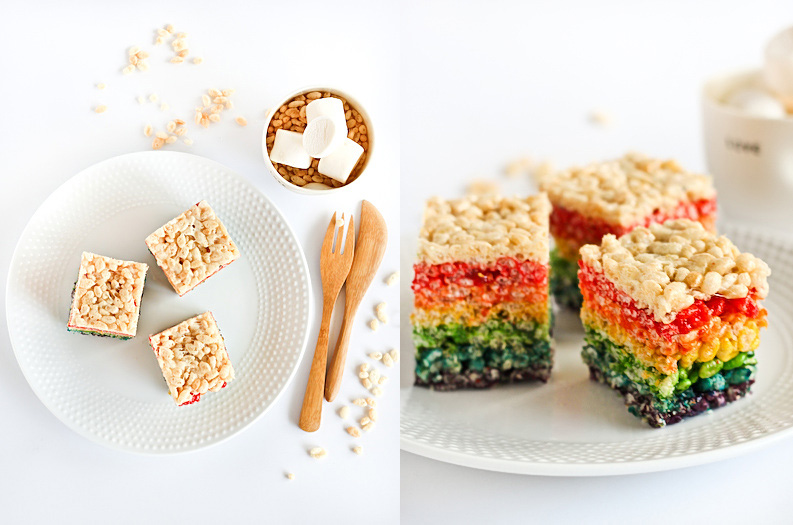
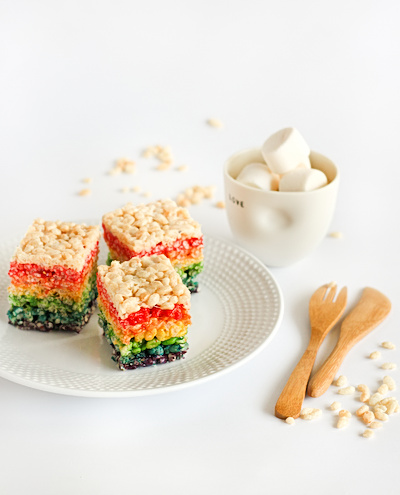
Tada! So bright! So vivid. (Yes I still love the Double Rainbow meme) Isn't it preeeettyy??? It looks even cooler when you put those two pictures right next to each other, look:
rainbow_rice_krispie_treats-5
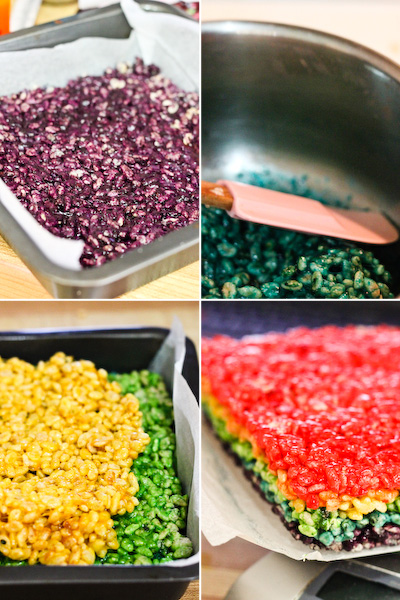
And before I get any remarks about the evils of food colouring, use natural food colouring or don't make it at all. This was for fun! I was nervous to see if this idea was actually possible, it all sounded so fiddly and messy having to do each layer separately and spreading it out in a thin layer. But after a couple of layers I really got into the swing of things, the trick is to work really quickly while pressing it into the pan, using a piece of baking paper to help flatten out each layer. The most annoying part was having to wash out my saucepan after each layer. Use a non-stick pan if you can, the caked-on bits were a total pain to scrub off.
rainbow_rice_krispie_treats-3
This doesn't really count as baking since it's just heating and mixing up ingredients in a saucepan but for something so simple it's a ridiculously satisfying snack. I know for sure that kids would love it because it really brought out the silly kid inside me. Plus the fact that I left the butter sitting on the heat too long for a few of the layers it ended up being browned butter rice krispies, which is pretty much the best mistake I've ever made. I mean, look at these ones on Smitten Kitchen, how amazing do they look??
rainbow_rice_krispie_treats-7
There was some debate about if I should top these squares with a plain white layer of Rice Krispies or not. It might be unnecessary but in the end I think it was the right choice to have the white layer, to cheekily hide all the rainbow colours underneath (it made me think the most fantastic cake in existence, Whisk Kid's rainbow cake). Plus the having the red layer as the top layer looked a bit creepy.
rainbow_rice_krispie_treats
Rainbow Rice Krispies Treats
(Adapted from the Original Treats recipe, makes 25 squares)
1 x 400g pack of marshmallows (I used white & pink ones), about 7 cups
100g butter (approx 7 tbsp)
7 cups rice krispies/rice bubble cereal (approx 210g)
Food colouring (I used mostly liquid, though I did have some Wilton paste as well, use whatever you prefer)

Grease and line a 20cm square cake tin with baking paper. Place about 1 tbsp (14 g) of butter and one cup of marshmallows (approx 60g) in a medium saucepan and place on low heat, stirring until completely melted. Add purple food colouring and 1 cup of rice krispies (approx 30g), take off the heat and stir until well coated. Using buttered spatula or a piece of wax paper, evenly press mixture into the bottom of the lined tin, trying to make it as even and well-packed as possible. Repeat with the same amount for each other colour; blue, green, yellow, orange and red, pressing each layer tightly over the top of the previous one in the pan. Optional: top with another layer of with no colour added, making it 7 layers in total.
rainbow_rice_krispie_treats-16
Set aside to cool and set. Lift out of the cake tin and cut into 25 square pieces using a long sharp knife. Best eaten on the same day but can be stored in an airtight container lined with baking paper in the fridge. Can also be frozen for up to 6 weeks.
rainbow_rice_krispie_treats-6
So if you feel like a colourful, super easy treat, or you need something cute for a party - make these! It's worth the effort.
rainbow_rice_krispie_treats-8

Thursday, April 21, 2011

Tim Tam Cake

Tim Tam Cake
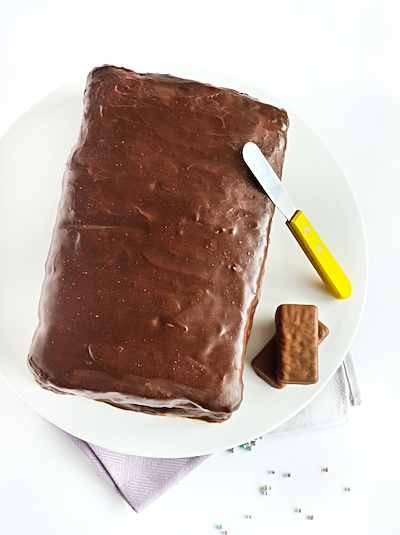
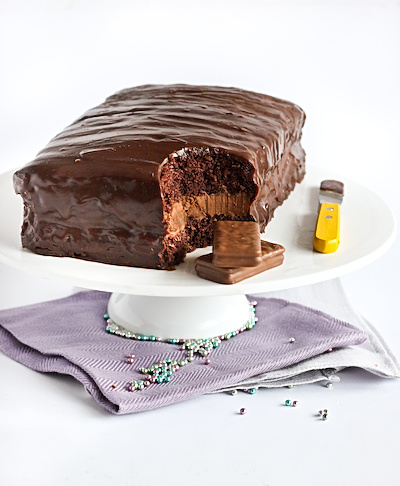
Hiya! After all the pretty Easter treats I shared with you last week, I'm now giving you a lumpy brown cake. But this is no ordinary chocolate cake. Does it look familiar to you? It is my homage to my favourite Arnott's biscuit, the ever-awesome Tim Tam. If you've never had a Tim Tam from Australia, you're missing out. If you don't like Tim Tams, I'm sorry but we can't be friends. These biscuits are one of the few chocolate treats that I am powerless to resist, I can eat an entire packet of Tim Tams in one sitting. (Which is why I hardly ever buy them anymore. I ate half a packet while I was making this cake!)
Tim Tam Cake
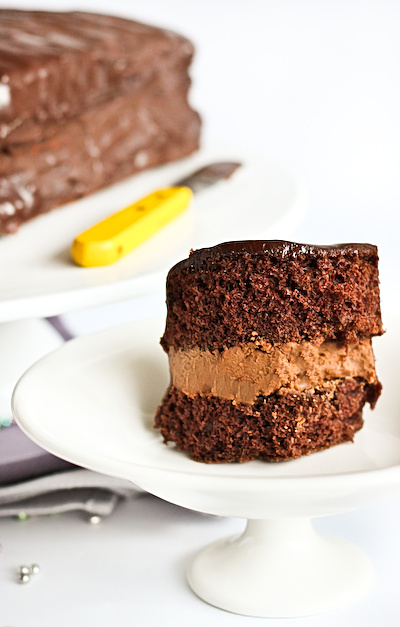
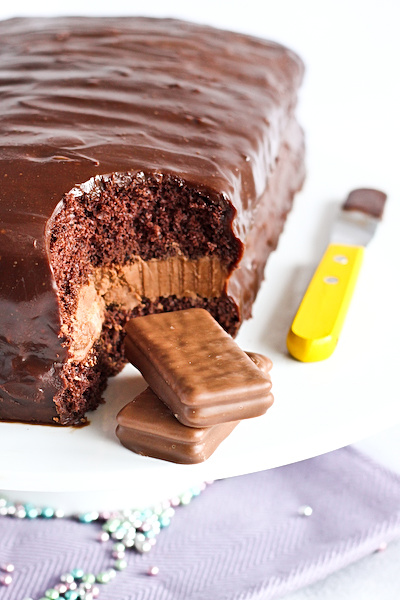
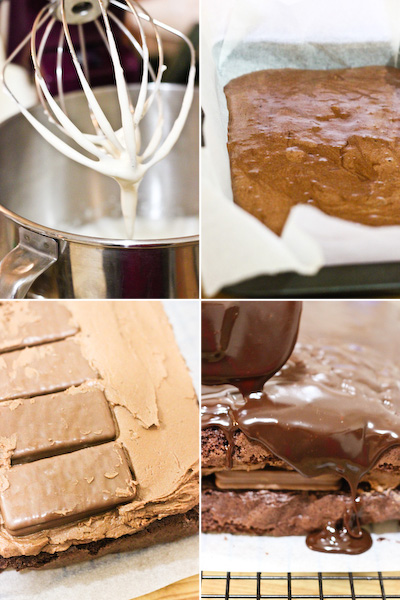
So as I was saying, this is no ordinary chocolate cake. It is a Tim Tam cake. It looks like a giant Tim Tam AND it has a pack of Tim Tams hidden inside it. Insanity. Also delicious. And easy!! Ever since I made my Iced Vovo Cake for Australia Day, I've had demands for all kinds of other Arnott's inspired cakes. I decided to save my Tim Tam cake attempt for Tomred's birthday (Happy Birthday for Saturday Tomred!), and I am quite surprised by the results. The idea was simple enough, chocolate cake with a butter icing filling and chocolate ganache drizzled on top, but I was super worried the cake would just be far too rich and heavy. So I decided to use a very light and fluffy chocolate sponge recipe for the cake, which made it more like the light chocolate biscuits you find in a Tim Tam. It worked perfectly, and made the cake soooo much lighter and less rich than my usual chocolate cake recipe. The thin layer of gooey chocolate ganache, and the slightly denser chocolate icing in the middle give this cake a whole range of different textures. It really surprised me how much easier this cake was to eat just because of the lighter sponge.
Tim Tam Cake
Now I realise my outer layer of chocolate is a bit darker than an original Tim Tam, so it looks more like a dark Tim Tam. I couldn't help it, I didn't buy enough milk chocolate! But the ganache worked great, as it started to thicken up I spread it all over the top of the cake and used a spatula to create the little ripples in the surface that you always see on a Tim Tam. Definitely not going to win any awards for being pretty or delicate, but it will make any Tim Tam lover (or chocolate lover) extremely happy. I didn't realise the biscuits in Tim Tam are actually malted, or I would have added some Milo or malted milk powder to the cake mixture too! Feel free to do it. Anywhoo I'm so excited to be having this super long weekend off to do absolutely nothing as I am completely sleep deprived, I hope everyone has a happy and safe Easter and Anzac Day. Oh and it seemed like good timing to be to making this cake for Anzac Day too! I dare someone to make this and do a giant Tim Tam slam.
Tim Tam Cake
Tim Tam Cake
(Chocolate sponge recipe from Gourmet Traveller, serves 10)
NOTE: To beginner bakers, if you are unfamiliar with sponge recipes you might want to read up on some tips on how to make a successful sponge cake before starting. Gourmet Traveller has a great article. If you prefer a higher cake to icing ratio, double the quantities below for the cake batter. You can also substitute the cake recipe for any light chocolate cake that you are more comfortable making.
4 large eggs
110g (½ cup) caster (superfine) sugar
65g cornflour (cornstarch)
35g (¼ cup) Good quality cocoa powder
1 tbsp plain flour
1 tsp cream of tartar
½ tsp bicarbonate of soda
50g unsalted butter, melted and cooled

For the cake filling:
100g butter, removed from the fridge 30 minutes before starting
150g chocolate, melted (I used semi-sweet, you can also use milk)
3 cups icing sugar, sifted
1 tbsp milk
Optional: 1 packet of Tim Tam biscuits, crushed
(If you wanted to mix things up a bit so it's not just all chocolate, you could mix a cup of raspberries into this icing, or maybe use mint chocolate instead?)

For the chocolate ganache topping:
300ml pouring cream (min. 35% milk fat pure cream)
400g milk chocolate (I only had 200g milk so I had to use some dark, which is why my ganache is a bit darker than I would prefer for a tim tam)

Line two 17x27cm rectangular slice/brownie tins, or one larger sheet cake tin with non-stick baking paper. (I actually only had one small tin, so I split all the ingredients in half and baked two separate cakes one after the other and it worked great!) Preheat oven to 180°C (350°F). Whisk eggs and sugar in an electric mixer until thick and pale (5-6 minutes, go nuts and don't underwhip). Sift over cornflour, cocoa, flour, cream of tartar and bicarb soda, fold in with spatula. Fold in butter, spoon into prepared tin. Bake in centre of oven until the centre of the cake springs back when lightly pressed (10-12 minutes). Turn onto baking paper covered wire rack and cool completely. (If you baked one large cake, cut into two equal sized rectangular cakes)
Tim Tam Cake
To prepare chocolate icing filling, beat butter light and fluffy and then gradually add sifted icing sugar and beat until smooth and pale. Add melted chocolate and milk and beat until smooth. (You can adjust the amount of milk you add to get the icing to the texture you want) Spread icing over the top of one of the cakes (Note: you don't need to use all of it, I made it about 1-2cm thick), and leave space to (if you want) place tim tams along the centre of the icing. (I saw a great tip from someone who made it, that it's even better if you crush up the tim tams before you put them in the middle to make it a lot easier to cut the cake later.) Sandwich other cake on top of the icing and biscuits. To prepare the chocolate ganache topping, break up chocolate into small pieces and place in a large mixing bowl. Slowly heat cream in a small saucepan. Just as it starts to come to the boil, remove from the heat and cool for a couple minutes. Pour hot cream over chocolate and set aside 10 minutes to allow chocolate to melt. Mix cream and chocolate together until smooth using a whisk, then cool (I placed mine in the fridge for about 15 mins) until it reaches room temperature and thickens. Pour over the top of the cake, using a spatula to ensure the ganache covers all the top and sides of the cake (the excess will drip off everywhere so make sure you lay down some baking paper to catch the drips). Chill in the fridge until the ganache sets, then peel off the bottom baking paper and serve cake at room temperature. P.S. I used a big cookie cutter to cut out a 'bite' of the cake, which I really liked the look of. The cake looks less Tim Tam-like when it's whole!

Tim Tam Cake
Edit: You can also see a version of this idea in Australian Good Taste Magazine, it has an easier chocolate cake recipe and they've called it a 'Timtastic Cake'. What a co-inky-dink. (And also on Taste.com.au as a Tim Tam Cake)

Sunday, April 17, 2011

Hot Cross Bun Ice Cream Sandwiches

hcb_icecream_sandwiches-14
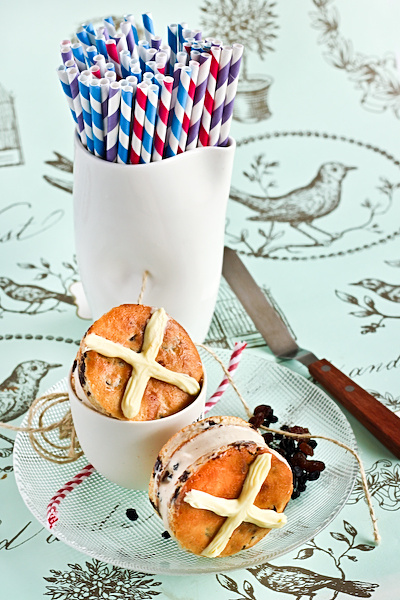
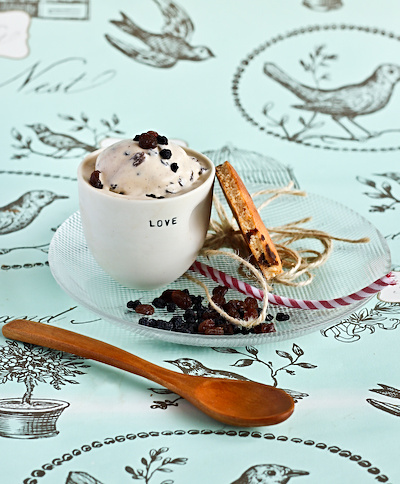
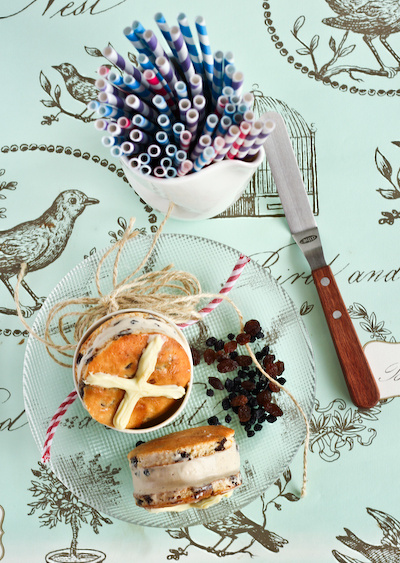
I have a big thing for ice cream sandwiches. They always remind me of the 5 years I spent growing up in Qatar; back then there wasn't a MacDonald's to be found in Doha but they eventually opened up a Dairy Queen. For me that meant kiddy meals with little pots of pink silly putty as the prize and yummy, sugar-coma inducing ice cream sandwiches. Ahh the memories. But as much as I love them there's a very good reason why I've never made them at home before. It's a long, slow process with many steps and lots of waiting. I just don't have the patience for that. (And of course disaster struck during the ice cream sandwiching process - I accidently left the freezer door open for a few hours which is why all my photos are full of ugly melty ice cream *sad face*) But I've been planning this one a while, nearly as long as my Easter Bunny Macarons. I really, really wanted to make some ice cream sandwiches that tasted just like hot cross buns.
hcb_icecream_sandwiches-3
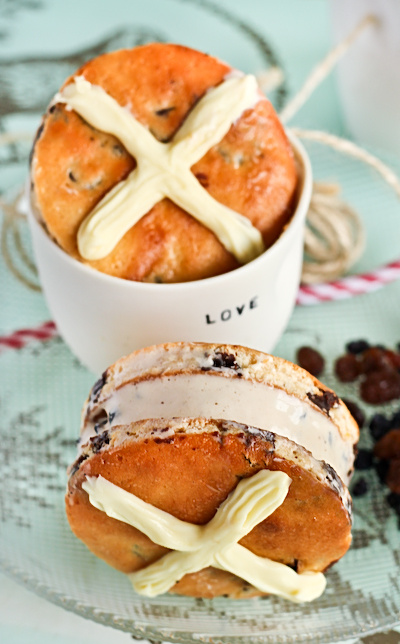
I was psyching myself up to start making them yesterday when I decided to do a quick Google search to see if it had already been done (I usually do this for all my ideas). My heart sank a little when the search reminded me that Y had made these amazing hot cross bun cookie sandwiches a couple years back and I knew I could never reach that level of perfection. But I decided to press on with my attempt, since I had a lot of egg yolks to get rid of. My interpretation is slightly different to Y's, with the cookie adding to the flavours that made this ice cream sandwich very much like a hot cross bun in taste. I decided to use my Orange Buttermilk Choc Chip Cookies as they were lovely and light so they wouldn' be too hard after freezing. I made them slightly bigger than the original recipe and added some cinnamon, using a cookie cutter right after baking to give them nice, clean edges. The orange zest in the cookies seemed like a great substitute for the candied orange peel you find in some hot cross buns. (I've never been a fan of the candied orange peel in the buns) Also the chocolate chips reminded me of the choc chip hot cross buns that I happen to love.
hcb_icecream_sandwiches-5
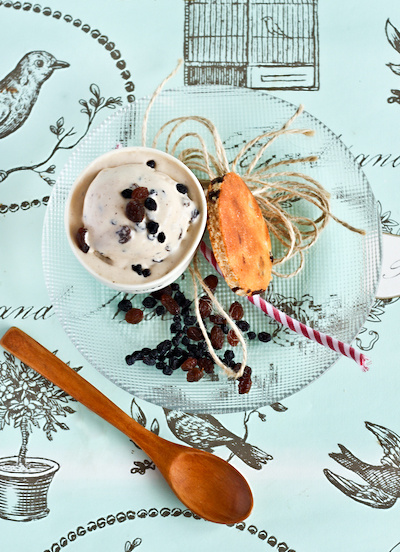
Lisa, my trusted advisor for all things ice cream and doughnut related, suggested that I adapt her lovely Christmas pudding ice cream, replacing the fruit and nuts with sultanas and currants. It worked perfectly, such a beautifully creamy and smooth ice cream that really tasted just like a hot cross bun, especially thanks to the sultanas and currants. I would be quite happy to eat the ice cream on its own to be honest. And before anyone starts complaining about the amount of wastage you get from the leftover scraps after using the cookie cutters to get your pretty round sandwiches, just remember you can re-freeze the leftover ice cream and crush up the cookie bits and have yourself an awesome snack with the leftovers. It's a great alternative sweet treat for Easter if you feel like doing something besides the usual hot cross buns. Just dont be like me, remember to close the freezer door or your sandwiches will go FLOP :(
hcb_icecream_sandwiches
Hot Cross Bun Ice Cream Sandwiches
(makes 12 ice cream sandwiches, adapted from Lisa's recipe)
3 eggs
2 egg yolks
2 tsp vanilla extract
1/2 tsp allspice
1 cup caster sugar
2 cups pouring cream (min. 35% milk fat pure cream)
3/4 cup sultanas
2/3 cup currants

For the cookies:
Ingredients for Orange Choc Chip Buttermilk Cookies
plus
1/2 tsp ground cinnamon
100g melted white chocolate

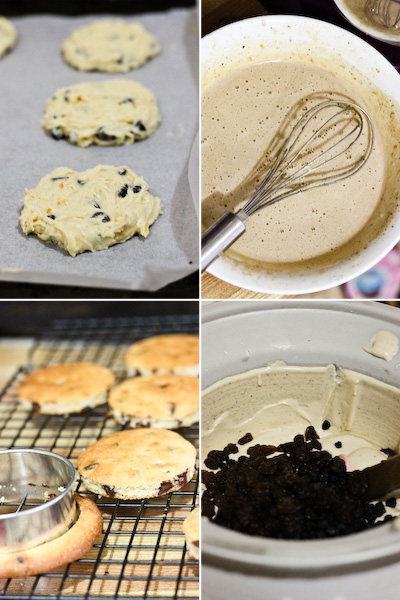
Place the eggs, extra yolks, vanilla, spice and sugar in a heatproof bowl. Place over a saucepan of simmering water and whisk until thick and pale. Remove from the heat and beat for a further 5 minutes or until cool. Whisk the cream until stiff peaks form. Gently fold through the egg mixture until just combined. Refrigerate until cold, preferably overnight. Freeze in an ice cream maker, according to manufacturer's instructions. Fold through sultana and currants, pour into a baking paper lined casserole dish or large baking sheet with high sides and freeze until hard (at least 6 hours or overnight).
hcb_icecream_sandwiches-13
Prepare the cookie dough as per the recipe, adding the extra cinnamon to the dry ingredients when you whisk them together. Spoon slightly larger portions of dough for each cookie, about 2 tbsp and flatten it out slightly using a spatula, leaving at least an inch of space around each cookie. You should be able to make 24 cookies. Bake, 1 sheet at a time, until cookies are puffed and golden at 180°C (350°F). Remove from the oven, while still hot and soft, place a sheet of baking paper over the top of cookies and use a flat surface (like another baking tray) to gently press the tops of the cookies flatter. (Optional step:) Use a round cookie cutter to cut the edges off of each cookie so they are nice and neat. (I used a 7.5cm cutter) Place on a wire rack to cool completely.

When ready to assemble, use the same sized cookie cutter (or one size smaller) to cut rounds of ice cream out of the tray it was frozen in and sandwich between cookies. You have to this in several rounds to stop the ice cream from melting. Refreeze ice cream sandwiches until hard. Place melted white chocolate in a piping bag with a round tip and pipe white crosses on the tops of each ice cream sandwich. Freeze until set and then serve.
hcb_icecream_sandwiches-4
P.S. Special thanks to Justine who was sweet enough to lend me some of her ceramics to use for my posts!

Wednesday, April 13, 2011

Easter Bunny Macarons

bunny_macarons=
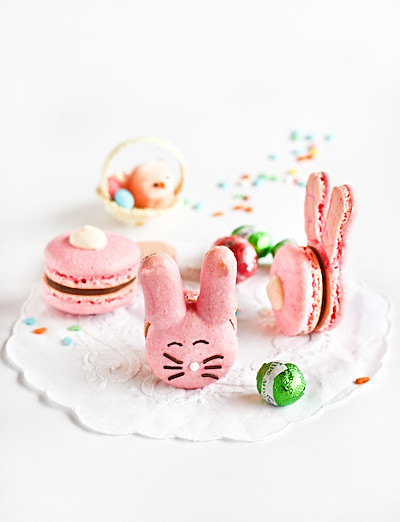
EASTER BUNNY MACARONS. OH EM GEE.

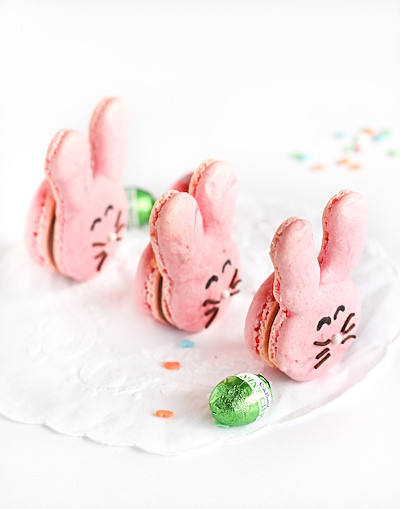
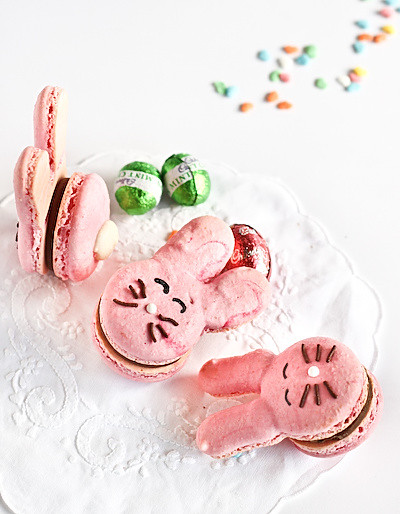
Okay *deep breath* trying to stay calm here. The extreme cuteness of this post may send me into a large bout of squeeing at any second. I finally got off my arse and started my Easter baking and this idea has been growing in my baking brain for a long time now. Slowly I've been adding and subtracting little details. These Bunny Macarons are the companion to my Piggy Macarons which I love oh so much. AREN'T THEY FREAKIN ADORABLE?! Sorry, I'm getting very carried away. But really, I don't think I've ever baked anything this cute before.
bunny_macarons-7
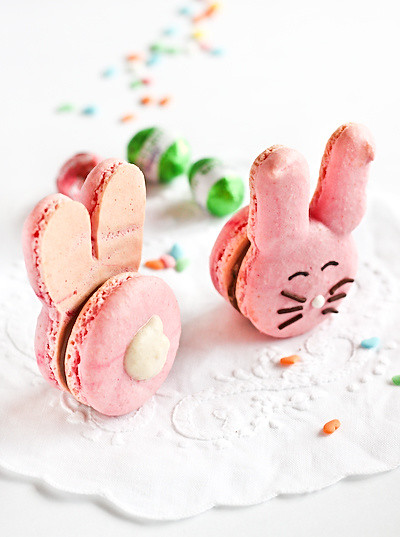
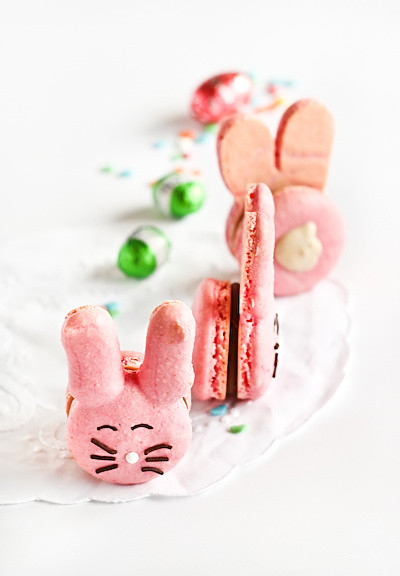
So what comes to mind when I think of Easter baking? Bunnies. Chocolate. Marshmallows. And hot cross buns, but let's save that for another post. So after successfully making piggies, I knew the only logical next step was Easter Bunnies. With fat white tails piped onto their cute macaron bums. And chocolate marshmallow icing. Look at that cute little bunny butt!
bunny_macarons-5
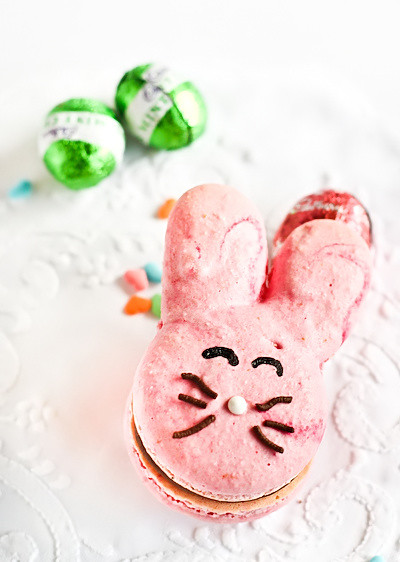
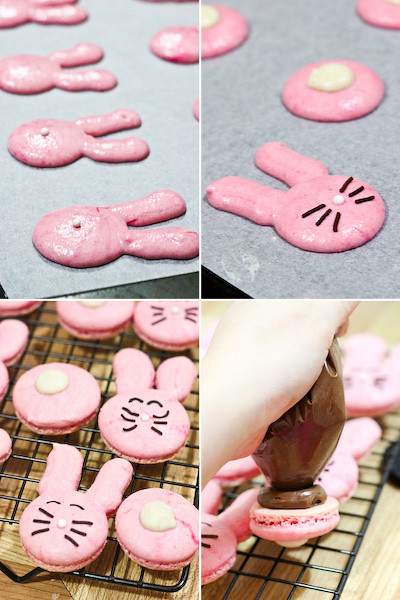
The decorating turned out to be pretty easy. I piped some regular small rounds and then piped two longer skinnier lines attached to them for the ears. White sugar balls for the nose (about the size of regular size cachous). Chocolate sprinkles for the whiskers, painstakingly lined up using tweezers. I set aside some plain white macaron mixture to pipe on for the tails. The eyes were drawn on after baking using black food colouring, the same as I did for my piggies.
bunny_macarons-10
I know the method below looks a bit lengthy but I was just trying to include as much detail as possible to avoid too much confusion. If you've made macarons before then these are not much harder. And so worth the effort! (If it is your first time...I would recommend trying some plain macs and reading up the advice on macarons from other blogs) I think I would make these even if it wasn't Easter. They are almost too cute though, I can't bring myself to eat them so I've given all of them away. I did eat plenty of the leftover chocolate marshmallow icing though, it was so gooey and moreish. It tasted like a Mars bar!
bunny_macarons-6
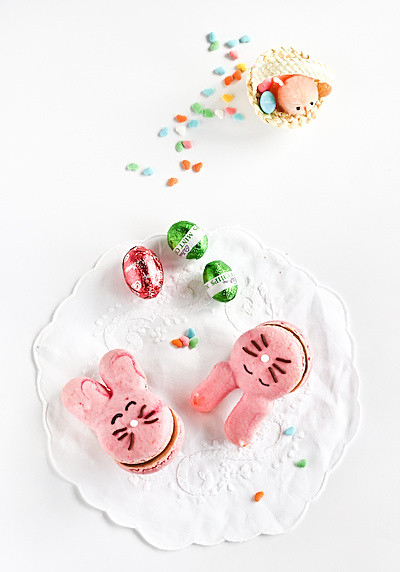
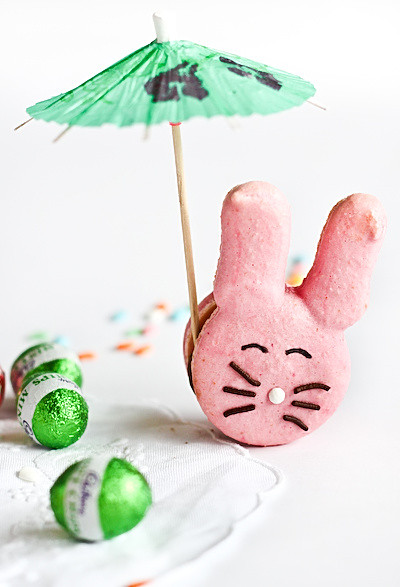
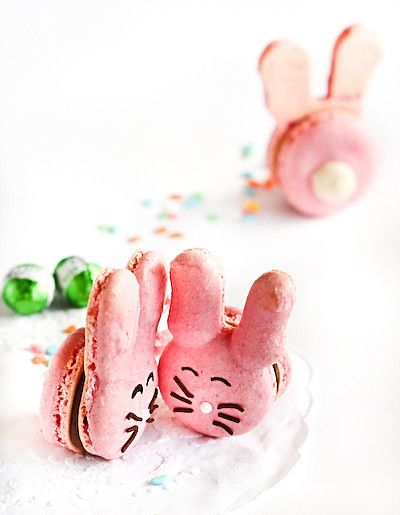
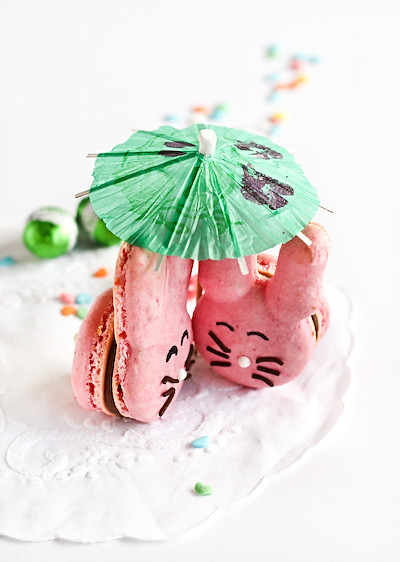
Yeah...So I may have gotten a bit carried away with the photos. It tends to happen when there are little cute things with faces. I start making up stories for each photo...
bunny_macarons-8
Bunny in the sun.
bunny_macarons-2
Easter bunnies like to gossip about other bunnies. Poor lonely bunny :(
bunny_macarons-4
Bunnies in love! ...Okay I'll stop now.
bunny_macarons-9
Bunny Macarons with Chocolate Marshmallow Icing
(makes 10-12 macarons, depending on size)
100g aged egg whites (you can use fresh eggs too, just make sure they are room temperature. I always use fresh these days, and zap it in the microwave on defrost for 10 seconds)
110g almond meal, dried in a cool (100 degrees C or less) oven for 5 minutes and sifted
200g icing sugar
50g caster sugar
Optional: 1 tsp powdered egg whites (available from The Essential Ingredient)
pink powdered food colouring

For the Chocolate Marshmallow icing:
2 egg whites
1/2 cup sugar
1/8 tsp cream of tartar
1/4 tsp pure vanilla extract
100g dark chocolate, melted

To decorate: liquid black food colouring (available from the supermarket) or edible ink pens, chocolate sprinkles, sugar balls/cachous

Line two baking sheets with baking paper. Place icing sugar in food processor and pulse for a minute to remove any lumps. Stir in almond meal and pulse for about 30 seconds to combine. Place in a large mixing bowl and set aside. Using an electric mixer, beat egg whites and egg white powder in a medium mixing bowl until the egg white powder dissolves and it reaches soft peaks. With the mixer on high speed, gradually add sugar and beat until it reaches stiff peaks.

Add meringue to your dry mixture and mix, quickly at first to break down the bubbles in the egg white (you really want to beat all the large bubbles out of the mixture, be rough!), then mix carefully as the dry mixture becomes incorporated and it starts to become shiny again. IMPORTANT: Just as the mixture has become incorporated, place about 1/2 cup of the mixture in a separate bowl and set aside (to be used for the white bunny tails). Add pink food colouring to the remaining mixture and mix until the correct consistency. Take care not to overmix, the mixture should flow like lava and a streak of mixture spread over the surface of the rest of the mixture should disappear after about 30 seconds. Place in a piping bag and pipe rounds of about 3cm diameter on baking sheets, about 5-6 on each sheet or silicon baking mats. Make sure you leave enough space above each round so you can pipe the two ears for each bunny face (remember to only pipe ears on half the rounds, leaving the rest for the backs of the bunnies). Gently rap your baking sheets on your bench top to remove any extra bubbles from your piped shells.
bunny_macaron

It is up to you what you use to decorate your bunnies, and this will decide when they are added. I added the white sugar balls (you could use silver cachous) for the noses and long chocolate sprinkles as the whiskers right after piping, using tweezers. If you prefer to draw the whiskers on, do this after baking. Leave your shells to dry for about 30 minutes, then mix the remaining white macaron batter to the correct consistency and place in a small piping bag and pipe the tails on the centre of the piped rounds that do not have ears. Leave this to dry again for at least half an hour, so that when you press the surface of one gently it does not break. This will help prevent any cracking and help the feet to form on the macs. Preheat your oven to 140-150 degrees C. Place on top of an overturned roasting tray or another baking sheet if your sheets are not professional grade, for better heat distribution. Bake for 15-18 minutes, depending on the size of your shells. Remove from the oven and cool on the tray for a few minutes, then gently remove from the sheet and place on a wire rack to cool completely. Use a skewer dipped in black food colouring or edible ink pens to draw on eyes (and whiskers if you choose).

To prepare the marshmallow icing, place egg whites, sugar, and cream of tartar in a heatproof bowl. Set over a saucepan with simmering water. Whisk constantly until sugar is dissolved and whites are warm to the touch, about 3 to 4 minutes. Remove from heat and whisk with an electric mixer, starting on low speed, gradually increasing to high, until stiff, glossy peaks form, 5 to 7 minutes. Add vanilla and melted chocolate, and mix until combined. Place in a piping bag and pipe on to rounds, pairing each bunny face with a bunny bum :) Store in the fridge overnight in an airtight container. Serve at room temperature.
bunny_macarons-3

Sunday, April 10, 2011

Strawberry 'Doughnut' Cake

strawberry_donut_cake-11
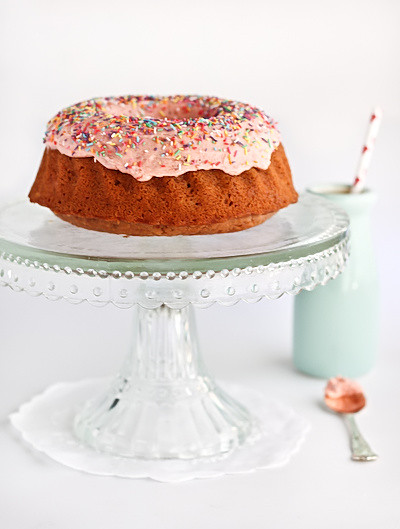
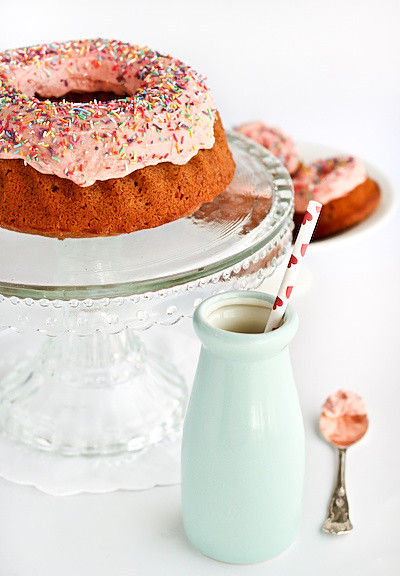
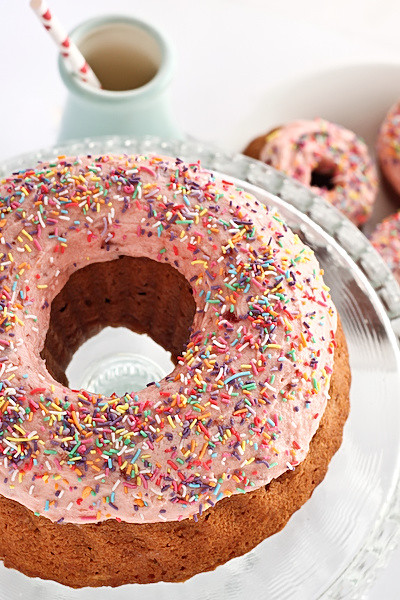
I can guess what you're thinking, 'Oh gawd there she goes again, making things that aren't doughnuts look like doughnuts'. Can you blame me? Sprinkles. Icing! So much sugary goodness. And I just realised that I let an important date go past last month - it's been 2 years since I started this blog! And what better way to celebrate a 2 year anniversary for the blog than by making a tasty cake that was inspired by one of my favourite ever recipes - my Doughnut Macarons.
strawberry_donut_cake-3
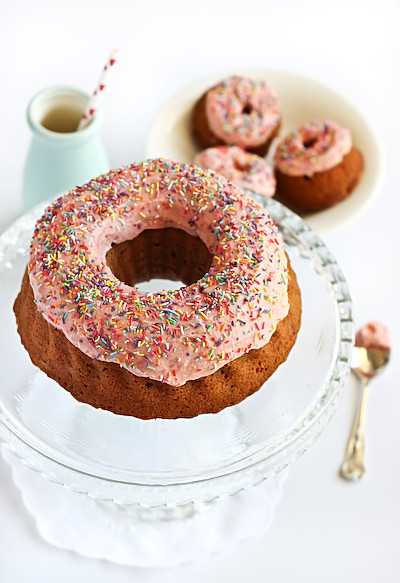
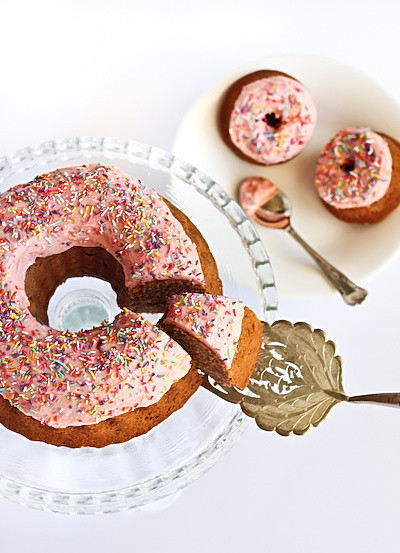
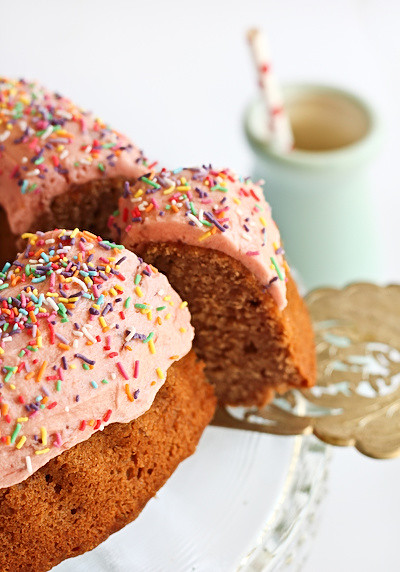
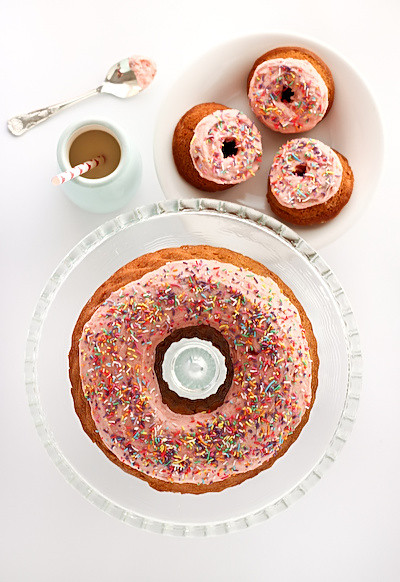
While I might cringe at the photos from back then, and remember how much I overcooked those macarons, I still love the idea. And the strawberry jam icing is one of my all-time favourites. Although I was tempted to make a cake that was topped with the little cute doughnut macs, I decided to make the cake itself look like a doughnut instead. It meant there was less waiting time between starting and me eating cake. A soft, moist Strawberry & Cinnamon bundt cake, smothered with that lovely Strawberry Jam Icing, topped with lots of colourful sprinkles. As a lover of all strawberry desserts, I knew I was going to have to use all my willpower to not eat the entire thing on my own.
strawberry_donut_cake-4
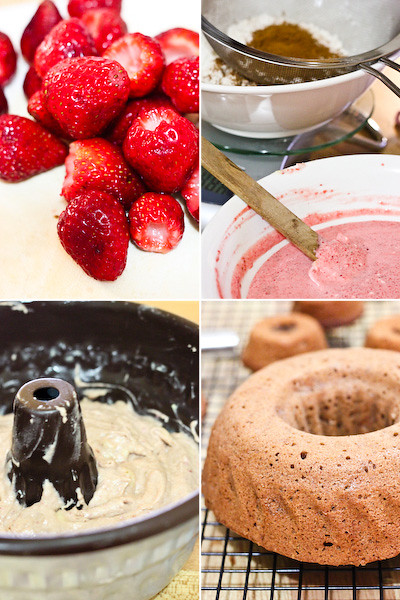
I improvised a bit, basing the recipe on another fantastic bundt cake I've made before - the Blueberry Buttermilk Cake with Milk Chocolate Honey Ganache. I replaced the buttermilk and blueberries with sour cream and fresh pureed strawberries, plus a bit of cinnamon because it always makes me think of doughnuts. And while this cake might not actually have the same texture and flavour of a doughnut, it's so darn cute and bursting with strawberry goodness. The cake is gorgeous in texture and flavour, and the strawberry jam in the icing helps to enhance the flavour of strawberries already in the cake.
strawberry_donut_cake
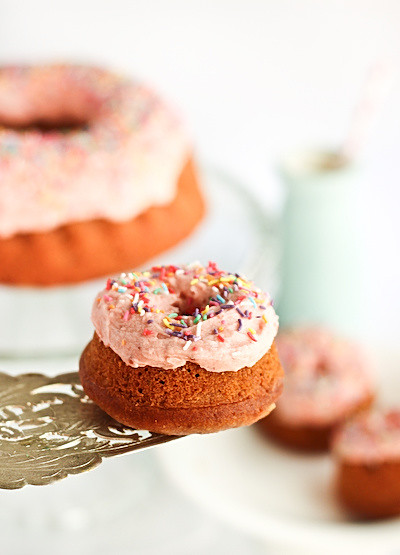
I also made another batch of the cake batter and poured it in to a cupcake tin so I could make mini doughnut cakes, that looked closer to the size of a real doughnut. These worked even better than I had hoped, golden and crunchy on the edges while still soft and luscious in the middle. And more icing for each bite of cake! You could make these in mini bundt tins if you life, but I just cut holes out of the middle of these cakes (and the holes made perfect-sized pieces for me to taste test :D).
strawberry_donut_cake-16
It's crazy to think how much this blog has changed my life in these past two years. It's given me the opportunity to experience so many great moments, taught me so much about myself and other people, and most unexpectedly it's led me to make some wonderful friends who have become so close that it's hard to believe that they were once strangers on the internet. Hugs for everyone! It's also given me an extra insulating layer of flab thanks to all the butter, sugar and flour but let's not dwell on that :P
strawberry_donut_cake-6
Anyways, please make this cake. It will make you happy. Though I'm slightly biased since it has all of my favourite things and I'm always happy after I bake. I'm so glad to have this blog so that I have somewhere to share all the baking insanity. It means I always have something to look forward to. And a perfectly good reason to bake lots of cakes.
strawberry_donut_cake-7
Strawberry 'Doughnut' Bundt Cake
(Adapted from this recipe, makes one small bundt cake or 6 cupcakes)

Note: My bundt tin is smaller than most bundt tins, you may want to double the quantities below to ensure there's enough batter
80g softened butter
100 g (nearly 1/2 cup) caster sugar
1 eggs
1/2 tsp pure vanilla extract
150g plain flour, sieved
1 tsp baking powder
1/4 tsp bicarbonate of soda, sieved
1 1/2 tsp ground cinnamon
A pinch of salt
1/4 cup sour cream
125g (1/2 punnet) strawberries, hulled and pureed

For the strawberry jam icing:
1 cup icing sugar, sifted,
60g butter
1/4 cup strawberry jam
A pinch of salt
Sprinkles, to decorate

Preheat oven to 160C (320F) and butter a bundt tin (I used a 20cm diameter pan), or 6 holes of a cupcake tray. Whisk strawberry puree in a medium bowl with sour cream and set aside. Beat butter and sugar in an electric mixer until creamy. Add eggs, then add vanilla extract. Meanwhile, sieve flour, cinnamon, baking powder and bicarbonate of soda into a bowl with a pinch of salt. With mixer on low speed, add half the flour mixture, then half the strawberry mixture. Repeat, then spoon mixture into cake tin. Smooth top, then bake until cake is golden and an inserted skewer withdraws clean (45-50 minutes, less if using a flatter pan, about 20 mins for cupcakes). Cool in tin for 10 minutes, then invert onto a rack and cool completely.
strawberry_donut_cake-17
If making cupcakes, you can use a small circle cutter to Remove butter from the fridge 30 mins before preparing icing. Place sifted icing sugar and butter in a mixing bowl and beat with an electric mixer until pale and fluffy. Add strawberry jam and salt and beat to combine. Use a spatula to ice the cake and top with sprinkles. Can be stored in an airtight container for a few days.
strawberry_donut_cake-2

Sunday, April 3, 2011

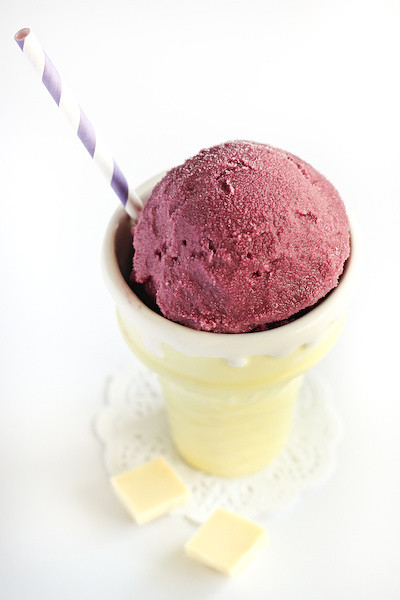
Blueberry Buttermilk Sorbet & White Chocolate Mud Cake

blueberry_sorbet_white_choc\
I'm so predictable. The weather finally starts cooling down in Sydney, and suddenly I have the biggest ice cream cravings ever. Generally I can't talk myself into making a batch of ice cream because I know I'll have to wait at least another day before I can eat it. And it's a total b*tch to photograph. I hate taking photos of things that melt! There's so much time spent trying to get a nice scoop into a cold dish, then the rush to snap a photo before the whole thing turns into a sticky puddle. It always ends with a grumpy me in the middle of a horrible mess. (This is the same reason why I don't do souffles.)
blueberry_sorbet_white_choc-3
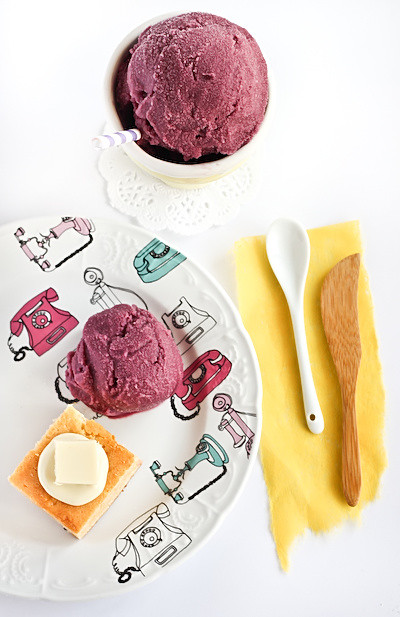
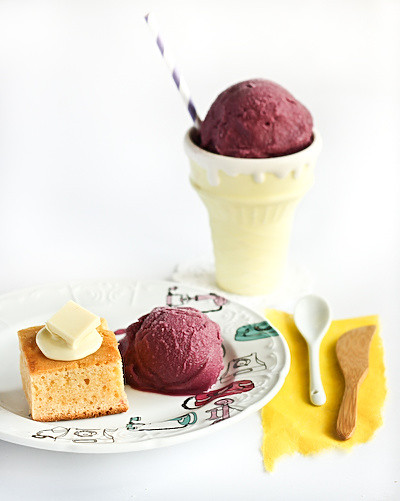
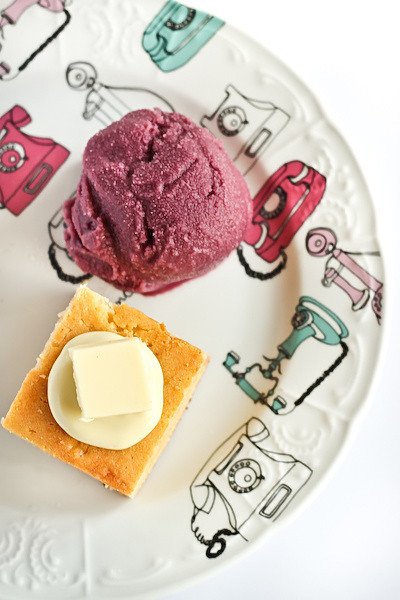
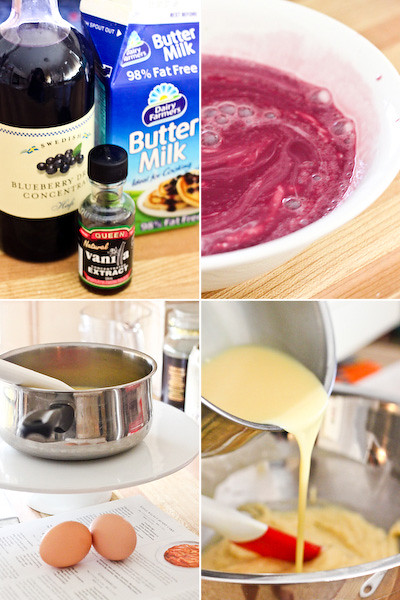
This weekend I decided I needed a cold dessert. But it just so happens that this was the easiest and quickest frozen dessert recipe I have ever, ever made. Blueberry Buttermilk Sorbet - three ingredients, mixed into a bowl and stuck into the ice cream maker. It was that easy. Okay, I might have cheated a little, rather than making a sugar syrup I used a blueberry drink concentrate that i picked up from IKEA a while back. It worked great, and look at that amazing colour! Of course, I could have made something similar by heating sugar, water and fresh blueberries, but the cordial was so darn convenient.
blueberry_sorbet_white_choc-6
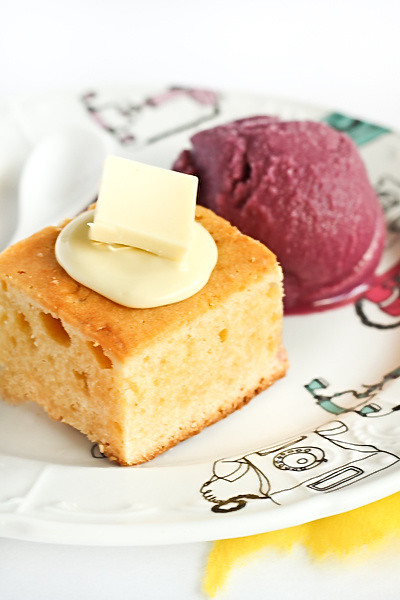
Since the sorbet was already churning away happily after 2 minutes of prep, I still had the motivation to whip something up to match it with. White chocolate mud cake sounded like the perfect treat to go with my tangy berry sorbet. I found this great recipe on Exclusively Food, which was meant to go with a sour cream icing so it seemed like the perfect cake to go with a buttermilk sorbet. This dense, rich cake is just the kind of thing you want to eat with a scoop of something cold and sour.
blueberry_sorbet_white_choc-4
I've never had buttermilk in a frozen dessert before, but it didn't surprise me that it was faaaaantastic. Buttermilk is a should be called SUPERmilk. It makes everything better! Pancakes, cakes, cookies, scones, salad dressing, and now sorbet. It gave the sorbet a light creaminess with a slight tang, but wasn't anywhere near as rich and heavy as a cream-based dessert. And the blueberry flavour was just the thing to add to it, though any berry would have worked great. Originally I wanted to make it strawberry buttermilk flavoured but I couldn't be bothered to drag myself down to the store to buy them. But don't let my laziness stop you from exploring the possibilities :) OOH you could even cook the cake as a thin layer in a sheet pan, and make a ice cream sandwich out of it. Pretty!
blueberry_sorbet_white_choc-7
Blueberry Buttermilk Sorbet
(serves between 6-10)
1 1/2 cups buttermilk
1 cup blueberry drink concentrate (alternatively, heat 1 1/2 cups of water with 1 cup of sugar and about a cup of blueberries, or other berries until the sugar dissolves, then just bring to the boil and strain)
1 tsp pure vanilla extract
Note: I used these measurements since I only had that amount of buttermilk left, feel free to double or increase amount of each ingredient accordingly

Mix all ingredients together in a large bowl and stir until combined. Chill thoroughly and then churn according to your ice cream maker's manufacturing instructions. Freeze in an airtight container overnight.
blueberry_sorbet_white_choc-13
White Chocolate Mud Cake
(recipe from Exclusively Food, serves 16)
300g white chocolate
200g butter
250ml (1 cup) milk
165g (3/4 cup) caster sugar
2 teaspoons (10ml) vanilla extract
2 large eggs, lightly beaten
100g (2/3 cup) self-raising flour
150g (1 cup) plain flour

Preheat oven to 160 degrees Celsius (NOT Fahrenheit.) (145 degrees Celsius fan-forced). Grease a 20cm square cake pan and line the base and sides of the pan with baking paper.

Place chocolate, butter, milk and sugar in a large saucepan over low heat, stirring frequently. Remove from heat when chocolate and butter have melted, and stir mixture until completely smooth. Allow mixture to cool at room temperature for 15 minutes. Add vanilla and eggs to chocolate mixture and stir until well combined.

Stir flours together in a large bowl. Add one cup of chocolate mixture to the flour and stir until a smooth paste forms. Repeat with another cup of the chocolate mixture.Add remaining chocolate mixture and stir until mixture is smooth. This gradual method of combining the wet and dry ingredients helps prevent lumps.

Pour mixture into prepared pan. Bake for about 1 hour 10 minutes to 1 hour 20 minutes. When the cake is ready, a fine-bladed knife inserted into the centre of the cake should come out without any batter attached. Loosely cover cake with greaseproof paper or a clean tea towel and allow it to cool to room temperature in pan. Store cake in an airtight container in the refrigerator and bring to room temperature before serving. The cake is suitable to freeze. Serve cake with sorbet.

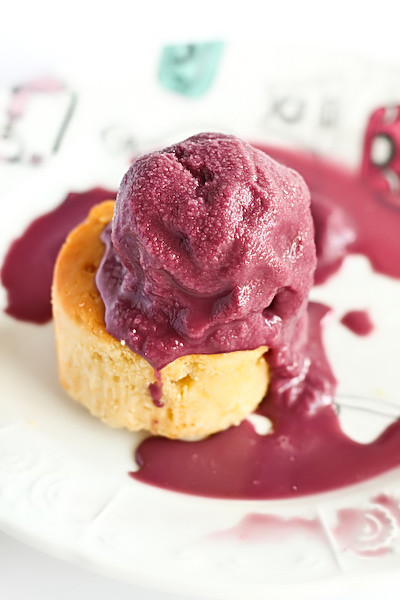
Annnddd...just to prove what a sticky, melty mess everything ends up in when I take photos of frozen desserts...
blueberry_sorbet_white_choc-5
Oops.