Pages

Sunday, May 29, 2011

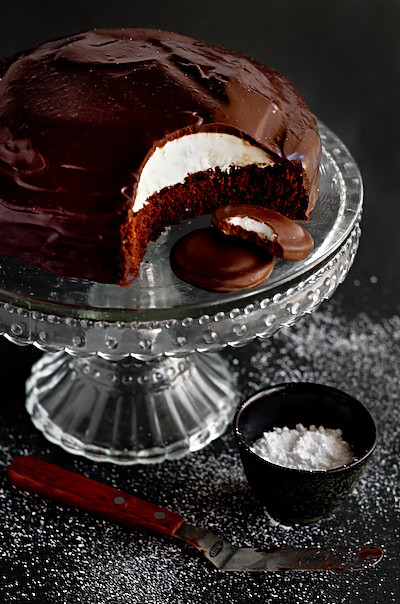
The Ultimate Milo (Chocolate Malt) Cake

milo_cake-9
I've been a very selfish baker recently. Rather than trying to diversify and come up with something new and unique, I just want to keep baking the same things I've been craving like crazy; cookies and things filled with Milo. I made so many batches of salted chocolate chip cookies that I had to offload them to friends and family to save my poor, expanding arse. And then I made this cake, which is basically a layered cake version of my Milo Cupcakes with Condensed Milk Icing. Because I'm kinda selfish and I wanted to eat it, even if it was similar to things I've posted on this blog before.
milo_cake-2
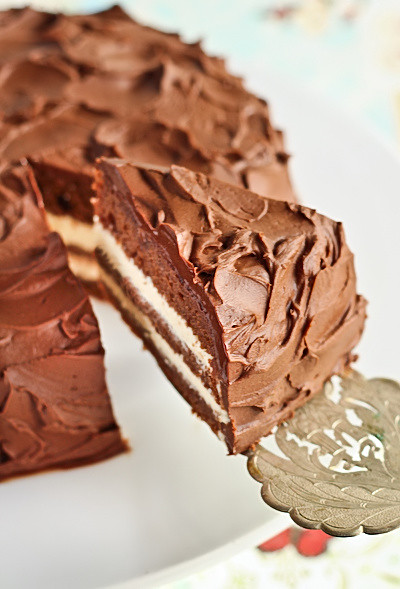
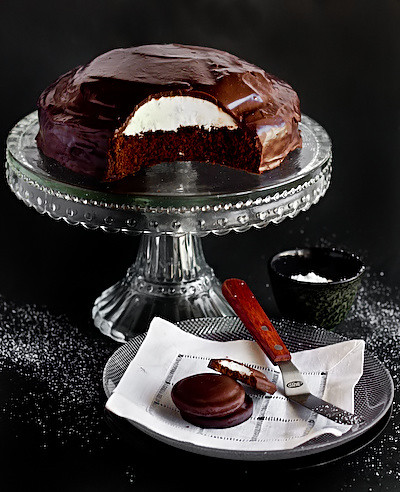
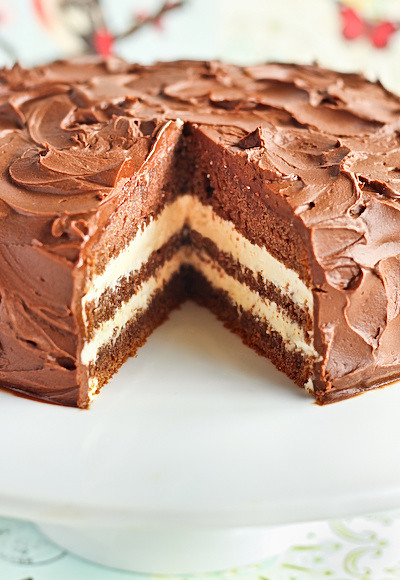
This cake nearly used up an entire tin of Milo. I wanted it to be bursting with Milo flavour, it's so strong this time that the room fills with a chocolate-malty aroma as soon as you bring the cake out. I know not all my readers will know what Milo is, but if you like chocolate and malt flavoured things, you will love this. I adapted my Double Rainbow Malt Cake so that it had about double the amount of Milo and way less sugar, making it the perfect cake to layer with tons of the Condensed Milk Icing from my Milo Cupcakes. And just to make it that much more Milo-y, I made a dark chocolate ganache with lots of Milo mixed in and swirled it all over the top of the cake in that sexy+lazy Nigella Lawson style of decorating.
milo_cake-3
This is one sexy, sexy cake. The ganache is SO EFFING GOOD. Something about the malt in the Milo just takes the ganache to the next level of addictiveness. I could sit here and eat the ganache on its own with a spoon. For those of you unable to get hold of Milo, you might be able to substitute it with cocoa powder and malted milk powder, but I'm not entirely sure it will be the same.
milo_cake
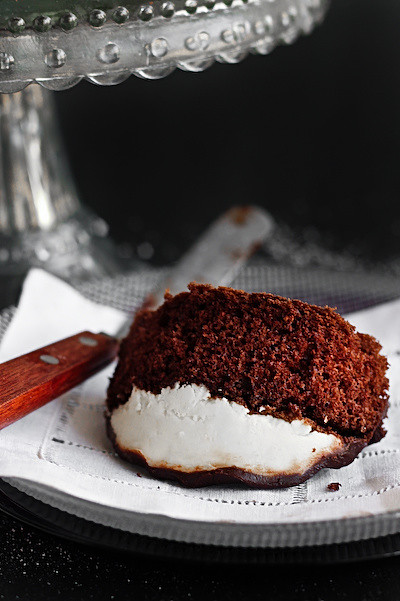
For those of you who have yet to experience the moreishness of condensed milk icing, you are really missing out! Adding condensed milk to a regular butter icing mixture makes it extra smooth and fluffy and is so good spread all over thin layers of the crumbly chocolate malted cake.
milo_cake-8
I was a little worried about the changes that I made to the original malt cake recipe, but I think it turned out pretty well. The cake is quite a dense, crumbly cake, but it is perfect for layering, and I like the fact that it makes a cake that's big enough to be cut into three, rather than having to bake separate cakes for each layer.
milo_cake-5
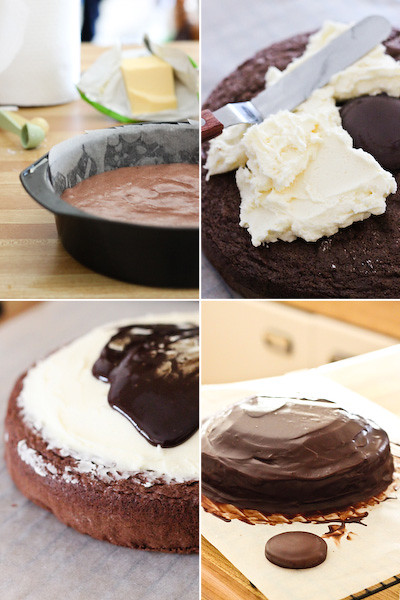
I know ganache can be tricky for people, if you look at my method photos you should be able to tell that I had a few issues - I got impatient and tried to pour my ganache over the top of the cake before it had cooled enough, so it dribbled right off the edge of the cake and ran all over the place. My advice is to be patient with your ganache. Chill it a few minutes at a time, giving it a bit of a whisk, until it gets to that perfect, lava-like texture and it will set not long after you spread it over your cake. Now if you'll excuse me, I have a cup of tea and a slice of Milo cake waiting for me...
milo_cake-6
Milo Cake with Condensed Milk Icing & Milo Ganache
(makes one 20cm diameter cake, adapted from my Double Rainbow Malt Cake)
125g butter, room temperature
50g (about 1/4 cup) caster sugar
195g (about 1 1/4 cups) plain flour
2 1/2 tsp baking powder
150g (about 1 1/4 cups) Milo powder (you could also use Ovaltine or Malted Milk Powder + Cocoa)
3 eggs
120ml (1/2 cup) buttermilk

For the condensed milk icing:
150g butter
350g icing sugar
2/3 cups condensed milk

For the ganache:
300ml pouring cream (min. 35% milk fat pure cream)
400g dark chocolate
1/2 cup Milo powder

Preheat oven to 180°C (350°F) and grease and line a 20cm round springform tin. Cream butter and sugar together until smooth and fluffy. Add eggs one at a time, beating well after each addition. Sift flour, baking powder and Milo together and then gradually add to the rest of the mixture with the mixer on low speed. With the mixer still on low, add buttermilk until just combined. Pour into cake tin and bake for 40-45 minutes or until a skewer inserted into the centre comes out clean. Remove and cool in tin for 10 minutes, then place on a wire rack to cool completely.
milo_cake-18
To prepare condensed milk icing, remove butter from fridge at least 30 mins before starting. Place butter in a large mixing bowl and beat on high with an electric mixer until fluffy, add icing sugar and condensed milk and beat until smooth and fluffy. Cut cooled cake into three equal slices, sandwich condensed milk icing in between layers of cake. Prepare the milo ganache; break chocolate up into small pieces and place in a large mixing bowl with the milo. (I found the milo formed small clumps, so it might be better to try adding milo to the cream in the saucepan first) Heat cream gently in a medium saucepan until it just reaches the boil. Pour hot cream into mixing bowl and set aside for 10 minutes to allow chocolate to melt. Using a whisk, stir until mixture is smooth and glossy. Set aside to cool to room temperature, until mixture is thick and only just pourable. (If you are impatient, you can chill in the fridge for about 5-10 minutes)

Pour ganache over the top of the sandwiched cake. If the ganache runs right off the edge of the cake, it is not cool enough, scrape the excess ganache back into the bowl and chill for longer. When it is ready, the ganache will lighten and be slightly less shiny, and then you can use a spatula to cover the top and sides of the cake, swirling the surface using the spatula. Leave ganache to set for about half an hour before serving. Can be stored in the fridge overnight. Serve at room temperature.
milo_cake-19
Edit: To anyone who tried to comment in the first 24 hours, Blogger's comment box is completely messed up and it didn't register your comment. So unfortunately I didn't get to read any of them :( But hopefully it should be working now, please let me know if there are still problems. I'm hoping Blogger sort out their shit soon.

Thursday, May 26, 2011

Maple Custard Pie & Candied Bacon

maple_custard_bacon-3
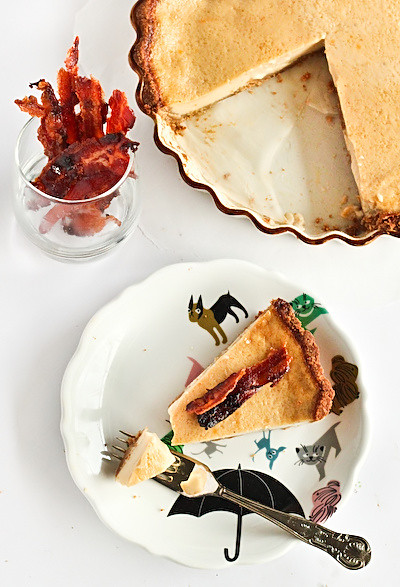
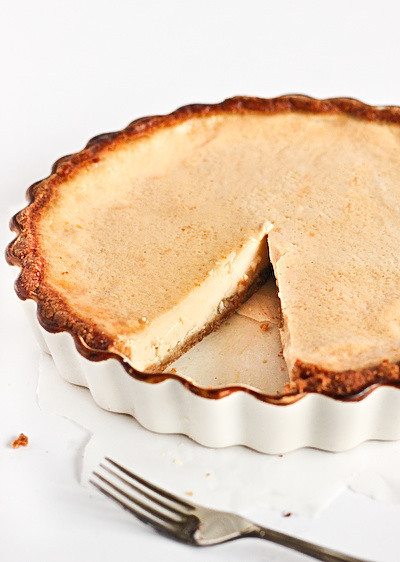
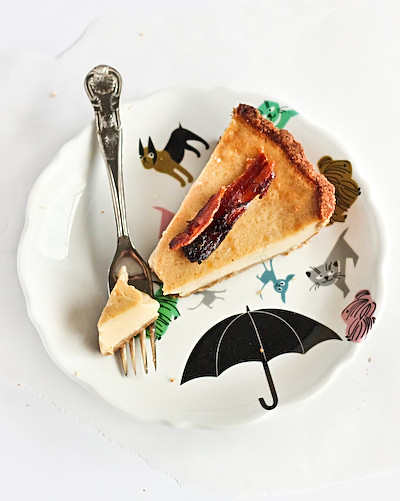
I know. I didn't think I'd ever go there but I did. I've always been very apprehensive about the whole bacon in desserts thing. But that was before I made candied bacon. And this Maple Egg Custard Pie. Each thing on its own is perfectly respectable, and quite delicious. But put them together and omgholyshizzwhatisthisamazingness?! I didn't expect the addition of the candied bacon to make such a difference to this pie, but I was slightly underwhelmed after trying a slice of the pie on its own and then completely amazed by the effect of the crunchy, salty and caramelised bits of bacon. It made all the difference.
maple_custard_bacon-4
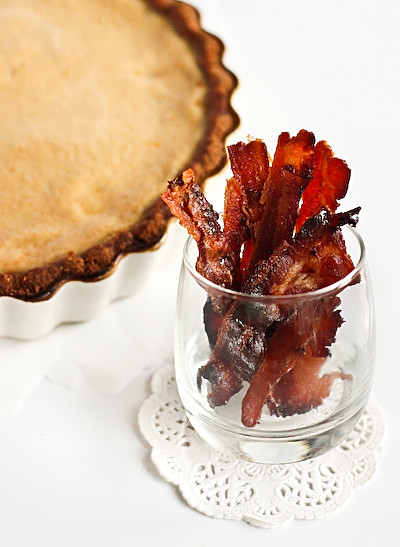
What is candied bacon exactly? It's very simple; thin strips of streaky bacon, slathered in a layer of brown sugar or maple syrup and baked to a crisp. It reminds me of Bak Kwa, the thin Malaysian Grilled Honey Pork that I love so much. The sugar gives the bacon this amazing toffee sheen and mellows the saltiness of the bacon, making it perfect for adding to very sweet desserts. Just like this pie. I adapted an American-style Egg Custard Pie (sort of like a huge custard tart for Australians), switching the sugar in the pie for some pure maple syrup. This gave the filling a jolt of extra flavour and a lovely golden colour. I've always been a big fan of the maple syrup and bacon combination. Some people might think it's pretty disgusting but I'm definitely in a sweet/salty combination phase. I'd say this recipe is about on par with the Popcorn Fudge for weirdness. But I think I like this one better because it's not quite as sweet, and I love bacon so friggin' much. Bacon is the thing I turn to when I'm feeling really, really rotten. For example, when I stabbed a hole all the way through my finger (don't worry I didn't post a photo of it) the first thing I did after getting stitched and drugged up was get myself a BLT. It has magical restorative powers you see.
maple_custard_bacon
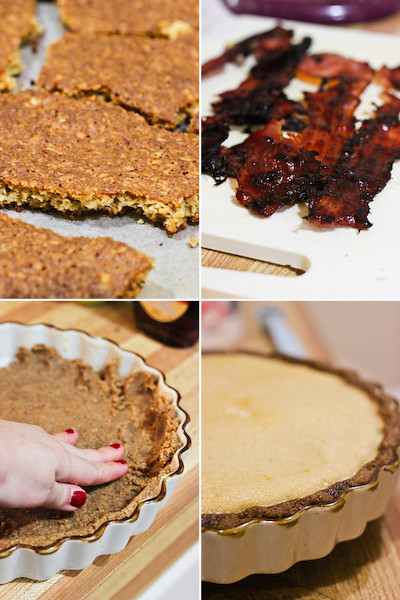
I didn't use any ordinary pie crust for this recipe, I finally tried out an adaptation of the rolled oat crust that Momofuku uses for its infamous crack pie. It's so buttery and addictive, with a lovely crisp texture from the oat cookies that you bake and then crush into the crust mixture. It might seem like a lot of extra effort to make this two step crust, but it is worth the extra time investment.
maple_custard_bacon-2
I love the fact that this dessert is filled with some of my favourite breakfast ingredients - bacon, eggs and oats. My only gripe was that because I used a biscuit-based crust, the custard made the base a bit soggy after it was in the fridge overnight. So I would suggest serving it on the same day you bake it, because it was so beautiful when it was fresh out of the oven. Or you can use whatever crust you want! But please don't forget about adding the bacon, it's just not the same without it. I served mine up as thin strips so people could take as much as they wanted, but you could chop it up into smaller pieces and then sprinkle it over the top.
maple_custard_bacon-5
Maple Custard Pie & Candied Bacon
(Makes one 25cm pie, crust adapted from Linda's pecan pie crust based on Momofuku's crack pie, filling adapted from this recipe)
For the oat cookies:
2/3 cup plus 1 tablespoon (85g) plain flour
Scant 1/8 teaspoon baking powder
Scant 1/8 teaspoon baking soda
1/4 teaspoon salt
1/2 cup (115g) softened butter
1/3 cup (71 g) brown sugar
3 tablespoons (35g) sugar
1 egg
Scant 1 cup (100g) rolled oats

For the pie crust:
Crushed oat cookies from ingredients above plus
1/2 cup (115g) butter, softened
1 1/2 tablespoons (21g) brown sugar
1/8 teaspoon salt
1 cup (140g) plain flour

For the custard filling:
3 large eggs, whisked
3/4 cup pure maple syrup
1/4 tsp salt
1/2 teaspoon vanilla extract
1 egg white
2 1/2 cups scalded milk
a pinch of freshly ground nutmeg

For the candied bacon:
175g thinly sliced streaky bacon (or the fattiest bacon you can find =D)
1/3 cup (71 g) brown sugar
(but don't do it until you serve it or the bacon will go soggy)

Preheat oven to 190°C (375°F) and a baking sheets with baking paper. Prepare the oat cookie crust; sift flour, baking powder, baking soda and salt into a medium bowl and set aside. In the bowl of a stand mixer using the paddle attachment, or in a large bowl using an electric mixer, beat the butter, brown sugar and sugar until light and fluffy. With the mixer on medium, add the egg and beat until combined. With the mixer on low, gradually add the flour mixture until combined. Stir in oats and spread mixture as flat and even as you can on the baking sheet. Bake until golden brown and set, about 20 mins, then cool on a wire rack until cool to the touch.

Break up cookie layer into smaller pieces and place in a food processor with butter, sugar and salt and pulse until they combine evenly. Add flour and pulse until just combined. Press mixture into a 25cm diameter pie dish that has been well-greased, preferably with a removable base (lined with baking paper if is not removable). You should have enough for a nice thick crust, perhaps with a bit leftover. This crust crumbles quite easily so try not to make it too thin.

maple_bacon_pie

Preheat oven to 205°C (400°F) and prepare the pie filling. In a large mixing bowl, mix together eggs, vanilla, maple syrup, nutmeg and salt. Prepare the scalded milk in a medium saucepan and then gradually add to the egg mixture, using a whisk to combine. Brush bottom and sides of the prepared pie crust with the extra egg white to help prevent a soggy crust. Pour custard mixture into crust. Carefully place in oven and bake until a knife inserted into the centre comes out clean, about 30-35 minutes. Cool on wire rack.

Prepare the bacon; preheat oven to 180°C (350°F) line a baking sheet with baking paper and pat your bacon strips dry with paper towels. Lay bacon strips in a single flat layer on sheet and then sprinkle brown sugar or equal amount of maple syrup over the top of the bacon. Bake until crisp, around 20 minutes. Cool on wire rack, use paper towels to dab off any excess bacon grease. Can be stored in an airtight container overnight. Pie is best served on the same day it is baked but can be refrigerated overnight. Do not place bacon on surface of pie until ready to serve.
maple_custard_bacon-13

Tuesday, May 17, 2011

Salted & Malted Chocolate Chip Cookies

malted_salted_choc_cookies-2
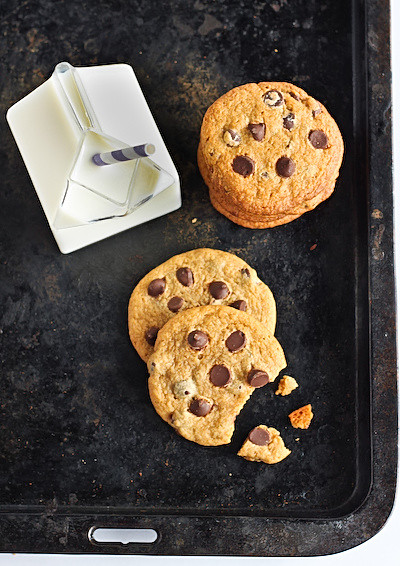
Catchy name isn't it? It's been a fun few days for me trying to perfect this recipe, because it means I have a constant supply of cookies on my kitchen counter. And my whole house smells like cookies. Heck, even my hair was smelling like cookies. For those of you who love chocolate chip cookies as much as I do, you know this is a good thing.
malted_salted_choc_cookies
Besides the catchy name, keep an open mind about these cookies and don't get knock 'em til you've tried them. They came about because I've been wanting to try a bunch of different experiments with my chocolate chip cookies. Not that there's anything wrong with my regular foolproof chocolate chip cookie recipe, but I'd seen a few different variations recently and I wanted to try it out for myself.
malted_salted_choc_cookies-3
The first experiment was adding lots of salt, after having these awesome salty chocolate chip cookies at Hart's Pub during the Gourmet Rabbit launch party. Apparently it was the same cookie dough they use for their chocolate chip cookie skillet and it was eye-opening. The extra dash of salt really balanced out the sweetness of the chocolate in these freshly baked cookies, making them so intensely moreish. The other recipe I was interested in trying was Pioneer Woman's Malted Milk Chocolate Chip Cookies because how darn good do they look?!
malted_salted_choc_cookies-5
I decided to kill two birds with one stone. Actually it was going to be three, since my brother recently asked why I hadn't done anything with salted caramel in a while, so I was going to make them malted & salted caramel chocolate chip cookies. But after throwing some chopped up soft caramel chews into my first batch of cookie dough, I watched as these cookies bubbled and gooped themselves all over the tray and then cooled into a hard crunchy disk of messiness, all because of the caramel. As soon as I realised what was happening I made this panicked squeaking noise and then ran back to the remaining cookie dough to dig out the rest of the caramel pieces. After that I tried chopping up maltesers (or malted milk balls for those in the US) and sprinkling them on top. This sort of worked; it was delicious but the chocolate on the maltesers bubbled up and looked pretty darn ugly. Hm. A was more than happy to eat up the failed batches, something about the salt levels and the caramel helped to overcome his general lack of interest in cookies.
malted_salted_choc_cookies-7
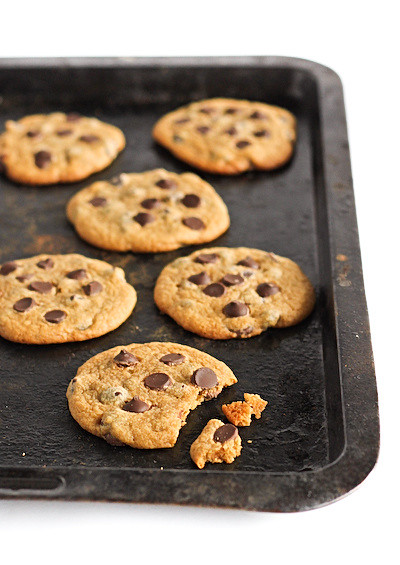
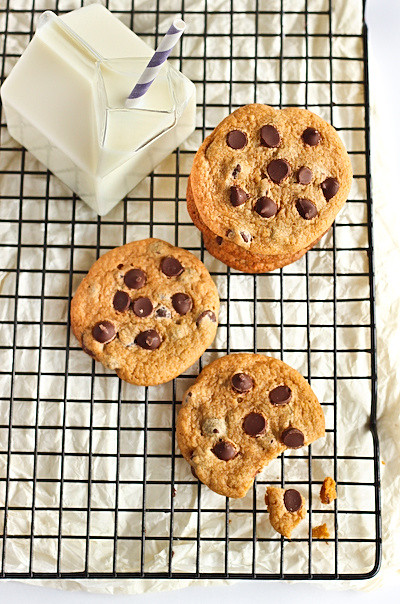
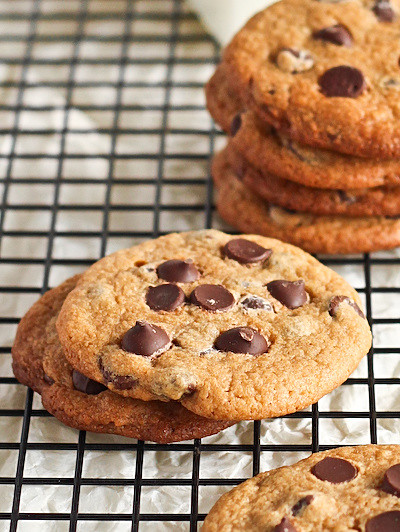
So with my final attempt at these cookies I kept it simple. It was my regular cookie dough with a large amount of extra salt plus tons of chocolate chips to help balance it out, and a good amount of malted milk powder. The result was this beauty of a cookie - thin, chewy in the centre with a golden, buttery crunch around the edges. The Salted & Malted Chocolate Chip Cookie! For some of the batches I baked them a little longer so they went dark golden brown and were crunchy all the way through (the way I usually like my cookies, see 3rd photo of this post) and these were great too. Basically it's up to you to decide if you want to make them chewy or crunchy and adjust the baking time accordingly. The hit of malt flavour adds something extra special, making it just like a malteser in cookie form. I used Horlicks, but I'm totally going to use Milo next time! I loved the hit of salt in every bite, I reckon it's a great recipe for anyone who doesn't have much of a sweet tooth. But the sweet tooths will love it anyway, because of all that chocolate ;)
malted_salted_choc_cookies-6
Salted & Malted Chocolate Chip Cookies
(adapted from my basic chocolate chip cookie recipe, makes 36 cookies)
125g unsalted butter, softened
1 cup tightly packed brown sugar
1 tsp pure vanilla extract
1 large egg
1/2 cup malted milk powder, or Horlicks, Milo or Ovaltine
1 1/4 cups (approx 175g) plain flour
1/2 tsp baking powder
1 1/2 tsp salt
1 1/2 cups + 1/2 cup dark chocolate chips (or more, because there's no such thing as too much chocolate!)

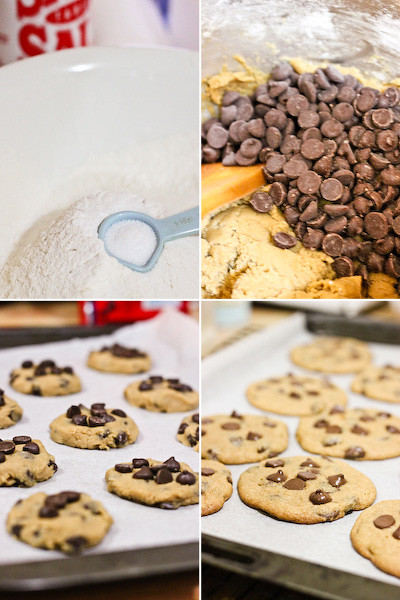
Preheat the oven to 180°C (350°F) and line two cookie sheets with baking paper. Place butter and sugar in a large mixing bowl and beat with an electric mixer on high until fluffy and pale. Add vanilla and egg and beat on low for a minute to combine. Add malt powder and beat on medium for a minute to combine. With the mixer still on low, add in the sifted flour, baking powder and salt until just combined. The dough should come together and be quite dry and a bit sticky. Using a wooden spoon fold through 1 & 1/2 cups of chocolate chips.
malted_salted_choc
Place level tablespoons of cookie mixture on a lined baking tray, press dough down to form a flat disk, about 1 cm high and 5 cm diameter. leaving at least 3cm space around each cookie to allow it to spread. With the extra 1/2 cup of chocolate chips, press a small amount of extra chips into the surface of each round. Bake for 15-20 minutes, until they start to turn golden brown on the edges. You can bake 2 trays at a time, but make sure to switch the top and bottom trays around halfway through to allow each tray to bake evenly. The sooner you remove them the chewier they will be. If you wish them to be crunchier, leave them in there for longer but make sure the bottoms don't burn (remember they will cook a bit more while cooling on the trays). Allow to cool and harden slightly on the tray for 5 minutes before placing biscuits on a wire rack to cool further.

malted_salted_choc_cookies-4

Thursday, May 12, 2011

Cheesecake with Lemon Poppyseed Macarons

lemon_poppyseed_cheesecake-3_filtered
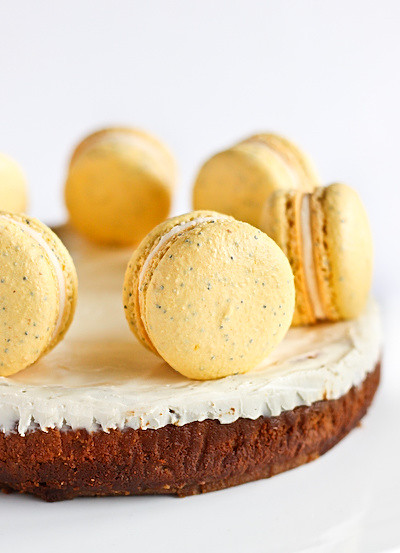
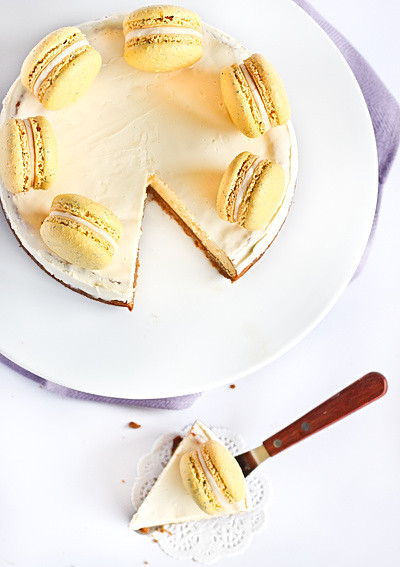
Just cheesecake? Plain cheesecake? No crazy flavours or colours or shapes? That's right. But this is no ordinary cheesecake. My brother asked me to try out this recipe, after having the best cheesecake he's ever had at Trattoria Garga in Florence while on his honeymoon. Lucky for those of us not going to Florence anytime soon, Saveur Magazine printed the recipe for the very same cheesecake. And to jazz it up a little bit, I topped it off with some lemon & poppy seed macarons. Aren't they so sunny and delicious looking? Though a little bit too big for the cake, I may have gotten carried away while piping them...
lemon_poppyseed_cheesecake_filtered
The cheesecake on its own is relatively simple. The original recipe called for the crust to come up the sides of the pan but I always have trouble making that look pretty, so I only made it for the base. The crust is ridiculously good, a regular biscuit crust, but baked until it is dark golden with a nutty, buttery flavour. The filling is better than any other traditional baked cheesecake I've ever had. I used to find most (non-Japanese) baked cheesecakes were super dense and heavy, with a gluggy sort of texture and way too sweet. I could never eat more than a few bites of it. But this filling has a lovely combination of cream cheese and mascarpone and it is so light and fluffy but not very sweet, giving it a lovely creamy richness without being sickly. It also has this magical top layer made with yoghurt, sugar and vanilla which gives it a delicate contrasting tang and depth of flavour. There's something so elegant about that yoghurt topping, I can't explain it.
lemon_poppyseed_cheesecake-4_filtered
The macarons were inspired by some lemon poppyseed macarons that the boy brought back from a Mother's Day high tea at T2. They were severly overbaked and super dry but still had a great lemon zing and I was intrigued to see the poppy seeds were incorporated into the shells. I decided to try them out as they'd been the perfect match for this cheesecake, matching the tangy flavour of the yoghurt coating. I just replaced some of the dry mixture with some poppy seeds and lemon zest and it was great! I loved the extra bite in the shells from the poppy seeds, and a simple lemon butter icing for the filling made them sing. Though I have to admit I had to resist the urge to pipe them in heart shapes.
lemon_poppyseed_cheesecake-6_filtered
The best part? No baking in water baths! I hate hate hate baking cheesecakes in water baths, no matter how many layers of clingfilm and foil I wrap around my springform tin, water somehow manages to leak in and make my crust super soggy. Don't be turned off by the length of the recipe below and the number of components, the cheesecake itself is super duper easy - it took me about half an hour prep and 1hr 20 mins total baking time. The macarons were done the night before, but I go into total autopilot mode when I make macarons so they weren't much extra effort for me. If you can't be bothered to do the macarons, just serve up the original cake with some marinated strawberries and it will be just as good. But I do think the macarons make it quite special.
lemon_poppyseed_cheesecake-13_filtered
Cheesecake with Lemon Poppyseed Macarons
(Adapted from Sharon's Cheesecake of Trattoria Garga, recipe from Saveur Magazine, serves 8)
For the macarons:
100g aged egg whites (you can use fresh eggs too, just make sure they are room temperature. I always use fresh these days, and zap it in the microwave on defrost for 10 seconds)
105g almond meal, dried in a cool (100 degrees C) oven for 5 minutes and sifted
195g icing sugar
50g sugar
Zest of one lemon, about 1-2 tsp
1 tbsp poppy seeds
Optional: 1 tsp powdered egg whites (available from The Essential Ingredient),
yellow powdered food colouring
50g unsalted butter
2 cups icing sugar, sifted
Juice from half a lemon

For the crust:
2 cups finely crushed digestives (English whole wheat biscuits, can be substituted with graham crackers)
1 tbsp sugar
4 tbsp (approx 60g) unsalted butter, melted

For the cheesecake filling:
1 1/2 cups (approx 390g) cream cheese, softened
1/2 cup plus 2 tbsp (approx 170g) mascarpone
1 cup sugar
3 eggs

For the cheesecake topping:
1 cup plain yogurt
1 tbsp. sugar
1/4 tsp. vanilla extract

(Macarons should be made and refrigerated 24 hours before serving to allow flavour to mature) Line two baking sheets with baking paper. Place icing sugar in food processor and pulse for a minute to remove any lumps. Stir in almond meal and pulse for about 30 seconds to combine. Place in a large mixing bowl and set aside. Using an electric mixer, beat egg whites and egg white powder in a medium mixing bowl until the egg white powder dissolves and it reaches soft peaks. With the mixer on high speed, gradually add sugar (and yellow food colouring if you wish) and beat until it reaches stiff peaks. Add meringue, poppy seeds and lemon zest to your dry mixture and mix, quickly at first to break down the bubbles in the egg white (you really want to deflate/beat all the large bubbles out of the mixture, be rough!), then mix carefully as the dry mixture becomes incorporated and it starts to become shiny again. Take care not to overmix, the mixture should flow like lava and a streak of mixture spread over the surface of the rest of the mixture should disappear after about 30 seconds. Place in a piping bag and pipe rounds of about 3-4cm diameter on baking sheets or silicon baking mats. Gently rap your baking sheets on your bench top to remove any extra bubbles from your piped shells.

Leave this to dry again for at least half an hour, so that when you press the surface of one gently it does not break. This will help prevent any cracking and help the feet to form on the macs. Preheat your oven to 140-150 degrees C. Place on top of an overturned roasting tray or another baking sheet if your sheets are not professional grade, for better heat distribution. Bake for 15-18 minutes, depending on the size of your shells. Remove from the oven and cool on the tray for a few minutes, then gently remove from the sheet and place on a wire rack to cool completely. Remove butter 30 mins before preparing the lemon icing. Beat butter and icing sugar with an electric mixer until pale and fluffy then add lemon juice and beat until smooth. Use a piping bag or spoon to fill your macarons with the icing. Store in the fridge overnight in an airtight container.
lemon_poppyseed_macs_cheesecake
For the crust: Preheat oven to 160°C (325°F). Mix crushed biscuits and sugar together in a medium bowl. Add butter and stir until well combined. Transfer crumb mixture to a greased and lined 25cm (10") springform pan (I had to use a 21cm springform pan). Using your hands, spread mixture out in an even layer, then use your fingertips to press crumb mixture into bottom of tin to form an even crust. Transfer to a baking sheet and bake until crust is set and golden in places, 15–20 minutes. Set crust aside until cool. For the filling, beat cream cheese and mascarpone together in a mixing bowl with an electric mixer on medium speed until light and fluffy, about 1 minute. Reduce speed to medium-low and gradually add sugar, beating well, about 1 minute. Add eggs, one at a time, beating thoroughly after each addition. Pour filling into crust and bake until just set, 40–45 minutes (Mine took about 1 hour in the smaller sized pan). Remove cheesecake from oven and set aside to cool for 5 minutes.
For the topping: Combine yogurt, sugar, and vanilla in a medium bowl. Pour onto cheesecake, spreading it out to cover top of cheesecake completely. Set aside at room temperature at least 2 hours. Run a knife between crust and inside ring of pan and remove ring. and serve. Can be refrigerated overnight in an airtight container. Only arrange macarons on top of cheesecake when you are ready to serve as yoghurt layer will cause macarons to go soggy.
lemon_poppyseed_cheesecake-5_filtered

Sunday, May 8, 2011

Raspberry Creme Brulee

raspberry_creme_brulee
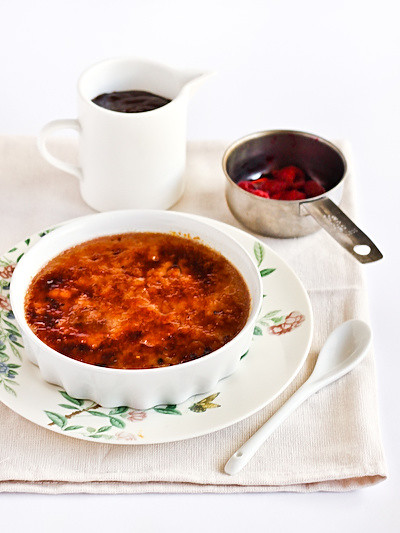
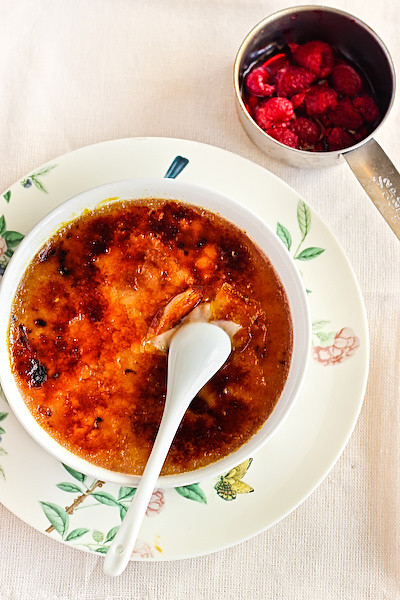
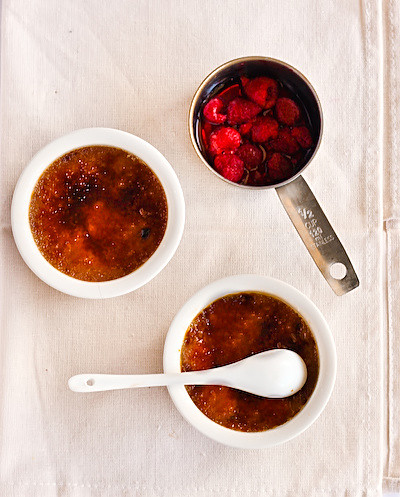
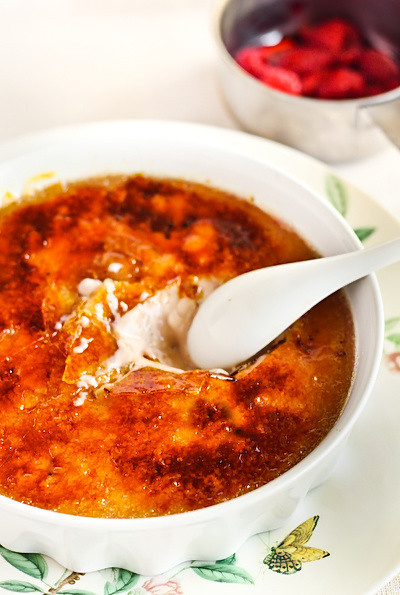
I love crème brûlée. The cracking sound of the toffee surface as you break through with your spoon always brings a mischievous grin to my face. I had to make some today, I didn't really care if it was for the blog or not, I just wanted to eat it. Of course I was too lazy to walk to the supermarket to get any extra ingredients, so I worked with what I had. The raspberries in my freezer were the magic ingredient today, giving my crème brûlées a lovely colour and a burst of extra flavour.
raspberry_creme_brulee-6
However, here is some advice: don't bake angry. Especially when a blowtorch is involved. Don't worry, I didn't burn myself or anything but there was a lot of burnt sugar, swearing and uneven toffee on top of my crème brûlée. Oh well. It still had the satisfying *crack* as I tapped it with a spoon. It's hard to tell from the photos but the raspberries gave the crème brûlée mixture a beautiful blush colour. That, plus the black flecks of vanilla bean were the perfect additions to the creamy custard hiding underneath that caramelised sugar layer.
raspberry_creme_brulee-4
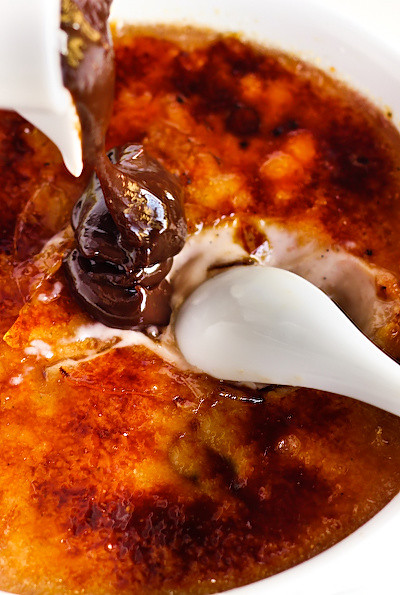
The flavours in this crème brûlée are lovely on its own, but if you're feeling extra indulgent take a leaf out of Karen's book and serve it with a warm chocolate sauce. I had some leftover chocolate ganache from my Mint Slice Cake from the other day which I warmed up and dolloped on top. Absolute heaven. Dark chocolate and raspberry is such a killer combination don't you think?
raspberry_creme_brulee-3
So there might not be anything ground-breaking about this dessert, but I love what a bit of raspberry puree does to any sweet dish. I searched around the internet for recipes for raspberry crème brûlées but all of them just threw the raspberries in whole. I wanted to keep my mixture silky smooth and seed-free, and I loved how pink it made the custard. And the best part? There's Chambord in it too! You can do no wrong with Chambord!
raspberry_creme_brulee-5
Raspberry Crème Brûlée
(adapted from Ina Garten's recipe, serves 6)
1 large egg
4 large egg yoks
1/2 cup sugar, plus 1/2 tbsp to top each serve
3 cups pouring cream (min 35% fat, pure cream)
2 cups fresh or frozen raspberries
2 tbsp Chambord
1 vanilla bean pod or 1 tsp pure vanilla extract/vanilla bean paste

Optional: Dark chocolate ganache to serve (see here for recipe)

Preheat oven to 150 degrees C (300 degrees F). Puree raspberries in a food processor and strain to remove seeds. Place egg, egg yolks and sugar and use an electric mixer on low speed to mix until just combined (you could use a hand whisk to combine too). You want to avoid whipping air bubbles into the mixture. Place cream in a medium saucepan with the vanilla pod (split and seeds scraped) or vanilla extract on low heat and bring just to the boil. Strain out vanilla pod. With your electric mixer on slow speed (or while stirring with a hand whisk), gradually pour hot cream mixture into the egg mixture.
raspberry_creme_brulee-16
Add raspberry puree and Chambord and mix on low speed until combined. Pour mixture into 6 ramekins (it's easier to do this if you are pouring out of something with a spout). Place ramekins on a tray with high sides and carefully pour hottest tap water into the pan so that it comes halfway up the sides of the ramekins. Place in oven for 35-40 minutes or until the custards are just set when gently shaken. Remove the ramekins from the water and place on a rack to cool completely. Refrigerate until ready to serve. To serve, sprinkle half a tbsp of sugar over the top of each and use a blow torch or the grill of your oven to caramelise the sugar. Optional: Serve with warm chocolate ganache.
raspberry_creme_brulee-13

Thursday, May 5, 2011

Mint Slice Cake

mint_slice_cake
At the risk of being a one-cake-gimmick wonder, I'm posting yet another biscuit-inspired cake. Think of it as a thank you cake for the amazing response to my Tim Tam Cake. I seriously didn't expect it but I guess everyone loves Tim Tams/chocolate cake so it's not too unbelievable. This Saturday is my best friend Asian Gaga's birthday. You might remember that for her last birthday I attempted my infamous Lady Gaga Cake, the photos of which make me cringe but she loved it. This year she asked if I could make the Tim Tam Cake for her, but could I make it smaller and mint flavoured? So I thought, why not just make a Mint Slice Cake? The Mint Slice (it doesn't have its own wiki page, aww.) is basically a chocolate biscuit with a thick layer of peppermint icing on top and the whole thing is covered with a layer of dark chocolate. It might not be as popular as the Tim Tam but it's always been a favourite of mine, thanks to my love of dark chocolate and peppermint and the awesome ratio of icing to biscuit.
mint_slice_cake-2
Originally I wasn't going to blog about it but I liked how the photos turned out. My blog was pretty quiet this week and I didn't want to leave it neglected for the whole weekend too! So I'm going to keep this short and sweet - the cake uses the same sponge cake and ganache recipe as the Tim Tam cake, which are both halved in quantity, and the chocolate in the butter icing filling is replaced with peppermint essence so that it's fluffy, white and minty. It was actually harder to make this one resemble the biscuit, the Tim Tams had those recognisable ripples on their surface but the Mint Slice is completely smooth. I suck at keeping ganache smooth. I did my best. The important thing is it tastes great! HAPPY BIRTHDAY ASIAN GAGA!!! I love you, crazy lady.
mint_slice_cake-5
Mint Slice Cake
(adapted from my Tim Tam Cake, sponge recipe from Gourmet Traveller)
2 large eggs
55g (¼ cup) caster sugar
32g cornflour (cornstarch)
17g Dutch-process cocoa
2 tsp plain flour
½ tsp cream of tartar
¼ tsp bicarb soda
25g unsalted butter, melted and cooled

For the mint icing:
100g butter, removed from the fridge 30 minutes before starting
3 cups icing sugar, sifted
2 tsp milk
2 tsp peppermint essence
Optional: Mint Slice biscuits to hide in this layer, I only hid one for fun so it's definitely not needed

For the chocolate ganache topping:
150ml pouring cream (min. 35% milk fat pure cream)
200g dark chocolate (I used 60% cocoa)

Grease and line one 20cm round cake tin. Preheat oven to 180°C (350°F). Whisk eggs and sugar in an electric mixer until thick and pale (5-6 minutes). Sift over cornflour, cocoa, flour, cream of tartar and bicarb soda, fold in with spatula. Fold in butter, spoon into prepared tin. Bake in centre of oven until cake springs back when lightly pressed (10-12 minutes). Turn onto baking paper covered wire rack and cool completely.
mint_slice_cake-12
Prepare the mint icing; beat butter and icing sugar together until light and fluffy, then add mint essence and milk and beat until smooth. Spread over the top of cake and smooth with a spatula. To make the ganache, place cream in a small saucepan on low heat. Just as it starts to come to the boil, remove from the heat and cool for a couple minutes. Pour hot cream over chocolate and set aside 10 minutes to allow chocolate to melt. Mix cream and chocolate together until smooth using a whisk, then cool (I placed mine in the fridge for about 10 mins) until it reaches room temperature and thickens. Pour over the top of the cake, using a spatula to ensure the ganache covers all the top and sides of the cake (the excess will drip off everywhere so make sure you lay down some baking paper to catch the drips). Chill in the fridge until the ganache sets, then peel off the bottom baking paper and serve cake at room temperature.
mint_slice_cake-4

Sunday, May 1, 2011

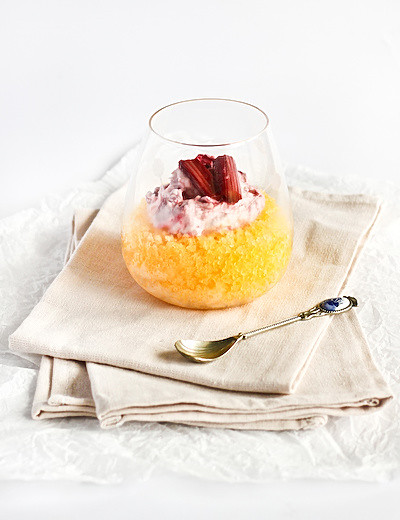
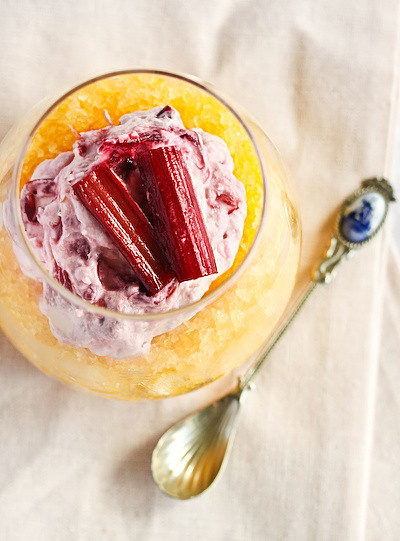
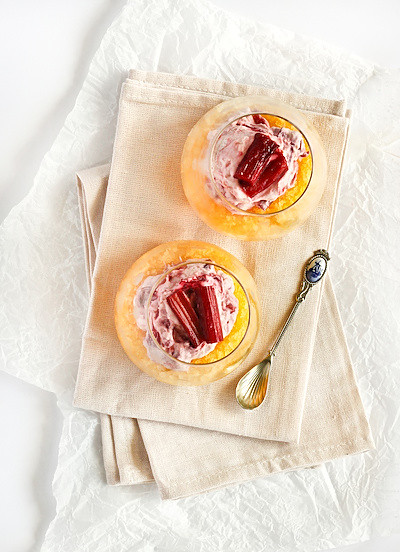
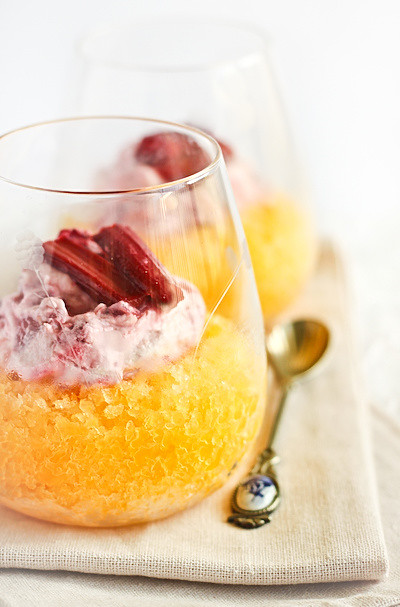
Rhubarb Fool & Orange Granita

orange_granita_rhubarb_fool-6
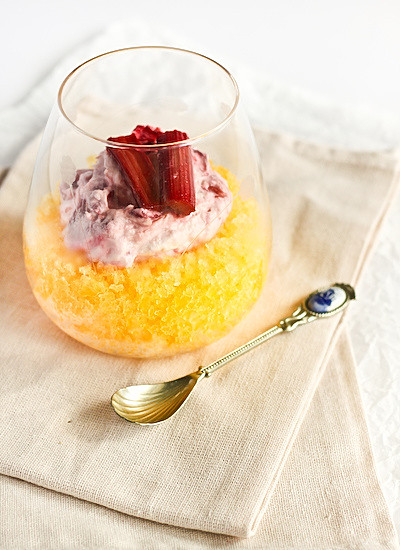
Okay, it's time to take a step back from all the crazy baking. I know - BORING, I personally love all the cray-cray that's been going on at this blog lately, but I don't have super awesome ideas coming out of my ying yang all the time ya know?! Wait that sounded wrong. Erm anyways...the other day my brother was asking me for a simple dessert recipe he could whip up for a dinner party, and I realised it's been a while since I've done anything nice and easy like that. (He ended up doing my no-bake green tea cheesecake in individual serving glasses, which was kinda genius)
orange_granita_rhubarb_fool-2
I've had this dessert on the waiting list for a while, since it's taken me AGES to find rhubarb as it's not in season yet. But I happened to swing by a Harris Farm Market recently and huzzah I have rhubarb! I LOVE the combination of rhubarb with citrus, especially orange or mandarin. It's a combination I've used previously (Mandarin & Rhubarb macarons, YUM) and it's delightful.
orange_granita_rhubarb_fool
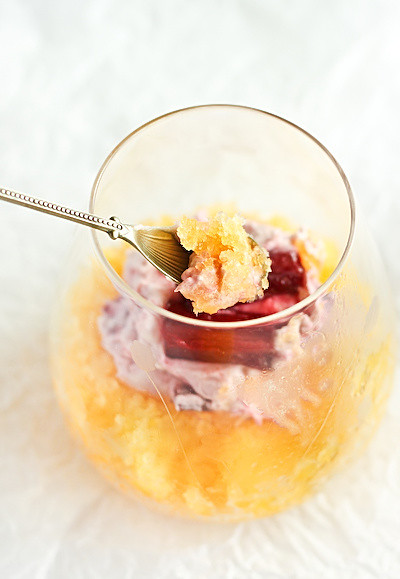
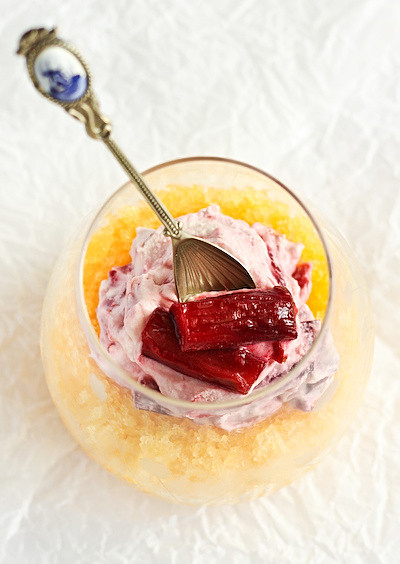
In case you can't already tell, the granita/fool combination here is inspired by one of my favourite desserts from one of my favourites restaurants, the Snow Egg dessert from Quay. I can still remember how in awe I was of that dessert, and how I didn't share a single morsel of it with A. Obviously my dessert here lacks the beautiful complexity of the Quay dish, but it has some of the basic elements that I loved, the contrast of the crunchy cold granita, tangy from the orange flavouring and the smooth creaminess of the fool with soft, sweetly stewed rhubarb. Love the colours in it too.
orange_granita_rhubarb_fool-4
With all the cold, wet weather we've had in Sydney recently I know you might be expecting puddings and cakes for dessert, but this is such a great way to end a meal in a light, refreshing way. I generally feel like these type of fruity, cool desserts after having the heavy rich meals I tend to crave in the cooler months.
orange_granita_rhubarb_fool-14
It also seems quite appropriate to do a dish inspired by a restaurant which is now IMPOSSIBLE to get into thanks to the last season of Masterchef, when we are hours away from the premiere of the new season of Masterchef! I know the food blogging community in particular is waiting with bated breath because of a certain contestant who we all know well. I can't wait! I'll be hanging out on Chocolate Suze's Masterchef chat, so come join in and save everyone else from MC flooded twitter feeds!
orange_granita_rhubarb_fool-5
Rhubarb Fool & Orange Granita
(serves 6, inspired by Quay's Snow Egg dessert)
Juice from 6 oranges
2 tbsp caster sugar + 4 tbsp water
1-2 tbsp orange liqueur (I used triple sec but Grand Marnier would be great)

For the rhubarb fool:
300g washed rhubarb, cut into 1 inch pieces
2 tbsp caster sugar + 1 tbsp water
300ml pouring cream (min. 35% milk fat pure cream)
1 tbsp orange liqueur

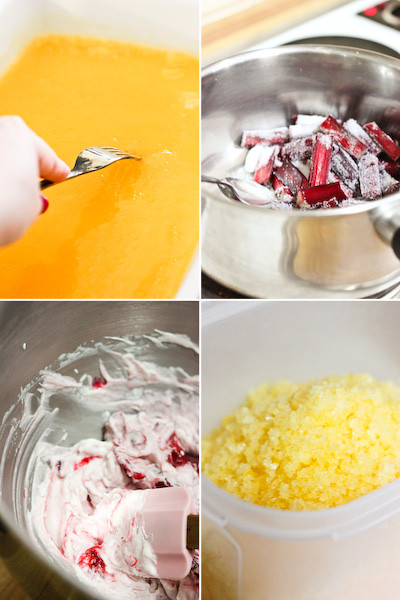
Juice oranges and strain any pulp. Place sugar and water in a small saucepan on low heat and stir to dissolve sugar and make a simple syrup. Remove from heat and add sugar syrup 1 tsp at a time to taste. (My oranges were very sweet so I hardly needed any). Add liqueur to taste and then play in the widest freezer safe dish you can fit in your freezer, I used a casserole dish. Ensure your liquid is no higher than 1 inch deep, the shallower the better as the liquid will freeze quicker. Freeze for an hour then remove and use a fork to scrape the semi-frozen liquid into fine granules. Return to the freezer and re-scrape every hour or so until the mixture is completely frozen. Keep in a freezer-safe container until ready to serve.
orange_granita_rhubarb_fool-16
Place chopped rhubarb, sugar and water in a medium saucepan on low heat. Stir until the sugar dissolves and the rhubarb is tender, about 10 minutes. Remove from the heat and set aside to cool. Place cream and liqueur in a large mixing bowl and whip to soft peaks using an electric mixer. Fold in stewed rhubarb, but save a few pieces to the side if you would like to use then for garnish. Chill fool in fridge until ready to serve. Spoon granita into serving bowls, then top with rhubarb fool and the extra pieces of rhubarb. Serve immediately. Best eaten on the same day, but the granita can be made well in advance.
orange_granita_rhubarb_fool-3