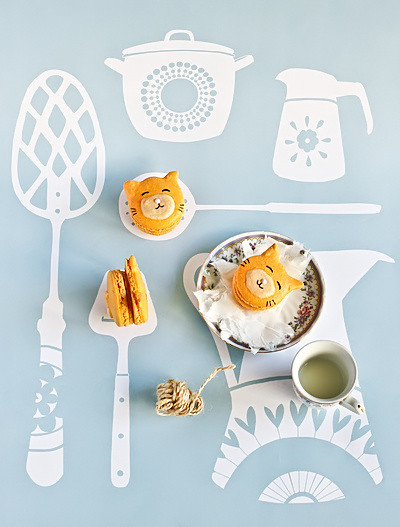
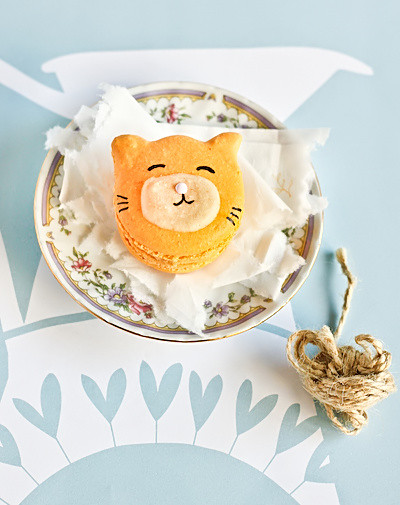
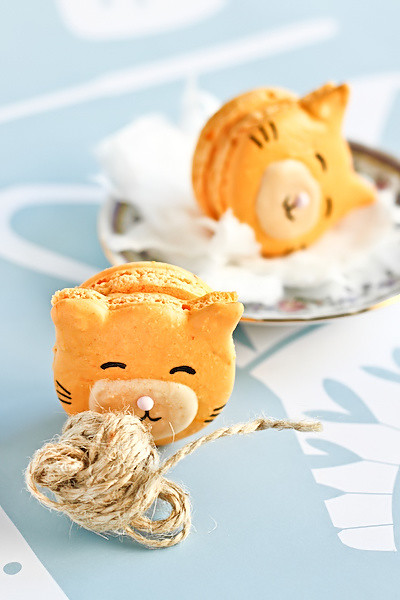
There have been a lot of animal-themed baked goods on this blog. Pupcakes. Piggy Macs. Bunny Macs. Sweets with little smiley faces on them are just too cute aren't they? This weekend is A's little sister's birthday and I wanted to make her something special. The newest member of their household is an adorable ginger kitty named Puss Puss and these kitty cat macarons are inspired by him.
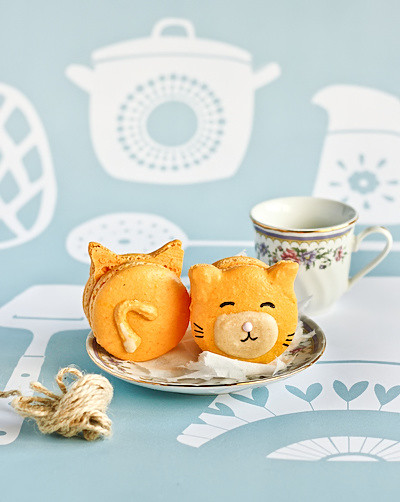
I've been wanting to do another animal macaron for some time now. A while back I REALLY wanted to make Hello Kitty macarons for Asian Gaga's birthday, but then I found a few blogs who had already done them so well and AG ended up requesting the mint slice cake anyway. But I think I like these ginger kitten macarons even more than Hello Kitty, they're so fat and happy! And look as those little tails :D
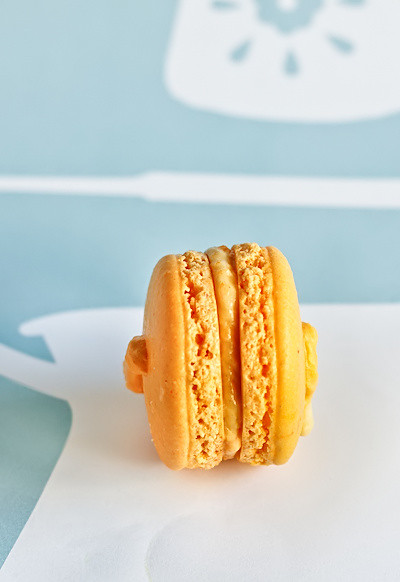
One thing we need to talk about is the filling. I decided to make a Carrot Cake-Flavoured Icing to match the orange shells. I was a little unsure if this would work but it turned out SO GOOD. It tastes just like carrot cake with cream cheese icing. I'm quite chuffed with it to be honest. I did manage to dump an entire container of ground cinnamon on myself in the process, which was very messy and I kept smelling myself and getting hungry for the rest of the day.
Hopefully A's sister will like these as much as I do. Happy Birthday Miss K!
Just like with my bunny macs, I might have gotten a little bit carried away with the photos/scenarios...
Kitty Cat Macarons with Carrot Cake Icing
(makes about 10 macarons)
100g aged egg whites (you can use fresh eggs too, just make sure they are room temperature. I always use fresh these days, and zap it in the microwave on defrost for 10 seconds)
110g almond meal, dried in a cool (100 degrees C or less) oven for 5 minutes and sifted
200g icing sugar
50g caster sugar
Optional: 1 tsp powdered egg whites (available from The Essential Ingredient), helps to stabilise egg whites but is not necessary
orange powdered food colouring
For the carrot cake icing:
1 medium carrot, peeled & finely grated
100g cream cheese
1 1/2 cups icing sugar, sifted
1/4 tsp cinnamon
To decorate: liquid black food colouring (available from the supermarket) or edible ink pens, sugar balls/cachous
Line two baking sheets with baking paper. Place icing sugar in food processor and pulse for a minute to remove any lumps. Stir in almond meal and pulse for about 30 seconds to combine. Place in a large mixing bowl and set aside. Using an electric mixer, beat egg whites and egg white powder in a medium mixing bowl until the egg white powder dissolves and it reaches soft peaks. With the mixer on high speed, gradually add sugar and beat until it reaches stiff peaks.
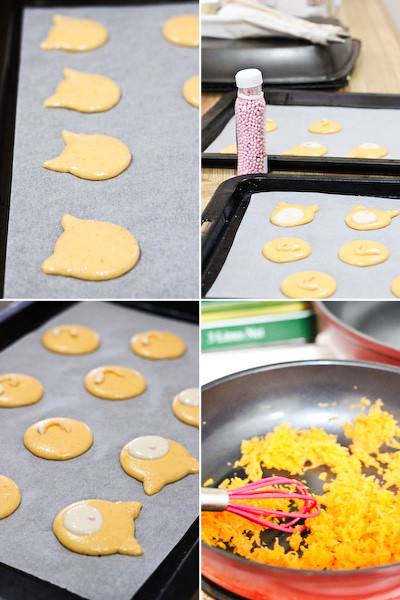
Add meringue to your dry mixture and mix, quickly at first to break down the bubbles in the egg white (you really want to beat all the large bubbles out of the mixture, be rough!), then mix carefully as the dry mixture becomes incorporated and it starts to become shiny again. IMPORTANT: Just as the mixture has started to combine, place about 1/4 of the mixture in a separate bowl and set aside (to be used for the white part of the faces). Add orange food colouring to the remaining mixture and mix until the correct consistency. Take care not to overmix, the mixture should flow like lava and a streak of mixture spread over the surface of the rest of the mixture should disappear after about 30 seconds. Place in a piping bag and pipe rounds of about 3-4cm diameter on baking sheets, about 10 on each sheet or silicon baking mats. Make sure you leave enough space above each round so you can pipe the two ears for each kitty face. Using a narrow piping tip, piped triangular ears on half of your piped rounds. Tap baking sheets carefully and firmly on the benchtop a couple times to remove any large bubbles.Leave to dry for about half an hour. Mix the leftover white macaron mixture to the same consistency as the orange mixture and place in a piping bag. Pipe small circles over the top of the rounds with ears. Place a pink sugar ball/cachous in the middle of the white circle for the kitty's nose. If you still have some mixture leftover of either colour you can pipe small tails on the non-face shells. Leave this to dry again for at least half an hour, so that when you press the surface of one gently it does not break. This will help prevent any cracking and help the feet to form on the macs. Preheat your oven to 140-150 degrees C. Place on top of an overturned roasting tray or another baking sheet if your sheets are not professional grade, for better heat distribution. Bake for 15-18 minutes, depending on the size of your shells. Remove from the oven and cool on the tray for a few minutes, then gently remove from the sheet and place on a wire rack to cool completely. Use a skewer dipped in black food colouring or edible ink pens to draw on eyes (and whiskers if you choose).
To prepare the carrot cake icing, heat a small non-stick frying pan on low and coat the surface with a small amount of unsalted butter. Place grated carrot in pan and sweat carrots until all excess moisture is remove and carrot is tender and cooked through (about 15 mins). Set aside to cool completely. Place cream cheese in a mixer (you may need to take it out of the fridge ahead of time to soften if you don't have a strong electric mixer), and beat until fluffy. Add sifted icing sugar, cinnamon and carrot and beat until smooth. Spoon/pipe onto shells and sandwich.
Kitty sniggering into his ball of yarn because he thinks the other kitty walks with a funny bum wiggle
I've been wanting to do another animal macaron for some time now. A while back I REALLY wanted to make Hello Kitty macarons for Asian Gaga's birthday, but then I found a few blogs who had already done them so well and AG ended up requesting the mint slice cake anyway. But I think I like these ginger kitten macarons even more than Hello Kitty, they're so fat and happy! And look as those little tails :D
One thing we need to talk about is the filling. I decided to make a Carrot Cake-Flavoured Icing to match the orange shells. I was a little unsure if this would work but it turned out SO GOOD. It tastes just like carrot cake with cream cheese icing. I'm quite chuffed with it to be honest. I did manage to dump an entire container of ground cinnamon on myself in the process, which was very messy and I kept smelling myself and getting hungry for the rest of the day.
Hopefully A's sister will like these as much as I do. Happy Birthday Miss K!
Just like with my bunny macs, I might have gotten a little bit carried away with the photos/scenarios...
Kitties playing
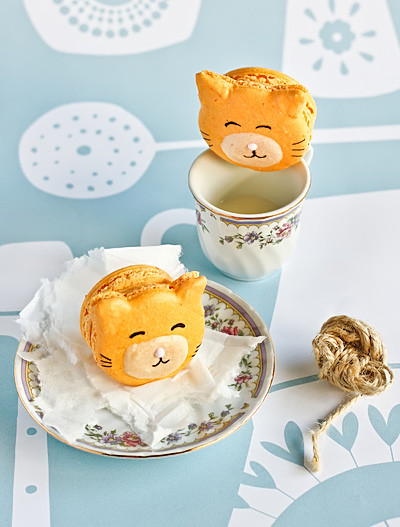
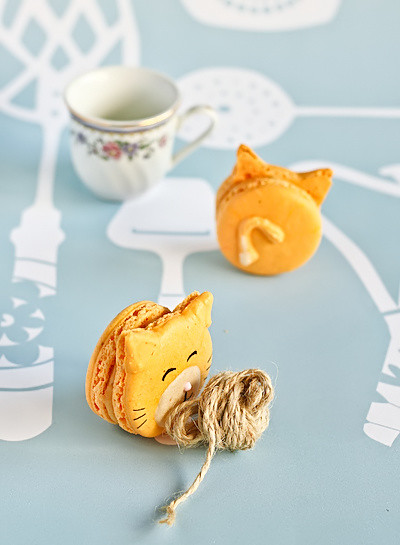
Kitties chatting over morning tea
I ended up with two extra tail shells, which is super creepy and makes me think of that Halloween episode of the Simpsons which parodies The Fly and their cat and dog get spliced together...someone please tell me I'm not the only one who knows what I'm talking about.Kitty Cat Macarons with Carrot Cake Icing
(makes about 10 macarons)
100g aged egg whites (you can use fresh eggs too, just make sure they are room temperature. I always use fresh these days, and zap it in the microwave on defrost for 10 seconds)
110g almond meal, dried in a cool (100 degrees C or less) oven for 5 minutes and sifted
200g icing sugar
50g caster sugar
Optional: 1 tsp powdered egg whites (available from The Essential Ingredient), helps to stabilise egg whites but is not necessary
orange powdered food colouring
For the carrot cake icing:
1 medium carrot, peeled & finely grated
100g cream cheese
1 1/2 cups icing sugar, sifted
1/4 tsp cinnamon
To decorate: liquid black food colouring (available from the supermarket) or edible ink pens, sugar balls/cachous
Line two baking sheets with baking paper. Place icing sugar in food processor and pulse for a minute to remove any lumps. Stir in almond meal and pulse for about 30 seconds to combine. Place in a large mixing bowl and set aside. Using an electric mixer, beat egg whites and egg white powder in a medium mixing bowl until the egg white powder dissolves and it reaches soft peaks. With the mixer on high speed, gradually add sugar and beat until it reaches stiff peaks.
Add meringue to your dry mixture and mix, quickly at first to break down the bubbles in the egg white (you really want to beat all the large bubbles out of the mixture, be rough!), then mix carefully as the dry mixture becomes incorporated and it starts to become shiny again. IMPORTANT: Just as the mixture has started to combine, place about 1/4 of the mixture in a separate bowl and set aside (to be used for the white part of the faces). Add orange food colouring to the remaining mixture and mix until the correct consistency. Take care not to overmix, the mixture should flow like lava and a streak of mixture spread over the surface of the rest of the mixture should disappear after about 30 seconds. Place in a piping bag and pipe rounds of about 3-4cm diameter on baking sheets, about 10 on each sheet or silicon baking mats. Make sure you leave enough space above each round so you can pipe the two ears for each kitty face. Using a narrow piping tip, piped triangular ears on half of your piped rounds. Tap baking sheets carefully and firmly on the benchtop a couple times to remove any large bubbles.Leave to dry for about half an hour. Mix the leftover white macaron mixture to the same consistency as the orange mixture and place in a piping bag. Pipe small circles over the top of the rounds with ears. Place a pink sugar ball/cachous in the middle of the white circle for the kitty's nose. If you still have some mixture leftover of either colour you can pipe small tails on the non-face shells. Leave this to dry again for at least half an hour, so that when you press the surface of one gently it does not break. This will help prevent any cracking and help the feet to form on the macs. Preheat your oven to 140-150 degrees C. Place on top of an overturned roasting tray or another baking sheet if your sheets are not professional grade, for better heat distribution. Bake for 15-18 minutes, depending on the size of your shells. Remove from the oven and cool on the tray for a few minutes, then gently remove from the sheet and place on a wire rack to cool completely. Use a skewer dipped in black food colouring or edible ink pens to draw on eyes (and whiskers if you choose).
To prepare the carrot cake icing, heat a small non-stick frying pan on low and coat the surface with a small amount of unsalted butter. Place grated carrot in pan and sweat carrots until all excess moisture is remove and carrot is tender and cooked through (about 15 mins). Set aside to cool completely. Place cream cheese in a mixer (you may need to take it out of the fridge ahead of time to soften if you don't have a strong electric mixer), and beat until fluffy. Add sifted icing sugar, cinnamon and carrot and beat until smooth. Spoon/pipe onto shells and sandwich.
Kitty sniggering into his ball of yarn because he thinks the other kitty walks with a funny bum wiggle


