Time has been flying along way too fast for me. I often wonder how people manage to keep up with all the crazy amounts of things they need to balance in their lives, since I find it pretty much impossible. Inevitably one aspect of my life gets messy and neglected at some point (it usually ends up being the housework since I am a total slob). It boggles my mind that it's July already.
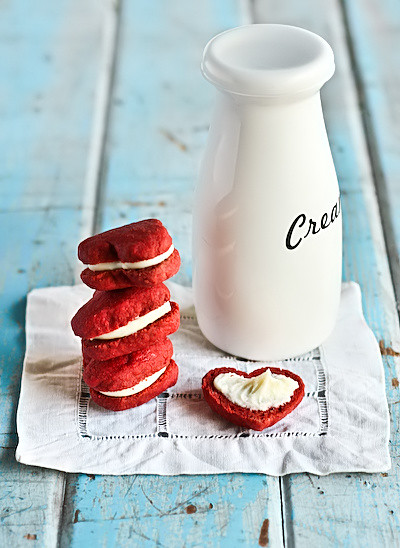
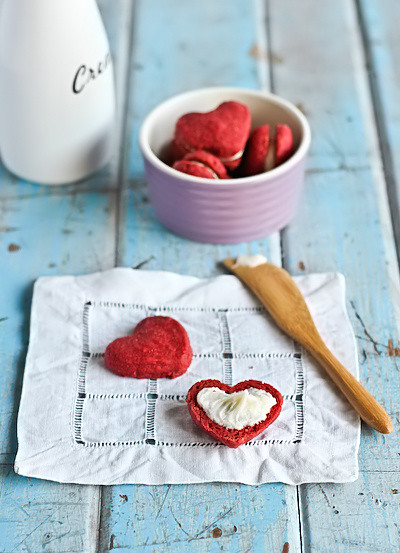
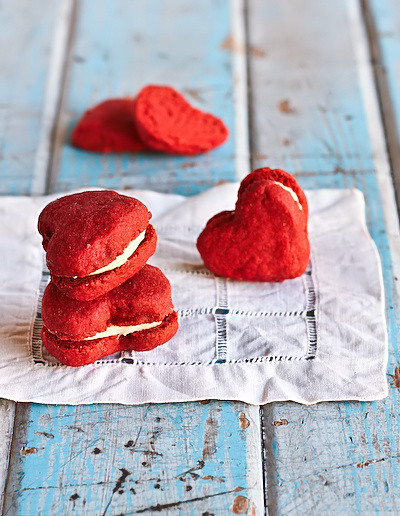
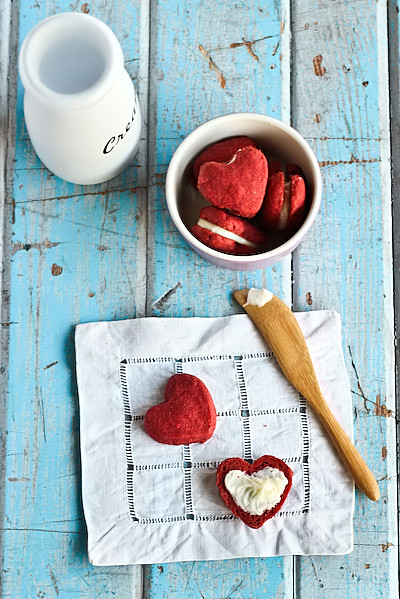
Luckily my blog has never been the thing to be completely neglected in the last few years. It's probably because it's my hobby, with no obligations and nothing that makes it feel like work. It'll be sad if that ever changes. Unfortunately my baking ideas can't keep up with how fast time flies seeing as I came up with a lovely, simple idea for a Valentine's Day baking project months too late. Check out these Red Velvet Melting Moment Biscuits, melt-in-your-mouth shortbread biscuits (also known as yoyos) sandwiched with fluffy cream cheese icing. I couldn't resist making them heart-shaped, even though it does remind me of the red velvet whoopie pies that I saw around Valentine's day. I have issues with whoopie pies. These are much better.
I adapted these from the same recipe I used for my Neopolitan Melting Moments, cos they were so full of awesome. These ones have a bit of cocoa and a ton of red food colouring and taste so great with the smooth cream cheese icing. I was originally planning to try this icing for the filling but I had leftover cream cheese and couldn't let it go to waste. It worked out great since the biscuits are so delightfully light that they needed that bit of richness and tang from the cream cheese.
This recipe is incredibly easy and quick to whip up, the only fiddly part is pressing the dough into the little heart shapes. Of course there's no need for the heart shapes, you can just roll and press regular rounds of dough for normal melting moments, but I love the hearts. I also love that A came home the other day with a chopped up chunk of an old, worn blue wooden door from his work because he remembered that I saw it once and ranted about how perfect it would be for photos. We love him.
Red Velvet Melting Moments
(adapted from this Gourmet Traveller recipe, makes about 24 biscuits)
250g soft, good quality unsalted butter
80g icing sugar, sifted
1 tsp pure vanilla extract
About 1 tbsp liquid red food colour, adjust as you like (I used gel colouring, which only needed about 2 tsp)
75g (1/2 cup) cornflour (cornstarch)
225g (1 1/2 cups) plain flour
1 tbsp cocoa powder (preferably Dutch-processed)
1/2 tsp salt
For the cream cheese icing:
113g cream cheese
1 tbsp (14g) butter
1 cup (150g) icing sugar, sifted
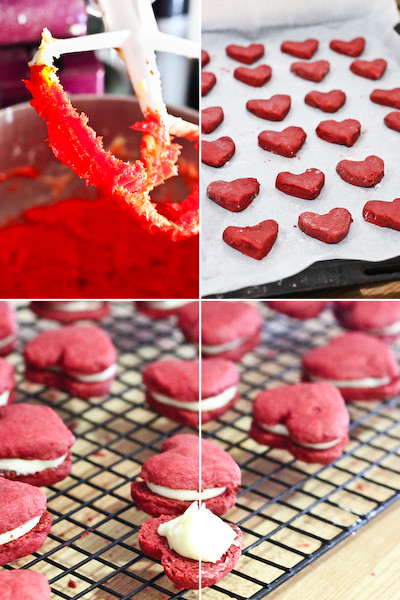
Preheat oven to 180°C (350°F) and line two baking sheets with baking paper. Using an electric mixer, beat butter and sugar until light and fluffy. Add red food colouring and vanilla and beat until just combined. Sift flours, cocoa powder and salt over butter mixture and, using a wooden spoon, stir to form a soft dough. If you are making heart shapes you may want to chill your dough for about 10 mins before you start to shape them, to stop the butter in the dough melting from the heat of your hands.
Keeping your fingertips lightly floured, press heaped teaspoons of dough into heart shapes that are about 0.5cm thick and 3.5cm wide and place on baking sheets (do not knead your dough, work it as little as possible). I could fit about 24 biscuits on each sheet. Bake for 12 minutes or until lightly coloured. Stand biscuits on trays for 5 minutes, before transferring to wire racks to cool completely.
To prepare the icing, remove the cream cheese and butter 30 mins before starting. Beat cream cheese and butter in a large mixing bowl with an electric mixer on high until smooth and fluffy. Add sifted icing sugar and beat until smooth. Spoon on to cooled biscuits and sandwich together. Can be served immediately or stored in the fridge in an airtight container.




What gorgeous photos. I really love your blog, it makes me wish I was a better baker!
ReplyDeleteThese are gorgeous, they'd be perfect for Valentine's Day!
ReplyDeleteOMG OMG. Defintely good for V. day... just imagine a box of them.. you'd totally take my breath away heheee
ReplyDeleteThese are beautiful! You were right about that door, such an interesting backdrop. I love the colour contrast.
ReplyDeleteThese are just the sweetest little hearts. I love them, the images are perfect with the blue wood background and the white lace material.
ReplyDeleteLovely Lovely Lovely... too good to spoil by eating surely :)
wawwww wonderfull.
ReplyDeleteYou always have the best recipes! I agree with Nicole, it really inspires me to think more creatively about baking.
ReplyDeleteI'm guessing this dough is too soft to be rolled? Would it be possible to roll and stamp out heart shapes with a cookie cutter?
Shakila - You guessed right, unfortunately the dough is super soft. I thought about rolling it, but it was so sticky, the best thing to do is to do it with your fingertips. Plus I think the more you work the dough the tougher it gets :(
ReplyDeletethey are so nice and delicious! and beautiful photos too!
ReplyDeleteThese are absolutely gorgeous. I love everything red, red velvet, cream cheese frosting and hearts. You make me want to become a better baker. And not to mention your photography skills are amazing!!
ReplyDeleteLove the heart shapes and yes, so much better than whoopie pies! and how nice of A to bring you props from work!
ReplyDeleteAdorable!!!!!!
ReplyDeleteNawww, doesn't have to be Valentine's to warrant heart-shaped goodies. And, in any other situations it would be weird to receive part of a door as a gift! <3
ReplyDeleteAnytime is the right time for something sweet and heart-shaped. I discovered this melting moment thing only since being in Australia - yours have so much character :)
ReplyDeletethese are gorgeous i love red velvet!
ReplyDeletehehe that really is an awesome door! and of course the biscuits gotta be hearts! super cute
ReplyDeleteWow!!! They look amazing :)
ReplyDeletewow! wonderfull food & congrats for the images
ReplyDeleteciao from Italy
What a beautiful job! Wonderfoul really. So... I stay here in your blog. Bye!
ReplyDeleteAndrea.
Stunning pics Steph! I love the look of that door and can't wait to see more lovely pics with it :)
ReplyDeleteI love that you have red velvet-ified melting moments.. Genius! They look so cute! I'm with Rita, doesn't have to be Valentine's to warrant heart-shaped goodies. Uber cute!
They are beautiful!! They would make such a wonderful gift.
ReplyDeleteLove the heart shape!
ReplyDeletehttp://mandycrandell.blogspot.com/
These are gorgeous and I would love if someone made them for me, lol!Yum!
ReplyDeleteThey are gorgeous :) better late then never. I am freaked about using so much red food colouring, i have read that originally red velvet was made with beetroot? I have beetroot powder but somehow i don't think you would get quite the same texture.
ReplyDeletebeautiful photos! i <3 your food styling!
ReplyDeleteHello there! WOW< I can't think of another word, but freak'n fabulous. The reds, and blues, the props, can you believe I never had Red Velvet before?
ReplyDeletegorgeous photos. This looks AMAZING!!! I'm definitely going to make this for our anniversary :)
ReplyDeleteThis is lovely! I love your props
ReplyDeleteThey look so pretty! Bookmarked this so that I can make it for the boy~
ReplyDeleteOh wow Steph, amazingly cute!!! I made red velvet macarons, I'd love to see you make them & in herat shapes!!! So adorable! =D xx
ReplyDeleteperfect photos ! gorgeous blog and recipes
ReplyDeleteWhy subscribe to Happy Hallmark Day once a year? Make every day Valentines Day! Love these biscuits. And yes - the old blue door is P.E.R.F.E.C.T!!!!! Another triumph Steph!
ReplyDeletesuch pretty melting moments! love it how u made it into a heart shape!
ReplyDeleteI'm dribbling on my computer from the sight those gorgeous Red Velvet Melting Moments
ReplyDeleteThank you for this recipe! I had some leftover icing from cupcakes, and was looking for something to use it with. I decided to make these the other day and they turned out pretty well! (https://fbcdn-sphotos-a.akamaihd.net/hphotos-ak-snc6/268960_10150313078544224_767549223_9475518_5321968_n.jpg).
ReplyDeleteI noticed there was a strong corn tortilla flavor (from the corn flour?) that came out after the initial bite. Is it supposed to taste pretty corn-y? Is there a substitute or is the corn flour crucial for the melt-in-your-mouth property of the shortbreads?
Kat - You may have used the wrong type of corn flour for this recipe, I believe what we call corn flour in Australia is called cornstarch in the US? It shouldn't have a obvious corn flavour.
ReplyDeleteP.S. I'll update the recipe to help avoid further confusion!
ReplyDeleteSo cute...and could be used for so many fun occasions! Once again another great recipe too!
ReplyDeleteNicole @ It's Feeding Time at the Zoo - Thank you so much, that's such a wonderful compliment!
ReplyDeletemissklicious - Thanks, I think so too! :D
Dolly - LOL thanks
Elly McCausland - I agree! So glad I got it :)
Gourmet Getaway - Aww thank you! I love the colours too. But I still ate them ;)
LEYLA'nın KAHVE DÜKKANI - Thanks!
Agnese - Thank you!!
Tina @ bitemeshowme - You are too sweet! Thanks so much :)
Jacq - Yes I'm very lucky he doesn't think I'm completely nuts for wanting a chunk of wooden door :D
Blog is the New Black - Thank you!
mademoiselle délicieuse - Hahaha so true. But it was the perfect gift!
yasmeen - I agree! Melting moments are the bomb :D
Two fit and fun gals - Thanks!
chocolatesuze - Of course! Thanks :)
Katie - Thanks so much!
Paul @cookingmesoftly - Er thank you!
La ventana dulce - Hehe okay...thanks!
Phuoc'n Delicious - Thanks so much! I'm gonna have to try really hard not to use it too much!
Butter Hearts Sugar - Thank you!
Mandy Crandell - Thanks
Sinful Sundays - Thanks so much!
muppy - I agree :D No I'm pretty sure it used to be made with a certain type of cocoa powder that turned slightly red when mixed in with the other ingredients
Christine - Thanks so much!
myFudo - Hi! Oh you should definitely try it! Though I think half the appeal is the bright colour rather than the flavour :)
Mai - Thanks so much! Hope you like the recipe :)
Kulsum@JourneyKitchen - Thanks so much! My props are gonna make me broke!
Miss Adriennely - Yay! I hope you both like them
LucyL - Thanks! I actually thought about doing the macs a while back but so many other people had done them already, I decided to try something different
Natali - Thanks!
Di-licious - Sounds like a plan! Thank you!
sugarpuffi - Thanks! It was time-consuming but worth it!
Anonymous - haha thanks!
Andrea @ Strawberry Chic - Thank you muchly :D
Your Recipes are gorgeous!
ReplyDeleteI follow you from Italy with pleasure! :)
Serena
These look heavenly... I cannot wait to try these! Thank you so much! :)
ReplyDeleteserena - Thanks for following!
ReplyDeleteBecca - You are very welcome :)
Is there a substitute for cocoa powder? Will it affect the taste if I exclude the cocoa ):
ReplyDeleteAnonymous - well you can exclude it and it will taste fine but it won't be red velvet flavoured anymore :S
ReplyDeleteChe carini!!! Un'idea da segnare per San Valentino ;-)
ReplyDeletehi! can I roll out the dough and cut the cookies with cookie cutters?
ReplyDeleteAnonymous - Unfortunately the dough is very soft and needs to be handled as little as possible so it's not the best for rolling and cutting with cookie cutters, sorry!
ReplyDeleteaww okay. Will still try the recipe though! Love this blog! :)
ReplyDeleteI'm going to do those Red Velvet Melting Moments of mother's day! I hope they will look as amazing as yours! Greetings from Germany, I love your blog! You are pretty talented :)
ReplyDeletethese are perfect for Valentine's Day!
ReplyDeleteI made this with a cookie cutter, but I couldn't roll out the whole lot, I just rolled out enough to cut out one at a time. It was a lot easier than fiddling with it with my fingers. And the result was perfect! Thanks for the recipe, my husband will be very pleased with his home made Valentines present.
ReplyDelete