Pages

Monday, November 28, 2011

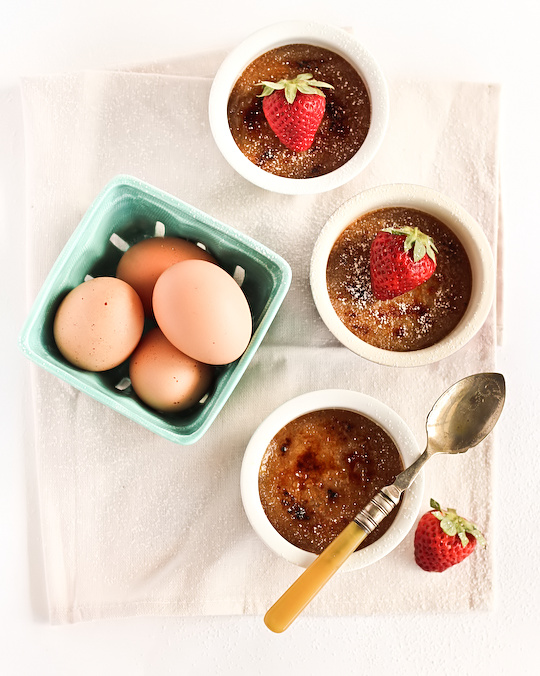
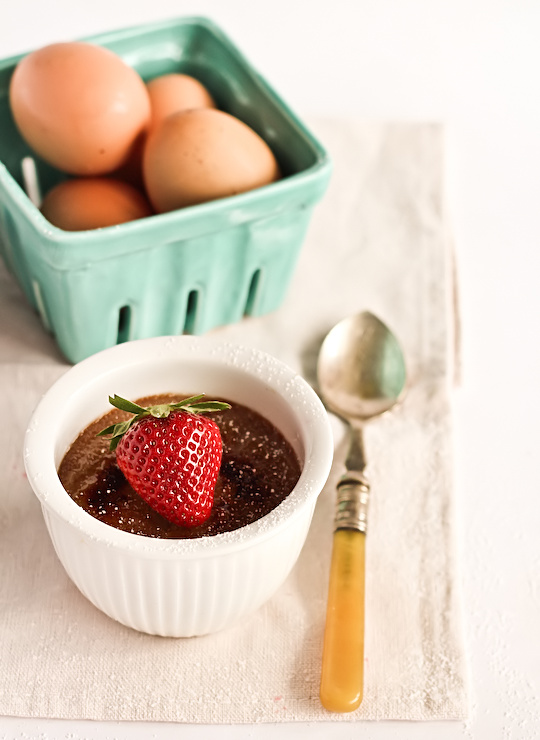
Spiced Strawberry Creme Brulee

spiced_strawberry_brulee-13
I'm going to be honest; this was not the recipe I originally set out to make. I was going to make some coconut macaroon tart shells and fill them with jam and cream. And it was meant to be a nice simple recipe that you could easily make more Christmassy. Because it's coming to that time of the year, my favourite time of the year, when I can finally whip out all my Christmas baking ideas. The coconut macaroon tart shells used up a few egg whites, so I thought I'd be practical and use the leftover egg yolks to make a spiced custard to fill the shells, along with some strawberry jam. It was all going smoothly, the shells were baking in the oven, the custard mixture was coming together and the jam was slightly warmed, ready to be spooned into the bottom of the shells.
spiced_strawberry_brulee-3
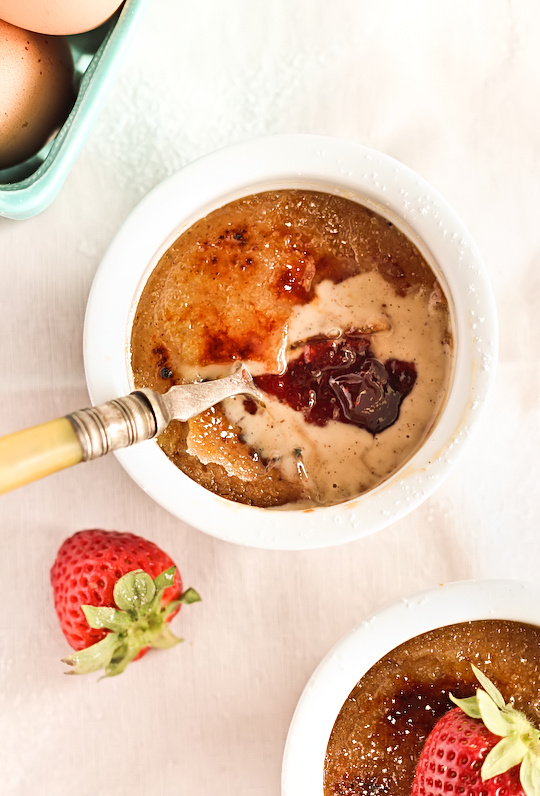
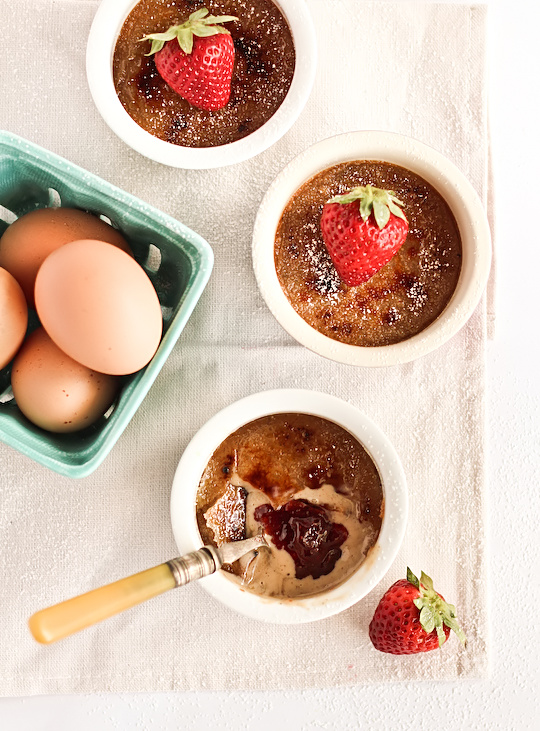
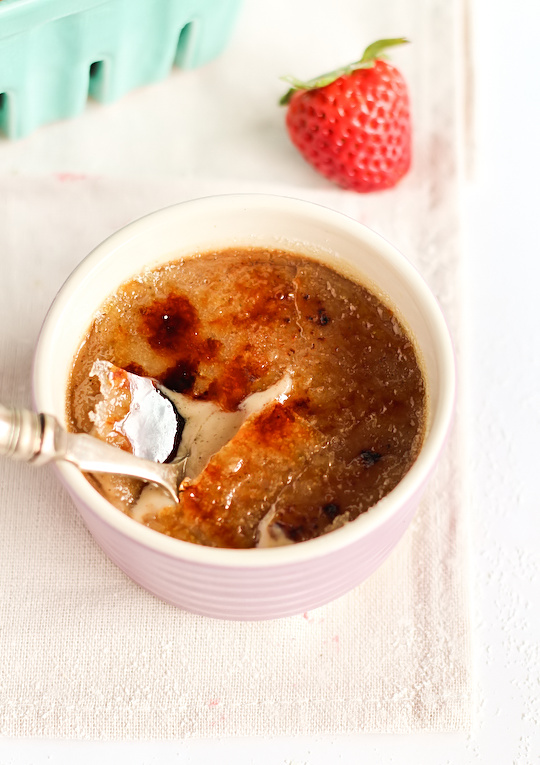
And then it all went bad. The shells refused to budge out of the tart tins no matter how hard I tried, and they fell apart. Clumps of coconut were thrown against the wall in frustration. I panicked and made up a whole new batch of coconut macaroon mixture and decided to turn it into a slice, so I pressed a thin layer of it into a tray and started baking that. Then I panicked more and decided against it and pull it out of the oven and tried to make individual cookies with it but it was already too far baked and I had to throw that away too. Balls. I really didn't want to waste the custard mixture that I had already made, it was so delicious and would be perfect for the holiday season. So in my last ditch effort at saving SOMETHING, I made these; Spiced Strawberry Crème Brûlée. The custard is flavoured with golden syrup, cinnamon, ginger and all other kinds of spices, and at the bottom sits a layer of strawberry jam and a little bit of brandy. And of course that thin, glossy layer of caramelised sugar on top that makes the perfect, satisfying crack as your spoon breaks through it. It wasn't too shabby considering the crazy, messy path I took to end up there.
spiced_strawberry_brulee-4
Of course, in my panicked state I didn't have a lot of patience so I probably underbaked these crème brûlées a little. Or a lot. And I barely chilled them, so the ones you see in the pictures are no where near as set as they should be. But they tasted oh so delightful, and all those beautiful spices made the mixture extra delicious (though the spices do make the custard look a little ugly and brown). Digging a little deeper gets you that hit of strawberry jam goodness, which would taste just as great if you substituted it with cherry jam, or marinated some freshly chopped strawberry pieces in some sugar and brandy overnight. The possibilities are endless.
spiced_strawberry_brulee-2
So no coconut macaroon tarts, but I still somehow managed to pull off a simple recipe that feels like a good way to transition into holiday baking. Hopefully my next attempt at something will be slightly less disastrous, I still have a lot of cleaning up to do in the kitchen thanks to this debacle :( In the meantime, feel free to check out my Christmas baking ideas from previous years, which you can find in the 'Holidays' section of my Recipes Index. I'd definitely like to see a few more Gingerbread Igloos this year.
spiced_strawberry_brulee-6
Spiced Strawberry Crème Brûlée
(adapted from this rhubarb and vanilla creme brulee recipe, makes approx 6)
430ml (about 1 1/2 cups) whipping cream (35% fat pouring cream)
1 vanilla bean, split lengthways (can be replaced with 1 tsp pure vanilla extract)
1/2 tsp ground cinnamon
1/8 tsp all spice
1/4 tsp ground ginger
6 egg yolks
75g (1/4 cup) golden syrup (replace with 75g sugar if unavailable)
About 2/3 cup strawberry jam mixed with 1 tbsp brandy (optional) - alternatively chop up 1 punnet strawberries and marinate overnight in 2 tbsp sugar + 1 tbsp brandy (optional)
Caster sugar for burning

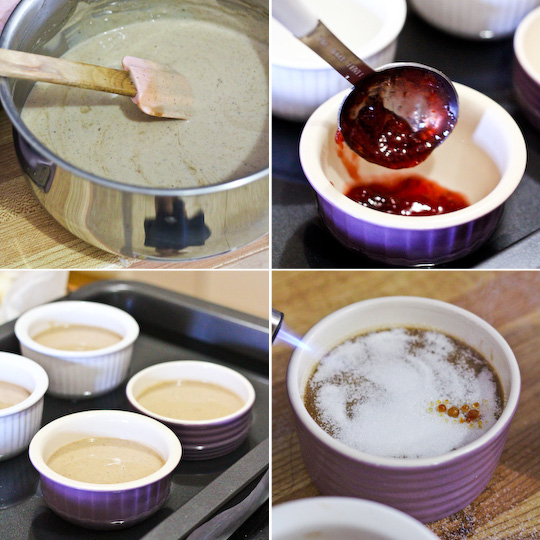
Preheat oven to 150°C (300°F). Place cream in a small saucepan, scrape the seeds of the vanilla bean into the cream and add the bean, cinnamon, ginger and all spice. Bring to the boil over high heat. As soon as it boils, remove from the heat and set aside for about 10 minutes.
spiced_strawberry_brulee-12
Place egg yolks in stainless steel bowl and use a whisk to combine. Add golden syrup and whisk for about 30 seconds, or until the syrup has combined and the mixture is pale. Pour the slightly cooled cream through a fine sieve, discarding the vanilla bean, then pour the cream into the egg yolk mixture, stirring well to combine.

Spoon about 1 tbsp of the strawberry jam & brandy mixture into the bottom of 6 1/2 cup ramekins and then add the warm custard mixture over the top until full. Place ramekins in a deep baking tray and pour in enough water to come halfway up the sides of the ramekins. Bake in oven for about 45 minutes, or until just set. Remove from the oven and cool, then chill in the fridge for at least 4 hours. Spoon about 2 tsp of caster sugar over each ramekin and caramelise the sugar with a kitchen blowtorch, or with your grill. Serve immediately.
spiced_strawberry_brulee-5

Thursday, November 24, 2011

Chocolate Cereal Milk Mousse & Coco Pops

chocolate_cereal_mousse-3
This post is coming to you a lot later than it should be. The main reason is because I am a lazy fatty who spent the entire weekend indulging on carbs. Deeeelicious. But I really did try to make up for it by whipping up this easy dessert on Monday. And then the sun disappeared. I'm not exaggerating, anyone who has been in Sydney will understand what I mean, it has been dark and grey with nowhere near enough natural light to take photos. And so my poor blog sat there neglected for a couple of days while I stared despondently out the window at the pouring rain. So much for a quick, easy blog post for this week! But I finally decided to give it a go after work yesterday, the light was pretty iffy so apologies if it looks a bit strange.
chocolate_cereal_mousse-13
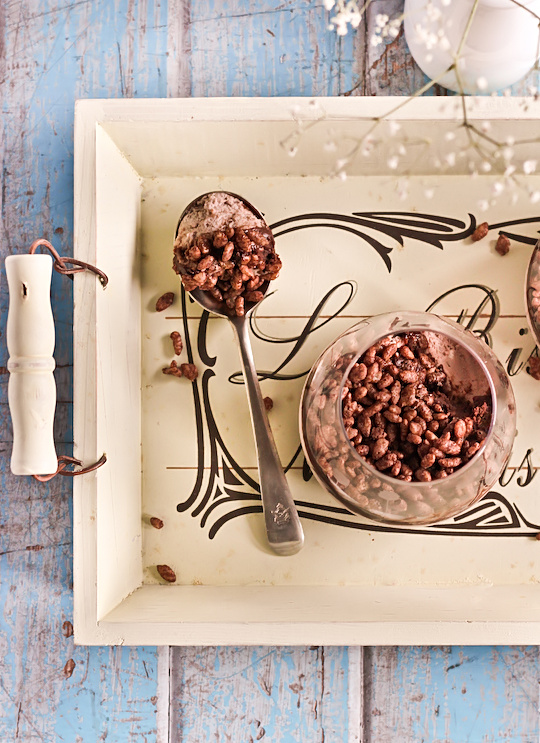
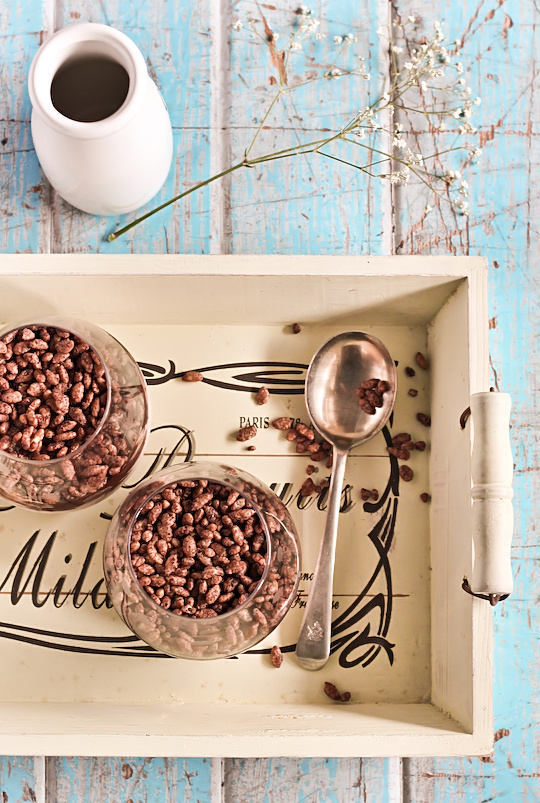
After the crazy, over-the-topness of a 5-layer ombre effect birthday sprinkle cake in my last post, I thought it might be a good idea to take a breather and do something a little less complicated. It was also stinking hot for a lot of last week, so the last thing that I felt like doing was turning on the oven. While searching through recipes on the internet I came across the one for Momofuku's strawberry pannacotta with cereal milk mousse and cornflake crumble. While I never got fully swept up by the hype that was their crack pie, I've always been very intrigued by the idea of cereal milk. I think it's such a fabulous idea, which would invoke so many childhood memories. So I decided to finally give it a go, but with a little bit of a twist - instead of using cornflakes I would use one of the cereals I grew up with; Coco Pops, to make a chocolate cereal milk mousse that I would top off with even more cocoa pops. So it would be as the slogan goes, 'just like a chocolate milkshake, only crunchy'!
chocolate_cereal_mousse-7
It's funny the things you find out while coming up with recipe ideas. I had no idea that not everyone knew about the whole chocolate milkshake only crunchy thing. I grew up hearing it! I didn't know that in the US they don't call them cocoa pops, they call them cocoa krispies. Which I guess makes more sense since they're cocoa flavoured rice krispies...But then in Australia we call them rice bubbles not rice krispies, argh! And they don't have them in Canada. This made me sad. Though apparently they sell something similar so I guess that's okay. Either way, I wanted to use this cocoa flavoured cereal to make a light, chocolatey dessert with a crunchy layer on top. I was a little worried the cocoa coating on the cereal would just make the mousse have a weird fake chocolate powdery texture, which it sort of seemed like it was going to halfway through making it. But after mixing in the cream it turned into this beautiful, light, completely uniquely flavoured mousse.

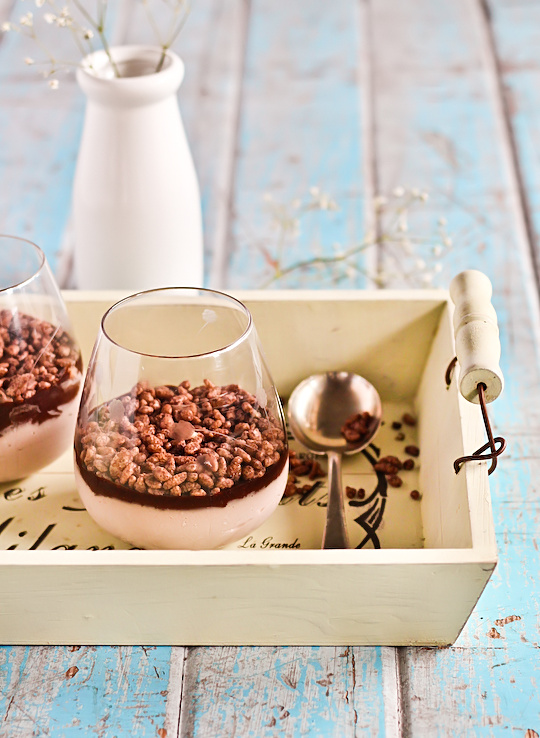
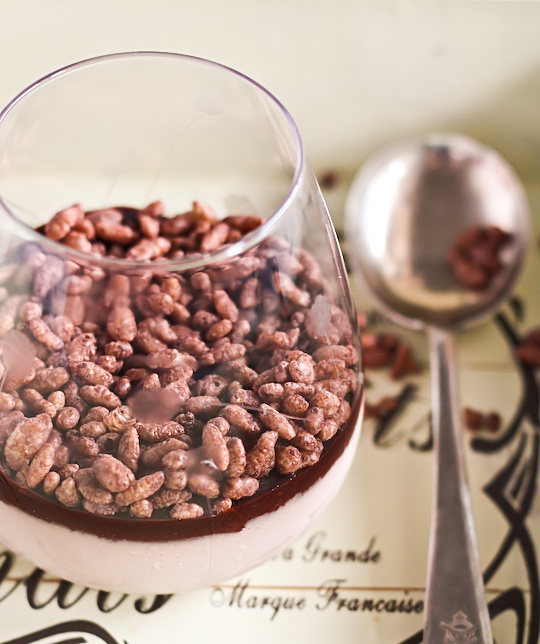
Take note, this is NOT a chocolate mousse. Do not make this recipe if you want a chocolate mousse. It tastes just like a bowl of cocoa pops with milk. I put a thin layer of chocolate ganache on the top of each mousse, to keep the cocoa pops on top separate so they wouldn't go soggy too quickly and it also makes up for the lack of any real chocolate in the mousse. It worked like a charm. But I did find that the cereal milk mousse was a little too firm for my liking, since the original recipe is meant to be set on top of a pannacotta. I've adjusted the amount of gelatin in the recipe so hopefully it will be a little lighter and softer. Anyway, it's a fast, fun and light dessert and if you like cocoa pops as much as I do, you should definitely make it.
chocolate_cereal_mousse-6
Chocolate Cereal Milk Mousse & Cocoa Pops
(adapted from Momofuku's cereal milk mousse recipe, serves 4)
For the cereal-milk mousse:
3 cups cocoa pops (AKA cocoa krispies)
2 cups whole milk
1 1/4 tsp powdered gelatine
Pinch of salt
2 tbsp caster sugar
1 cup heavy cream (I used 35% fat pouring/pure cream)

For the topping:
100ml (a bit less than 1/2 cup) heavy cream (I used 35% fat pouring/pure cream)
100g dark chocolate. chopped into small pieces
Extra cocoa pops to top off

Preheat the oven to 135°C (275°F). On a lined baking tray, toast the cereal for 5 minutes. Set aside to cool. In a sealable container, combine the toasted cereal and milk. Let steep for 20 minutes, then strain into a measuring cup; the mixture should yield about 1 cup of 'cereal milk'.

Place 1/2 cup cereal milk in a medium bowl. Sprinkle powdered gelatin on top. In a small saucepan, scald 1/2 cup cereal milk with the salt and sugar. Whisk hot milk into the cool milk until the gelatine is dissolved. Chill until almost set (I basically chilled mine and checked on it every 5 minutes until it was thick and almost going lumpy, at which point I whisked it until smooth and proceeded).
chocolate_cereal_mousse-17
Whip the cream to stiff peaks and fold it into the almost-set gelatine mixture. Pour mixture into 4 serving glasses. Chill in the fridge while preparing the topping. Put chopped chocolate in a medium heatproof bowl. Place 100ml cream in a small saucepan on medium-low heat and just bring to the boil. Pour hot cream over the chocolate and leave to sit for a minute to allow chocolate to melt. Use a whisk to mix, ensuring that it is smooth and all the chocolate has melted (if it hasn't, place the bowl over a pan of simmering water and stir until smooth).

Leave to cool for about 5 minutes (ensure that the mixture is still pourable, otherwise you will have to reheat). Carefully pour a thin layer of the chocolate mixture over the top of each mousse glass. Sprinkle a layer of cocoa pops over the top. Chill until set, at least one hour. Best served on the same day to ensure cereal layer is still crunchy.
chocolate_cereal_mousse-5
Edit: Oops I just realised I spent the whole post misspelling it Cocoa Pops when it's actually Coco Pops...but I can't be bothered fixing it all through the post, sorry!

Monday, November 14, 2011

Purple Ombre Sprinkles Cake

purple_ombre_sprinkle_cake-16
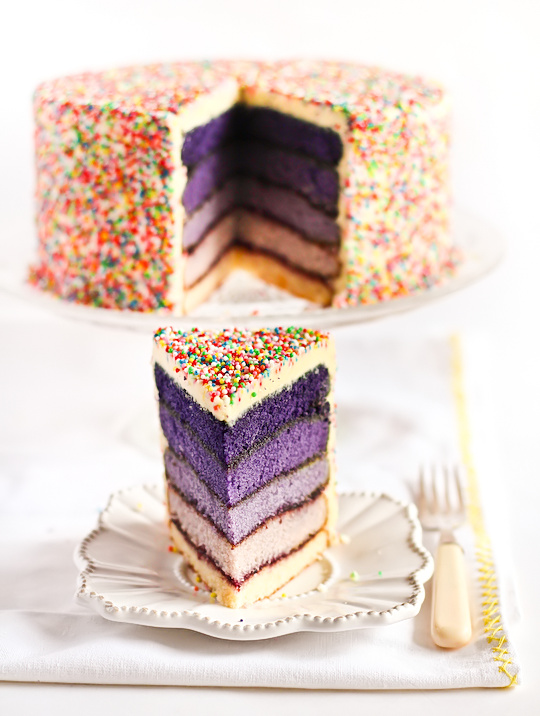
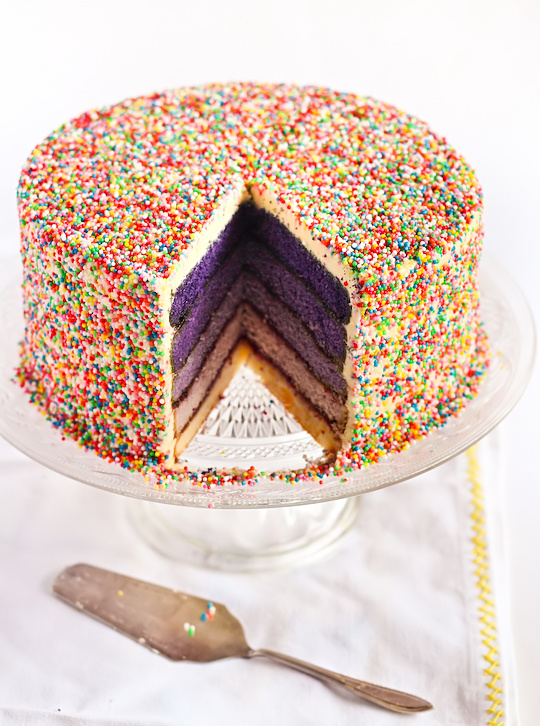
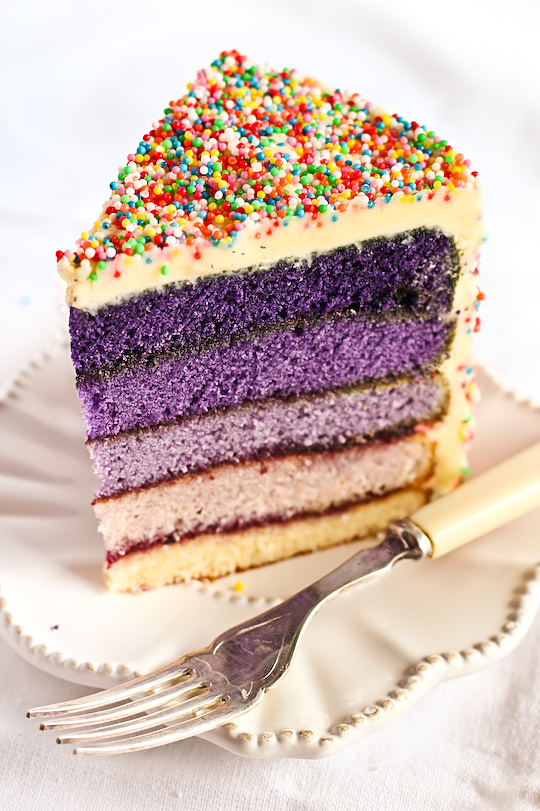
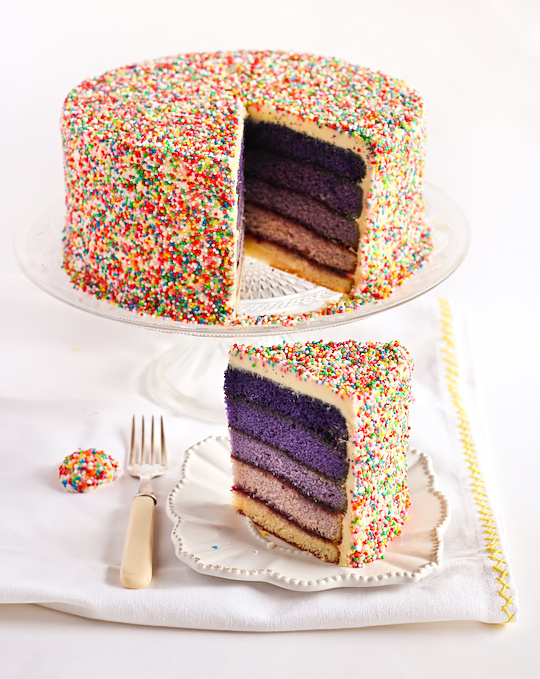
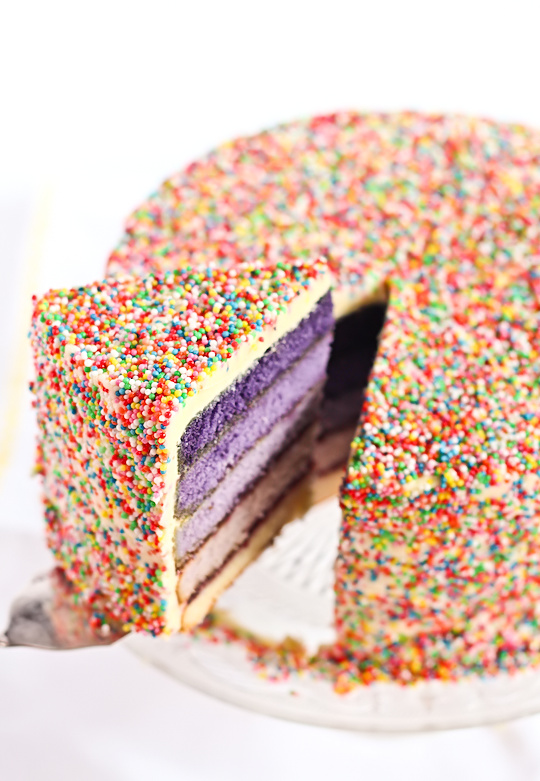
Tomorrow is my birthday, and though I've reached the stage where birthdays don't excite me anymore I thought I would do a fun cake for this week since I didn't have anything else planned. I wanted to do a crazy cake that was 100% just for me, just all the things I loved and have wanted to put into a birthday cake. And that means sprinkles and lots and lots of purple. Enter Steph's crazy purple ombré sprinkles cake with salted buttercream. I've always been in complete awe of all the amazing colourful layered cakes I see on different blogs, especially the gorgeous ones that have the ombré effect. I never though I'd be able to pull off one, it seemed like something that required patience and to be neat and meticulous and I can't do any of that very well. But since this cake was entirely for me, the only person I would be disappointing is myself if I failed so I went for it.
purple_ombre_sprinkle_cake-19
I've had a really bad week. Really bad. At first the thought of baking while in the middle of this horrible week seemed like a terrible idea but then I remembered that baking is my happy place, my therapy. So I pottered around the kitchen and lost myself in this recipe and it really did make me feel better. I used the most reliable yellow cake recipe I knew of, from my Le Cordon Bleu cooking book. It's deliciously buttery, the batter is stable enough to deal with a lot of mixing and the texture and moisture of the cake works well for layered cakes. It's one of the first cakes I ever made while learning to bake. The original cake is for a 3 layered cake, but I split up the mixture into five layers so I could get a good range of purple shading. I only have one 20cm cake tin which meant I had to bake 5 cakes, one after the other, cleaning, regreasing and lining each tin in between. It took a while and took my mind off my crappy week. And it also reminded me once again that I need to buy more cake tins.
purple_ombre_sprinkle_cake-17
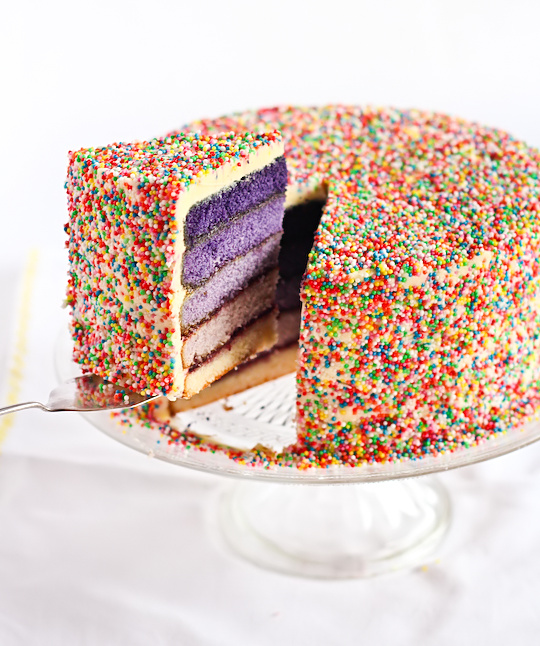
I used Wilton colouring gel and it worked absolute wonders. I usually find it's way too hard to to get the perfect shade of purple when using red and blue colouring so I saved myself the trouble and got some violet colouring. I am absolutely in love with the effect of the shading, and surprised that I managed to get the gradient of shading right. I did a little happy dance when I cut into the cake for the first time. And I also chortled smugly at the recent memory of someone who worked at a professional bakery telling me that to get this kind of shading between each layer would require someone to make 60 cake layers before they got it right. Haha whatevs.
purple_ombre_sprinkle_cake-4
I decided to use the leftover blackcurrant jam from my Ribena Cupcakes from last week. I love jam in cakes so much, it keeps them moist and gives it a nice burst of flavour. And it worked great since it was purple too. I used my favourite icing, the simple salted butter icing that I can't stop using recently. I originally was planning to do a crazy bright purple icing but decided to keep it simple and white, to give you the surprise of the bright colour when you cut into the cake. It works so well, as learnt from the epic Whisk Kid rainbow cake that is burned into my memory as the best cake ever. Originally I wanted to cover the entire cake in chocolate freckles because I recently rediscovered my love for them. But when I started to cover the cake in the freckles I realised the cake looked pretty damn ugly, like it was covered in festering warts. Lovely, I know. So I went into full panic mode and ripped off all the freckles and started slapping rainbow sprinkles all over the cake to cover up the mess I'd made. Sprinkles EVERYWHERE. I even found a sprinkle in my belly button when getting changed later. It was a mess, but my cake ended up looking like one giant freckle and that is kinda awesome. It reminded me of this amazing cake from Sprinkle Bakes. And check out the stunning Vanilla Malt Sprinkle Bark Cake Lisa made me! Sprinkles make everything better.
purple_ombre_sprinkle_cake-18
Purple Ombré Sprinkles Birthday Cake
(makes one round 18cm 5-layer cake, yellow cake recipe adapted from Le Cordon Bleu Complete Cooking Step-by-Step)
Note: Sorry US readers, I didn't have time to measure the ingredients in cups so I could convert the measurements for you, you'll have to convert it yourself or use some kitchen scales for this one! Thanks to Reanna for posting the US conversions for the recipe in the comments below, you can see them here.

For the cake:
355g plain flour
1 tbsp baking powder
1/2 tsp salt
225ml milk
2 tsp vanilla extract (I used 1 tsp extract and 1 tsp vanilla bean paste)
400g caster sugar
225g unsalted butter, softened
4 medium eggs
Purple food colour (I used Wilton violet gel colouring)
Jam to spread between layers, I used blackcurrant jam but you could use grape or strawberry, or double the amount of icing and use that

For the icing:
500g icing sugar sifted (easiest way to sift is by pulsing in a food processor)
275g salted butter (about 2.5 sticks)
Extra table salt to taste
Optional: sprinkles to decorate

Preheat oven to 180°C (350°F) and grease whatever 18cm round cake tins you have (I only had one so I had to bake each cake one after the other). If you only have 20cm cake tins I'd recommend splitting the batter into only 4 layers instead of 5. Line the base of tins with baking paper and grease paper and dust tins with flour. Combine flour, baking powder and salt in a medium bowl and set aside. Mix milk and vanilla together in a measuring jug.

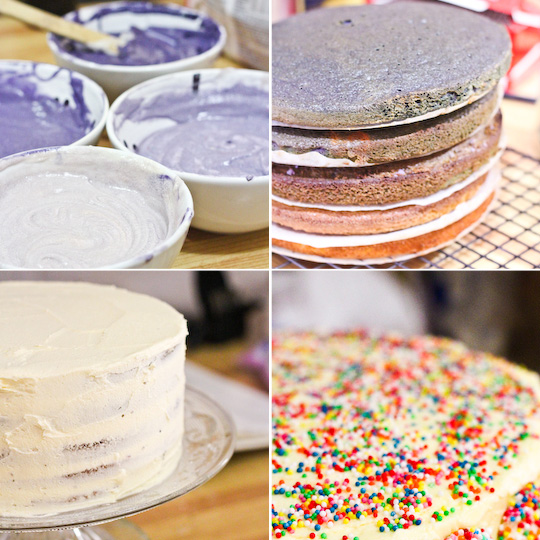
Using an electric mixer on low speed, beat sugar and butter in a large bowl until blended. Increase speed to high and beat for 2 mins or until pale and creamy. Reduce speed to medium low, add eggs 1 at a time, beating well after each addition. Alternately add flour mix and milk mixture, beginning and ending with flour mixture (I did it by adding 1/4 of of the dry mixture followed by 1/3 of the wet mixture at a time). Beat until smooth, occasionaly scraping bowl with a spatula. Divide mixture evenly into 5 medium bowls (I did this by measure the batter, it ended up being about 300g per bowl for me). Leave one bowl of batter white, then very gradually add colouring to each bowl and gently fold it into the mixture, adding slightly more colouring as you do each bowl so that the 5 bowls give you a even gradient of colour.
purple_ombre_sprinkle_cake-15
Pour batter into prepared tins and bake each layer for about 15-20 minutes or until a skewer into the centre comes out clean and the outside is golden. Cool in tin for 5 mins and then turn out onto wire racks to cool completely. Prepare the icing; remove butter from fridge 30 mins before starting and chop into small cubes. In a large mixing bowl, beat butter on high with an electric mixer until smooth and fluffy. Reduce speed to medium-low and gradually add icing sugar until combined, then increase speed to high and beat until pale and fluffy. While still mixing, gradually add any extra table salt to taste if needed.

Prepare cake for icing, you may need to trim the tops a bit to make sure they are level. Layer cakes with jam (or more icing). Crumb coat the cake with some of the prepared icing and chill for 15 mins. Cover the cake with more icing, smoothing out with a spatula (I use an offset spatula that I keep clean and warm by running under hot water to get it smoother). If decorating with sprinkles, it can get pretty messy so place your cake in a large container that will catch any of the sprinkles that will run off the cake as you try to stick them on the sides of the cake. Serve cake at room temperature, store cake in the fridge in an airtight container.
purple_ombre_sprinkle_cake-6

Monday, November 7, 2011

Ribena Cupcakes

ribena_cupcakes-3
If this entire blog wasn't already enough of a testament to my extreme sweet tooth, I'll share another bit of information. Throughout most of primary and high school my Mum could not get me to drink plain water, no matter how hard she tried. I would only drink Ribena, I loved the stuff. For those of you not familiar with Ribena, it's a super sweet blackcurrant cordial and I used to drink buckets of it. I'm not quite sure why I stopped drinking it as much, but I think it was replaced with an addiction to apple juice boxes when I moved to Sydney. And then I remember there was all this scandal because some school students found out that ribena had something like NO vitamin C in it, but I just shrugged it off since that was never the reason I drank the stuff.
ribena_cupcakes-13
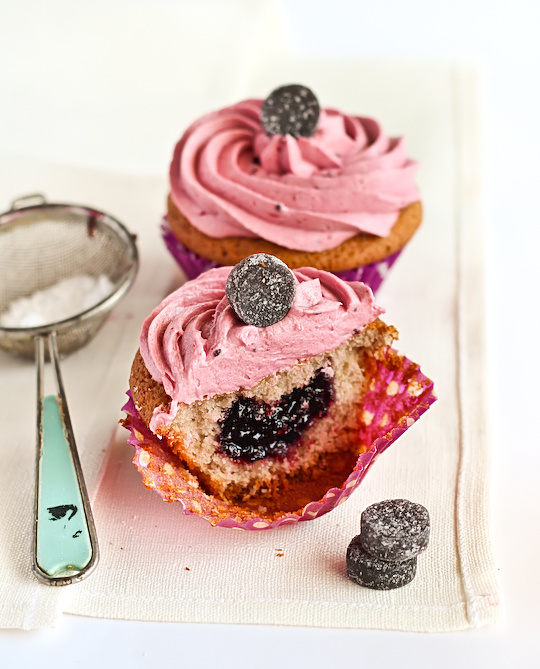
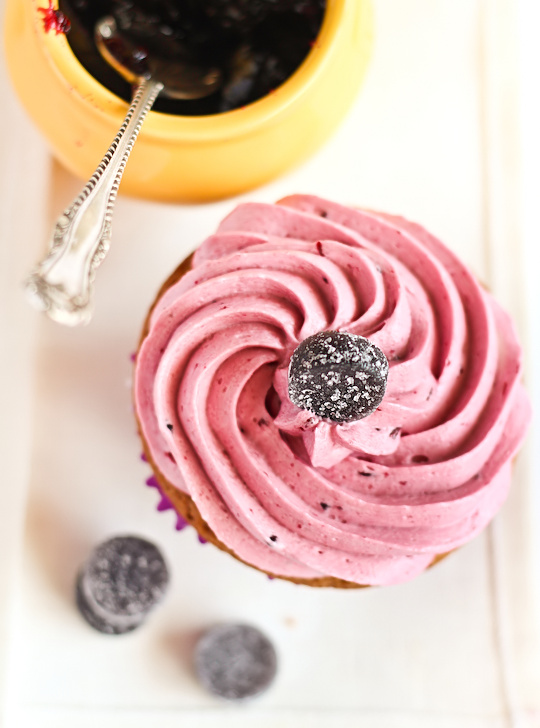
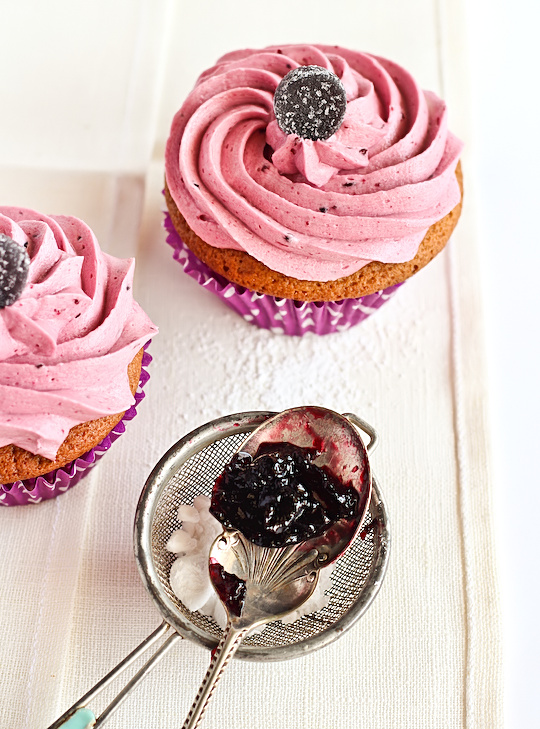
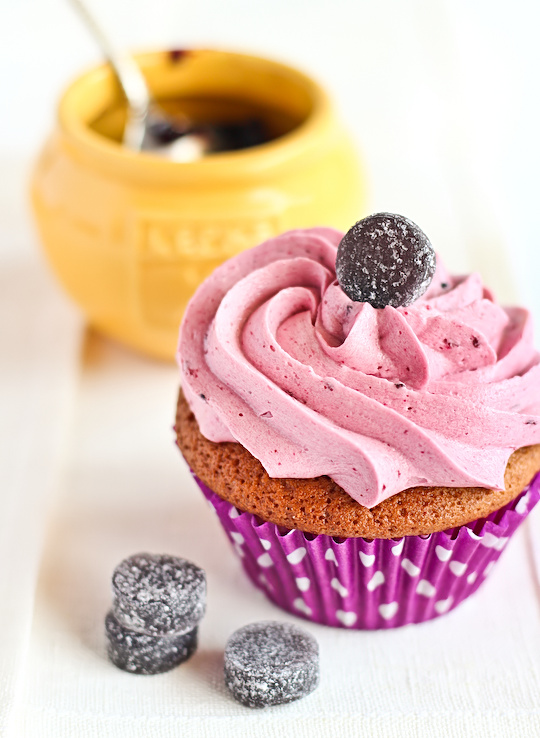
So I decided to test out a new cupcake flavour as a tribute to this super sweet drink; Ribena Cupcakes. I was a little worried since I figured the cordial was probably not strong enough in flavour to make my cake batter and icing taste distinctly of blackcurrant. But then I happened across blackcurrant jam in the supermarket (I can't believe I've never bought it before, maybe because the jar looked so similar to the blackberry jam that I passed it by) and the jam tastes exactly like a super concentrated ribena. It worked like a charm, these cupcakes taste just like ribena. And to top it all off, a blackcurrant pastille on top. Does anyone love blackcurrant pastilles as much as me? I usually force myself to avoid them because if I buy them I will eat the entire pack in one sitting and end up with a black tongue, purple lips and a crazy sugar high.
ribena_cupcakes-5
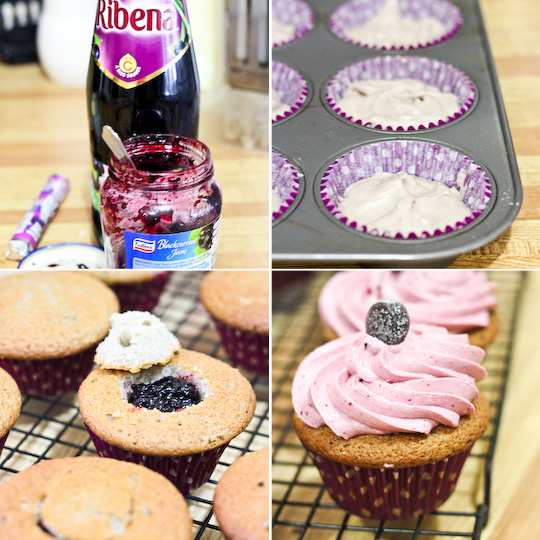
I used my foolproof cupcake recipe as the base of the cake batter, replacing the liquid with ribena and reducing the amount of sugar. That's why it's my foolproof cupcake recipe, it seems to handle whatever kind of crazy adaptations I make to it. The cake itself doesn't have a super strong flavour of blackcurrant, just a pretty purple hue. But I filled the centres with a big dollop of blackcurrant jam to make up for it. I was playing around with the idea of doing a Swiss meringue buttercream for the icing, but I realise that these days I still prefer eating a regular butter icing. And this one tastes pretty awesome. In the same way that my strawberry jam buttercream is so full of flavour, this blackcurrant icing really packs a delicious punch.
ribena_cupcakes-7
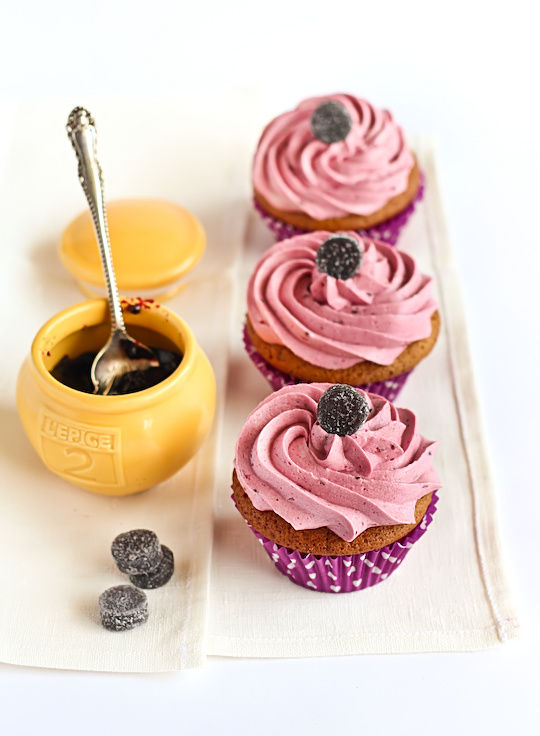
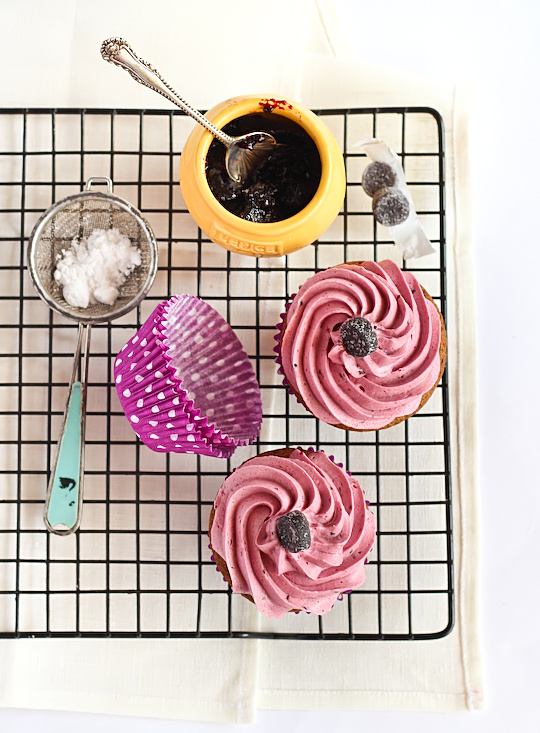
There's so much about these cupcakes that are very me. Look how purple they are! When I got the idea for these cupcakes in the middle of last week, I couldn't resist ordering these adorable papers from emerald + ella and they arrived in time for my weekend baking :) And they really do taste like ribena, even though the thing making them taste like ribena isn't the ribena haha. I'd consider it my early birthday present to myself, but my birthday isn't for another week so I still have time to make myself a crazy birthday cake if I want to...I'm not sure if I can be bothered...We'll see!

ribena_cupcakes-4
Ribena (Blackcurrant) Cupcakes
(makes 12-14 cupcakes, adapted from my foolproof cupcake recipe)
1/3 cup ribena cordial (not mixed with extra water)
2 eggs
125g unsalted butter, at room temperature
1/2 cup caster sugar
225g self-raising flour
1 jar blackcurrant jam (1 tsp jam per cupcake)

For the icing:
Note: if you are looking for a slightly lighter topping, you could either do a simple icing sugar and ribena glaze, or a Swiss Meringue Buttercream with ribena added
210g butter (about 1 3/4 sticks), chopped into small cubes
375g (about 3 cups) sifted icing sugar
2 tbsp ribena cordial
3 tbsp blackcurrant jam
Optional: Blackcurrant pastilles to decorate

Preheat oven to 190°C (375°F) (if fan-forced use 180°C (350°F)) and line a cupcake tray with paper cases. There are two options for preparation, either work just as well as the other. Combine all cake ingredients in a food processor and blend for 2 minutes. If you have extra time and are worried about over-mixing the flour like me, blend the ribena, butter, sugar and eggs together first for one minute, then add the flour and blend for another minute. If you don't have a food processor, cream butter and sugar together using an electric beater until light and smooth. Add eggs one at a time and beat in well. Add the ribena and flour and quickly mix until combined, avoid overbeating the flour.

Pour cake mixture in paper cases, filling them about 3/4 full. It's usually easiest to use a table spoon to scoop the batter and then drop it into your paper cases. Bake in the oven for 10-15 minutes or until golden and a skewer inserted into the centre comes out clean. Cool in tin for 5 minutes and then carefully remove and cool cakes on wire rack completely.
ribena_cupcakes-12
Prepare the icing; remove butter from fridge 30 mins before starting. Beat chopped butter in a large mixing bowl with an electric mixer on high until smooth and fluffy. With the mixer on low, gradually add sifted icing sugar until combined, then beat on high until smooth and fluffy. Add ribena and jam gradually, you may need to add extra icin sugar to ensure your icing is the right consistency. It should be smooth but not runny. Use a small knife to cut a circle of cake out of the middle of the cupcakes. Fill the centre with a teaspoon of jam (you may need to use a small spoon to dig out more cake so there is enough space) and replace the cut out cake tops. Pipe icing over the top of the filled cupcakes. Decorate with blackcurrant pastilles on top and serve immediately. Can be stored in an airtight container for several days, serve at room temperature.
ribena_cupcakes-6