Monday, August 27, 2012

Coconut Chiffon Cake with Roasted Pineapple

Coconut Chiffon Cake with Roasted Pineapple
This week is going to be chock-full of birthday cakes. I have two to make in the space of two days, the second of which is for my mother-in-law (hopefully A's family don't read this before her birthday!). I decided to be super organised and do a practice run of her cake over the weekend to make sure I could figure out any improvements or tweaks I could make to the recipe before I had to rush around making it on Thursday night. I'm so glad I did because there are heaps of tiny things I want to change that will hopefully improve it.
Coconut Chiffon Cake with Roasted Pineapple
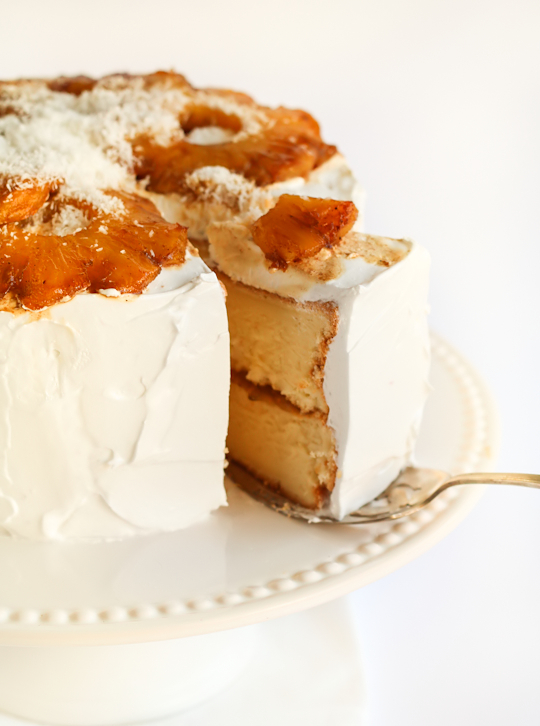
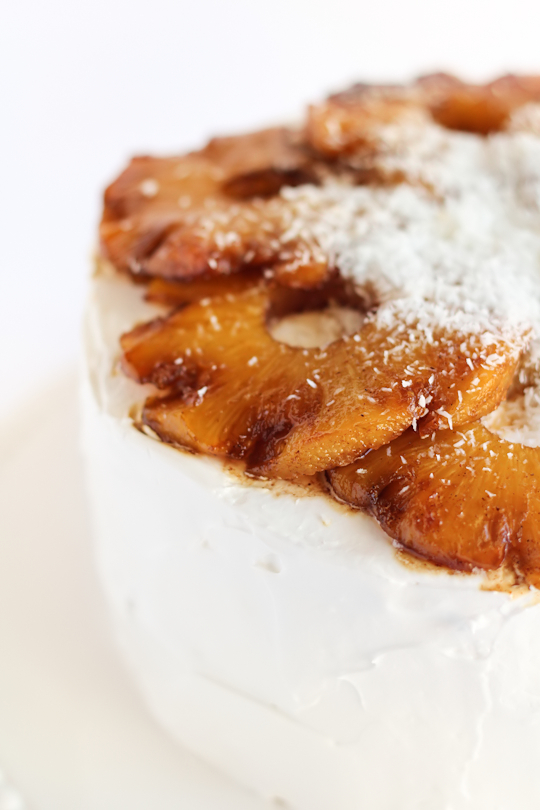
I started off with a pretty simple idea, I wanted a shiny white coconut-flavoured cake because I know she likes coconut. I've made the Gourmet Traveller coconut chiffon cake before and knew it would be the perfect cake for this occasion. It's so fluffy and light and is one of those cakes that you can have with a cup of tea and it won't make you feel like it's too rich or too sweet. The original cake combines coconut and lime together which works so well, but I thought I'd change it up and try it with some caramelised pineapple slices instead. The centre of the cake is filled with jam, which can either be homemade pineapple jam or any other type of jam you think will work with it (I tried some with fig jam and it was pretty good). Or just sticking to the lime curd from the original recipe will work too.
Coconut Chiffon Cake with Roasted Pineapple
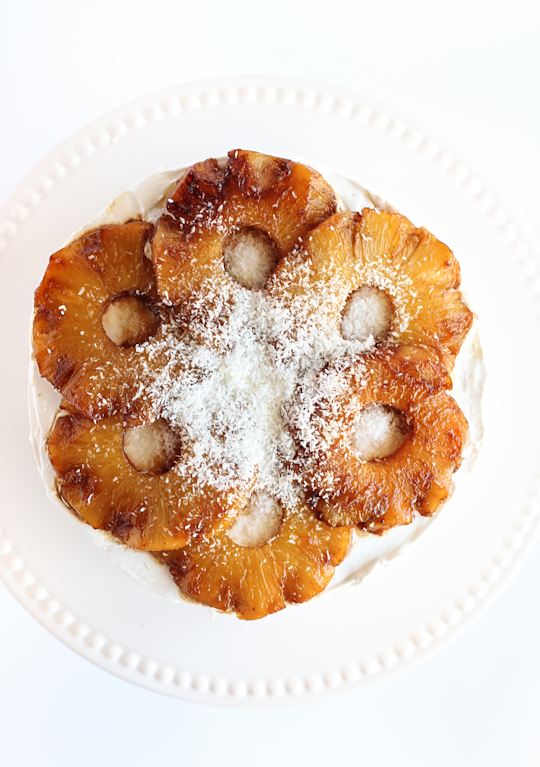
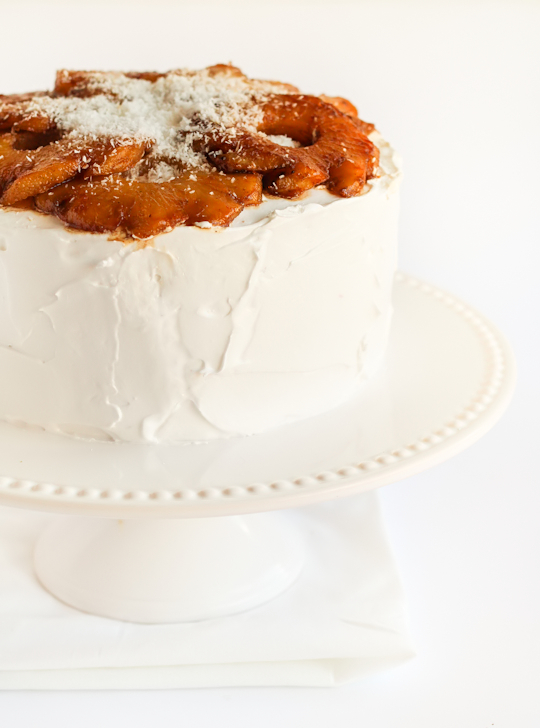
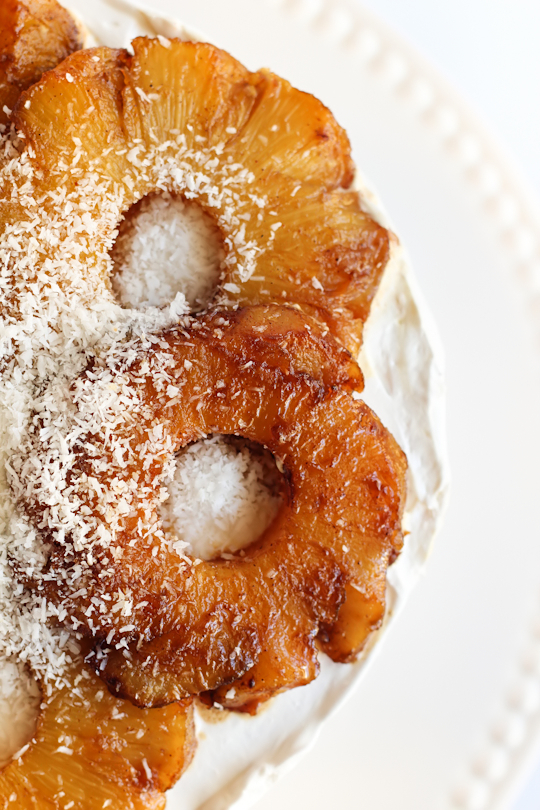
I'm not usually a huge fan of the meringue, but an Italian meringue does work well on some cakes. This one is a perfect match for the roasted pineapple slices. I just love the look of the pristine white cloud-like icing against the dark caramel-covered bits of pineapple. Just look at those gloriously golden chunks of pineapple. I sprinkled some coconut on top because it looked a little plain with just the coconut on top. Unfortunately I only had dessicated coconut available at the time, but I think they cake will look a lot prettier with shredded coconut instead.
Coconut Chiffon Cake with Roasted Pineapple
After I had finished taking the photos and A & I were tucking into a slice of the cake, he came up with the brilliant idea of torching the meringue icing so it would be like a toasted marshmallow. And who doesn't love toasted marshmallows?! While I'm still quite attached to the look of the perfect plain white icing, I have to admit the toasted meringue tasted pretty amazing. So I think on the actual day I'll bring along my blow torch and toast the top half of the cake to add a little theatricality. Fun!
Coconut Chiffon Cake with Roasted Pineapple
(adapted from this Gourmet Traveller recipe, serves 8-10)
For the cake:
300g (2 cups) plain flour, sieved
220g (1 cup) sugar
3 tsp baking powder
1/2 tsp salt
125ml (1/2 cup) vegetable oil
7 eggs, separated
2 tsp coconut essence
Pinch of cream of tartar
To sandwich between cakes: this pineapple jam, or any other filling of your choice e.g. lime curd or fig jam will work great

For the meringue icing:
185g (6.5oz) caster (superfine) sugar
60ml (1/4 cup) water
3 eggwhites
Pinch cream of tartar
1-2 tsp coconut essence

For the roasted pineapple:
1 ripe pineapple, peeled, cored and sliced into 1cm thick rings
2 tbsp brown sugar
2 tbsp maple syrup
1/2 tsp ground cinnamon
1/4 tsp cloves
1 star anise
Optional: Shredded or dessicated coconut to decorate

Preheat oven to 165°C (330°F) and grease, line and flour two 17cm or 20cm round cake tins (I used 17 cm). Combine flour, sugar, baking powder and salt in a bowl. Whisk in 200ml water, vegetable oil, egg yolks and coconut essence until smooth. Whisk eggwhites and cream of tartar in a separate bowl until stiff peaks form, fold one-third through flour mixture, then fold remaining eggwhites into flour mixture. Pour equal amounts of mixture into the prepared tins, then bake until cakes are golden and a skewer withdraws clean (30-40 minutes; don’t be concerned if cakes crack a little or are domed in the centre, they will settle as they cool). To avoid too much shrinkage I turned the oven off at 35 mins and left the cakes in there to cool for 5 mins, then cooled in tins for 15 minutes and cooled completely on a wire rack, then trim tops level.
Coconut Chiffon Cake with Roasted Pineapple
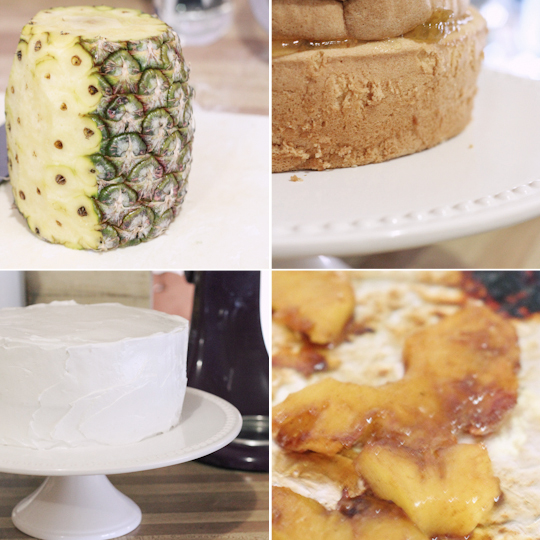
Prepare the meringue icing; combine sugar and 60ml water in a small saucepan over medium-high heat and stir until sugar dissolves (1-2 minutes). Brush down sides of pan with a wet pastry brush to remove sugar crystals, then bring to the boil and cook until syrup reaches 115°C (240°F) on a sugar thermometer (soft ball stage; 10-15 minutes). Whisk eggwhites and cream of tartar in an electric mixer until soft peaks form. Meanwhile, continue cooking syrup to 121°C (250°F), then, whisking eggwhites continuously on medium speed, slowly add hot syrup until all is incorporated. Whisk on high speed until thick, glossy and cooled to room temperature (15-20 minutes), then stir in coconut essence. Spread jam or filling over one cake and sandwich with second cake layer. Crumb coat entire cake with icing and then cover cake with remaining icing. Refrigerate while you prepare the roasted pineapple (or leave overnight if you want to make the cake ahead of time).

For the roasted pineapple, place all ingredients in a mixing bowl and toss together until sugar is dissolved and all pieces are well coated with mixture. Preheat oven to 200°C (390°F). Place on a baking tray line with several layers of foil and bake in oven until caramelised, turning pineapple slices over regularly (if slices start to dry out in over, sprinkle a few tsp of water over the slices to moisten). Cool completely on tray and then arrange slices on top of cake. Top with shredded coconut. To add a bit of fun to the cake, use a blowtorch to toast the top half of the meringue icing when you serve the cake.
Coconut Chiffon Cake with Roasted Pineapple
Print Friendly and PDF

Monday, August 20, 2012

Spiced Blondies with Chai-Infused Ganache

Spiced Blondies with Chai Infused Ganache
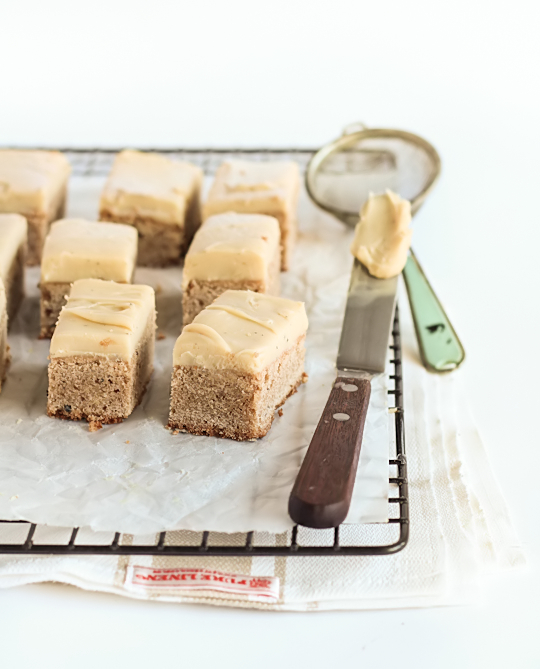
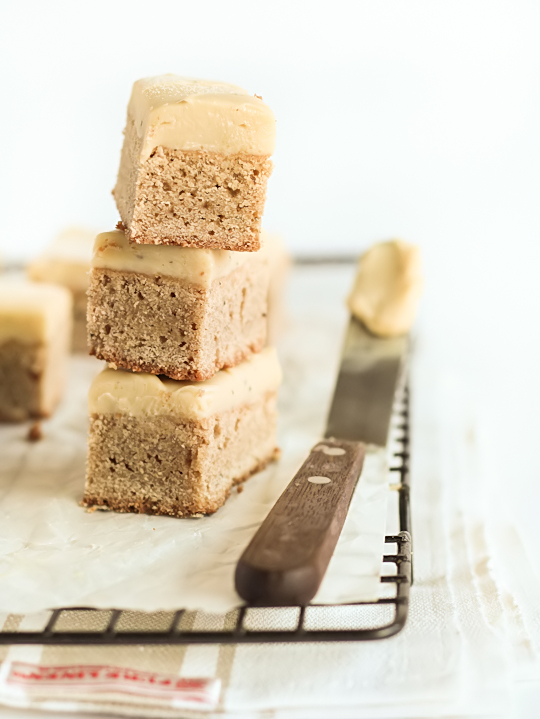
If you've been reading my blog for long enough, then you know I'm a big fan of using tea in desserts (see here, here and here). I've had a few tea bags of chai mix sitting in my kitchen and decided that a white chocolate ganache infused with all those spices and tea would taste amazing. I was totally right. And then I spread a wonderfully thick layer of the this delicious ganache on top of a blondie, which I also added lots of similar spices to.
Spiced Blondies with Chai Infused Ganache
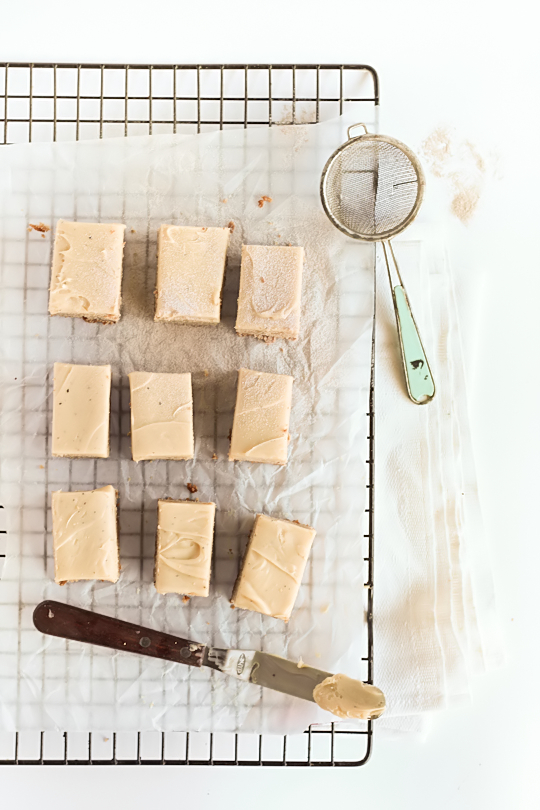
They might not be much to look at, but the flavour of these little squares really packs a punch. Think of biting into one of these fudgy, cakey squares and tasting the brown sugar, butter, cinnamon, cardamom, ginger, coriander seed, cloves and (my favourite) black pepper. I've been fascinated with using black pepper in sweet recipes, but this was the first time I really tested it out. I really, really love the way the pepper adds a little zing of flavour to this recipe. You wouldn't think it would work but it does, trust me. Just a word of warning, keep a close eye on your oven and don't let the blondies overcook like I did, I wish that mine were a lot less cooked through (still tasted awesome though).
Spiced Blondies with Chai Infused Ganache
Spiced Blondies with Chai-Infused Ganache
(adapted from Martha's Choc Chip Blondies, makes approx 16)
225g (2 sticks) salted butter, melted, plus more for pan (add 1/2 tsp salt to flour mixture if using unsalted butter)
275g (1 1/3 cup) packed light-brown sugar
2 large eggs
1 1/2 tsp pure vanilla extract or vanilla bean paste
2 US cups (250g) plain flour, (spooned and leveled)
1 1/2 tsp ground cinnamon
1 tsp freshly ground pepper
1 tsp ground ginger
1/2 tsp ground cardamom
1/4 tsp ground cloves
1/4 tsp ground coriander seed
Pinch of freshly ground nutmeg

For the chai ganache:
2 tbsp chai tea mix (or two tea bags), I used T2 Chai
300ml (about 1 1/4 cups) pure/pouring cream (or heavy whipping cream in the US, min 35% fat unthickened)
400g (14 oz) good quality white chocolate, finely chopped.

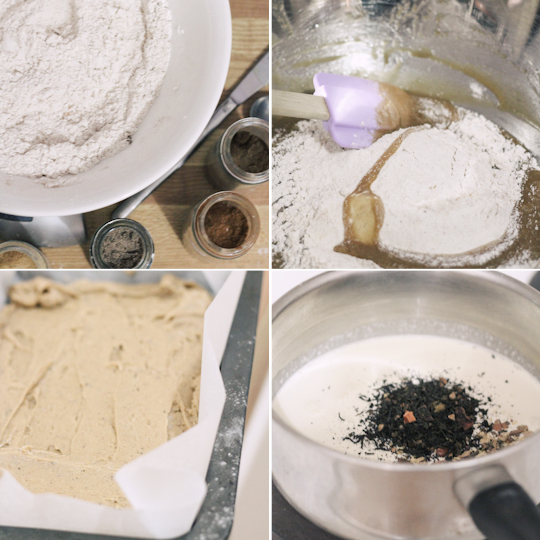
Preheat oven to 180°C (350°F), Brush a 17x27cm slice/brownie tin (or an 8-inch square baking pan) with butter; line pan with a piece of baking paper, leaving a 2-inch overhang on two sides. Butter paper. Sift flour and ground spices together in a medium bowl and set aside. In a large bowl, whisk butter and sugar until smooth. Whisk in egg and vanilla. Add flour and spice mixture; stir together just until moistened (do not overmix). Transfer batter to prepared pan; smooth top. Bake until top is golden brown and a toothpick inserted into the center comes out clean, 30 to 35 minutes. Set pan on a wire rack, and let cool completely.
Spiced Blondies with Chai Infused Ganache
Prepare the ganache. Place chopped chocolate in a heatproof mixing bowl. Place tea and cream in a medium saucepan and slowly bring to the boil. Remove from the heat when it just starts to boil. Pour over the chopped chocolate (strain to remove tea bits) and leave for 5 mins to allow chocolate to melt. Carefully whisk mixture until smooth (if there are still lumps, place the bowl over a pot of simmering water and stir until they are gone). Set aside to cool (or chill if you want to speed it up), until has returned to room temperature and is thickened but still spreadable, whisking every 5 mins or so to keep it smooth. Spread thickly over the top of blondies, smoothing with a spatula. Leave to set for at least half an hour. Using baking paper overhang, lift cake from pan and transfer to a cutting board; cut into 16 pieces. Can be stored in an airtight container for several days.
Spiced Blondies with Chai Infused Ganache
Print Friendly and PDF

Monday, August 13, 2012

Caramel Koala Macarons

Caramel Koala Macarons
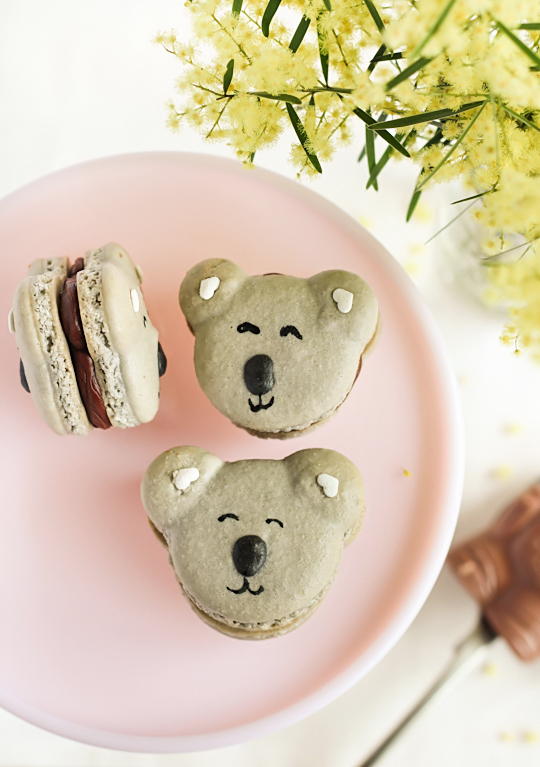
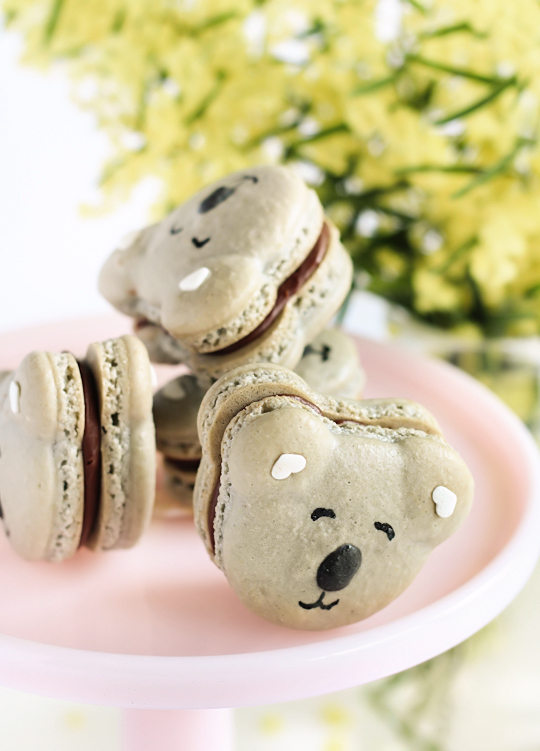
I'll be blunt; I'm in a foul mood. It's been a shit week and I am not in a good head space. So I decided that it was time to make another animal macaron. I don't really care if they're gimmicky, they are so cute that they are guaranteed to cheer me up. So far I've made piggies, bunnies and kitties. It seemed like it was time to pay tribute to an Aussie animal. Some fat, sleepy koalas. Sure, Australia is full of deadly, venemous creatures but we also have lots of adorable ones too.
Caramel Koala Macarons
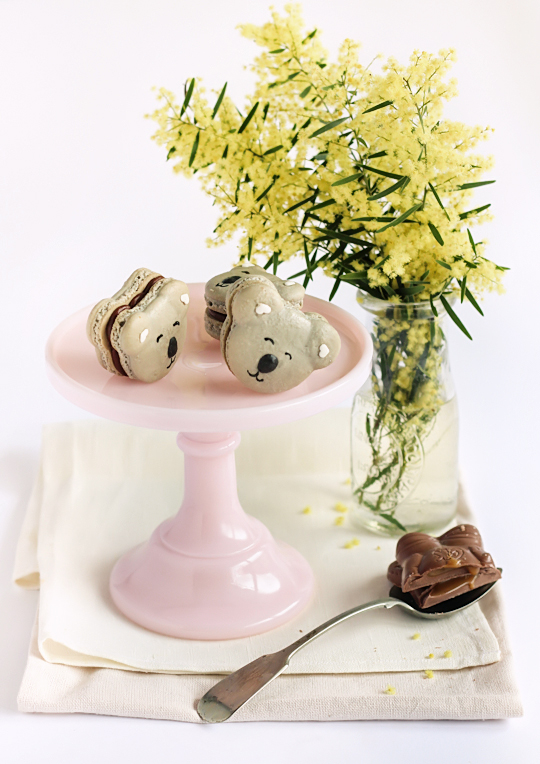
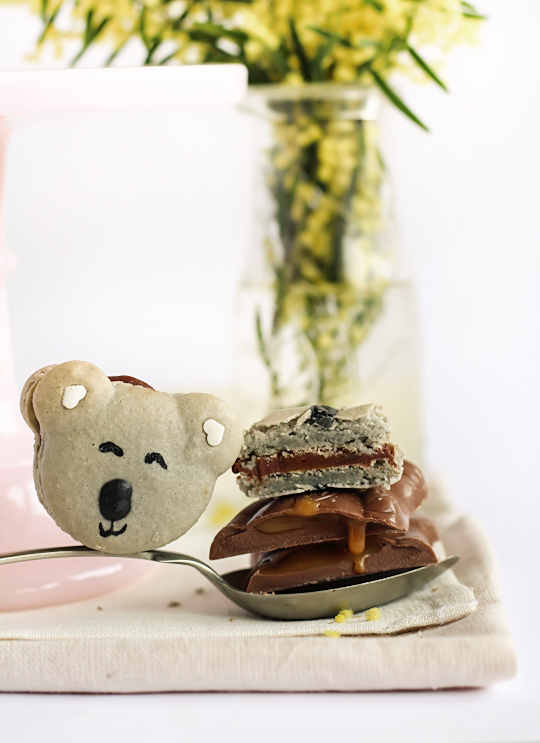
Those of you in Australia will understand the choice of a milk chocolate ganache filling with a gooey caramel centre for these koala macarons. They are inspired by the Caramello Koala chocolate bar (Wikipedia page for those who haven't heard of it, I love that there's a paragraph titled 'The art of eating Caramello Koalas'). These days even my insatiable sweet tooth finds the combination of milk chocolate and caramel in a Caramello Koala a little too intensely sweet to eat very often. But it was the perfect flavour for these koala-shaped macarons, and I couldn't resist making it a salted caramel filling to balance out all the sweetness from the milk chocolate and sugar.
Caramel Koala Macarons
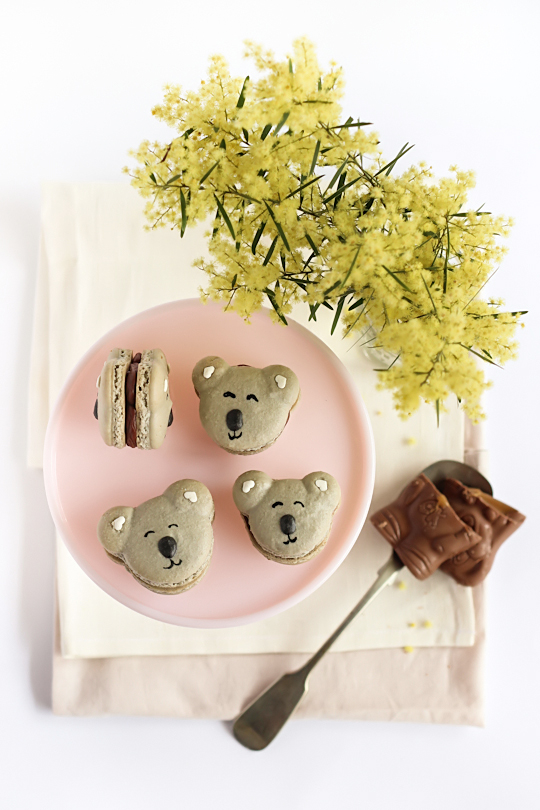
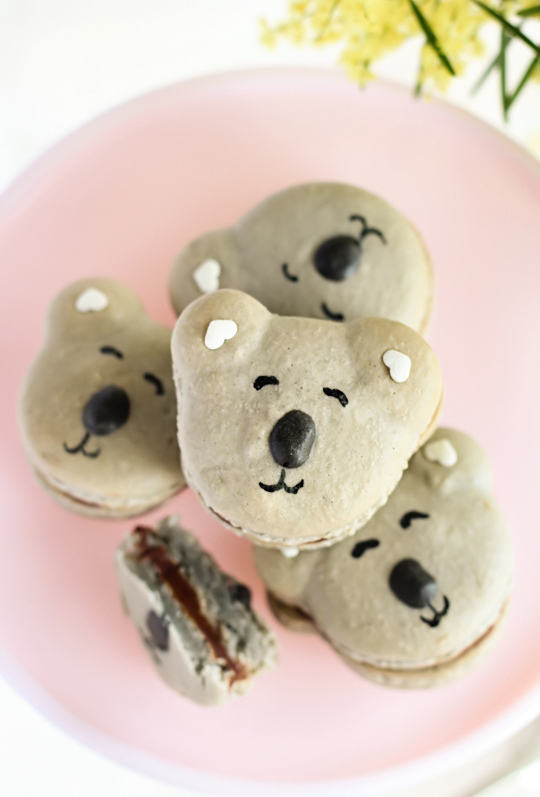
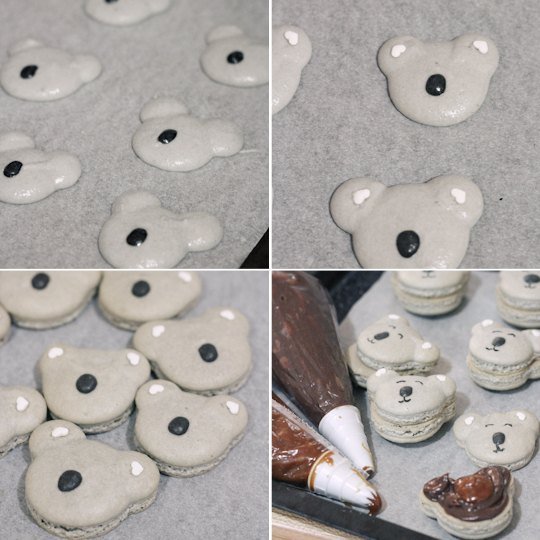
The cute little koala faces were quite straightforward to make on a macaron shell; I basically piped a Mickey Mouse sort of shape in grey-tinted macaron mixture and piped on a big nose in black macaron mixture. I ended up using some white heart-shaped sprinkles for the ears of the koala, but I think if I had the chance to do it again I'd pipe on some white macaron mixture instead. I think they look quite sweet, though I'm not sure how much some of them actually look like koalas.
Caramel Koala Macarons
I really love the combination of milk chocolate ganache with the salted caramel centre as a macaron flavour. As with any of these animal macarons, it feels a little weird biting into their happy little faces, but you get over it once you taste that salted caramel in the centre. I actually prefer this flavour over a plain caramel filling or a plain chocolate ganache, it's nice to get that surprise when you bite into the centre of the macaron.
Caramel Koala Macarons
(makes 12-15 macarons)
For the macarons: (if you are a beginner with macarons, read up and practice plain macarons first. BraveTart has lots of useful advice and info on the subject)
100g aged egg whites (you can use fresh eggs too, just make sure they are room temperature. I always use fresh these days, and zap it in the microwave on defrost for 10 seconds)
110g almond meal, at room temperature and well sifted
200g icing sugar
50g caster sugar
Optional: 1 tsp powdered egg whites (available from The Essential Ingredient), helps to stabilise egg whites but is not necessary
To decorate: black food colouring (I used Wilton's black gel icing colour), white heart-shaped sprinkles

For the chocolate ganache:
150g (5.3 ounces) good quality milk chocolate, finely chopped
100ml (just under 1/2 cup) pure/pouring cream (or heavy whipping cream in the US, min 35% fat unthickened)

For the caramel:
I used a half batch of this caramel recipe, an easier and less messy alternative is to make dulce de leche (instructions here), or skip the caramel entirely and use Caramello Koalas when making the ganache


Prepare the macarons first; line two baking sheets with baking paper. Place icing sugar in food processor and pulse for a minute to remove any lumps. Stir in almond meal and pulse for about 30 seconds to combine. Place in a large mixing bowl and set aside. Using an electric mixer, beat egg whites and egg white powder in a medium mixing bowl until the egg white powder dissolves and it reaches soft peaks. With the mixer on high speed, gradually add sugar and beat until it reaches stiff peaks.

Add meringue and a small amount of black food colouring (to tint the mixture light grey) to your dry mixture and mix, quickly at first to break down the bubbles in the egg white (you really want to beat all the large bubbles out of the mixture, be rough!), then mix carefully as the dry mixture becomes incorporated and it starts to become shiny again. Take care not to overmix, the mixture should flow like lava and a streak of mixture spread over the surface of the rest of the mixture should disappear after about 30 seconds. Place most of the mixture in a piping bag with a 1cm round tip, leave about 3-4 tbsp of the mixture in the bowl (will be used for piping the noses).
Caramel Koala Macarons
Pipe 3cm circles of mixture plus two small 0.5 cm circles connected to each of these to form the face and the ears of the koala. Add more black food colouring to the remaining mixture in the bowl and place in a separate piping bag with a narrow tip (I used a 3mm round tip). Carefully pipe small black ovals in the centre of each koala face, for the nose. Tap baking sheets carefully and firmly on the benchtop a couple times to remove any large bubbles. Very carefully place white heart sprinkles in the centre of each ear (this step is optional, or you could keep some of the macaron mixture white and pipe this in the middle of each ear instead).

Leave to dry for at least half an hour, so that when you press the surface of one gently it does not break. This will help prevent any cracking and help the feet to form on the macs. Preheat your oven to 140-150°C (285-300°F), depending on your oven. Place on top of an overturned roasting tray or another baking sheet if your sheets are not professional grade, for better heat distribution. Bake for 20-25 minutes, depending on the size of your shells. Carefully test if the base of the shell is ready by gently lifting one and if it's still soft and sticking to the baking paper, then it needs to bake for a few minutes longer. Remove from the oven and cool on the tray for a few minutes, then gently remove from the sheet and place on a wire rack to cool completely. I used a skewer dipped in black food colouring to draw on the eyes and mouth, you could also use a black edible ink pen or royal icing.

Prepare the caramel as per the recipe linked above and set aside to cool then place in a piping bag. Prepare the ganache; place chopped chocolate in a heatproof bowl and gently heat cream in a small saucepan until it just comes to the boil, then pour hot cream over the chocolate and set aside for a few minutes to allow the chocolate to melt. Using a whisk, gently combine mixture until it is smooth (if there are still lumps, place the bowl over a pot of simmering water and stir until they are gone). Set aside to cool (or chill if you want to speed it up), until has returned to room temperature and is thickened but still pipable. Place in a piping bag with a narrow round tip, pipe a ring of ganache just inside the end of one side of a macaron, and fill the centre with caramel. Sandwich macaron with another shell, repeat with remaining shells. Chill in the fridge in an airtight container overnight, serve at room temperature.
Caramel Koala Macarons
Print Friendly and PDF

Monday, August 6, 2012

Croquembouche Cake with Lemon & Berries

Croquembouche Cake with Lemon & Berries
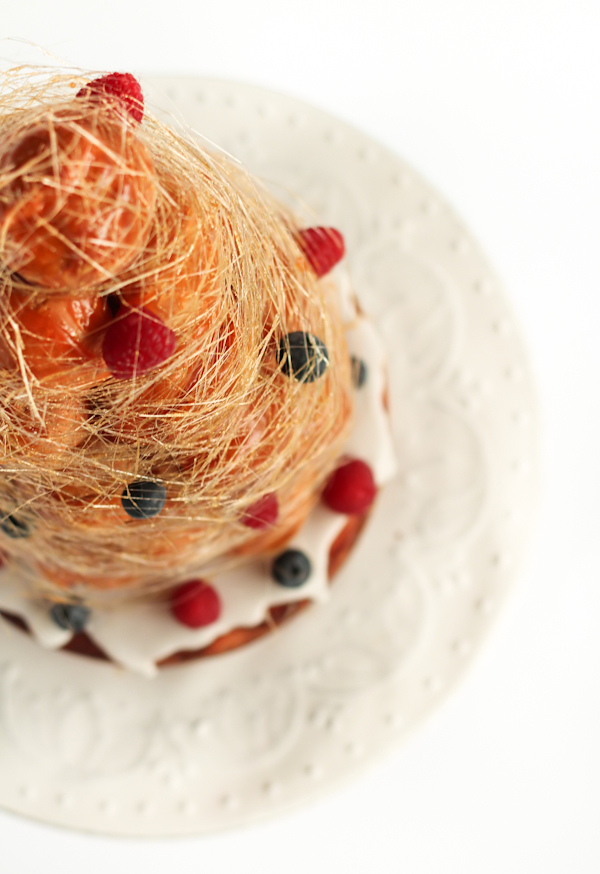
I was in a bit of a pickle this week. I had the task of making a birthday cake for my father-in-law (who is wonderful), and right up until the day before his birthday I had no clue what I was going to make. The last two cakes I made for A's family were the honeycomb crunch checkerboard cake and the pink ombré daisy cake. I didn't want to disappoint. A's dad is a HUGE Arsenal fan, so the obvious suggestion from everyone was to do a Gunners-related cake. But for some reason I wasn't really feeling it this time around. It's been done. Maybe next year...
Croquembouche Cake with Lemon & Berries
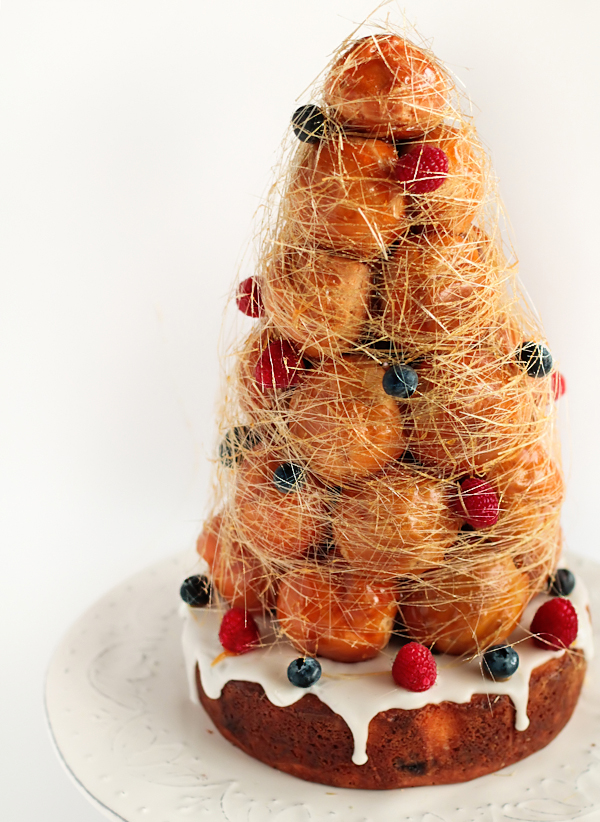
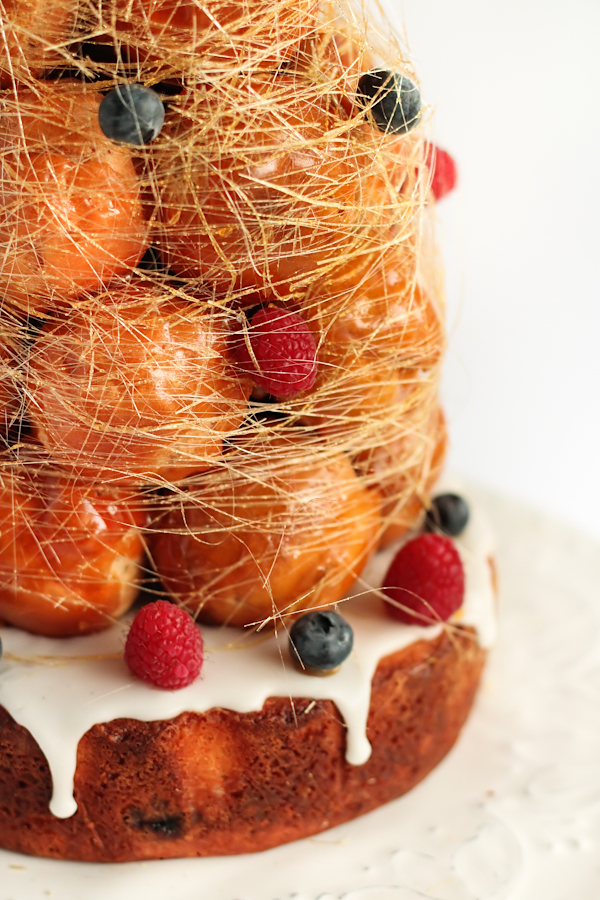
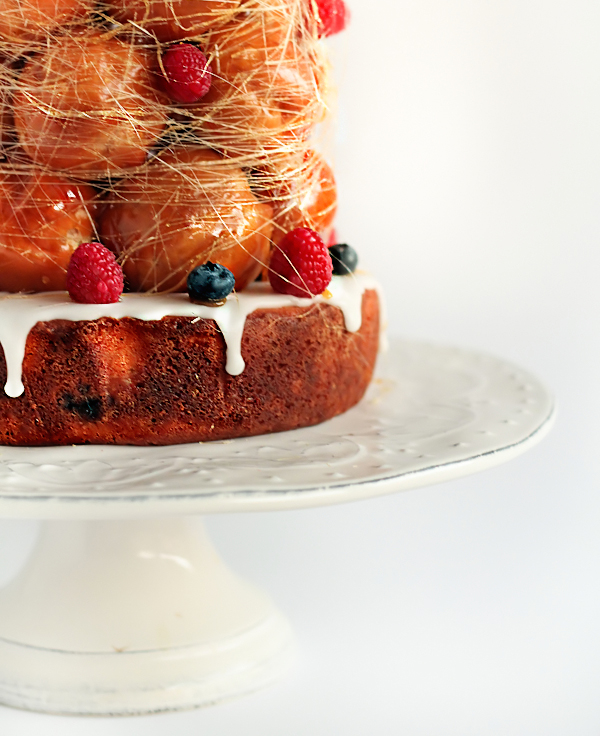
A's Dad mentioned that he loves fresh raspberries and blueberries, so I splashed out and paid a ton for the very out of season fresh berries at the supermarket. Their whole family are big fans of Masterchef Australia, so the night before his birthday I suddenly got all determined to make a damn croquembouche. Don't ask me why I have to call it a damn croquembouche, I don't know why. But in my head I kept thinking, "That's it, I'm going to make a damn croquembouche.". You'd think I had scared myself off with my previous not so good-looking effort, but I guess time heals all sugar burn related wounds. So I made this Lemon Blueberry Cake covered in Lemon Icing topped with a Croquembouche (with raspberry creme patissiere-filled choux pastry/profiteroles).
Croquembouche Cake with Lemon & Berries
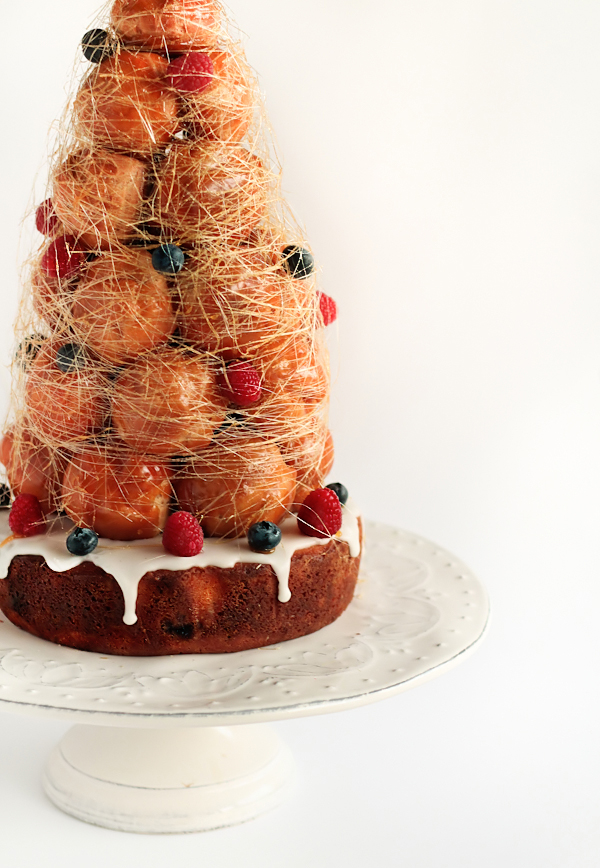
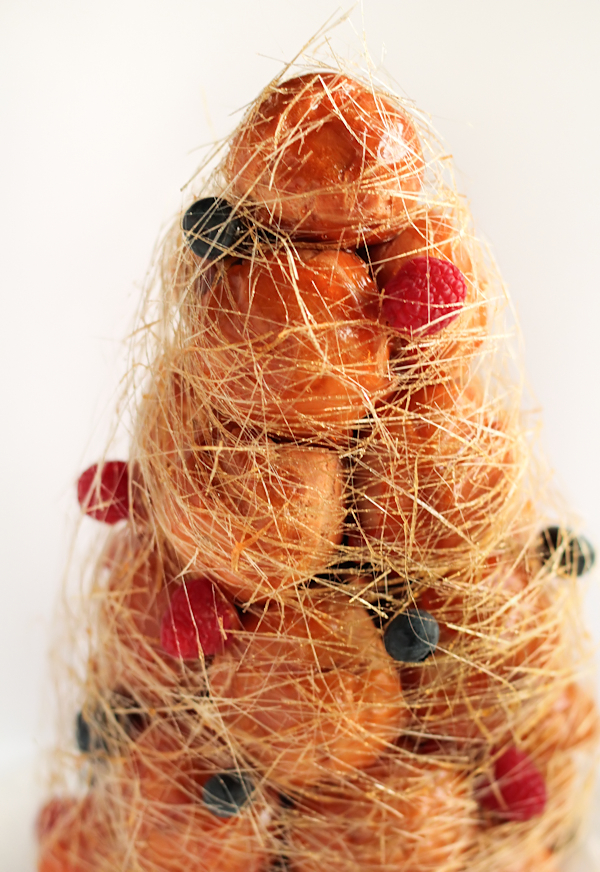
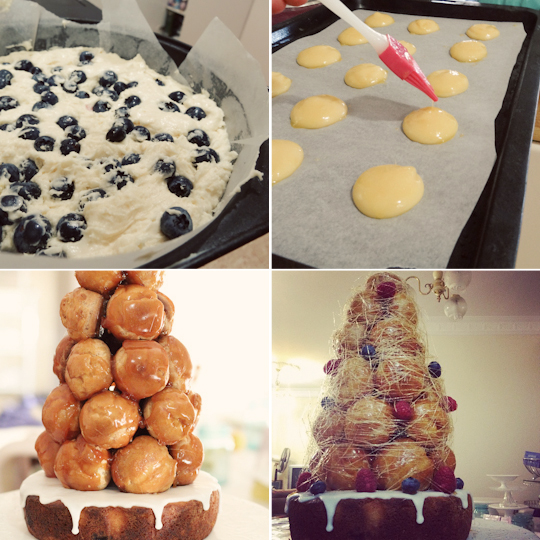
As I mentioned in that previous post, I am not a huge fan of the croquembouche. I will always chose cake over choux pastry. I still remember many years ago being quietly unimpressed to find out that a particular birthday party I was attending would end the night with profiteroles instead of birthday cake. That being said, I loved the challenge of making it and because A's family watch Masterchef I knew they would appreciate the effort that went into it. It wasn't a full-size croquembouche, just big enough to make a rather impressive cake topper. I didn't have one of those fancy metal cones to use as a mould for constructing it, so I had to rely on building it up from the bottom layer up like brickwork and hope that I wouldn't make it too wonky. I was pretty satisfied with the result, but of course suffered a few painful sugar burns in the process. Ouchhh...
Croquembouche Cake with Lemon & Berries
It might seem a little random to put cake and pastry together like this, but the flavours worked quite well. The cake is quite small and has a very strong, tangy lemon flavour. It really helped to balance out the intense sweetness from the toffee. Lemon and berries will always work together flavour-wise. And it didn't feel right to have a birthday cake without any cake. I will admit I was pretty pleased with the end result, A pointed out that I had a rather smug smile on my face as we waited at the front door of his family's house that night. It was totally worth all the effort and sugar burns to see their reaction to the cake! P.S. Sorry about the slightly blurry photos, I was racing to get it done before the sun went down!
Croquembouche Cake with Lemon & Berries
Croquembouche Cake with Lemon and Berries
(cake adapted from Exclusively Food, croquembouche recipe from here)
For the lemon blueberry cake:
185g (about 3/4 cup) butter, softened (if using unsalted butter, add 1/4 tsp table salt with the butter)
190g (3/4 cup + 5 teaspoons) caster (superfine) sugar (regular white sugar will still work if superfine unavailable)
3 large eggs, at room temperature
1 tsp finely grated lemon zest
185g (about 1 1/3 cups) self-raising flour
4 tbsp lemon juice
1/2 punnet (60g) blueberries, fresh or frozen

For the lemon icing:
300g icing sugar (confectioner's sugar)
1-2 tbsp lemon juice

The cake and icing can be prepared a day ahead of the croquembouche and stored in the fridge in an airtight container. Preheat oven to 170°C (340°F). Grease the side and base of a 18cm round cake tin. Line base and side of the pan with non-stick baking paper. Beat butter and sugar in a large mixing bowl with an electric mixer on high until very pale and creamy (at least 10 mins). Add the eggs one at a time, beating for a few minutes after each addition. Don't rush the addition of the eggs as the mixture will be more likely to separate and develop a curdled appearance. Add the zest with the last egg. Add half the flour and stir until just combined. Repeat with remaining flour. Mix in juice. Pour mixture into prepared pan and spread evenly. Sprinkle blueberries evenly over the top of the batter. Bake for about 50-55 minutes, or until a skewer inserted into the centre of the cake comes out clean. The cake should spring back when lightly pressed in the centre. Cool completely in tin on a wire rack.

When cake is completely cool, prepare the icing. Place icing sugar in a mixing bowl and gradually add lemon juice about 1 tsp at a time until the mixture is a smooth, thick white paste (a little thicker than toothpaste). If mixture isn't thick enough it will run right off the edge of the cake and you will need to add more icing sugar. If it is too thick Pour over the top of cake and allow to set.
Croquembouche Cake with Lemon & Berries
For the choux pastry:
3/4 cup water
6 tbsp (85g) unsalted butter
1/4 tsp salt
1 tbsp sugar
1 cup (125 g) all-purpose flour
4 large eggs
For the egg wash: 1 egg and pinch of salt

For the raspberry crème patissiere:
2 cups whole milk
4 tbsp cornstarch (cornflour in Aus)
200g (about 1 cup minus 1 tbsp) sugar
2 large eggs
4 large egg yolks
4 tbsp (55 g) unsalted butter
2 tsp pure vanilla extra
1 cup fresh or frozen raspberries (about 150g) - pureed and strained

For the toffee:
2 cups (450 g) sugar
1 tsp lemon juice
For the spun sugar: repeat steps for the toffee but add 1 tbsp glucose syrup at beginning (or light corn syrup)
To decorate: extra fresh berries

Crème patissiere and choux can be made a day ahead as well, just don't fill the choux pastry. Prepare the raspberry crème patissiere; dissolve cornstarch in 1/2 cup of milk. Combine the remaining milk with the sugar in a saucepan; bring to boil; remove from heat. Beat the whole egg, then the yolks into the cornstarch mixture. Pour 1/3 of boiling milk into the egg mixture, whisking constantly so that the eggs do not begin to cook. Return the remaining milk to boil. Pour in the hot egg mixture in a stream, continuing whisking. Continue whisking (this is important – you do not want the eggs to solidify/cook) until the cream thickens and comes to a boil. Remove from heat and beat in the butter, vanilla, and raspberry puree. Pour mixture into a stainless steel/ceramic bowl. Press plastic wrap firmly against the surface. Chill immediately and until ready to use.

For the choux pastry, preheat oven to 220°C (425°F), line two baking sheets with parchment paper. Combine water, butter, salt and sugar in a saucepan over medium heat. Bring to a boil and stir occasionally. At boil, remove from heat and sift in the flour, stirring to combine completely. Return to heat and cook, stirring constantly until the batter dries slightly and begins to pull away from the sides of the pan. Transfer to a bowl and stir with a wooden spoon 1 minute to cool slightly. Add 1 egg. The batter will appear loose and shiny. As you stir, the batter will become dry-looking like lightly buttered mashed potatoes. At this point add in the next egg. Repeat until you have incorporated all the eggs. Transfer batter to a pastry bag fitted with a large open tip. Pipe choux about 1 inch-part in the baking sheets. Choux should be about 1 inch high about 1 inch wide. Using a clean finger dipped in hot water, gently press down on any tips that have formed on the top of choux when piping. You want them to retain their ball shape, but be smoothly curved on top. Brush tops with egg wash (1 egg lightly beaten with pinch of salt). Bake the choux at 220°C (425°F) degrees until well-puffed and turning lightly golden in color, about 10 minutes. Lower the temperature to 180°C (350°F)degrees and continue baking until well-colored and dry, about 20 minutes more. If they start to deflate or still feel soft to the touch when they cool then return them to the oven until they are dry enough. Move to a rack and cool completely. Can be stored in a airtight box in the fridge overnight if you want to make them ahead of time.

When you are ready to assemble your croquembouche, place creme patissiere in a piping bag with a narrow tip. Pierce the bottom of each choux and fill with raspberry creme. Refrigerate filled choux while you prepare the toffee; combine sugar and lemon juice in a saucepan with a silicon spatula stirring until the sugar resembles wet sand. Place on medium heat; heat without stirring until sugar starts to melt around the sides of the pan and the center just begins to smoke. Begin to stir sugar. Continue heating, stirring occasionally until the sugar is a clear, light amber color. Remove from heat immediately as the toffee will continue to brown a bit more while off the heat. Very carefully dip one side of each choux in a thin layer of toffee, letting the excess drip off and then leave to set on a sheet of baking paper. When toffee is set, dip the other side of each choux. If the toffee starts to get too thick, return to very low heat and stir until it is liquid again. Assemble the croquembouche on another sheet of baking paper, using the leftover toffee to stick a ring of about 5-6 choux together to form the base of the cone, the tops of the choux facing outwards. Then stack smaller layers of choux on top until it comes to a point. Carefully place assembled croquembouche on top of iced cake. Make another batch of toffee for the spun sugar, using two forks to spin thin strands of sugar around the croquembouche. Decorate with extra berries. Serve within the same day (toffee will start to melt from the humidity in the air, try to keep in a cool place until ready to serve).
Croquembouche Cake with Lemon & Berries
Print Friendly and PDF