Monday, December 24, 2012

Pandan Cotton Soft Cheesecake with Kaya

Pandan Cotton Soft Cheesecake with Kaya
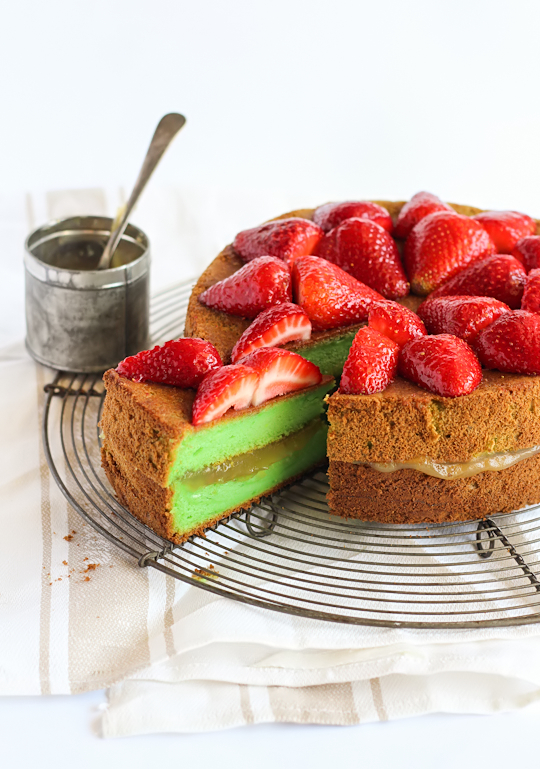
I didn't make this cake for Christmas, I made it for my brother's birthday a couple weeks ago. But I thought I'd share it with you guys because it is SO GOOD, and it's red and green so it's still relevant to the season. I've made plain Japanese cotton soft cheesecake before, the such a magical hybrid of cheesecake and sponge cake but this one has a Malaysian spin to it. This one is flavoured with pandan, and the cake is filled with kaya. If you've read my blog for a while and you don't know what either of those are then I will be sad. I've written about it a lot. Pandan-flavoured stuff is awesome. Kaya is AWESOME. This cake is awesome.
Pandan Cotton Soft Cheesecake with Kaya
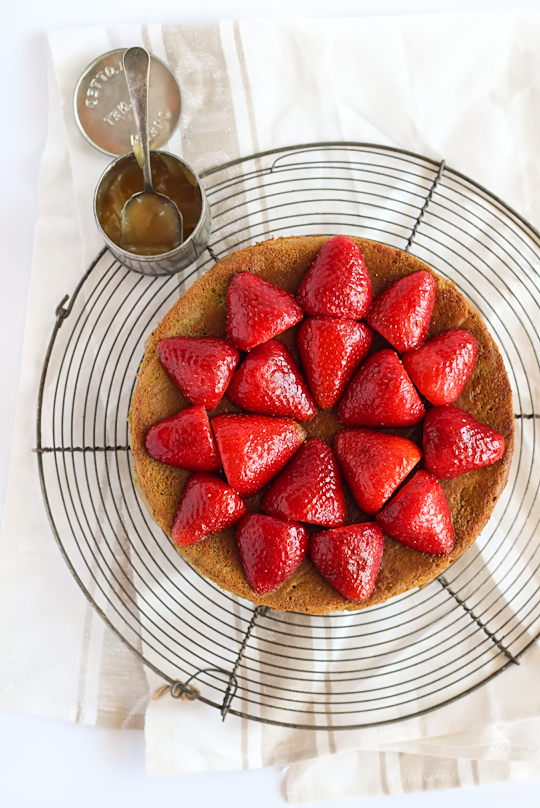
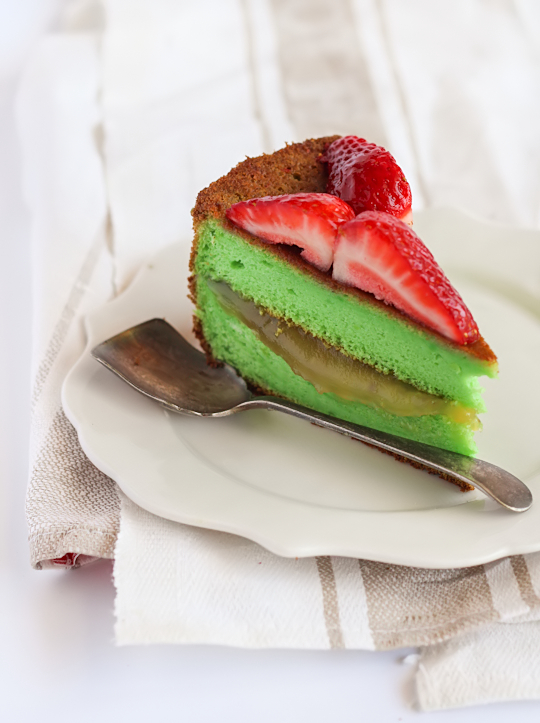
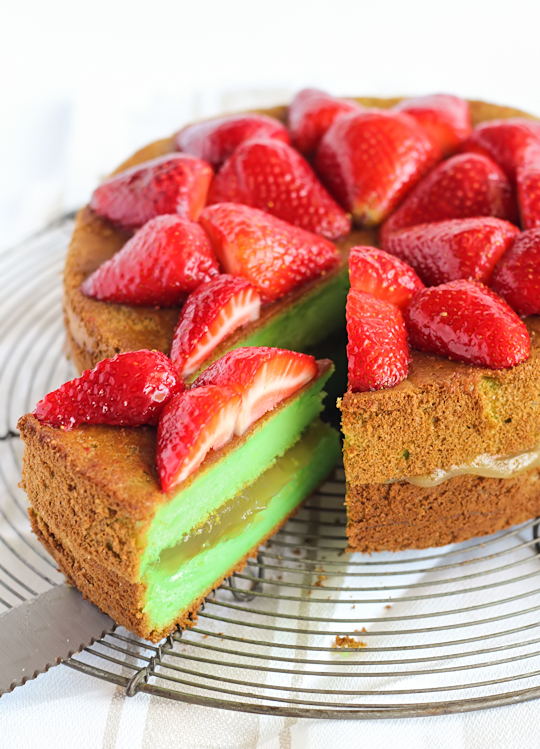
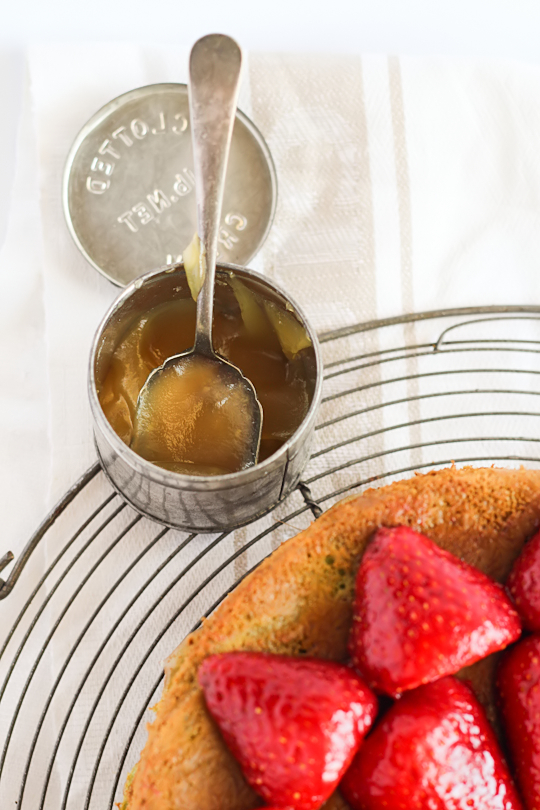
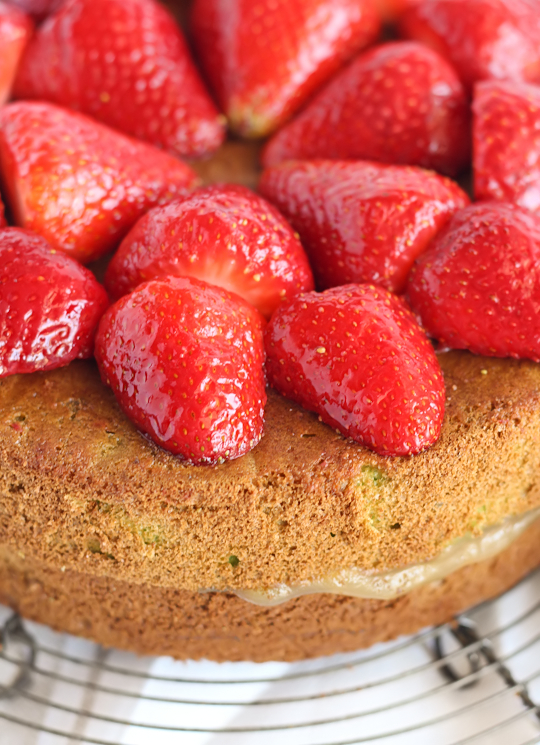
The pandan flavouring gives the cake that neon green hue, and I think the strawberries work really well as a topping, both looks and flavourwise. The super light and soft pandan cheesecake is fun alternative to the usual pandan chiffon cake, and it works really well as a cheesecake flavour. Because the cake itself is so light and has a bit of a tangy flavour from the cream cheese, it goes well with that thick layer of coconut jam in the middle. Kaya is the sort of thing that shouldn't be eaten in moderation.
Pandan Cotton Soft Cheesecake with Kaya
I'm silly and completely forgot that I needed to bake cakes in a water bath, which is why the outside is a little browner than you might expect. But when you cut into the cake it looks pretty impressive. If you couldn't be bothered splitting the cake into two separate layers you can bake it as one cake and spread the kaya on top instead. And if you can't be bothered making your own kaya or buying some from the Asian supermarket, you could try filling the cake with some coconut flavoured cream.
Pandan Cotton Soft Cheesecake with Kaya
Anyway, I wanted to wish all of you a very Merry Christmas and a Happy New Year. I hope everyone has a safe and happy holidays. I'll be back next year with more sugary, buttery recipes!
Pandan Cotton Soft Cheesecake with Kaya
(serves 12, adapted from this recipe from Diana's Desserts)
140g/5 oz fine granulated sugar
6 egg whites
6 egg yolks
1/4 tsp cream of tartar
50g/2 oz butter
250g/9 oz cream cheese
100 ml/3 fluid oz fresh milk
2 tsp pandan paste (you will need more if using pandan essence, adjust to taste)
1 tbsp lemon juice
50g/1.75 oz plain/all-purpose flour
30g/1 oz cornflour (cornstarch)
1/4 tsp salt
1 cup kaya (Malaysian coconut jam, available at most Asian groceries or here's a recipe to make your own)
Optional: Fresh strawberries or other fruit to decorate

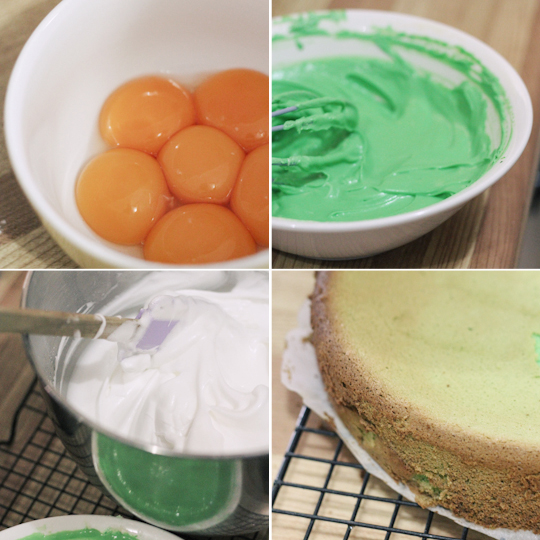
Preheat oven to 160°C (320°F). Grease base and sides, and line the base of two 18cm round cake tins with baking paper. Melt cream cheese, butter and milk over a double boiler. Cool the mixture. Fold in the flour, the cornflour, egg yolks, lemon juice and pandan paste and mix well. In a separate mixing bowl, whisk egg whites with cream of tartar until foamy. Add in the sugar and whisk until soft peaks form. Add cream cheese mixture to egg white mixture and stir until combined. Split mixture between the two cake tins. Bake cheesecake in a water bath (I forgot the water bath, this isn't the end of the world it will just be a little drier on the outside) for about 50 mins or until set and golden brown at 160°C (320°F).
Pandan Cotton Soft Cheesecake with Kaya
When cakes are ready, cool them very slowly to stop the cakes from collapsing in the centre. Turn the oven off first for 5 mins, then open the oven door and let it cool for another 10 mins, then cool in tin for 15 mins. Remove from tin and cool completely on a wire rack. Sandwich the two cake layers together with the kaya in between. I topped my cake with strawberries, which had been hulled, halved and marinated in sugar for an hour. Serve immediately or store in the fridge in an airtight container for up to about 3 days.
Pandan Cotton Soft Cheesecake with Kaya
Print Friendly and PDF

Monday, December 17, 2012

Ginger Shortbread with Cherry Icing

Ginger Shortbread with Cherry Icing
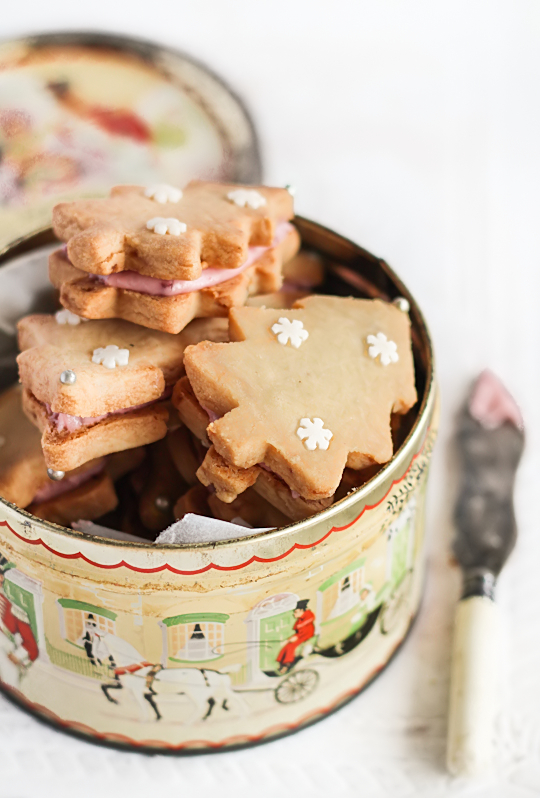
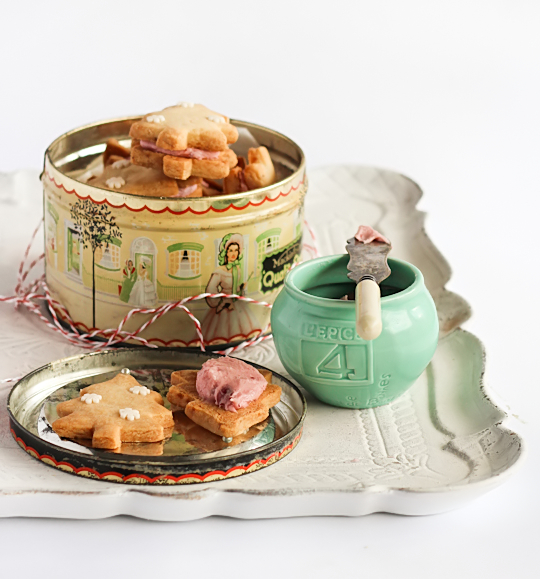
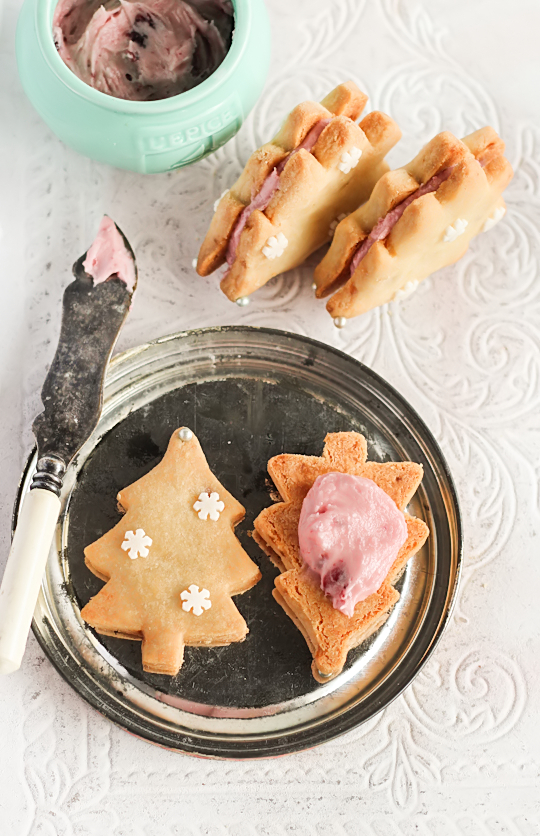
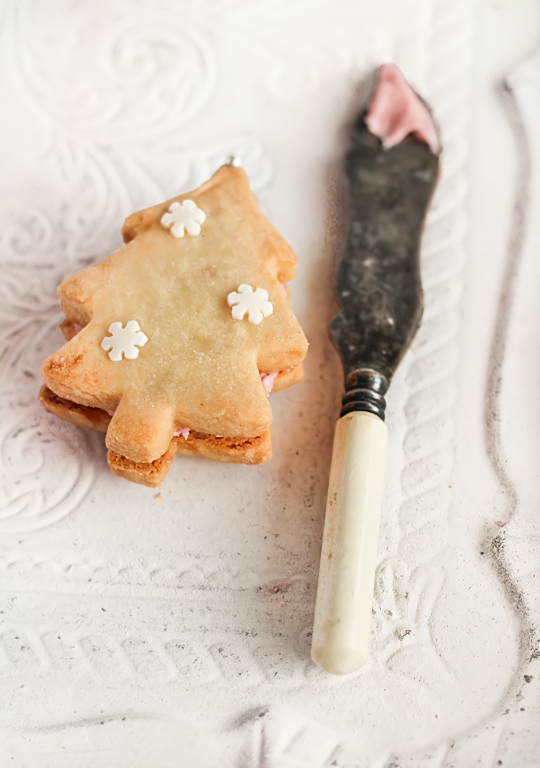
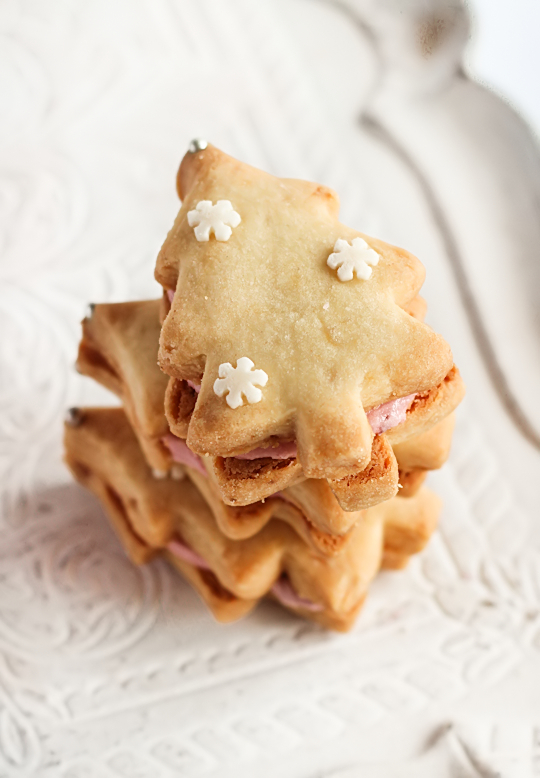
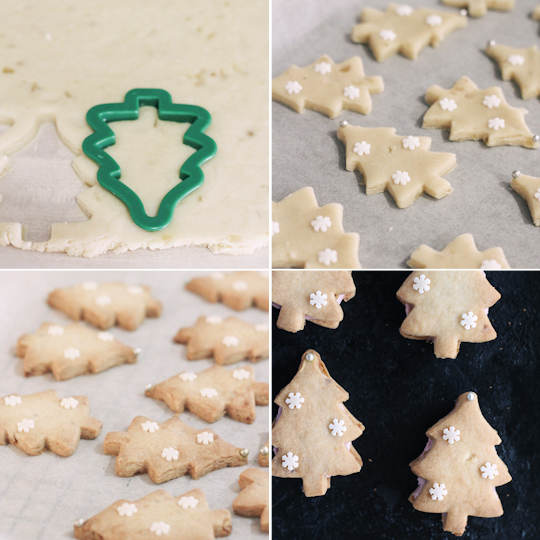
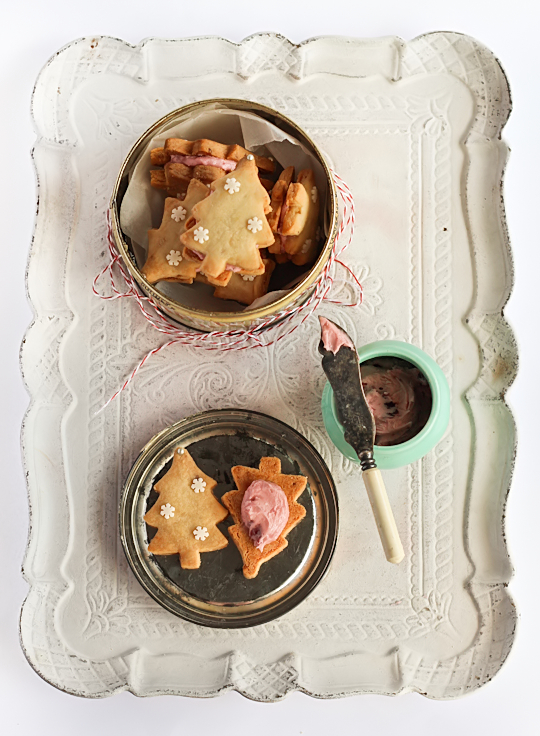
I think we are all in the need of a little comfort right now. Mine comes in the form of butter-loaded melty shortbread. I couldn't decide between making gingerbread or shortbread this weekend, so I ended up making ginger shortbread! These Christmas tree decorated sandwich cookies are made using a lovely and easy shortbread recipe, mixed with lots of ground ginger and nubs of candied ginger. They are also filled with a pretty pink cherry icing (yay for more butter!).
Ginger Shortbread with Cherry Icing
If you're not a fan of ginger you could skip the ginger part (but that would make me sad). It adds that ever so slight tingle of heat to the biscuits, and goes really great with the sweet cherry icing. I was guestimating a bit with the ginger amounts, I added what I thought was a metric shitload of ginger and it still turned out quite subtle. I've increased it slightly in the recipe below but you can adjust it depending on what you prefer.
Ginger Shortbread with Cherry Icing
I was a little bit lazy with the icing, even though there are some fantastic fresh cherries available in Australia at the moment I ended up using the a cherry jam (albeit a good quality jam) to flavour the icing. It's one of my favourite shortcuts. You're always guaranteed to get a good flavoured icing when you add a bit of jam, without adding too much liquid to the mixture.
Ginger Shortbread with Cherry Icing
These shortbread biscuits are really best when they are eaten with a generous slathering of icing, the cookie itself is not very sweet so it can handle the sweetness from the icing. If you are making the biscuits on their own, I would probably add a little bit more sugar to the mixture. Either way, this shortbread is a great treat for the family over Christmas, and it will look so cute wrapped up in cellophane packages as gifts. The hard part is stopping yourself from eating all of them before they make it out of the kitchen!
Ginger Shortbread with Cherry Icing
(makes about 20 sandwiched cookies, adapted from this Taste.com.au recipe)
250g (about 2 sticks) butter, chopped, softened (I used salted, if not add another 1/4 tsp of salt)
1/2 cup (about 115g) sugar (I used caster/superfine but regular white sugar works too)
1 1/2 cups (about 190g) plain flour
3/4 cup (about 80g) rice flour
3 tsp ground ginger
A pinch of salt
2 tbsp candied ginger, finely diced (crystallised or glace, I used glace)
Optional: sprinkles and/or silver cachous to decorate 

For the cherry icing:
125g butter (about 1 stick), softened
2 cups (about 250g) icing/confectioner's sugar, sifted - amount should be adjusted until icing is correct consistency
3-4 tbsp cherry jam (alternatively, use fresh/frozen cherries that are finely diced and add a bit more icing sugar, or make this cherry compote)

Line two baking trays with baking paper. Place butter and sugar in a large mixing bowl and beat with an electric mixer on high until light and creamy. Sift over flour, rice flour salt, and ground ginger. Add candied ginger and mix on low until it just starts to come together as a dough. Turn out on to a lightly floured surface and knead very lightly until smooth (try to avoid contact with the dough as much as you can as the heat from your hands will melt the butter in the mixture, and the more your knead the tougher your biscuits will be).
Ginger Shortbread with Cherry Icing
Roll out dough between 2 sheets nonstick baking paper until 0.5cm (0.2 inches) thick. Using a 5cm biscuit cutter (or a christmas tree cutter like mine), cut shapes from the pastry.  Place on baking trays. Press leftover dough together and repeat. Decorate with sprinkles and cachous however you prefer. Refrigerate for at least 30 minutes or until firm (I waited about an hour). Preheat oven to 160°C (320°F) Bake for about 15-20 mins or until light golden. Cool on trays for 5 mins then move to a wire rack to cool completely.

Prepare the icing; place butter in a large mixing bowl and beat on high with an electric mixer until smooth. Gradually add icing sugar and beat until combined. Add cherry jam and beat again until combined. Adjust amount of jam or fruit and icing sugar until you achieve the right consistency, icing should be smooth but not too runny. Pipe or spoon icing between two biscuits. Can be stored in an airtight container for several days, best kept in the fridge if you are in hot weather.
Ginger Shortbread with Cherry Icing
P.S. Go HERE to check out all my Christmas recipes!
Print Friendly and PDF

Monday, December 10, 2012

Candy Cane White Chocolate Mousse

Candy Cane White Chocolate Mousse
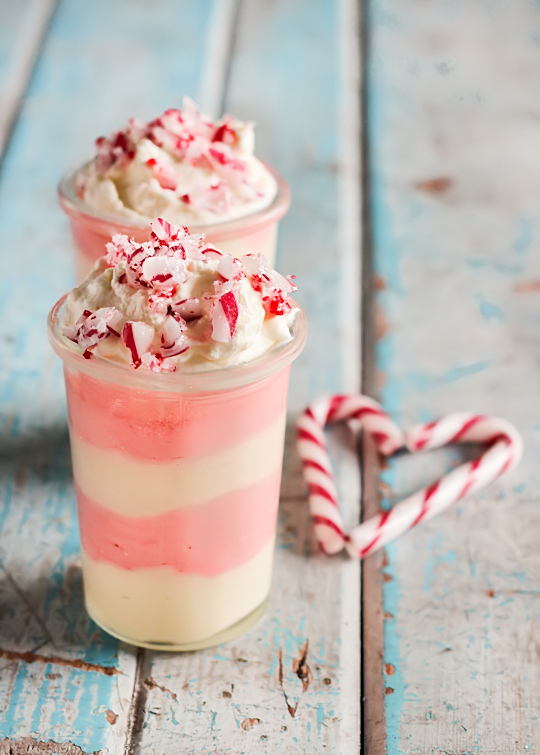
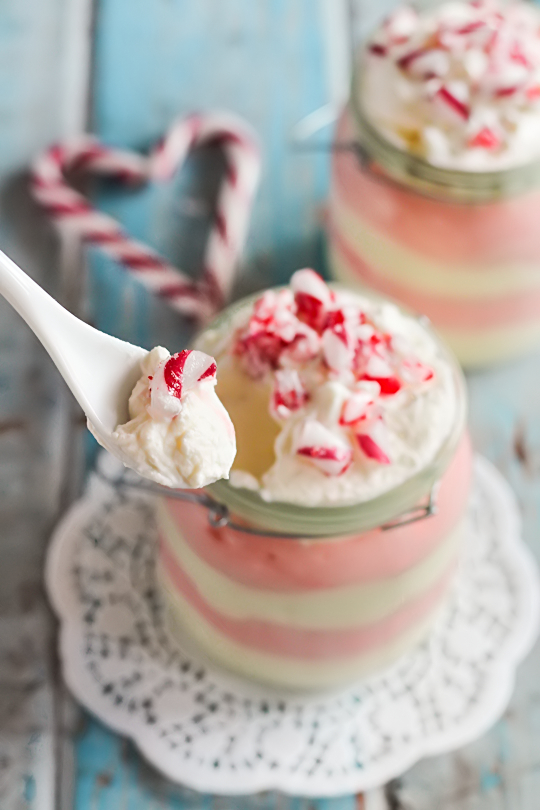
More Christmas baking! This is a super, super easy recipe that requires no actual baking, just a little bit of heating, stirring, whipping and folding. I love candy canes. I have always been a peppermint fan, and they always look so pretty when they are crushed up and used in a dessert of some sort. This dessert is a fantastic one that is not too heavy (perfect as a refreshing dessert after a big Christmas lunch), and can be prepared well ahead of time.
Candy Cane White Chocolate Mousse
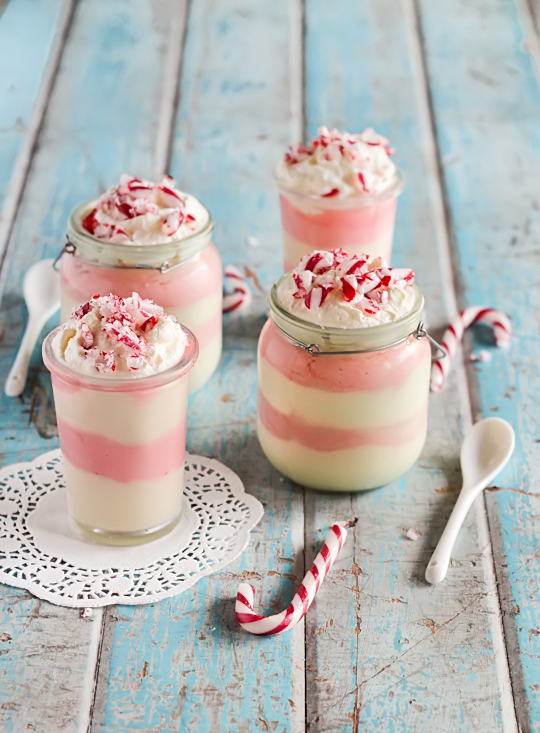
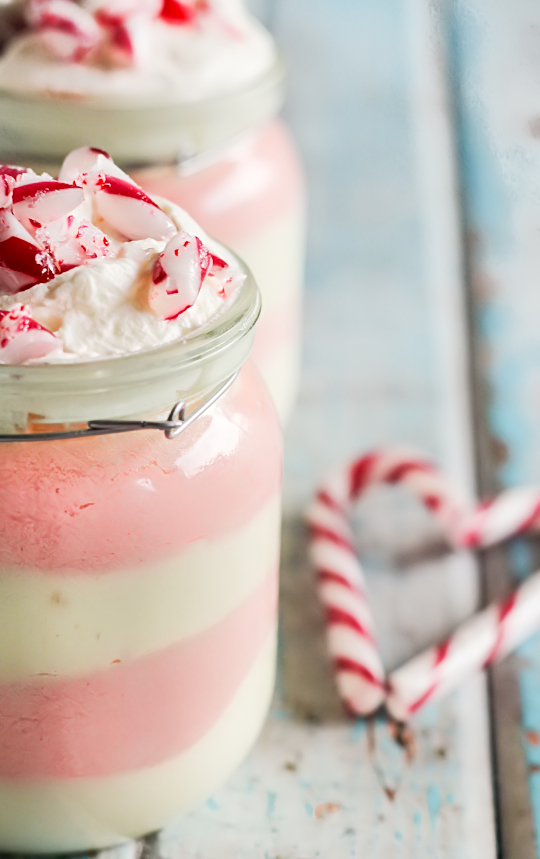
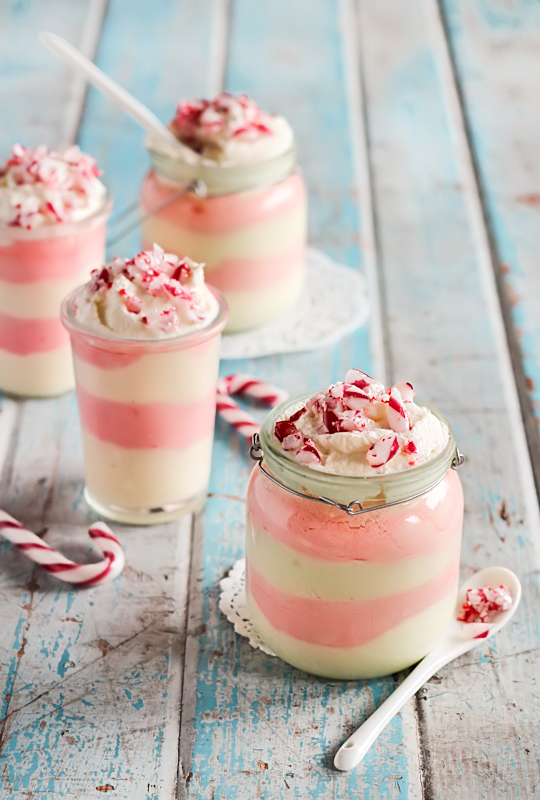
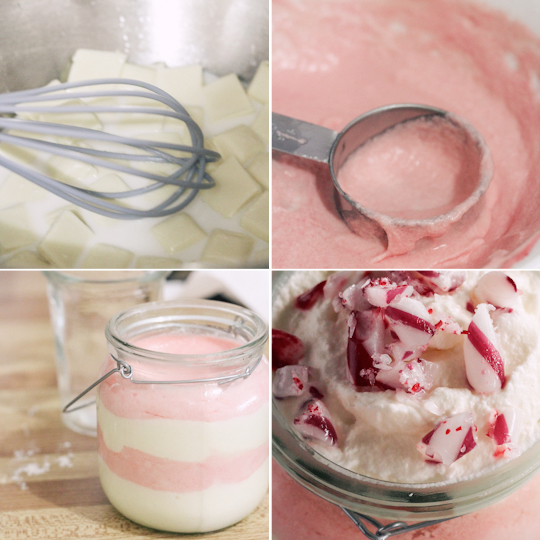
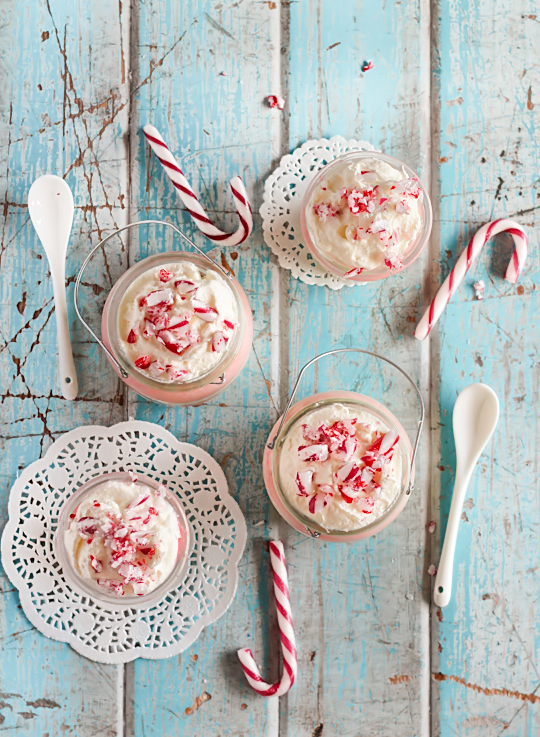
I used a simple white chocolate mousse recipe flavoured with peppermint; just enough to give it a nice hint of minty-ness against the white chocolate flavour, but not enough to make it taste like toothpaste. To make it a little prettier, I added a bit of pink food colouring to half of the mixture and layered the two colours. It looks super cute, especially in narrow glasses or small jars. I always keep any glass jar or container that I can get my hands on because they make fantastic serving glasses.
Candy Cane White Chocolate Mousse
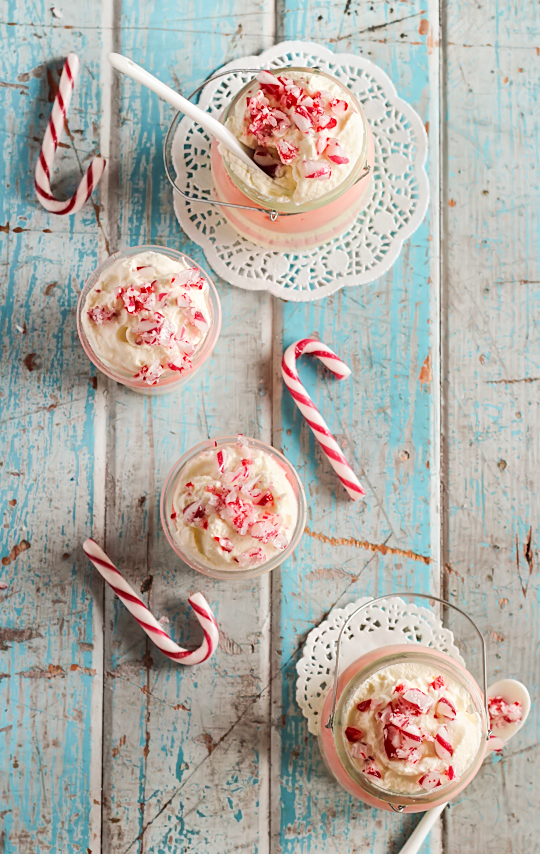
Top them off with a bit more whipped cream, and a sprinkling of crushed candy canes and you have a very pretty dessert. I know not everyone is a peppermint fan, so you can always change it up and use non-mint flavoured candy canes and flavour the mousse however you want.
Candy Cane White Chocolate Mousse
It's going to be a very busy Christmas season this year. Along with all the usual Christmas chaos, I'm looking forward to welcoming my niece into the world around the same time! I'm already determined to make a baker out of her :) Hopefully I'll have time to try out a few more Christmas-related recipes before then.
Candy Cane White Chocolate Mousse
So I may have gotten a little carried away with the photos, can you blame me?
Candy Cane White Chocolate Mousse
(serves 6, adapted from this recipe)
250g (about 9oz) white chocolate
60ml (1/4 cup) milk
1 1/2 tsp peppermint essence
3 large eggs, separated
350ml (1.5 cups) pure/pouring cream (or heavy cream in the US, min 35% fat unthickened)
To decorate: red/pink food colouring, extra whipped cream, crushed peppermint candy canes

Place white chocolate, milk and peppermint essence in a heatproof bowl over a saucepan of boiling water, making sure the bowl does not touch the water. Heat until the chocolate is just melted, stirring regularly. Cool for 5 minutes, then beat in egg yolks one at a time until well combined. Whip cream to soft peaks in a separate bowl, and then gently fold into warm mixture until just combined. In a separate clean large mixing bowl, beat egg whites to soft peaks. Gently fold in the rest of the mixture into the egg whites until just combined.
Candy Cane White Chocolate Mousse
If making the pink and white layers, place half the mixture in a separate mixing bowl and fold in food colouring until just combined. Spoon alternating amounts of pink and white mousse into six 1/2-cup capacity serving glasses. Chill for 3-4 hours or overnight in the fridge. To serve, top with extra whipped cream and a sprinkle of crushed candy canes.
Candy Cane White Chocolate Mousse
P.S. Go HERE to check out all my Christmas recipes!
Print Friendly and PDF

Monday, December 3, 2012

Coconut Cake with Spun Sugar Christmas Trees

Coconut Cake with Spun Sugar Christmas Trees
You may have noticed that I've been struggling to keep up with my weekly blog posts recently. It's been a tough month, unfortunately life keeps getting in the way of blogging. I never want the blog to feel like work or a chore for me, so rather than forcing myself to do something earlier I waited until I really wanted to bake. This weekend I decided to get started on some Christmas baking. Of course this happened to coincide with our first heatwave of the summer, thanks Sydney weather! My apartment turns into an oven in the heat, so I managed to make myself slightly delirious by turning the oven on and trying to spin sugar at the same time in this heat. It was a bit of a disaster, the sugar strands were basically melting as soon as they formed. I gave up and sat in front of the air-conditioner for the rest of the day.
Coconut Cake with Spun Sugar Christmas Trees
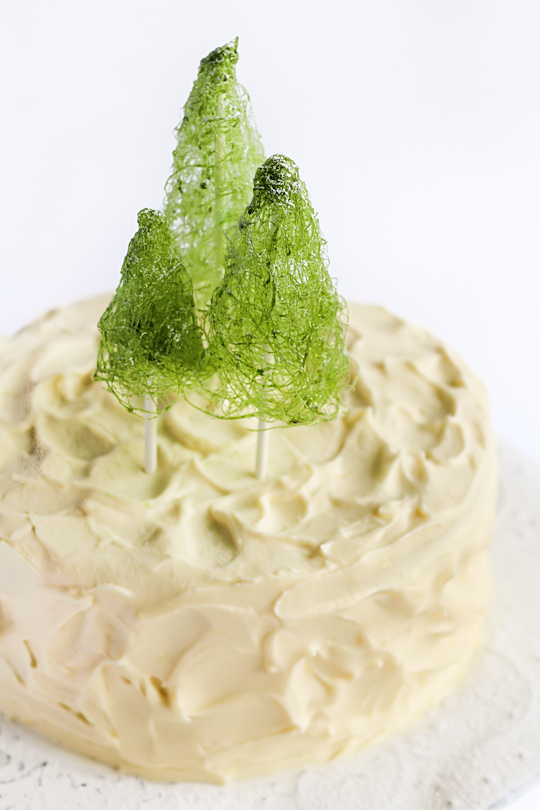
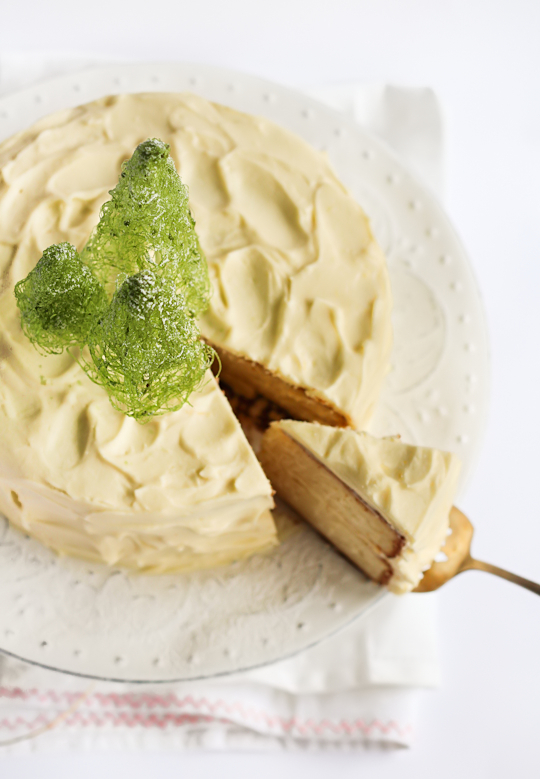
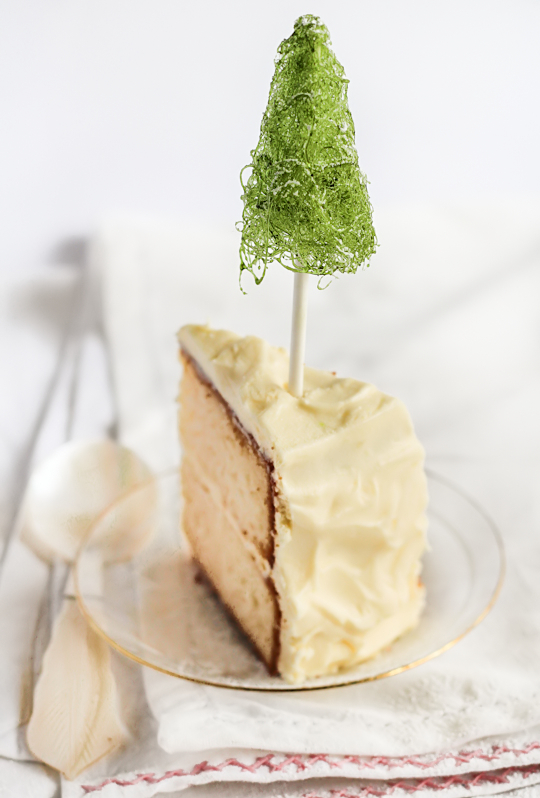
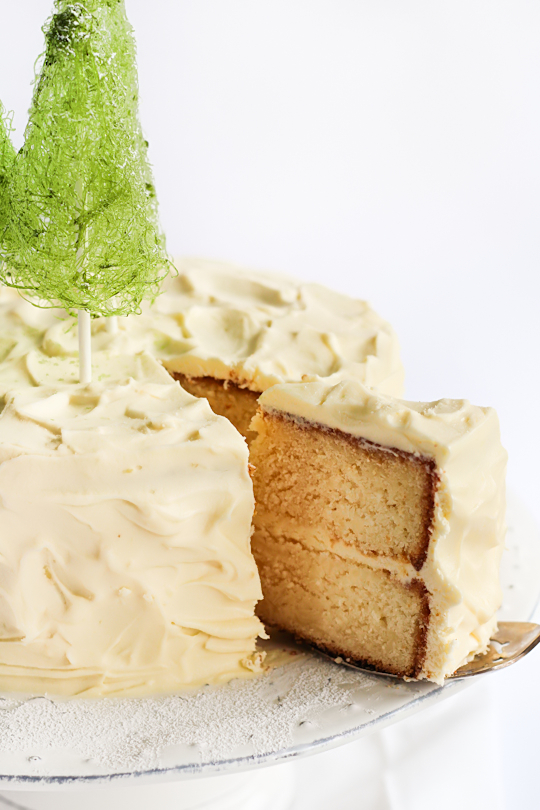
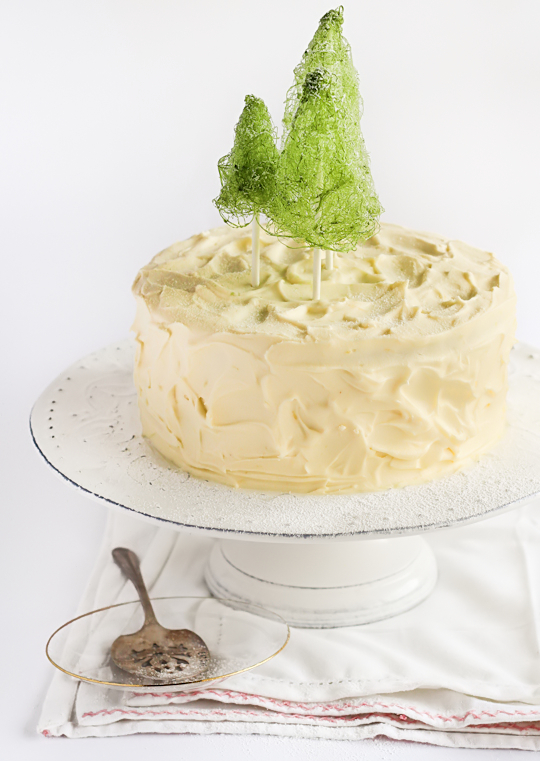
Thankfully, a cool change came through and I managed to get some spun sugar action going the next day. I'm still trying to get the hang of spun sugar, so I think I could do an even better job of these cute little Christmas trees next time. By adding a bit of green food colouring to the toffee mixture, the spun sugar made these great little tree-shaped cake toppers. I think they work quite well on top of this stark white cake, a very soft and moist coconut cake layered with whipped lemon cream cheese icing. Even if you're not making it for Christmas, this is a damn tasty cake.
Coconut Cake with Spun Sugar Christmas Trees
The spun sugar trees definitely take some practice, I made about 10 before I was happy with a few of them. Unfortunately the weather was the absolute worst type of weather for spun sugar, so they didn't last very long (maybe 2 hours) before they started melting. My main tip would be to make sure you don't make them too early if you are in hot weather like myself, otherwise the humidity will get to them and they will disappear before anyone gets to see them. I kept them in the fridge and dusted them with icing sugar to keep them dry. And make sure you protect your bench tops with baking paper to avoid having to scrape stray beads of toffee that are glued to your counter. You can even decorate the trees with sprinkles or silver cachous, but I was just happy to see that my initial idea turned out pretty well and didn't want to mess with it anymore.
Coconut Cake with Spun Sugar Christmas Trees
Coconut Cake with Whipped Lemon Cream Cheese Icing & Spun Sugar Christmas Trees
(serves 12-15, icing recipe adapted from Not So Humble Pie)
For the coconut cake:
250g butter, softened (if using unsalted, add 1/4 tsp of salt to mixture)
1 1/2 (about 350g) cups sugar (I used caster (superfine) but white sugar is fine)
1 teaspoon coconut essence
4 eggs
1 cup (about 80g) desiccated coconut
3 cups (about 375g) self-raising flour
250g (about 1 cup + 2 tbsp) sour cream
1 cup milk

For the lemon cream cheese icing:
500g (about 17.5oz) cream cheese, room temperature
50g butter, softened
2 cups (about 250g) icing (powdered) sugar
Finely grated zest from 1 lemon (about 1 tsp)
1 cup thickened (heavy) cream, cold

Preheat oven to 180°C (350°F) (170°C (340°F) for fan-forced). Grease two 18cm round cake tins (you can use 20cm ones, it will just mean you have a slightly shorter cake) and line the bases with baking paper. Place butter and sugar in a large mixing bowl and beat with an electric mixer on high speed until light and fluffy. Add coconut essence and then add eggs one at a time, beating after each addition until combined. With the mixer on low speed, add half the dry ingredients (flour + coconut) followed by half the wet ingredients (sour cream + milk) and mix until just combined. Add the remaining ingredients and mix until just combined, taking care not to overmix. Split mixture between the two tins and bake for 45-50 mins, or until a skewer inserted into the centre comes out clean). Cool in tins for 10 minutes, then turn out onto a wire cooling rack to cool completely.

For the icing place cream cheese and butter in a large mixing bowl and beat with an electric mixer until smooth. Add lemon zest, then add icing sugar gradually, beating until combined. In a separate mixing bowl, beat cream to nearly stiff peaks then add to cream cheese mixture and mix until smooth. Take care not to overmix. Sandwich icing between the two cake layers and crumb coat the cake with icing. Use the remaining icing to cover the cake completely.
Coconut Cake with Spun Sugar Christmas Trees
For the spun sugar:
1 1/2 (about 350g) sugar
1 tbsp lemon juice
Optional: green food colouring, I used Wiltons gel icing colouring

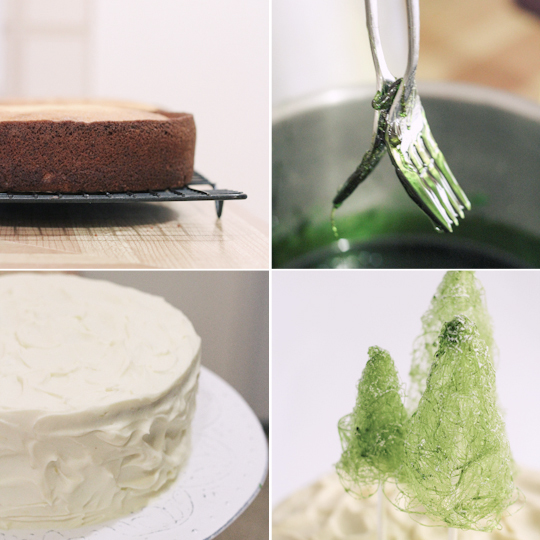
For the spun sugar trees, place all the ingredients in a heavy-based saucepan on low heat. Stir mixture with a wooden spoon or silicon spatula until the sugar has completely dissolved. Turn the heat up to medium-high and allow it to boil for 3-4 minutes until the mixture becomes a bubbling, thickened syrup. Place the base of the saucepan carefully in cold water to halt the cooking process (I just filled my sink with some water). Using two forks held back-to-back (see photo above), or a special sugar whisk, dip prongs into the syrup mixture. Shake the forks back and forth over a clean, lightly oiled sharpening steel or long metal skewer (this will be messy so it is best to cover your bench top in baking paper), so that long threads of spun sugar are formed. Lift up spun sugar threads carefully and wrap around the tip of a lollipop stick, pinching the top end so that it forms a cone. This may take some practice to get the amount of sugar and shape correct. If the syrup starts to harden too much, return the pan briefly to low heat until the mixture melts again. Remember, any small amount of heat or humidity will cause your spun sugar to melt, so try to leave this step until you are nearly ready to serve your cake. Place spun sugar trees on top of the cake and dust lightly with icing sugar. You can also decorate the trees with sprinkles or silver cachous.
Coconut Cake with Spun Sugar Christmas Trees
P.S. Go HERE to check out all my Christmas recipes!
Print Friendly and PDF