Monday, January 28, 2013

Pink Peppercorn Brownies

Pink Peppercorn Brownies
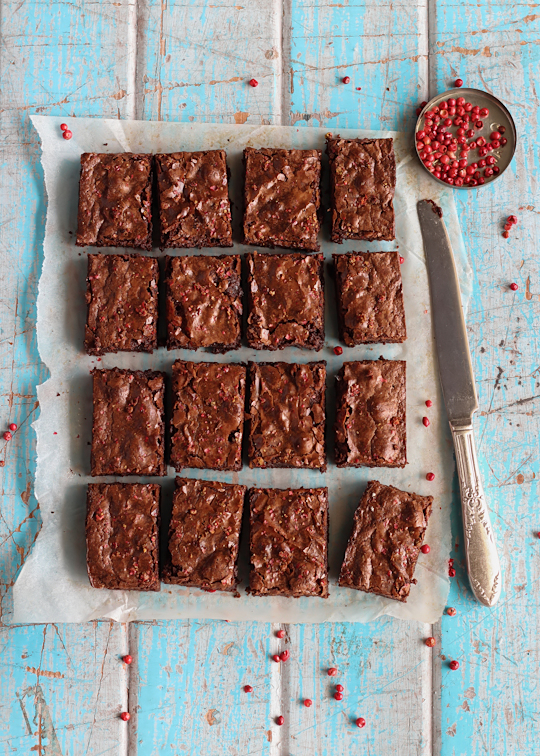
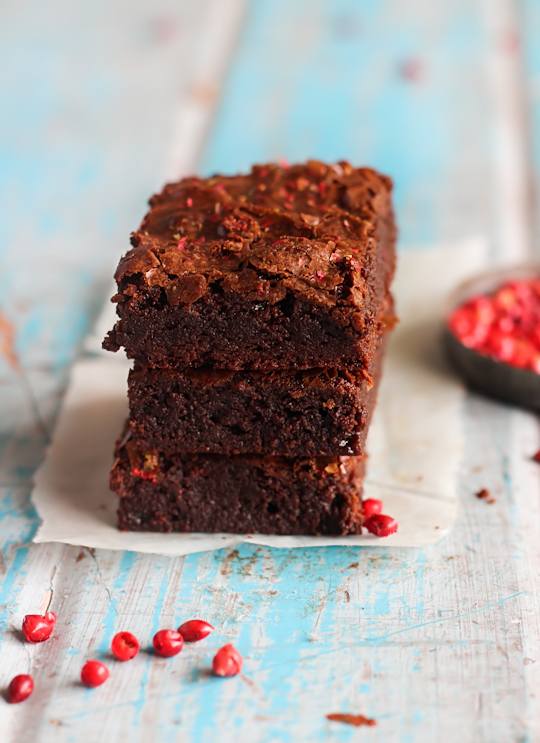
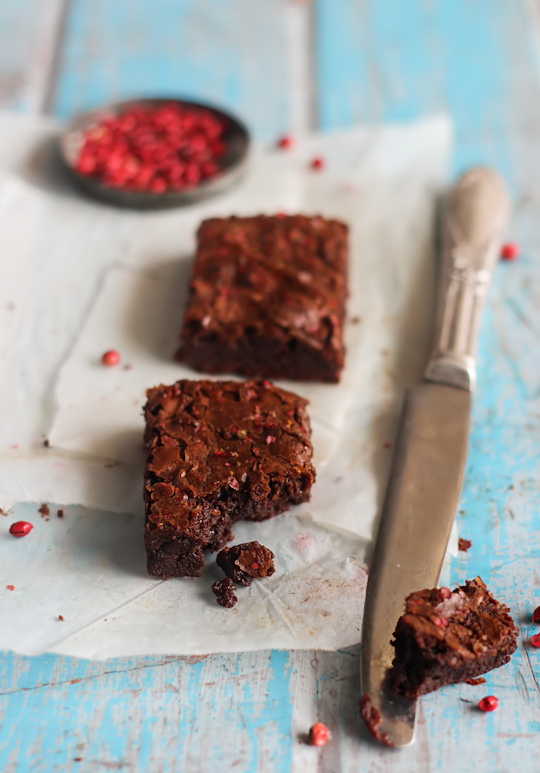
I could go into a long and detailed explanation about how I was inspired to experiment with some different spices after buying a small tub of pink peppercorns...but let's be real, I just wanted an excuse to bake brownies. Perfectly fudgy chocolate brownies with that wonderful crackly layer on top. At the moment my baking schedule is completely determined by whatever naughty sweet treat I've been fantasising about while eating my tuna salad lunches. I needed the brownies.
Pink Peppercorn Brownies
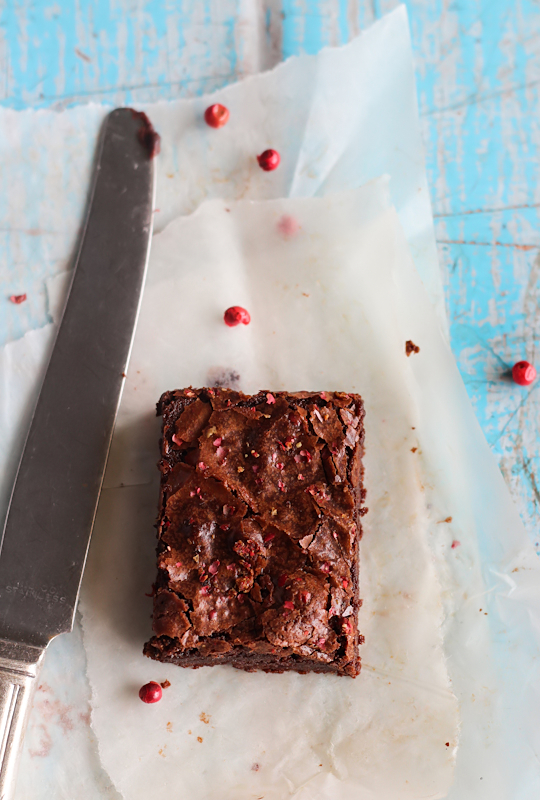
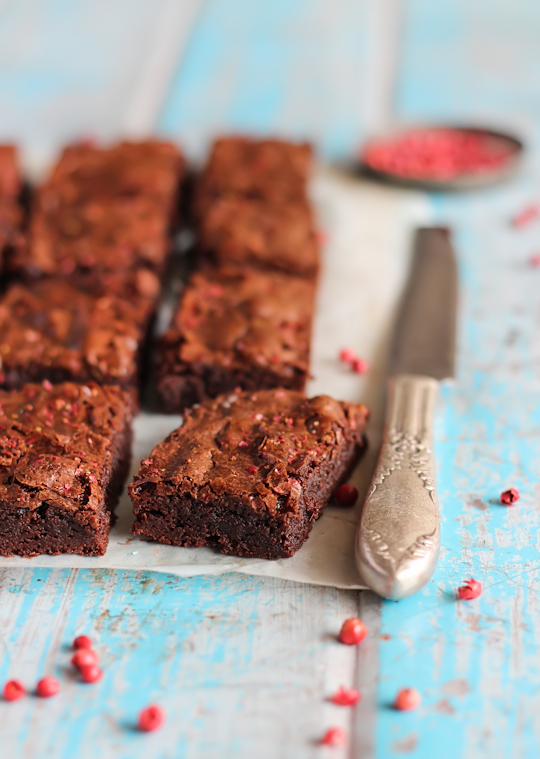
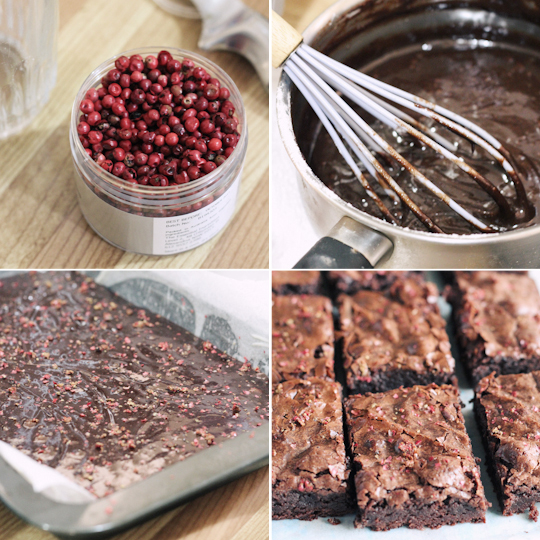
But I really was eager to try out the pink peppercorns with a dessert of some sort. I already love using black pepper in desserts, and yes I know that pink peppercorns are not technically peppercorns but they have that great peppery flavour and a vibrant pink colour, which I think looks fantastic sprinkled on top of the dark chocolate brownies.
Pink Peppercorn Brownies
This recipe is essentially a twist on the spiced blondies I made a few months ago (one of my favourite recent creations). I used the pink peppercorns, with a bit of real vanilla bean, cinnamon, cloves and cardamom. It's fun to try out if you want something different to the regular brownie, and the colour of the pink peppercorns on top make it pretty enough for some Valentine's Day baking.
Pink Peppercorn Brownies
Recently I've struggled with over-baked, cakey, dry brownies that are missing the ideal crackly top and chewy edges. This time I decided to base this recipe on David Lebovitz's recipe from his book Ready for Dessert: My Best Recipes, available online at Babble. Dear David, you are so awesome. Never change. I will definitely be using this recipe again, it made the prettiest, fudgiest, chewy brownies ever. Oh, and if the idea of using pink peppercorns freaks you out too much just replace it with freeze-dried raspberries or something.
Pink Peppercorn Brownies
(adapted from David Lebovitz's Absolute Best Brownie recipe, makes 16 brownies)
85g (3oz / 6 tbsp) butter, cut into pieces (I used salted, add a pinch of salt if using unsalted)
225g (8oz) bittersweet or semisweet chocolate, chopped
3/4 cup (150g) sugar
1/4 tsp ground cinnamon
1/8-1/4 tsp ground cardamom (adjust to taste, 1/4 tsp is quite strong)
1/8 tsp ground cloves
1 tsp vanilla bean paste, or vanilla extract, or scraped seeds from one vanilla bean pod
2 large eggs, at room temperature
1/4 cup (35 g) all-purpose flour
About 2 tsp freshly ground pink peppercorns

Preheat the oven to 180°C (350°F), I'd recommend lowering it to 170°C if using fan-forced. Grease well and line the bottom and two long sides of a 20x30cm slice/brownie tin (can be substituted with a 20cm/23cm square cake tin). Let the baking paper hang over the long edges, it will make it easier to lift brownie out later. Grease the paper lightly as well.

In a medium saucepan, melt the butter, then add the chocolate and stir over low heat until the chocolate is melted and smooth. Remove from the heat and stir in the sugar, cinnamon, cardamom, cloves and vanilla bean until combined. Stir in the eggs one at a time until smooth. Add the flour and stir energetically for just a minute, until the batter loses its graininess, becomes smooth and glossy, and pulls away a bit from the sides of the saucepan.
Pink Peppercorn Brownies
Scrape the mixture into the prepared pan. Sprinkle pink peppercorns evenly over the top of the mixture and then bake until the center feels almost set, about 27-30 minutes. Don’t overbake. Let cool completely in the pan before lifting out the brownies using the baking paper overhang. Slice into 16 equal pieces. Store in in airtight container (I kept mine in the fridge to keep it from going soggy), can be stored for 4 days or frozen for up to a month.
Pink Peppercorn Brownies
Print Friendly and PDF

Monday, January 21, 2013

Milo Cheesecake with Chocolate Crackle Crust

Milo Cheesecake with Chocolate Crackle Crust
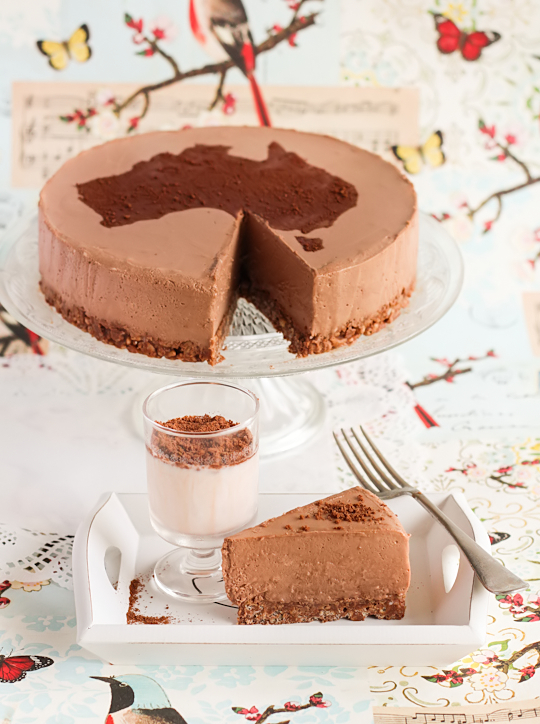
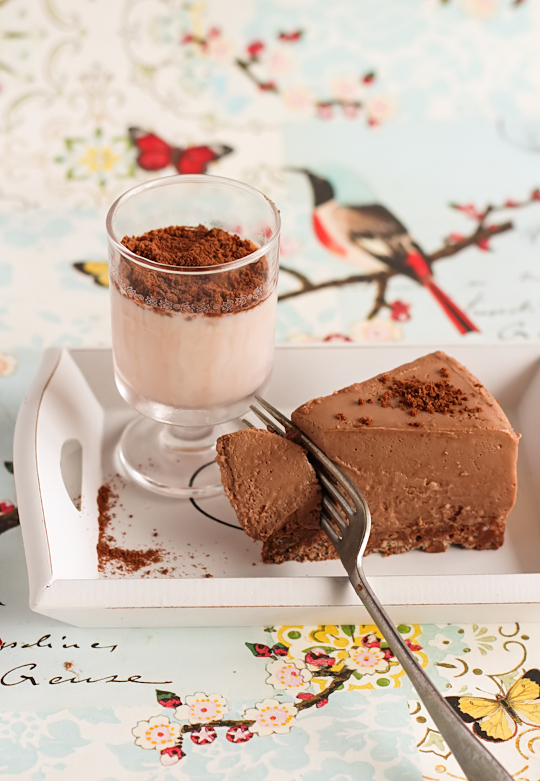
You guys, we need to talk about this cheesecake. It might not look like much, it's brown and kinda rough around the edges. But OH MY GOD it tastes amazing. It's like a party in your mouth. I'm pretty chuffed with myself for making this. It seemed like a pretty simple flavour combo; I wanted something with an Australian twist to it since Australia Day is coming up very soon, so I decided to make a Milo Cheesecake with chocolate crackles for the base.
Milo Cheesecake with Chocolate Crackle Crust
For those of you outside Australia, chocolate crackles might mean something different to you. I know they sometimes refer to those chocolate cookies that are dusted in icing sugar, but here chocolate crackles is the name of one of our favourite childhood treats. It's similar to rice krispies squares, except the marshmallow is replaced with chocolate and coconut and set into cupcake paper liners. Pretty much the best thing ever at the school bake sales. And here I've used it as the base of my cheesecake, and it works so well. The original chocolate crackles are made with Copha and cocoa powder, but I have issues with Copha with so I replaced it with real milk chocolate. It works just as well in this case since you are keeping the entire thing chilled.
Milo Cheesecake with Chocolate Crackle Crust
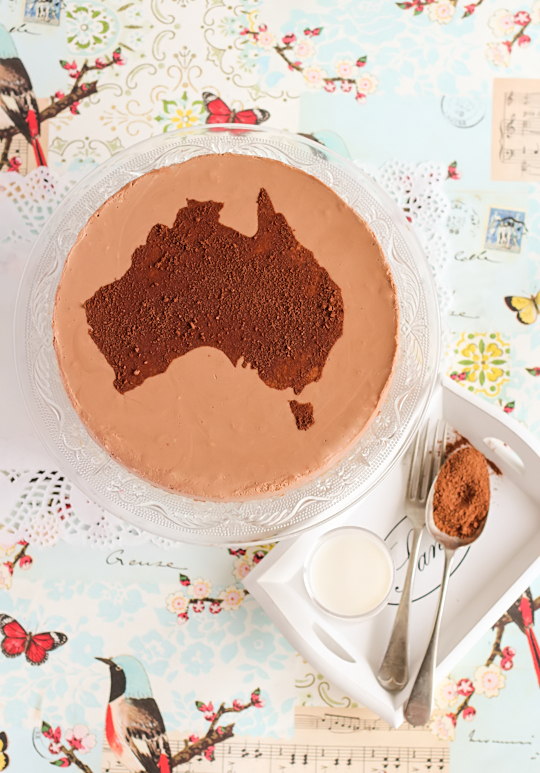
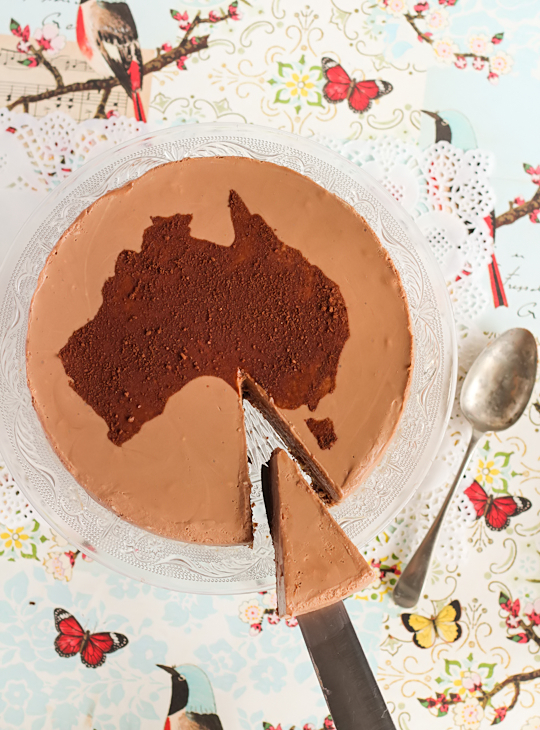
Now I know there are going to be people who don't know what Milo is, there always is. It's a chocolate malt powder that's mixed with milk (or sometimes mixed with water and condensed milk if you're Malaysian), and it's one of my favourite things in the whole world. Just search for milo on this blog if you don't believe me. If you can't get Milo wherever you are, Ovaltine will be an adequate substitute, or malted milk powder with some cocoa powder might work as well. But nothing beats the real deal. I mixed it into the cheesecake filling, as well as using it as a topping on the cheesecake in the shape of Australia! Husband gets props for suggesting the shape.
Milo Cheesecake with Chocolate Crackle Crust
Sydney just experienced it's hottest day on record, so when planning my baking for this weekend I was determined to keep the oven turned off. This cheesecake is entirely no-bake, you need to melt some chocolate for the base and then heat some milk for the chilled cheesecake filling. Pretty straightforward and worth the small amount of effort. I used my usual chilled cheesecake recipe, and added a sh*tload of Milo. I wanted to make sure it really packed a strong punch when it came to that malted chocolate flavour.
Milo Cheesecake with Chocolate Crackle Crust
Remember, I'm still in the middle of my new year's health kick at the moment so I had to force myself to only have the smallest taste of this cheesecake. It was TORTURE. I could pretty much eat the whole thing. You might be concerned about this being too rich or sweet but it's not too bad. The whipped cream in the gelatine keeps it pretty light. You might need some elbow grease to cut through the chocolate crackle base, just use a sharp serrated knife. Seriously, I encourage you to try this out for Australia day, everyone will love it!
Milo Cheesecake with Chocolate Crackle Crust
Australian Milo Cheesecake with a Chocolate Crackle Crust
(serves 8-10)
For the chocolate crackle base:
250g good quality milk chocolate, finely chopped
1/3 cup dessicated coconut
2 cups rice bubbles/rice krispies cereal

For the cheesecake filling:
300ml (about 1 1/4 cups) thickened (heavy) cream
340g (12oz) cream cheese, softened
1/3 cup (75g) sugar (I used caster/superfine)
200ml (about 3/4 cup) milk
1 1/2 cups Milo powder (can substitute with Ovaltine or malted milk powder + cocoa to taste)
4 tsp powdered gelatine
Optional: Extra Milo powder to decorate

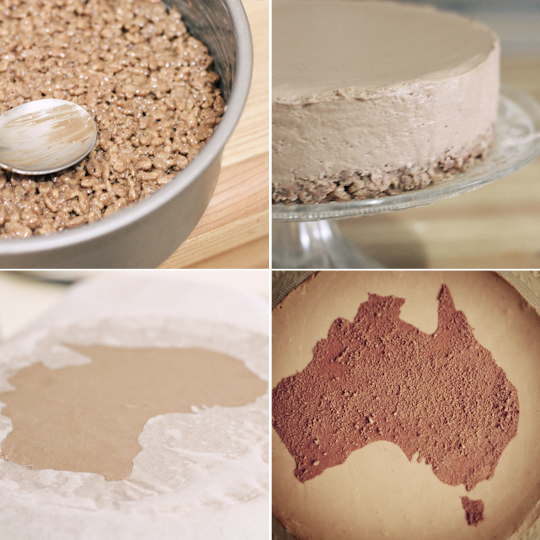
Grease and line the base (with baking paper) of a 18cm or 20cm springform tin. Place chopped chocolate in a heatproof bowl and place bowl over a small saucepan of simmering water and stir until melted. (Okay I am lazy and melted mine in the microwave) Stir in coconut, then stir in rice bubbles. Pour into prepared tin and flatten into the base of tin in an even layer, using a spatula or the back of a spoon. (Sneak in a spoonful of the mixture for yourself to taste, it's good for the soul.) Place in the fridge for at least half an hour or until the chocolate is set.
Milo Cheesecake with Chocolate Crackle Crust
Prepare the cheesecake filling; whip cream in a mixing bowl until it reaches soft peaks (take care not to overmix). Place cream cheese in a separate large mixing bowl and beat with an electric mixer on high until smooth. Add sugar and beat until combined. Place gelatin in a small separate bowl with 3 tbsp cold water to soften it. In a small saucepan, heat milk until it just comes to a boil, remove from heat then whisk in milo powder to dissolve. Add softened gelatin and whisk again to combine. Ensure there are no lumps. Add warm milk mixture to cream cheese and beat until smooth. Fold in whipped cream until smooth and then pour mixture over crumb layer. Chill for at least 3 hours or overnight. To serve, run a thin-bladed knife under hot water and then carefully run around the edge of the pan to loosen it. Carefully remove from pan and serve, or store in an airtight container in the fridge until ready to serve. 
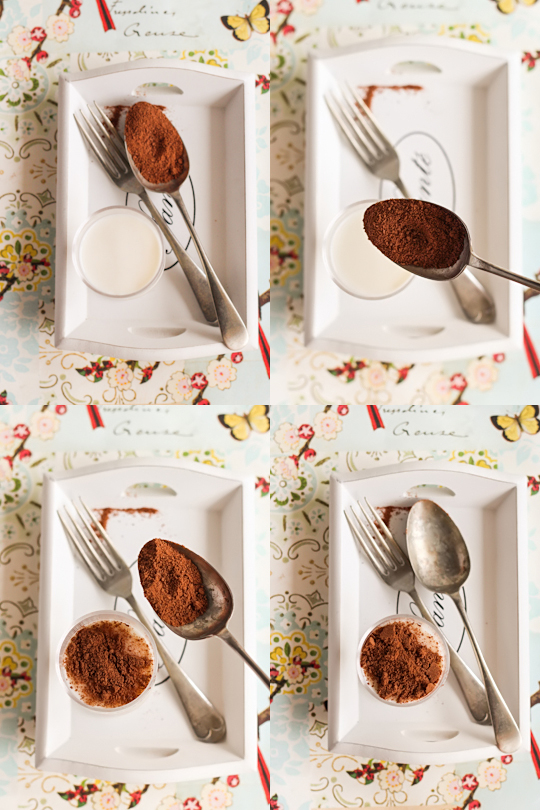
If you wish to decorate the top like mine, trace a map of Australia out on a piece of baking paper and cut out. Press baking paper stencil over the top of the cheesecake and sprinkle milo on top. Brush off excess powder and then carefully lift up stencil.
Milo Cheesecake with Chocolate Crackle Crust
P.S. Thanks to Lisa at filtered media for sending me a Profiline PushPan several months ago to try out. It worked perfectly for this recipe!
Print Friendly and PDF

Monday, January 14, 2013

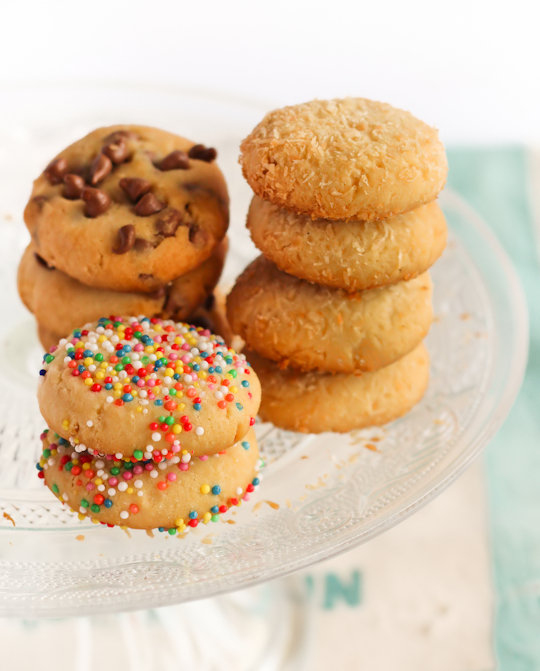
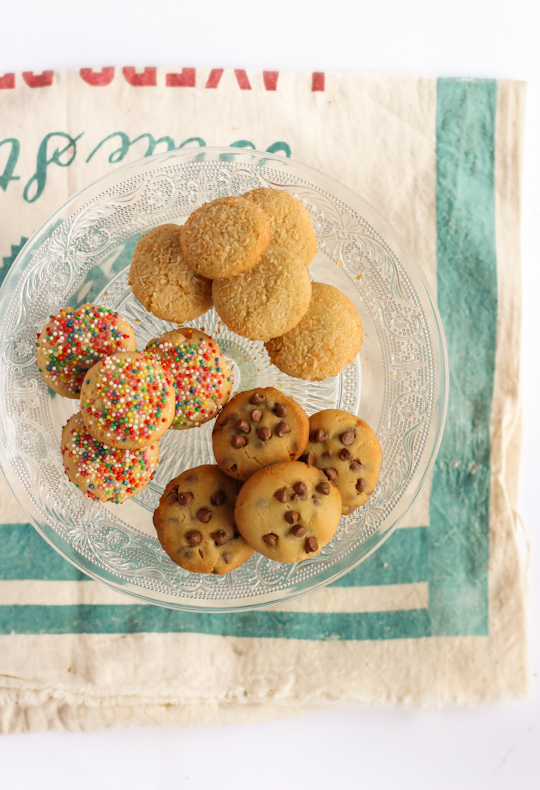
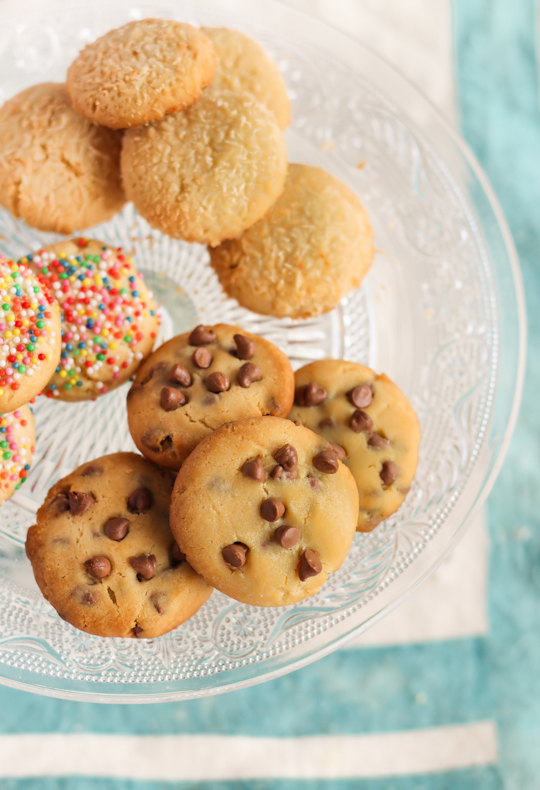
Assorted Condensed Milk Cookies

Assorted Condensed Milk Cookies
Since the new year, I've been guilt-tripped on to the inevitable health-kick that follows all the unhealthy holiday eating. Because of this, I've had trouble getting thoughts of fried chicken out of my head. And cookies. All I wanted to eat this week was masses and masses of junk food. I'm a stress-eater, and nothing sounded better at the end of a shit day than some milk and cookies. So when the weekend came around, it was not surprising that I didn't feel like baking anything but cookies.
Condensed Milk Cookies
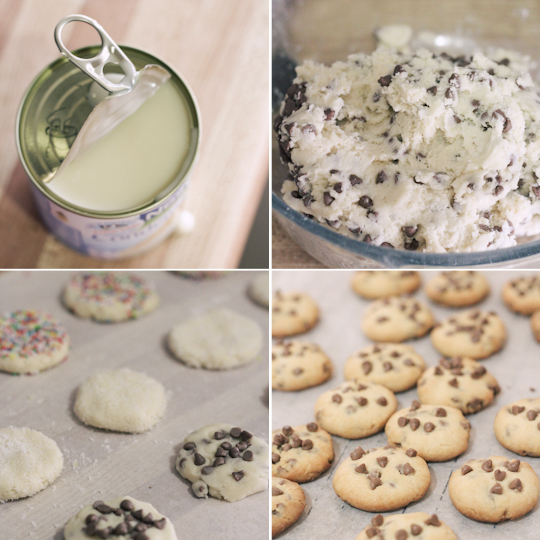
I can't take credit for this recipe. I didn't have much ingredients in my cupboard except for the basics and a can of condensed milk, so I googled 'condensed milk cookies'. Interestingly I found several similar looking basic recipes that everyone seemed to remember from their childhood. It sounded so wonderfully straight-foward and easily adaptable, it was essentially three ingredients plus whatever toppings you like. I had to give it a go.
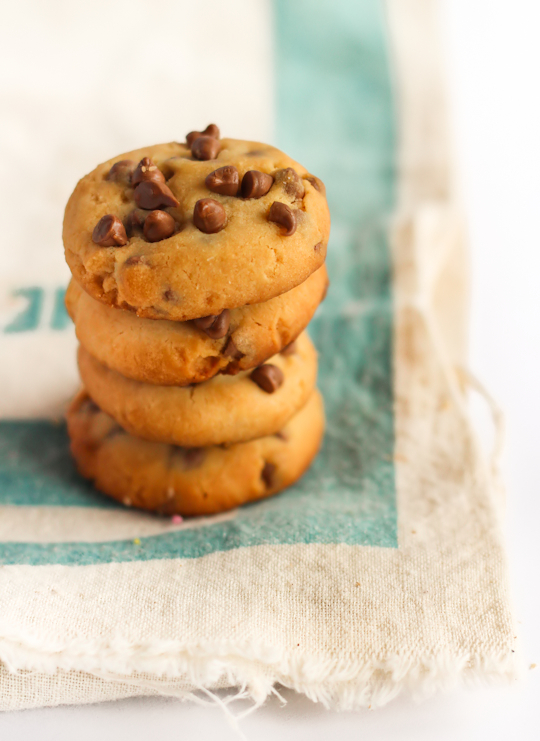
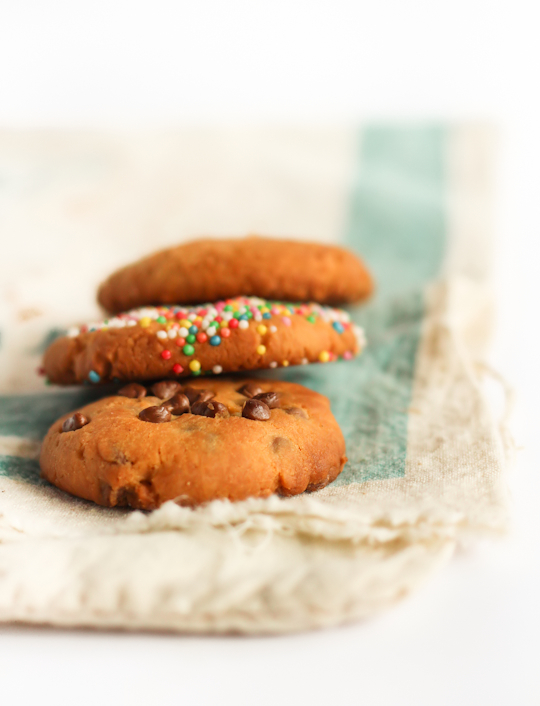
Condensed Milk Chocolate Chip Cookies
I can't believe I haven't heard of this recipe before. It is kind of magical. It deepens my love for condensed milk further, if that's even possible. Some recipes called for additions of sugar and/or vanilla extract, but I simplified it down to just butter, condensed milk and (self-raising) flour. I wasn't entirely sure it would taste like much, but it totally works. The cookies turn out crisp and golden, and pretty much melt in the mouth. (However I should mention that I used good quality butter, which always helps. I do not approve of those who use margarine to bake.)
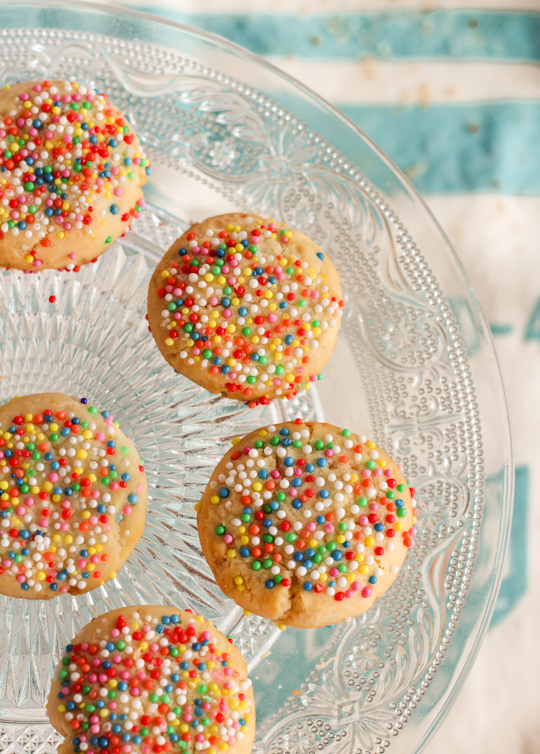
Condensed Milk Sprinkle Cookies
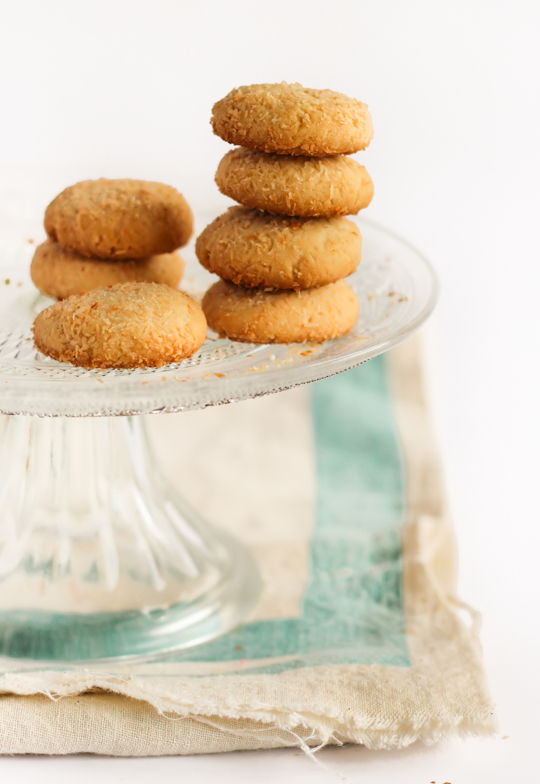
Because I am undecisive, I experimented with several cookie flavours. They all tasted great, I can't pick a favourite. Chocolate chips mixed into the dough is always a classic, and though they are very different from my two favourite choc chip cookie recipes, I am always willing to try new recipes. Especially when they simple! The child in me loves the rainbow sprinkle coated cookies, in the same way I will always love chocolate freckles. And the cookies coated in dessicated coconut are so light and aromatic (mmm toasted coconut...), they remind me of some of the cookies you can get in Malaysia during Chinese New Year.
Condensed Milk Coconut Cookies
Anyway, I had to share this recipe with you. I love the idea that the base of this recipe is just butter, condensed milk, flour and toppings. It was perfect for me, who was trying to use up the scraps in my cupboard without having to run down to the shops. You can use whatever toppings you feel like, I would love to try these again with sultanas or chopped up dates, and maybe some triple chocolate ones with cocoa powder mixed into the dough. I might be on a health-kick, but I still had to try at least one of each cookie for taste-testing purposes. Cookie cravings begone!
Assorted Condensed Milk Cookies
Condensed Milk Cookies (with Chocolate Chips, Sprinkles or Coconut)
(makes a LOT of cookies, based on several recipes available online: 1 2 3 4)
400g (3.5 sticks) butter, softened (I used some salted butter, you might want to add a pinch of salt if using unsalted butter)
1 can (395g) sweetened condensed milk
4 cups (about 500g) self-raising flour (you can make your own using plain flour + baking powder, just follow instructions on baking powder pack)
Toppings of your choice: I mixed 200g chocolate chips into half the dough, and coated 1/4 of the remaining cookies with coconut, and the other 1/4 with 100s & 1000s (rainbow sprinkles), you can also use nuts, sultanas, milo, cocoa powder, candied fruit, all kinds of stuff! If you want to make plain cookies you might want to add some extra sugar or vanilla because the dough needs a little extra something to go with it.

Preheat oven to 180°C (350°F) and line two cookie sheets with baking paper. Place butter in a large mixing bowl and beat with an electric mixer on high until smooth and fluffy. Add condensed milk and beat until smooth, scraping the sides of the bowl every now and then to ensure it mixes evenly. Stir in flour until just combined. The mixture should come together easily as a dough that is soft but still easy to handle with lightly-floured hands. (You may need to add extra flour, a tablespoon at a time if the mixture is too sticky). Take care not to overmix or you will make your biscuits tougher.

Add your desired toppings. As mentioned, I split my mixture in half and stirred chocolate chips into one half. Roll balls of cookie dough (I used a heaped tsp amount for small bite-sized cookies, and a heaped tbsp for larger cookies), press into discs and arrange on prepared trays. Leave at least a cm around each cookie. For the cookies I coated in toppings (sprinkles or coconut), I rolled them into balls  with unfloured hands, then pressed them flat into a bowl of the toppings to coat the cookie.
Assorted Condensed Milk Cookies
Bake until cookies are light golden (about 12-15 mins for small cookies, 15-20 for larger cookies). If baking in hot weather, keep the uncooked cookies in the fridge until ready to go into the oven. Remove from oven and cool on tray for 5 mins, then transfer to a wire rack to cool completely. Store in an airtight container for several days.

This recipe makes a large amount of cookies, you can stir in the toppings and then roll the mixture into logs and wrap in clingfilm. These logs can be refrigerated for up to a week and sliced and baked at your convenience. Alternatively you can freeze the cookie dough logs to store it for longer, just defrost in the fridge for half an hour and do the same thing.
Assorted Condensed Milk Cookies
Print Friendly and PDF

Monday, January 7, 2013

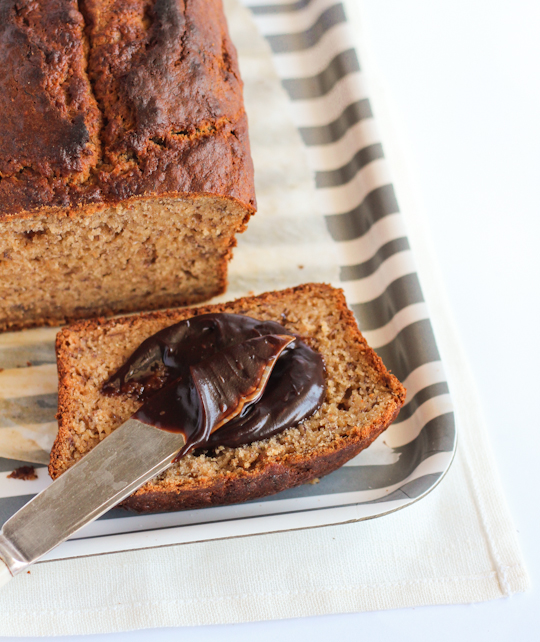
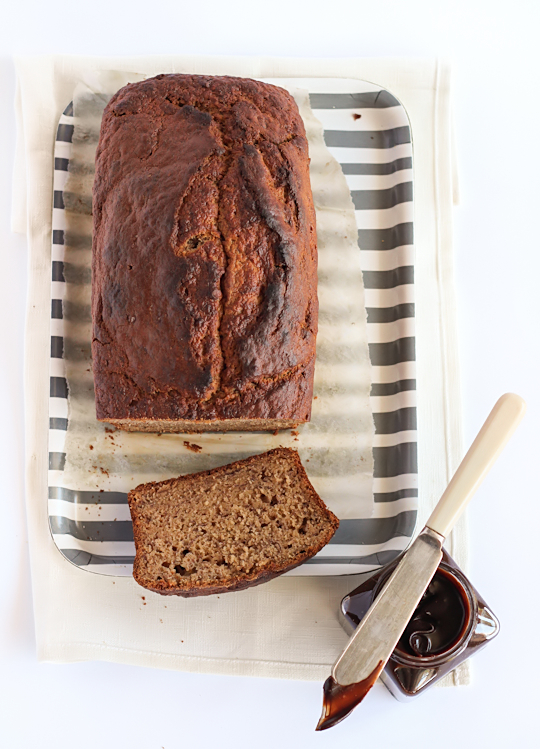
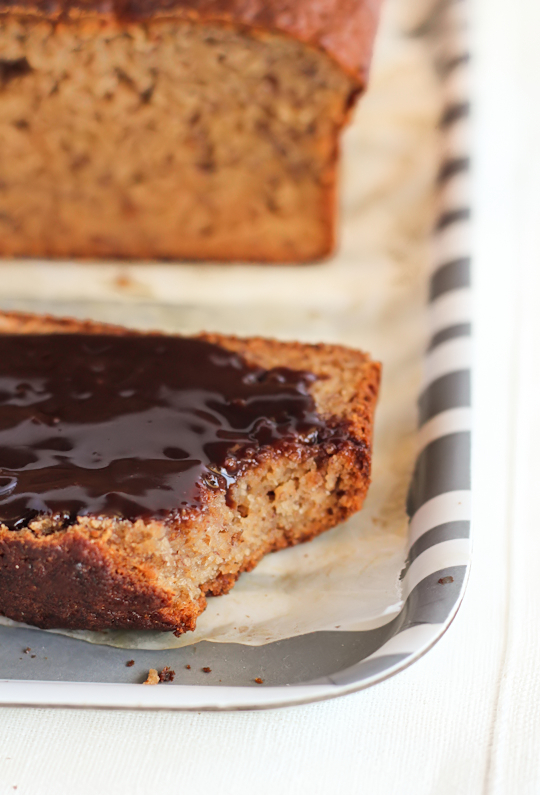
Banana Bread with Dark Chocolate Spread

Banana Bread with Dark Chocolate Spread
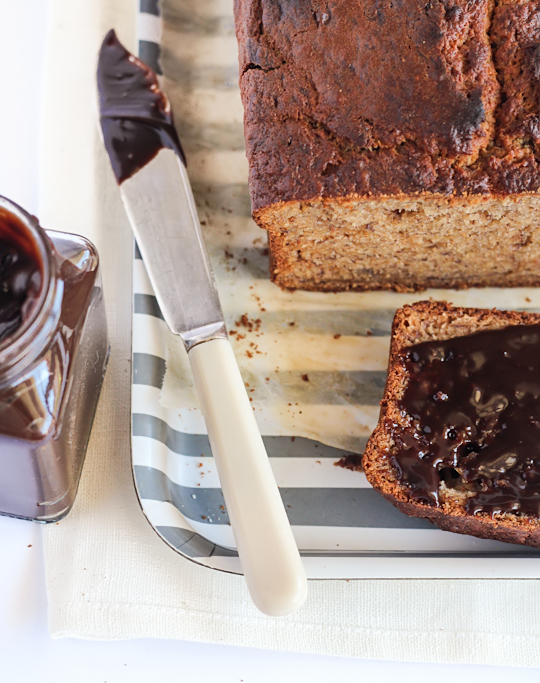
I'm keeping it pretty simple this week after all the effort that went into this layered cake. This is a really fantastic and easy recipe for banana bread, with a small twist. It comes with a silky smooth dark chocolate spread. It's not like nutella, there's no nuts in it because of my allergies. But it's a gorgeous chocolate spread that is full of good quality bitter dark chocolate, and just a very thin layer of it on a slice of banana bread is perfection.
Banana Bread with Dark Chocolate Spread
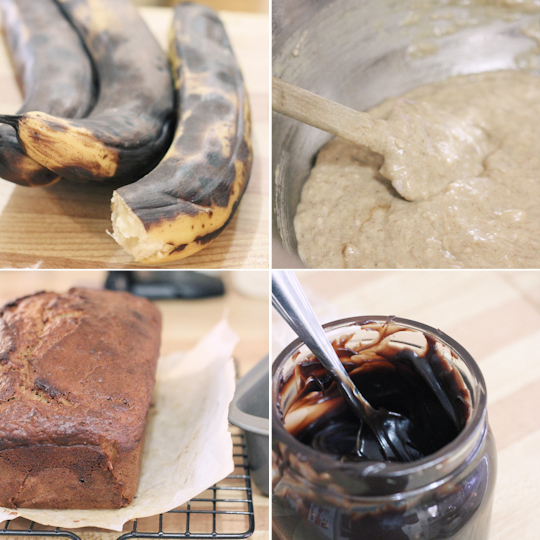
This particularly banana bread recipe has no yeast it in, so it's like most of the cake-like banana breads that you get here in Australia. The important part to getting a really tasty banana bread is to make sure your bananas are ridiculously overripe. Like black to the point where they are nearly (but not) rotten. I had a few bananas sitting on my kitchen counter for a good week and a half and they were completely blackened. It might seem gross when you're peeling them but all that strong smell and flavour will give you a great tasting banana bread.
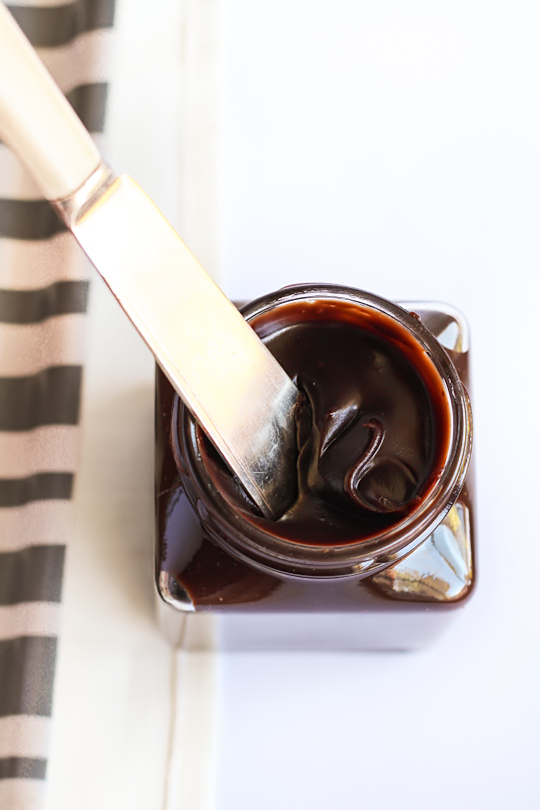
Dark Chocolate Spread
The chocolate spread might seem like too much to go with something that is already as sweet as a banana bread, but trust me it works. I've put dark chocolate chips into my banana bread before and loved it, so this is essentially the same but you can control how much chocolate you want to use. Because I used a very dark chocolate, it's not very sweet at all. Even so, it's still quite a rich spread so you only need to use it sparingly. If you're not a fan of the bitterness of dark chocolate, feel free to use milk chocolate but skip on the golden syrup in both the banana bread and the spread recipes.
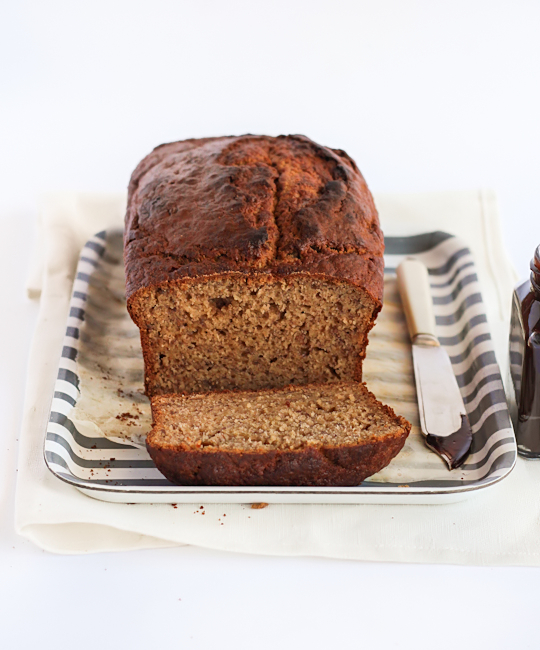
Banana Bread with Dark Chocolate Spread
A giant lump of banana bread might not be the most appealing to photograph, but it was so good to eat. The smell of this banana bread baking in the oven was incredible. I made sure to increase the smount of spices in the recipe but you could increase it even more if you like your spices. Just make sure not to overbake it, there's nothing worse than dried out banana bread.
Banana Bread with Dark Chocolate Spread
(banana bread adapted from Taste.com.au, chocolate spread recipe adapted from SugarHero)
3 very overripe medium bananas, peeled
2 tbsp golden syrup
2 1/3 cups (about 300g) self-raising flour
1/3 cup (about 50g) plain flour
3 tsp ground cinnamon
1/4 tsp all spice
3/4 cup, firmly packed (about 150g) brown sugar
3/4 cup (about 185ml) milk
3 eggs, lightly whisked
75g (2/3 stick) butter, melted, cooled

Preheat oven to 180°C (350°F) and grease the base and sides of a 21x11cm (base measurement) loaf tin. Line the base and 2 opposite sides with non-stick baking paper, allowing it to overhang. If you have a smaller tin like me you can pour the extra batter into a lined muffin tin. In a medium bowl, mash banana together with the golden syrup. Stir in milk, eggs and melted butter until combined and then set aside.

Sift the combined flours, allspice and cinnamon into a large bowl. Stir in the sugar and make a well in the centre. Add the banana mixture to the flour mixture and stir until just combined. Spoon the mixture into the prepared pan and smooth the surface. Bake in oven for 45-50 minutes or until a skewer inserted into the centre just comes out clean. Remove from oven and set aside in the pan for 5 minutes. Turn onto a wire rack to cool completely. Cut into slices to serve.
Banana Bread with Dark Chocolate Spread
For the dark chocolate spread:
1/4 cup water
1/2 cup sugar
1 tbsp unsweetened cocoa powder
1/4 tsp salt
1 tsp pure vanilla extract
100g dark chocolate, finely chopped (about 2/3 cup, I used 70% cocoa)
140g (5 ounces) unsalted butter, softened and cubed
2-4 tbsp golden syrup, adjust to taste

In a small saucepan, combine the water, sugar, cocoa powder and salt. Place the pan over medium heat and stir until the sugar and cocoa powder dissolve. Keep stirring until it just starts to simmer, then remove the pan from the heat and add the vanilla extract, chopped chocolate, and cubed butter. Whisk until smooth. If you wish to make the spread any sweeter, whisk in golden syrup a tablespoon at a time, adjusting to taste. Pour into a jar or other container with a lid. Press a layer of plastic wrap on top of the chocolate to prevent a skin from forming, and refrigerate it until it thickens. If it is too cold to spread easily, let it sit at room temperature until it softens before serving. Store it in the refrigerator for up to two weeks.
Banana Bread with Dark Chocolate Spread
Print Friendly and PDF

Tuesday, January 1, 2013

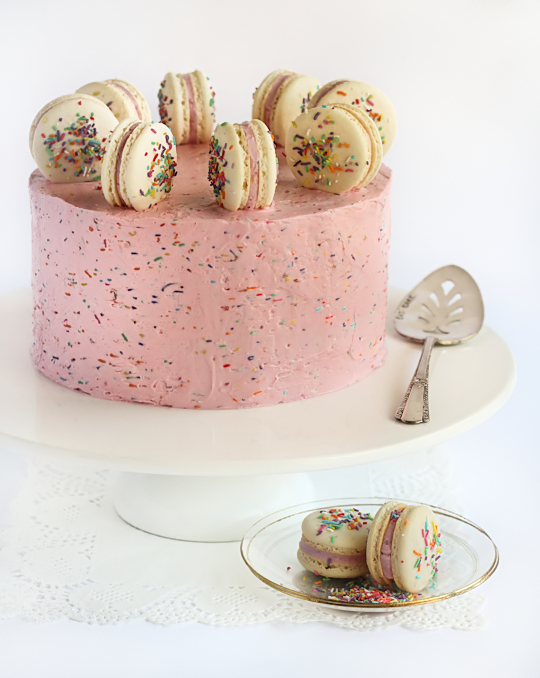
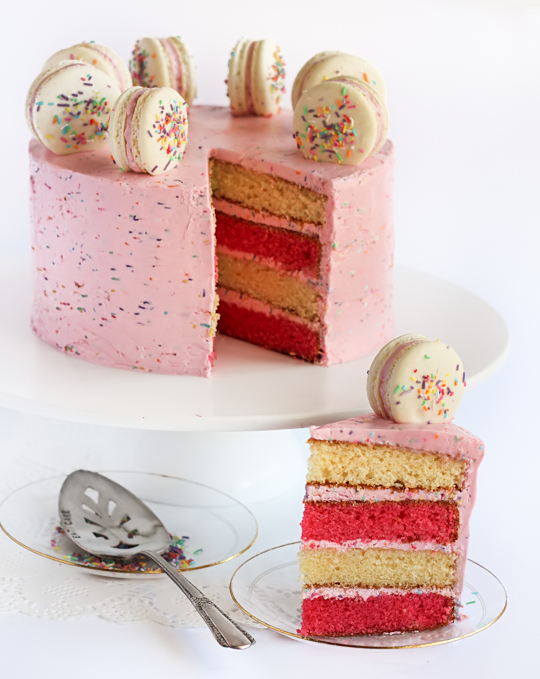
Pink & White Layered Sprinkle Cake with Macarons

Pink & White Layered Sprinkle Cake
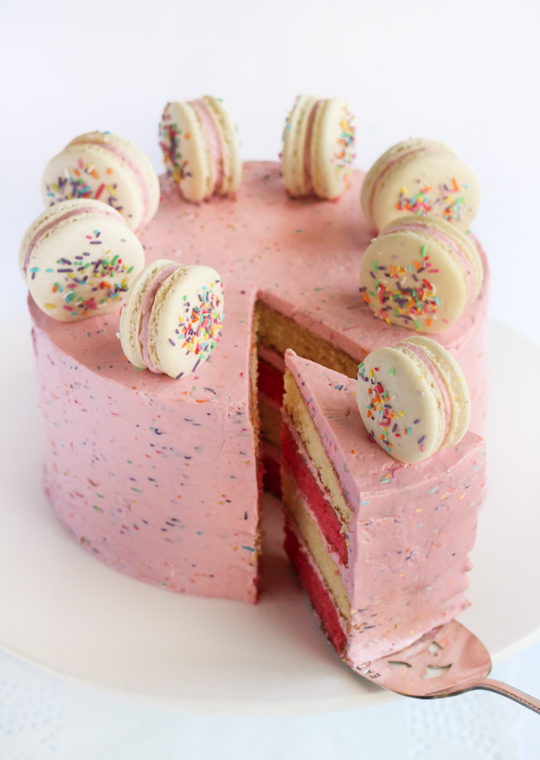
Happy 2013 everyone!!! It's a brand new year, can you believe it? It felt like 2012 went by so ridiculously fast. To start the new year I made a cake for my brother and sister-in-law to celebrate their soon to be born baby (we're still waiting impatiently for her to show up!). Since we know it's going to be a girl I decided to go crazy with the pink and the sprinkles. You can't go wrong with lots and lots of sprinkles.
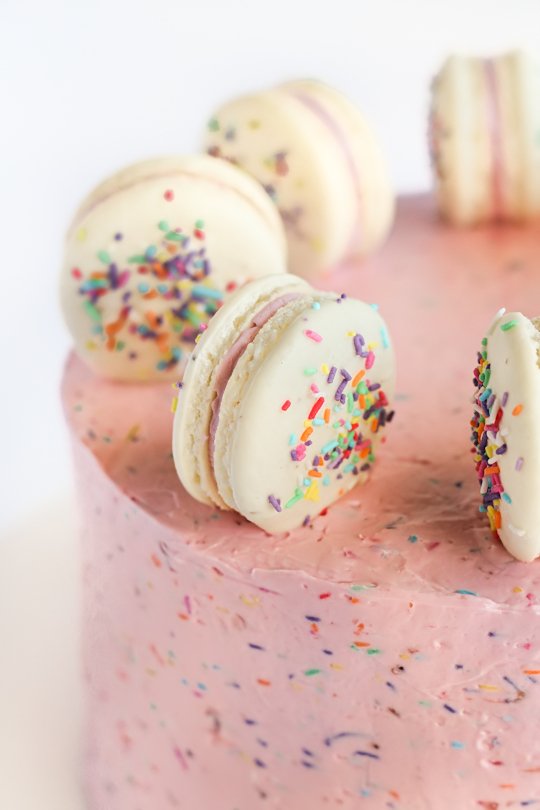
Pink & White Layered Sprinkle Cake
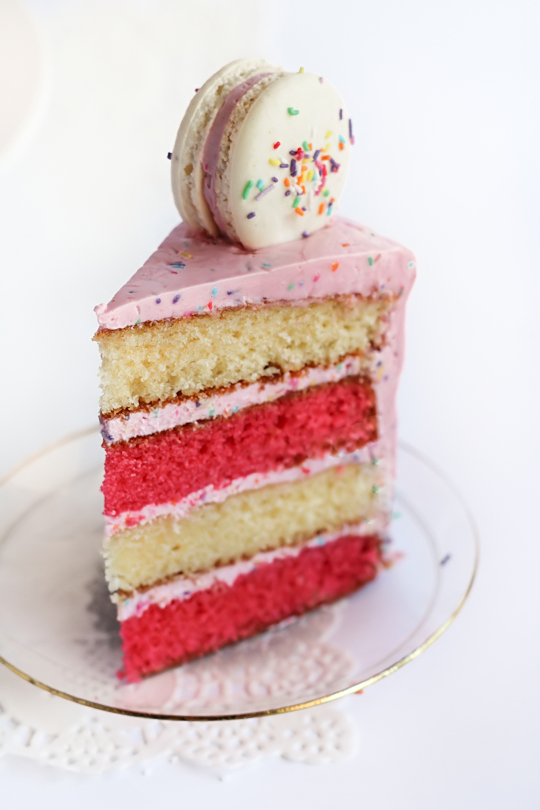
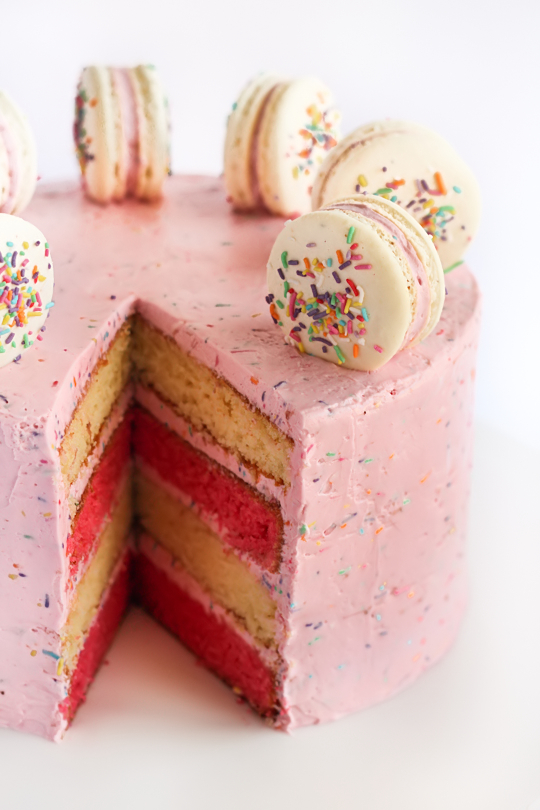
I made my usual trusty yellow cake for the four cake layers, adding a tiny bit of strawberry flavouring and pink food colouring to half the cake batter. I've done ombre layered cakes before, and checkerboard cakes, but I thought this time I would try making it pink and white striped. It's easier and it still has a striking appearance.
Pink & White Layered Sprinkle Cake
For the icing I made a Swiss meringue buttercream, flavoured with strawberry jam and mixed with a ton of rainbow sprinkles to make it a funfetti buttercream. The sprinkles add such a pretty colour to the icing as well as a bit of texture.
Pink & White Layered Sprinkle Cake
I made some plain macarons as a cute cake topper, filled with the same buttercream that I used for the whole cake. On my first attempt I made some teal-coloured macarons but I completely stuffed them up (even after all the practice I've had I can still mess up my macarons all the time). And of course, lots of sprinkles! MOAR SPRINKLES! Happy New Year!
Pink & White Layered Sprinkle Cake
Pink & White Layered Cake with Strawberry Funfetti Buttercream & Macarons
(makes a four-layered 18cm cake, yellow cake recipe adapted from Le Cordon Bleu Complete Cooking Step-by-Step)
355g (approx 2 & 2/3 cups) plain flour
1 tbsp baking powder
1/2 tsp salt
225ml (about 1 cup minus 1 tbsp) milk
2 tsp pure vanilla extract
400g (approx 1 & 2/3 cups) white sugar (I used caster/superfine)
225g (approx 2 sticks) unsalted butter, softened
4 medium eggs
Optional: 1 tsp strawberry essence + pink food colouring for half the cake

Preheat oven to 180°C (350°F) and grease whatever 18cm (7 inch) round cake tins you have (I only had two so I had to bake it in two rounds, it also works fine with just one tin). You can also use 20cm (8 inch) pans but the layers will be thinner. Line the base of tins with baking paper and grease paper and dust tins with flour. Combine flour, baking powder and salt in a medium bowl and set aside. Mix milk and vanilla together in a measuring jug.

Using an electric mixer on low speed, beat sugar and butter in a large bowl until blended. Increase speed to high and beat for 2 mins or until pale and creamy. Reduce speed to medium low, add eggs 1 at a time, beating well after each addition. Alternately add flour mix and milk mixture, beginning and ending with flour mixture (I did it by adding 1/4 of of the dry mixture followed by 1/3 of the wet mixture at a time). Beat until smooth, occasionaly scraping bowl with a spatula. Divide mixture evenly into 2 medium bowls (I did this by weighing the batter, it ended up being about 700g per bowl for me). Gently fold pink colouring and (optionally) strawberry essence into one bowl. Pour HALF of each bowl of batter into the prepared tins (so you end up with two pink layers and two white layers) bake each layer for about 15-20 minutes or until a skewer into the centre comes out clean and the outside is golden. Cool in tin for 5 mins and then turn out onto wire racks to cool completely. Wrap in clingfilm and chill in the fridge for at least 1 hour or overnight. If your cake layers are slightly domed in the middle you may need to slice a little bit off the top of them to make sure they are flat
Pink & White Layered Sprinkle Cake
For the strawberry funfetti buttercream:
(If you're new to making Swiss meringue buttercream, these wonderful tutorials from two of my favourite bloggers will help)
7 large egg whites
1 1/3 cup sugar white sugar (I used caster/superfine)
400g butter, room temperature
1/2-2/3 cup strawberry jam, adjust to taste
1/2 cup funfetti/rainbow sprinkles (optional)

To prepare the buttercream, whisk together egg whites and sugar in a large heatproof bowl. Clip a candy thermometer to side of bowl. Set bowl over a pan of simmering water, and whisk until mixture reaches 70°C (160°F) and sugar has dissolved, about 5 minutes.

With a mixer fitted with the whisk attachment, beat egg white mixture on high speed until cooled and thick, about 5 minutes. Reduce speed to medium, and add butter, 1 tablespoon at a time, beating until incorporated after each addition. Add strawberry jam and whip until smooth and thick. If the mixture is runny or splits, don't worry just keep on whipping and it will eventually come together. Buttercream can be refrigerated in an airtight container for up to 3 days; bring to room temperature before using, and beat on low speed until smooth. Stir in sprinkles. Sandwich alternating pink and white layers with about 1/2cm layer of buttercream, then crumb coat the outside of the cake. Cover cake with another layer of icing and smooth with an offset spatula (or go for the easier uneven icing technique if you can't be bothered smoothing it). Make sure to leave at least a cup of buttercream behind if you are filling the macarons with it. To make the macarons, follow the instructions for these plain macarons, but do not add food colouring and pipe simple 3-4cm circles. Top with more rainbow/funfetti sprinkles before baking. Fill baked and cooled macaron shell with the remaining buttercream. Top cake with macarons and refrigerate overnight. Remove from the fridge at least 30 mins before serving.
Pink & White Layered Sprinkle Cake
Print Friendly and PDF