Monday, April 29, 2013

Strawberry Panna Cotta with Roasted Rhubarb

Strawberry Panna Cotta with Roasted Rhubarb
I have had a strange relationship with panna cotta. A weird fact about me; until about the age of 14 I was an extremely fussy eater. I couldn't handle any amount of chilli, I hated most vegetables and hardly ate any seafood. I'd rather stay home and eat a bowl of spaghetti bolognese than go out with my family and eat Malaysian hawker food. All those years living in KL were completely wasted on me. Sad, I know. But I remember on my first visit to Melbourne we went to this Italian restaurant (which I totally can't remember anymore) and I had my first vanilla bean panna cotta. I fell in love. It was so silky smooth and creamy with little pops of vanilla bean and just the right amount of wobble from the gelatine; it was heaven on a plate. My brother and I spent the better half of the next year trying to recreate that panna cotta at home, trying all kinds of gelatine leaves and all sorts of recipes but we could never get it quite right. But I like to think that was the end of my fussy period and the start of my love of trying new things.
Strawberry Panna Cotta with Roasted Rhubarb
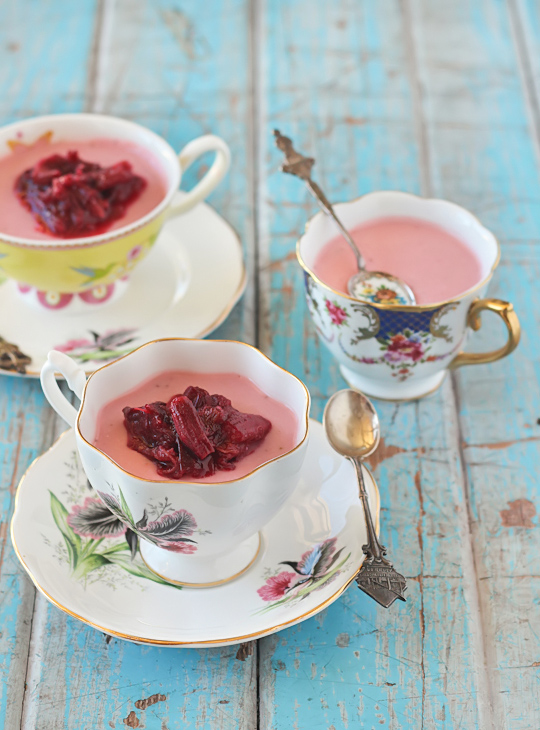
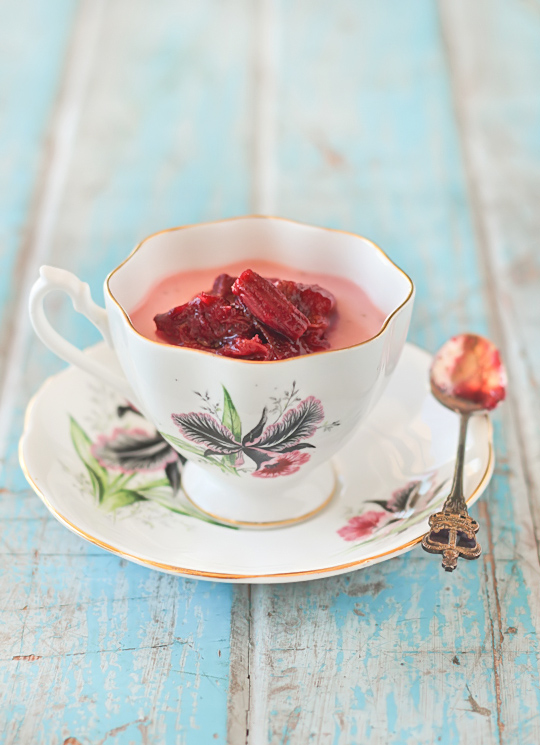
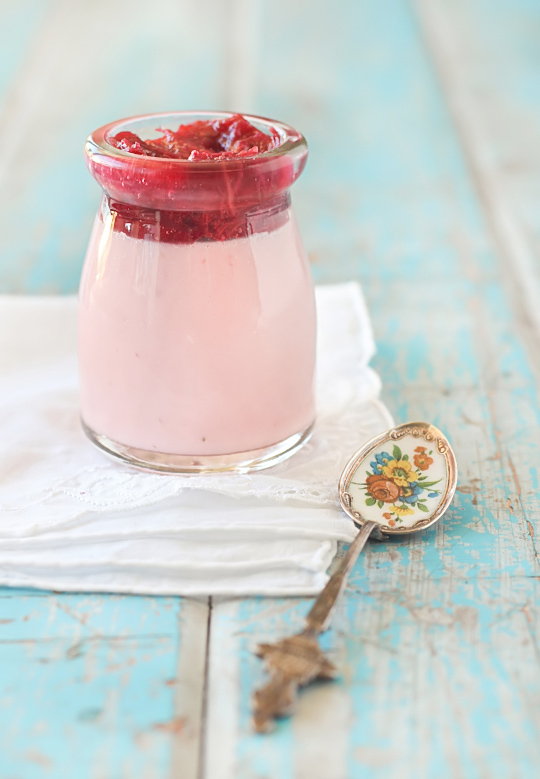
So panna cottas have a special place in my heart. Unfortunately they did seem to become the default dessert on the menu at a lot of restaurants all over the place for a couple of years, so it became a little bit less exciting for me. But I still love it. This weekend we had a BBQ and I decided to try a bit of an untraditional panna cotta, flavouring it with fresh strawberries instead of vanilla bean. I thought it would be a nice refreshing way to end the day after all that meat. And since it's coming into the cooler months of the year, some roasted rhubarb was the perfect way to top off these pretty pink panna cottas. 
Strawberry Panna Cotta with Roasted Rhubarb
I found a great recipe for strawberry panna cotta from Gourmet (link below). It's really packed full of strawberry flavour, and surprisingly smooth even though it uses powdered gelatine instead of leaves. But feel free to try to convert it to gelatine leaves if you prefer. Unfortunately I made the mistake of chilling them in the top shelf of my fridge (the rest of it was packed full of sausages and potato salad), which made some of them freeze a little and ruined the smooth texture a little. Bummer. But the flavour was still great, and the roasted rhubarb had such a vibrant colour and tasted amazing with the strawberry.
Strawberry Panna Cotta with Roasted Rhubarb
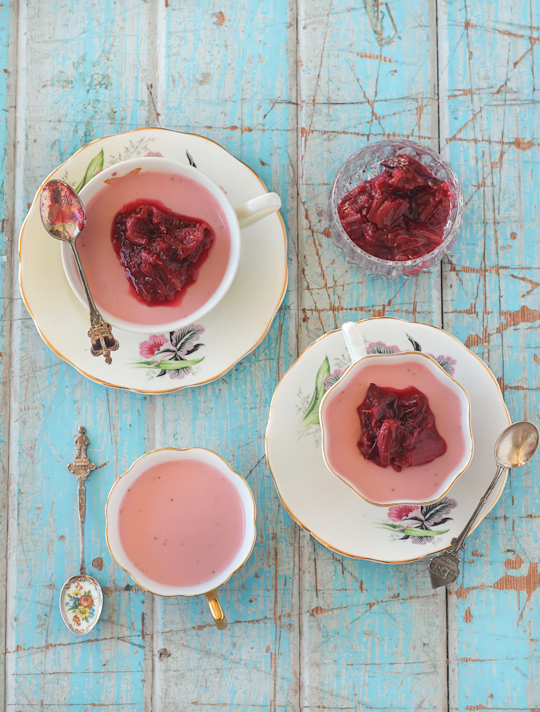
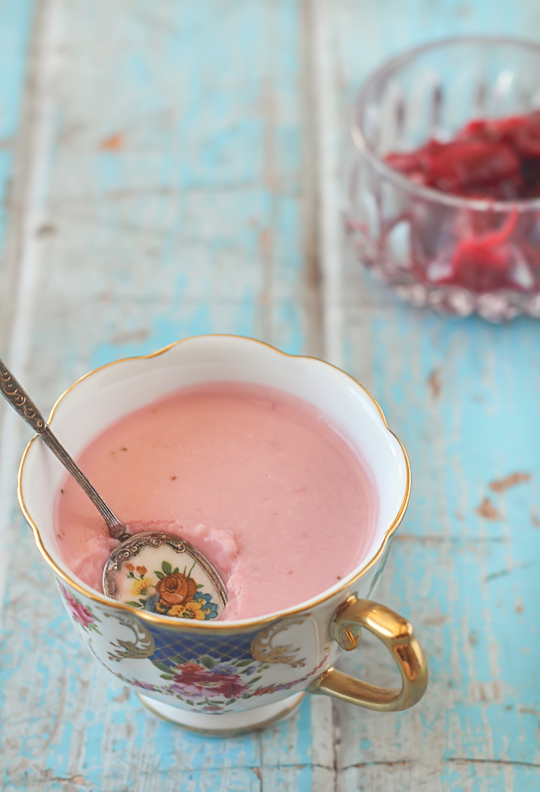
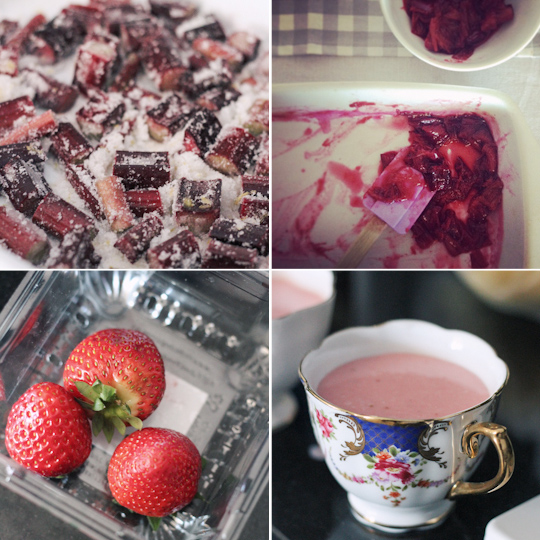
The one bad thing about collecting props from all over the place is that I rarely have more than 3 of the same serving glass. So I used all sorts of random glasses and teacups to hold my panna cottas. I thought the tea cups were pretty cute but sometimes you can't go past a regular clear serving glass, especially when the dessert has such a pretty colour on its own! Either way, this dessert went down so well at the end of our BBQ and really is the perfect light way to end any meal.
Strawberry Panna Cotta with Roasted Rhubarb
(adapted from Gourmet, serves 6)
2 punnets (500g) sliced strawberries
1 3/4 cups well-shaken buttermilk
6 tbsp sugar
2 1/2 tsp gelatine powder
1/4 cup milk
1/4 cup pure/heavy cream (min 35% fat unthickened)

Blend strawberries, buttermilk, and sugar in a blender/food processor until very smooth, then pour through a very fine sieve into a medium bowl, pressing hard on solids. Discard solids. Sprinkle gelatine over milk in a small bowl and let stand 1 minute to soften. Bring cream to a boil in a small saucepan. Remove from heat and add gelatin mixture, stirring until dissolved. Whisk cream mixture into strawberry purée and pour equal amounts into 6 molds or serving glasses. Chill molds/glasses, covered, until firm, at least 8 hours.

(If using moulds; dip molds in a small bowl of hot water 2 or 3 seconds, then invert panna cottas onto dessert plates and remove molds.) Let stand at room temperature 20 minutes to soften slightly.
Strawberry Panna Cotta with Roasted Rhubarb
For the roasted rhubarb (from Dorie Greenspan):
450g (1lb, trimmed weight) rhubarb
1/2 cup sugar (or more to taste)
Grated zest of 1 lemon

Preheat oven to 200°C (400°F). Cut rhubarb into pieces 1-2 inches long (whatever you prefer) and place in a baking dish/roasting pan that will hold them comfortably. Sprinkle over sugar and zest and stir until the rhubarb is covered in sugar. Set aside for about 5 minutes, or just long enough for a little syrup to start to form. Cover baking dish with foil and roast in preheated oven for 15 minutes. Take a peek and if the sugar isn't almost completely melted, stir the rhubarb, re-cover the pan with the foil  and roast a few mintues more.  Remove the foil and let the rhubarb roast for another 5 minutes or so, until the syrup is bubbling. Remove from oven and cool before serving. Can be prepared the night before serving and chilled in an airtight container.
Strawberry Panna Cotta with Roasted Rhubarb
Print Friendly and PDF

Monday, April 15, 2013

Gummy Bear Layer Cake

Gummy Bear Layer Cake
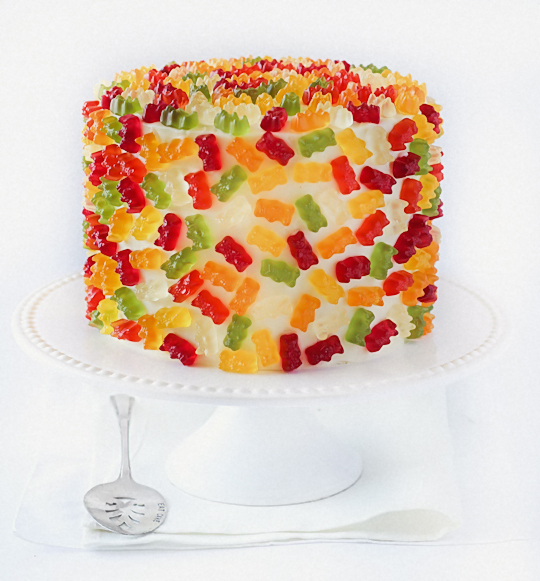
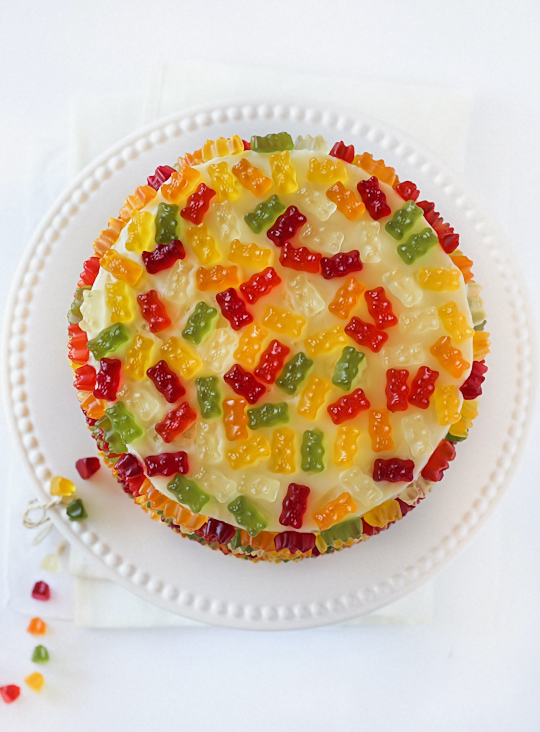
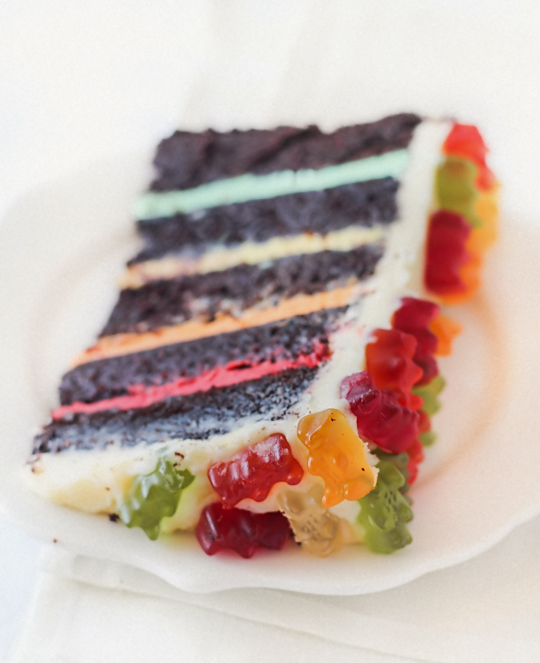
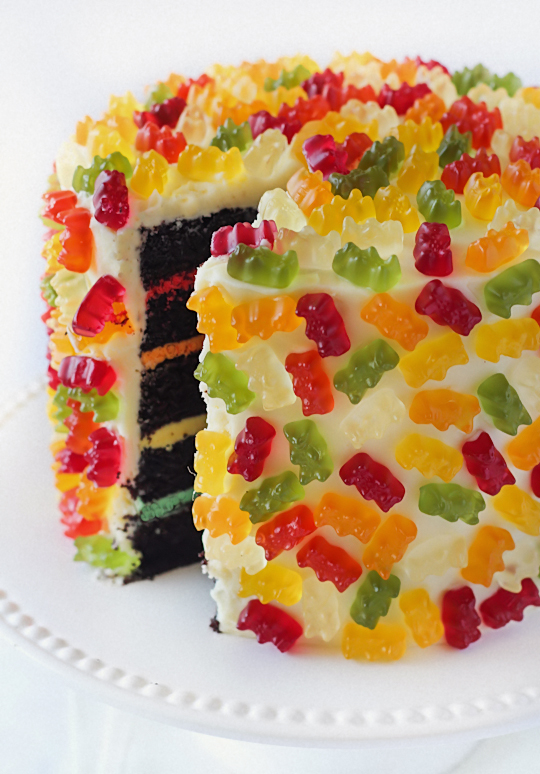
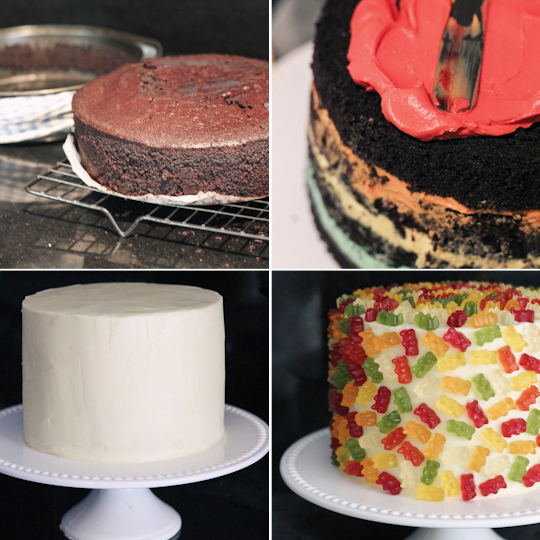
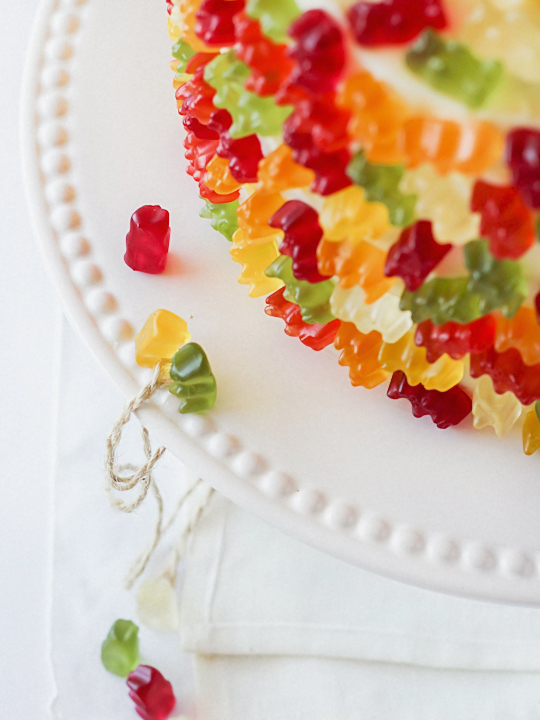
Yep. I covered an entire cake in gummy bears. It's been a while since I did a ridiculously over the top sugar high insanity cake (see Fudge Brownie Cookie Dough Cake), and what better occasion to do one than my friend Tomred's birthday? He is the supplier of all sorts of sweet treats in our office, with a constant supply of Tim Tams and gummy lollies, so this cake seemed appropriate for him. After all, I've already made him a Giant Tim Tam Cake. And I just wanted an excuse to cover a cake in gummy bears. If I learnt anything from my Sprinkle Covered Purple Ombre Cake, cakes are always awesome when covered in sugar.
Gummy Bear Layer Cake
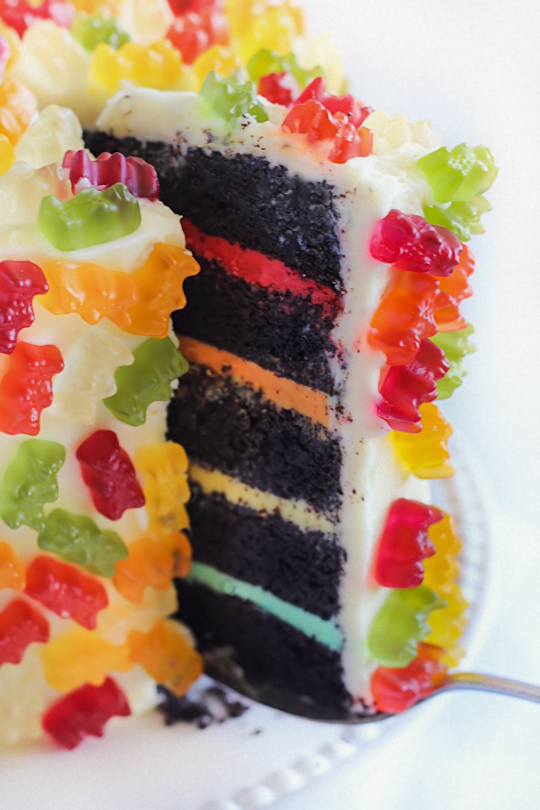
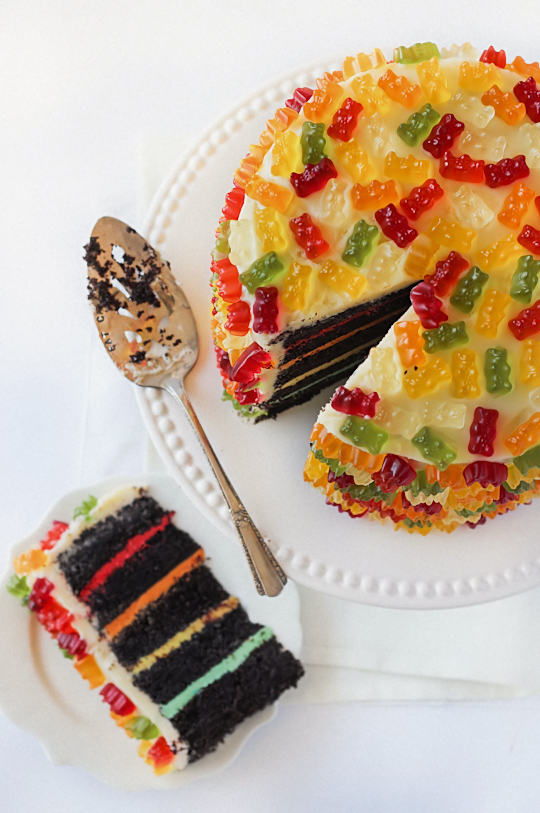
My point is, try not to be too mad at me for making this entirely ridiculous and unnecessarily over the top cake. It's fun to go there every now and then. I mean, look at how pretty it is when you cut into it! It's 5 layers of chocolate buttermilk cake layered with salted butter icing and each layer of icing is tinted to match the colours of the gummy bears on top. SO FUN.
Gummy Bear Layer Cake
I did learn some hard lessons while making this cake. First of all, as great as this chocolate cake recipe is, the cake tends to crumble quite easily so it is not the most ideal for cutting into thin layers and covering in icing. It was a messy job. I'd definitely recommend chilling the cakes overnight before you cut them up, or you can use your favourite chocolate cake recipe as a substitute. I kept the icing simple, using a LOT if salted butter to try to counteract the amount of gummy bears (and I took sugar out of the cake batter too). You could use a Swiss meringue buttercream instead, but I tend to prefer regular butter icing to buttercreams.
Gummy Bear Layer Cake
The gummy bears are a lot chewier than I remembered. So as awesome as it looks as a cake decoration, it makes it a little impractical when you are trying to have a bite of everything at once. And it does make it a little harder to cut slices, I felt bad cutting into the gummy bears! Of course you could skip the gummy bears or use less of them, but I just had to try this out to see how it looked.
Gummy Bear Layer Cake
It was totally worth it. Just looking at this cake makes me happy. Even though I know that most people who eat the cake will end up picking off the gummy bears and saving them for later, I love the effect of the gummies. Plus it's like getting a slice of cake plus a lolly bag for later!
Gummy Bear Layer Cake
So Happy Birthday for tomorrow Tomred! Thanks for being a friend who understands that your birthday cake will almost always come with a slice cut out of it for photographic purposes. It would have been cruel not to share an inside shot with you guys, right? Don't get too freaked out by the recipe, it makes a lot of cake so the amounts sound insane. You can halve everything to make a more normal sounding cake.
Gummy Bear Layer Cake
(cake recipe from Martha Stewart, makes a 5-layer 18-20cm round cake, serves 30ish people)
For the cake: (You can halve this recipe to make a smaller cake)
3 cups (about 385g) plain/all-purpose flour
2 &1/2 cups (about 560g) sugar (I used caster/superfine but white/granulated is fine too)
1 tbsp baking powder
2 tsp baking/bicarb soda
1 tsp salt
1 & 1/2 cups unsweetened cocoa powder, preferably Dutch-process
340g (3 sticks) butter, melted
1 & 1/2 cups (about 360ml) buttermilk
4 large egg
4 large egg whites
Preheat oven to 180°C (350°F). Grease and line three 18-20cm round cake tins (if you have taller cake tins you can do this in two tins, don't risk it if your tins are shallow like mine as the batter may overflow). Line a standard cupcake tray with papers. In a large mixing bowl, combine flour, sugar, baking powder, bicarb soda, and salt; set aside. With an electric mixer, combine cocoa and 3/4 cup hot water until a thick paste forms (this process intensifies the chocolate flavor). Add butter, buttermilk, eggs, and egg whites; beat until combined. Whisk in flour mixture until smooth. Pour mixture into tins, distributing to make 5 layers (2/5 in two of the tins and 1/5 in the 3rd, or if using two tall tins; 3/5 in one and 2/5 in the other). Bake until a skewer inserted in the center of cake comes out clean, about 45-60 minutes.Cool in tin for 10 minutes then carefully remove from tin and cool completely on a wire rack. You can chill the cakes at this point to make them easier to cut. Using a long serrated knife, cut cakes into 5 even layers and trim off any doming that may have occurred during baking. (I used this trick to help my cakes bake more evenly)
Gummy Bear Layer Cake
For the icing:
(It sounds like a lot of butter and sugar but you need a lot to cover all 5 layers. Feel free to halve the amounts for a smaller cake)
500g (about 4 1/3 sticks) salted butter, softened
500g (about 4 cups) icing/confectioner's sugar, sifted
1 tsp pure vanilla extract
2-3 tbsp milk
Optional: Green, yellow, red food colouring
375g (3 & 1/3 sticks) salted butter, softened
375 (3 cups) icing/confectioner's sugar, sifted
1/2 tsp pure vanilla extract
1-2 tbsp milk
 4 packs (700g) of gummy bear candies

To fill the cake layers and crumb coat the cake, place the 500g of butter in a large mixing bowl and beat until light and fluffy. Gradually add 500g sifted icing sugar while beating on low speed until combined, then add vanilla extract and beat on high until fluffy. Add milk 1 tbsp at a time while beating on high until you achieve desired icing consistency. Icing should be very fluffy and light in colour, easy to spread but stiff enough to hold its shape. Split mixture into 5 equal portions. Add food colouring to four of the portions, green, yellow, orange and red. Sandwich coloured icing between the 5 layers of cake. Use the remaining icing to crumb coat the outside of your cake. Chill in fridge for at least an hour, can be left overnight.

Prepare more icing using the remaining ingredients and repeating the steps above, without adding food colouring. Using a spatula, spread icing smoothly over the top of the crumb coat. Decorate cake with gummy bears. Serve immediately or store in an airtight container until ready to serve.
Gummy Bear Layer Cake
Print Friendly and PDF

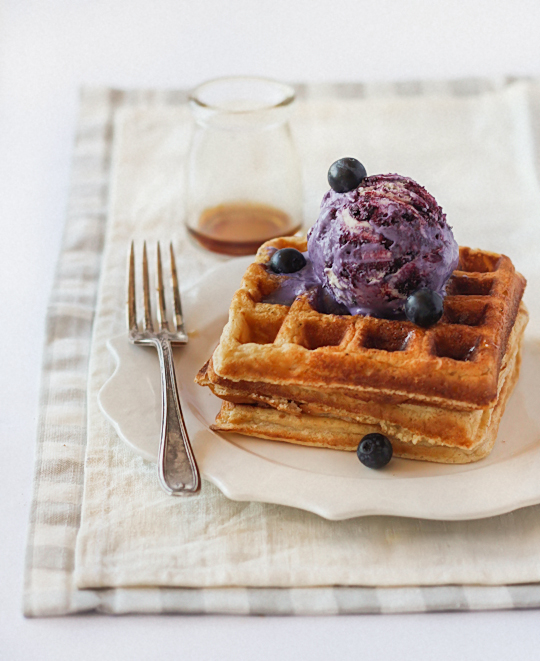
Brown Butter Waffles with No-Churn Blueberry Ice Cream

Brown Butter Waffles with No-Churn Blueberry Ice Cream
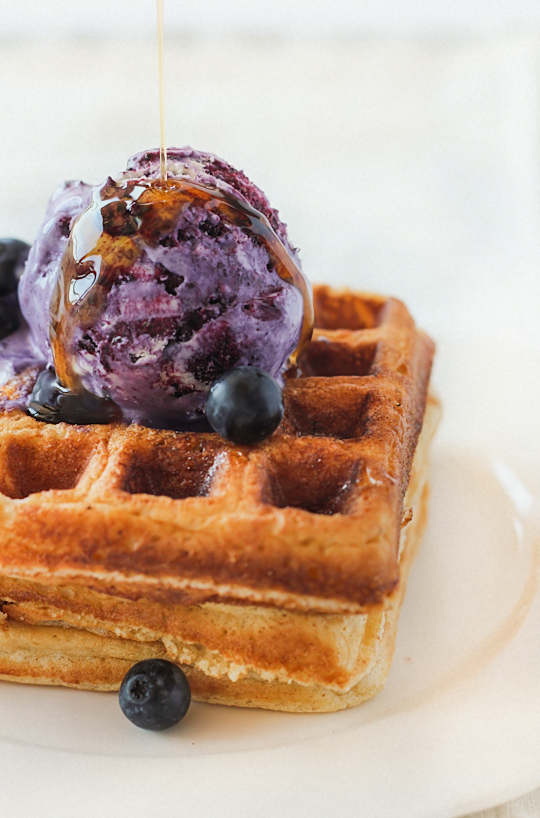
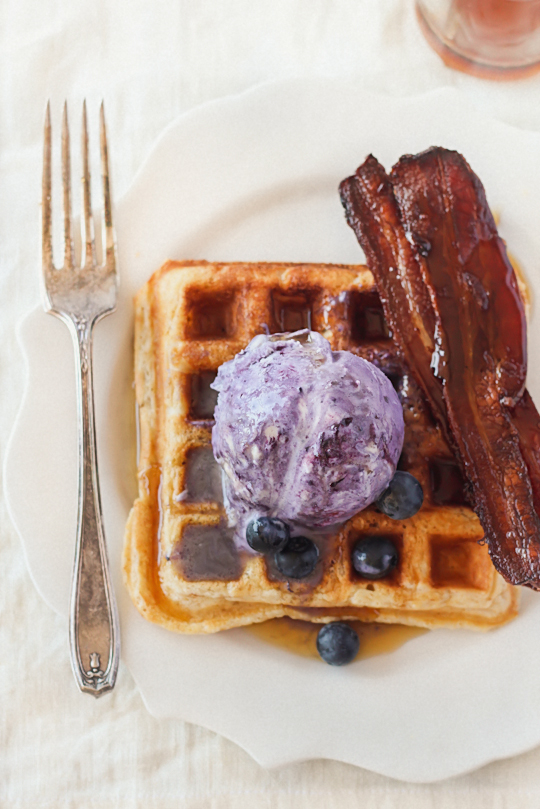
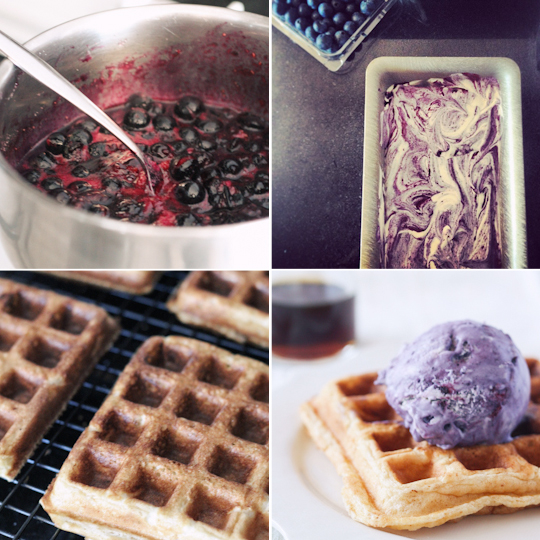
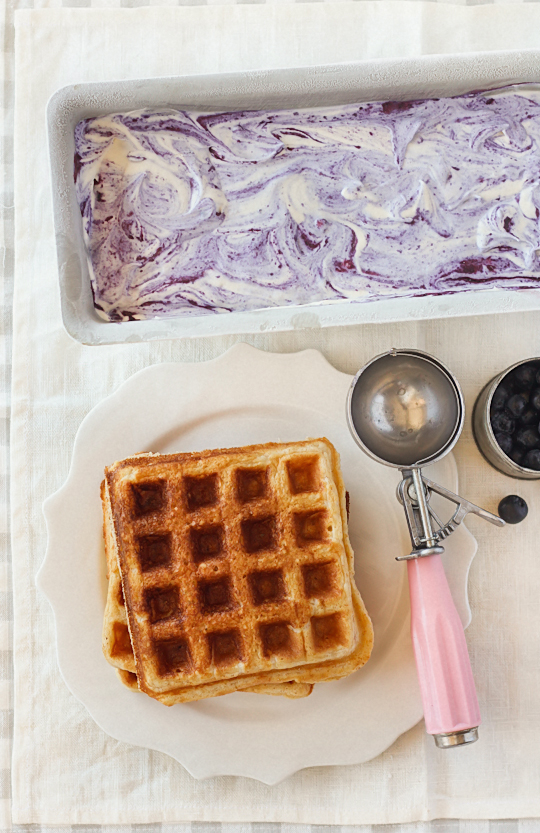
Oh my. That photo right there makes me salivate profusely everytime I look at it. Every. Time. It's probably worse for me because I know exactly what it tastes like, and it tastes even better than it looks in that photo. This is the first time I've ever made waffles for this blog, because this is the first time I've had a waffle iron since I moved out of home! YAY. Thanks to the awesome Suze for letting me borrow her waffle iron. I'm the kinda person who cannot eat waffles without ice cream. The combination of those piping hot, golden waffles with some creamy ice cream melting on top makes me happy. So this weekend I made my own ice cream and waffles. And ate it with maple syrup. And bacon. Yup.
Brown Butter Waffles with No-Churn Blueberry Ice Cream
Once you have a waffle iron, you need a good waffle recipe. Luckily for me, my brother has a great one. We've been using it for years and it has never failed us. It may seem a bit more tedious than some of the more basic recipes (because you have to separate your eggs and whip the egg whites separately), but it is definitely worth the extra effort. The waffles you give lots of love will love you back! My brother's one complaint was that the recipe uses vegetable oil and he would have loved to try it with butter instead. We are a butter-loving family. So I took it to the next level and made these waffles with browned butter. If you've been reading my blog for long enough you know how much I love the aroma and flavour of brown butter. It's ridiculously good with pretty much everything. These waffles are no exception.
Brown Butter Waffles with No-Churn Blueberry Ice Cream
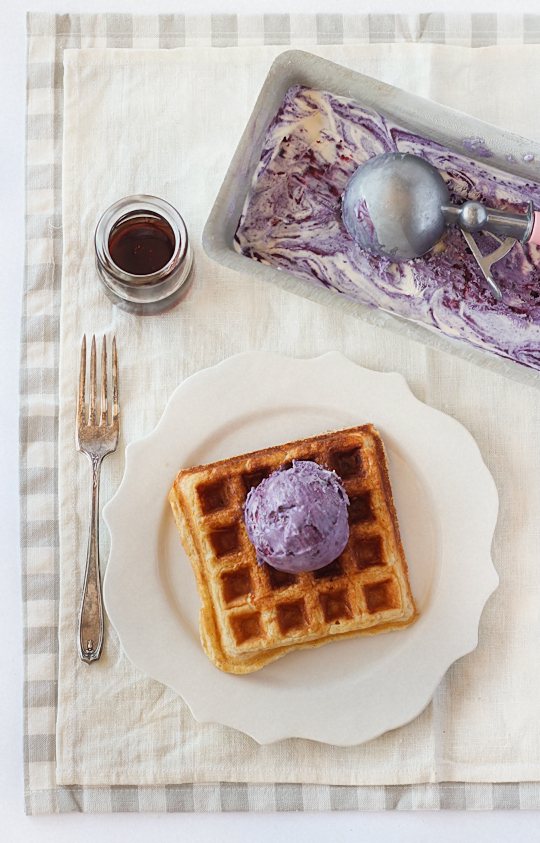
Rather than flavouring the waffles with blueberries, I decided to make Blueberry Ice Cream instead. It's been a while since I've made ice cream and there are two big reasons for that. 1. It can be a pain to make the custard base for an ice cream, chilling it, then waiting for it to churn and freeze. 2. I HATE HATE HATE photographing things that melt. It is incredibly stressful to try and scoop that pretty, perfect little scoop of ice cream and then shoot it before it turns into a puddle. I usually end up covered in melted ice cream. The awesome Lisa solved one of these problems by sharing an amazing no-churn ice cream recipe (linked below). It's so ridiculously easy and works just as well as churned ice cream in my opinion. And it's so pretty that it was worth running around to get the shot of one scoop of ice cream.
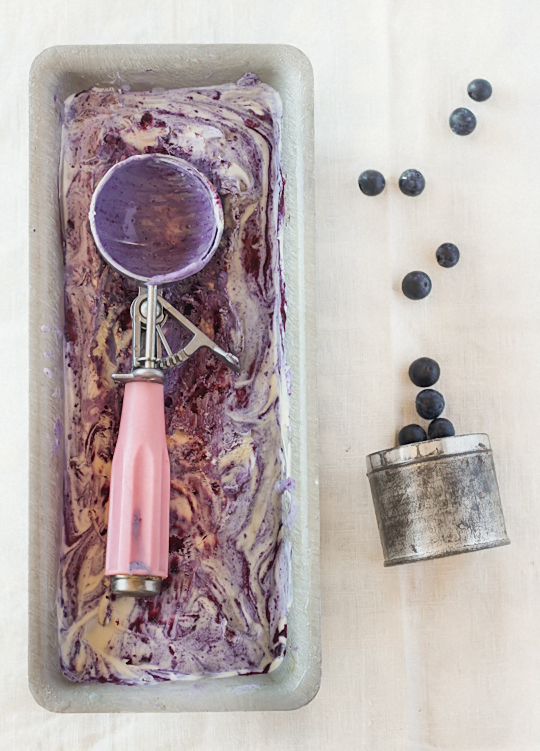
No-Churn Blueberry Ice Cream
When I was a kid I remembered tasting a sample of blueberry ice cream in the supermarket. It was so good, it stuck with me forever (even though my Mum refused to buy a tub for me no matter how much I whinged). I remember searching in the supermarket ever since then for blueberry ice cream and never finding one that was like the one I tasted. This recipe tastes JUST like how I remembered that blueberry ice cream. You have no idea how happy that makes me. I'm surprised that it's not a more popular ice cream flavour because it works so well and the colour is so beautiful. Look at all those pretty swirls of purple! It is definitely worth making at home, and you can use frozen berries if you want to save a bit of money. 6 dollars for a fresh punnet eek.
Brown Butter Waffles with No-Churn Blueberry Ice Cream
In other news, it was really fantastic to hear that I was included in the Top 100 Voices of 2013. And even better, two of my best friends Karen & Lisa are included in the top 25 Food and Wellbeing category with me! Love you crazy, talented girls. You can see the other great bloggers included in the category here.
Kidspot_VoicesOf2013
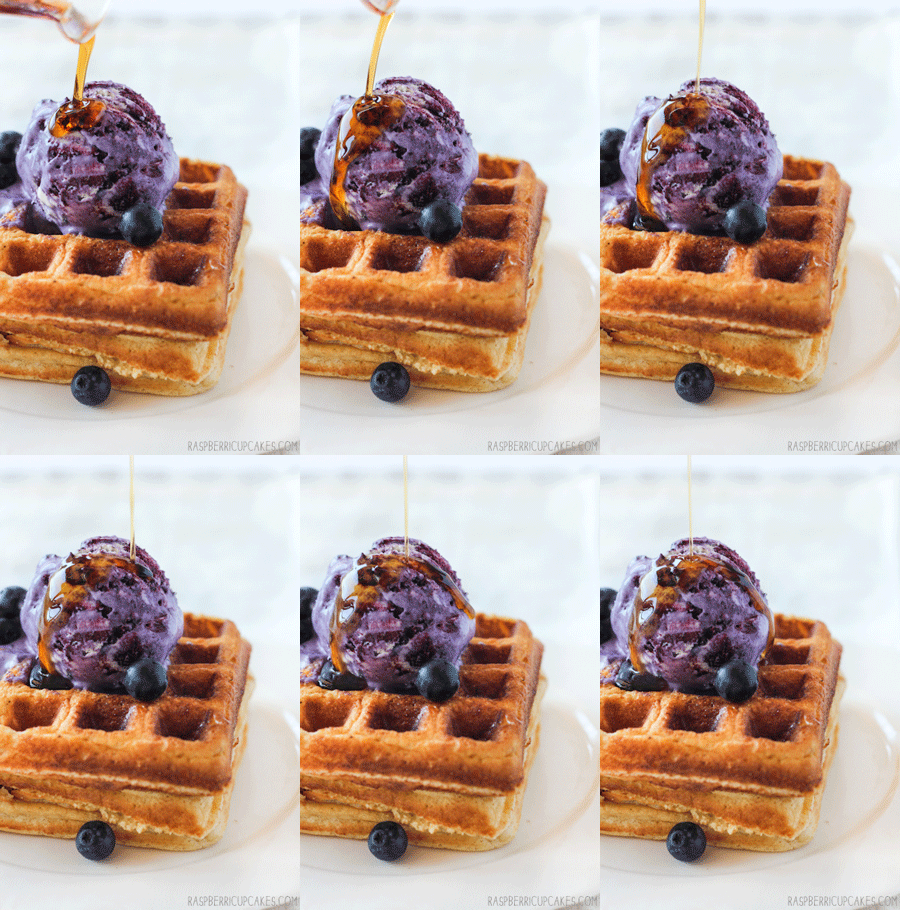
Speaking of nominations, go check out the Saveur food blog awards and if you have the time make sure you vote for the incredibly talented Top with Cinnamon. And check out Izy's blog if you haven't already, I'm currently slightly obsessed with it. To celebrate I made a (crappy) gif, which is no where near as amazing as the mesmerising ones you'll find on her blog. Blame my handheld photography and dodgy photoshopping skills. But I do love a good drizzle of maple syrup.
Brown-Butter-Waffles-with-No-Churn-Blueberry-Ice-Cream
Brown Butter Waffles with No-Churn Blueberry Ice Cream
(makes approx 8 waffles and about 1-1.5L of ice cream)
For the blueberry ice cream (adapted from spicy ice cream):
2 punnets (250g) fresh or frozen (and thawed) blueberries
Juice of 1/2 lemon
3-4 tbsp sugar, adjusted to taste
2 cups cream (pure/pouring cream (or heavy cream in the US, min 35% fat unthickened))
1 can (395g) sweetened condensed milk

Place blueberries, lemon juice and sugar in a small saucepan (I used 3 tbsp of sugar first and then added another tbsp after tasting it later) on low-medium heat. Stir regularly until the sugar dissolves and the skins of the blueberries start to split. Continue to stir and allow mixture to simmer for 5-10 minutes, and try to mash the blueberries with a fork as they soften. When mixture starts to thicken slightly, remove from the heat and allow to cool. When at room temperature, transfer to a bowl and chill in the fridge until needed.

Place cream in a large mixing bowl and beat with electric mixer on high until it reaches soft peaks (take care not to overmix). Gently fold in condensed milk until combined and then pour mixture into a large loaf tin (about 1.5L capacity). Dollop blueberry mixture over the top of the cream mixture and then use a spatula to fold the fruit carefully throughout the cream. Alternatively, blend the fruit mixture and add it at the same time as the condensed milk for a smoother colour and texture (I prefer the rustic, swirly look). Freeze overnight.
Brown Butter Waffles with No-Churn Blueberry Ice Cream
For the waffles (adapted from this Toastmaster Waffle Iron recipe):
110g (about 7 tbsp) butter (can be substituted with 7 tbsp vegetable oil)
1 3/4 cup flour (plain/all-purpose)
2 tsp baking powder
1/2 tsp salt
1 tbsp sugar
3 large eggs, separated and at room temperature
1 1/2 cups milk, room temperature

Preheat your waffle iron. Place butter in a small saucepan on low heat stirring occasionally, until foamy, about 5 minutes. Continue to cook, stirring frequently, until the milk solids turn brown and the butter smells nutty, about 4 minutes longer (take care not to burn, I removed mine from the heat just as it started turning brown as it continues to cook in the saucepan even after it's off the heat). Set aside.

Sift flour, baking powder, salt and sugar in a large mixing bowl and set aside. In another mixing bowl, whip egg whites to stiff peaks, set aside. While slowly mixing (either with a whisk or an electric mixer on low), add egg yolks to mixture, follow by the butter, and then the milk. Mix until combined. (If your milk is too cold this may cause the mixture to go a bit grainy because of the butter solidifying, but this is okay). Fold egg white into mixture until combined. Pour mixture into your heated waffle iron, I used about 1/2 cup of mixture per waffle. Cook to your waffle iron's instructions, until waffles are golden brown and crisp. Serve immediately with your blueberry ice cream, and some maple syrup and streaky bacon if you're into that sorta thing ;)

Leftover waffles can be frozen once they have cooled completely, then reheated in the toaster or microwave before serving.
Brown Butter Waffles with No-Churn Blueberry Ice Cream
Print Friendly and PDF

Monday, April 8, 2013

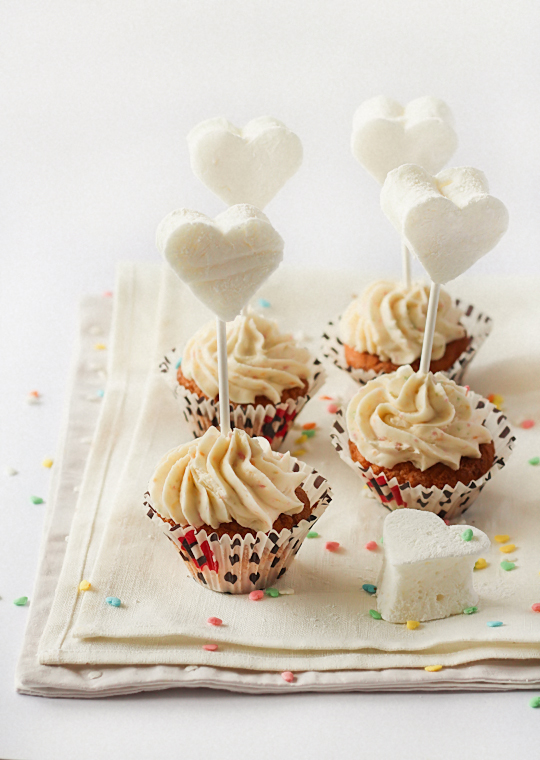
Passionfruit Cupcakes with Marshmallow Toppers

Passionfruit Cupcakes with Marshmallow Toppers
I'm a bad friend. At the very least, I've been a bad friend recently. When your life is a mess you tend to be incapable of doing the most obvious of tasks, like keeping in touch with your friends and getting your hair cut (it's getting ridiculously long now). So when my best friend Asian Gaga had a housewarming party and I knew that I was going to be a bad friend and wouldn't be able to go, I became determined this weekend to bake something for her party. It was the least I could do.
Passionfruit Cupcakes with Marshmallow Toppers
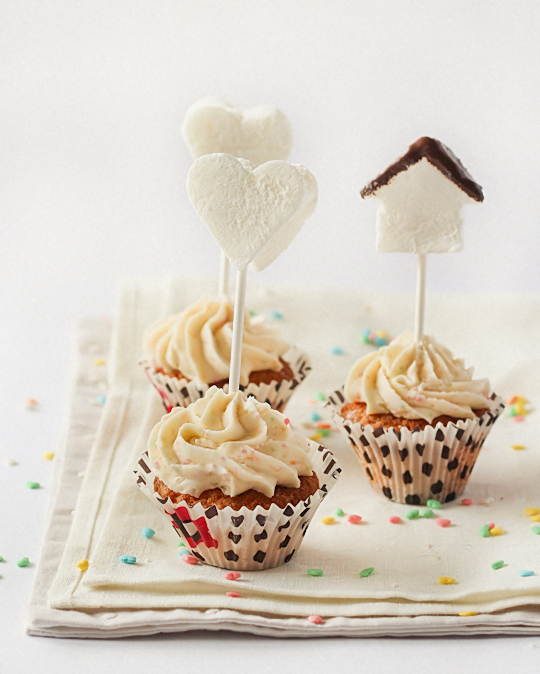
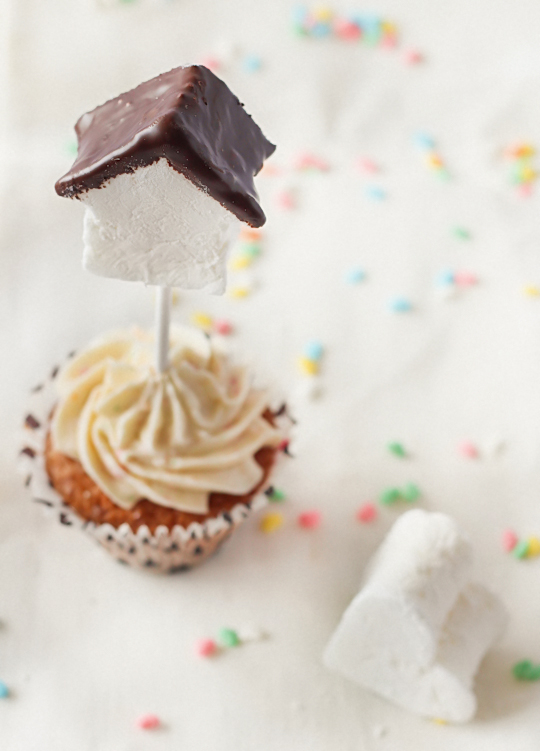
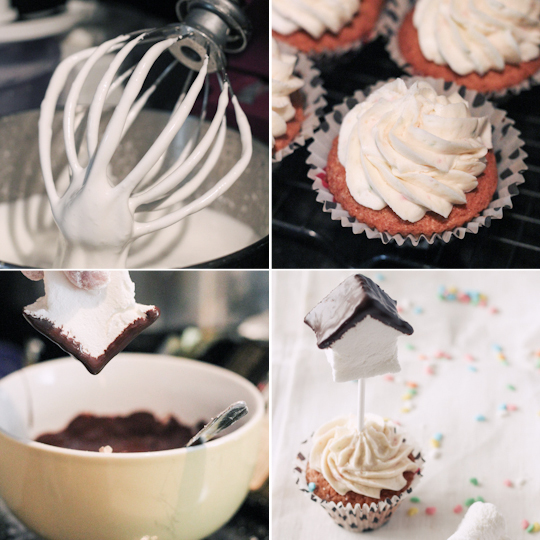
Of course, sometimes when you try to channel your frustration into your baking it can be a bit of a disaster. I had this vision of the cutest cupcakes topped with these neat, elegant, fluffy white house-shaped marshmallow with chocolate-dipped roofs. It sorta went to plan at first; I made Passionfruit Cupcakes topped with the best Fruit Tingles (Fizzy Candy) Icing. Then I made a batch of Homemade Passionfruit Marshmallows. But when it came to making them house-shaped, it was nearly impossible without a proper cookie cutter to do the job. I tried to cut it free-hand, and also around a stencil which I cut out of plastic, but it was just way too messy. After cutting through about 1/3 of the marshmallow I had about 2 decent houses. So I cut my losses and switched to the good old-faithful heart-shaped cutter. You can never go wrong with hearts!
Passionfruit Cupcakes with Marshmallow Toppers
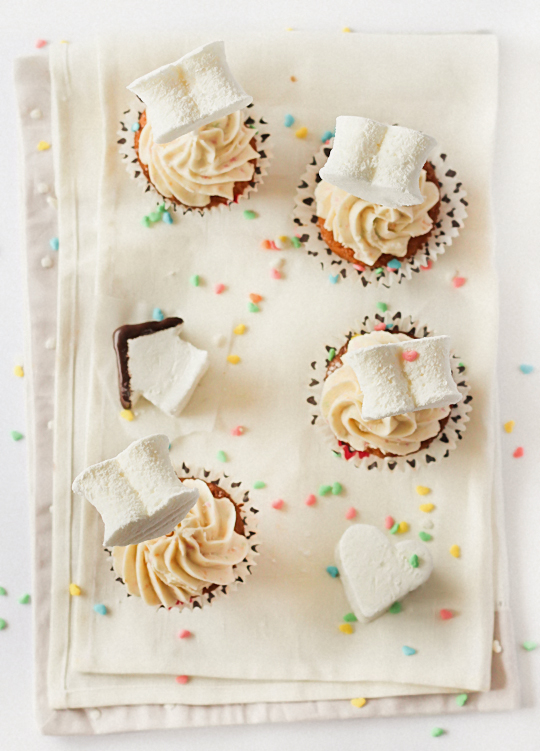
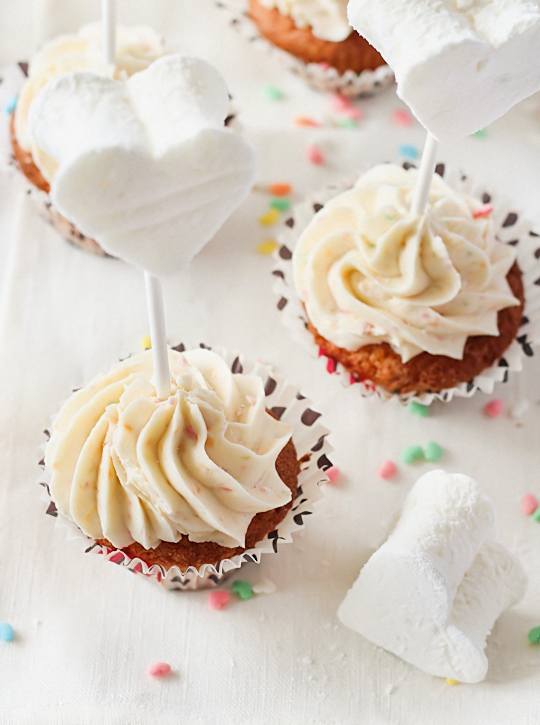
They look pretty cute in the photos but about 10 minutes after I took these shots the marshmallows started sliding slow down the lollipop sticks. Learn from my lessons people; I cut and dusted the marshmallows and stuck them straight on to the lollipop sticks upright. You really can't do that with homemade marshmallows, they need plenty of time to dry out once they've been cut. I ended up having to cut my lollipop sticks in half so the hearts were sitting right above the icing. A rather bumpy car trip left the cupcakes barely recognisable by the time they reached their destination :( I hate transporting fiddly baked goods!
Passionfruit Marshmallows
But the good news is, I think they tasted pretty good. I mean, you can't go wrong with the Fruit Tingles Icing. It's sweet, with a hint of salt from some good quality butter and then every now and then you come across a nubbin of sour, fizzy candy. I mixed fresh passionfruit pulp into my foolproof cupcake recipe, and into my usual marshmallow recipe. Even though I'm not a fan of passionfruit it really works great in marshmallows. And I can't repeat this enough; MAKE HOMEMADE MARSHMALLOWS. They are so much better than store-bought.
Fruit Tingle (Fizzy Candy) Macarons
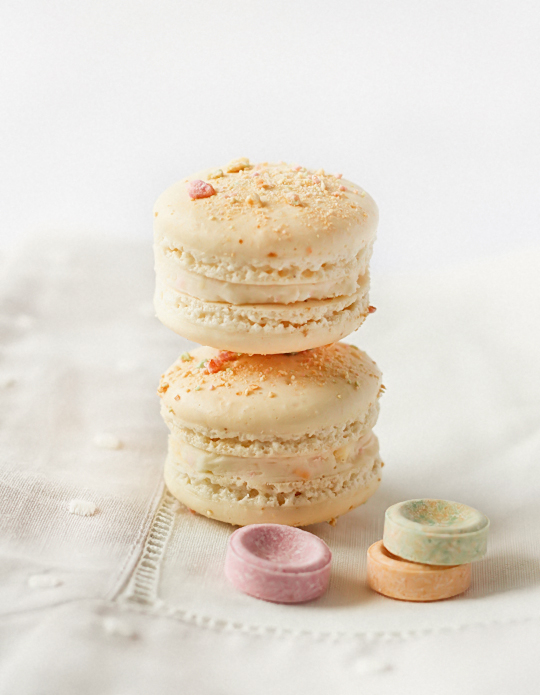
With any cupcake recipe, I always make too much icing. There's nothing worse than running out of icing when you are decorating cupcakes! It seemed like a gigantic waste to throw out any of the leftover icing, so I whipped up a batch of macarons (using my usual macaron shell recipe, topped with crushed up Fruit Tingles for those wondering) and filled them with the leftover icing. Ta-daaa!!! Fruit Tingle Macarons! How cute are they?? So I managed to make lots of great separate bits and bobs this weekend, but my execution of putting them all together was a bit shit. Hopefully the cupcakes went down well even though they were all smashed up.
Passionfruit Cupcakes with Marshmallow Toppers
Passionfruit Cupcakes, Fizzy Candy Icing and Passionfruit Marshmallows
(makes about 12 cupcakes, and about 30-40 marshmallows)
For the cupcakes:
125g (about 1 stick + 1 tbsp) butter
3/4 cup sugar (I used caster/superfine but regular/granulated works fine)
2 eggs, room temperature
1/4 tsp pure vanilla extract
Pulp of 3-4 fresh passionfruit (optional: strain to remove seeds)
225g (about 1 & 3/4 cups) self-raising flour

For the icing:
250g (about 2 & 1/4 sticks) salted butter (or use unsalted and add 1/4 tsp salt), softened
375g (about 3 cups) icing sugar, sifted
3 sticks (105g) Fruit Tingles (for non-Australians, replace with any other fizzy tablet candies like Bottle Caps or Smarties (not the chocolate covered candy with the same name), SweeTarts or Barratt's Refreshers

Prepare the cupcakes; line a 12-hole cupcake tray with papers and preheat oven to 180°C (350°F) (if fan-forced use 170°C (340°F)). Place butter and sugar in a large mixing bowl and beat on high with an electric mixer for 3-5 minutes, until light and fluffy. Continue to beat on medium speed and add one egg at a time, mixing until combined. Add vanilla extract, passionfruit pulp and self-raising flour and mix on low until just combined. Spoon equal amounts into the cupcake papers, filling them about 3/4 full (I use an ice cream scoop to make this easier). Bake for 15-20 minutes, until golden brown on top and a skewer inserted into the centre of a cake comes out clean. Cool in tin for 5 minutes then cool completely on a wire rack.

When cakes are cool, prepare the icing. Crush Fruit Tingles into very fine pieces (you don't want anyone to break a tooth!), I did this by placing it into the food processor and pulsing it fine. You may end up with some very fine powder as well as small pieces, but that's fine. Place butter in a large mixing bowl and beat on high with an electric mixer until smooth and fluffy. Gradually add icing sugar, and beat again until combined and fluffy. Gradually mix crushed candies into the mixture, adjusting to taste. Place mixture in a piping bag and pipe over cupcakes.
Passionfruit Cupcakes with Marshmallow Toppers
For the Passionfruit Marshmallows:
500g (about 2 cups) sugar
1 tbsp liquid glucose (or light corn syrup)
Pulp of 3-4 fresh passionfruit, strained to remove seeds
2 tbsp gelatine powder
2 large egg whites
Vegetable oil (or melted butter) for greasing
1 cup (75g) icing sugar, sifted
1 cup (75g) cornflour (cornstarch)

Grease and line the base and sides with baking paper of a 24x32cm rectangular cake tray, or two 20cm square cake tins. Place caster sugar, glucose and 200ml water in a small saucepan. Place on low heat and stir until the sugar has dissolved. Top up passionfruit pulp with cold water to make a total of 200ml liquid and place in a small bowl. Sprinkle gelatine powder over it and set aside to soften. Increase heat on saucepan to medium-high and insert a sugar thermometer. Boil for 5-10 minutes, until sugar thermometer reaches 120°C (250°F) (I got my candy thermometer from a $2 dollar shop for those wondering). Remove from the heat and carefully add gelatine to mixture and whisk until gelatine dissolves and no lumps remain (if you are worried about this step you can heat the bowl of gelatine over a pot of simmering water first to make it smoother before adding it).

Place egg whites in a large mixing bowl and start beating with an electric mixer with a whisk attachment on high speed until it reaches soft peaks (if you are using a hand mixer you should beat your egg whites to a stiff peak before you start adding the syrup). Gradually add hot sugar syrup to the egg white while mixing. Beat until mixture is glossy and white, about 5 minutes on a stand mixer and closer to 10 with a hand mixer. Before mixture starts to cool too much, pour mixture into prepared tin and use a spatula to quickly smooth top. Leave to set at room temperature overnight. Use a greased knife to cut into squares or your favourite cookie cutter to cut out shapes.  Mix icing sugar and cornstarch together and use to dust each marshmallow (dip your cookie cutter into the icing sugar mixture to make it easier to cut out shapes). Place on a piece of baking paper to dry at least 2 hours, then store in an airtight container in a cool place. If placing on sticks, insert lollipop sticks into marshmallows and leave to dry overnight. Best eaten within two days.
Passionfruit Cupcakes with Marshmallow Toppers
Print Friendly and PDF