I am pretty excited to share this post with you guys. Earlier this year I was contacted by the lovely Amanda from i am baker. That in itself was pretty exciting, her blog is a HUGE source of inspiration for me. I mean she made the original rose cake and heart-hidden-inside cake, just to mention a couple of the hugely creative ideas she has pioneered. Amazing. So when she proposed a food-styling challenge to me, I didn't even think twice before saying yes. Style a chocolate cake with a budget of $25 for props? It was on like Donkey Kong.
So the challenge was as follows; style a chocolate cake however you want and with any recipe you want but you only have $25 to spend on styling props (background not included). The cake was a no-brainer, you know how much I love to bake chocolate cakes these days. The budget was more than a little bit tricky. Those of you living in Sydney know how hard it is to find good, affordable homewares. I gave myself a little leeway, taking into account the exchange rate at the moment and stretching my budget to $AU27. Even then, I had to go to my one of my hidden away antique stores to find a few items that were special enough and still fit the price.
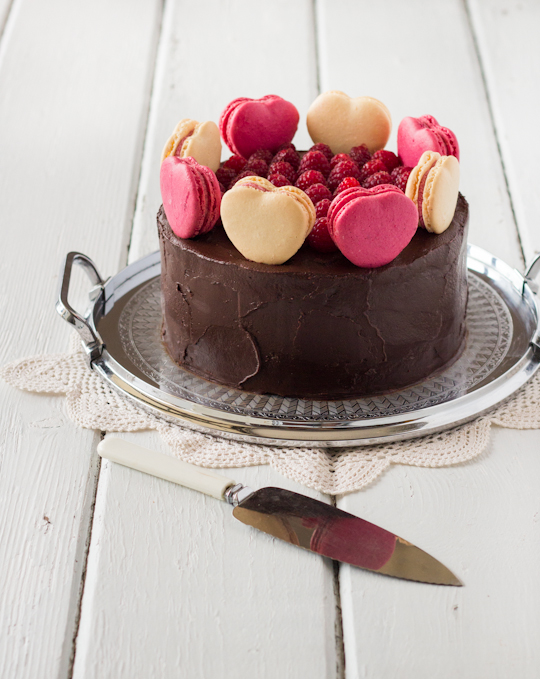
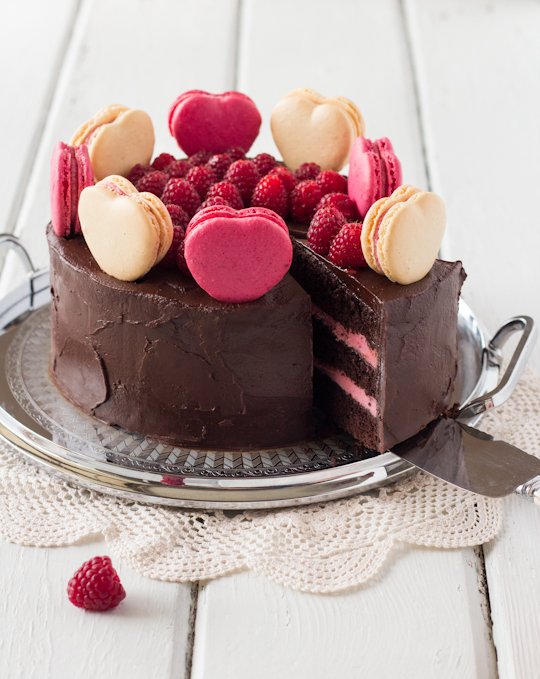
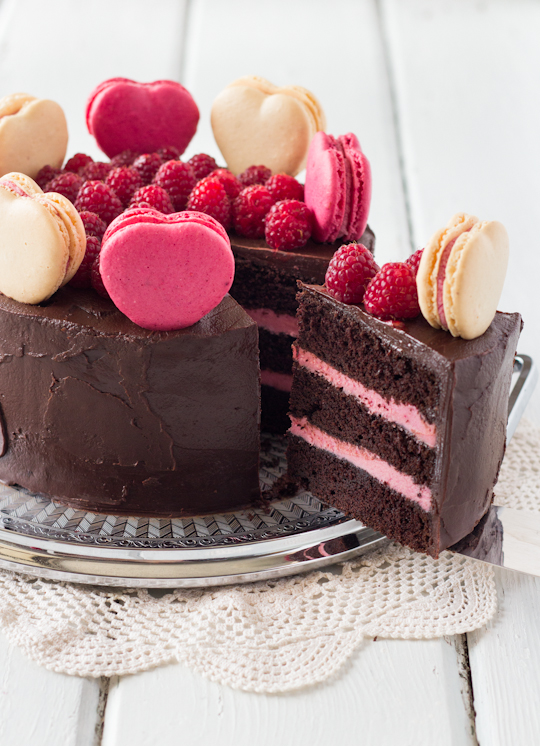
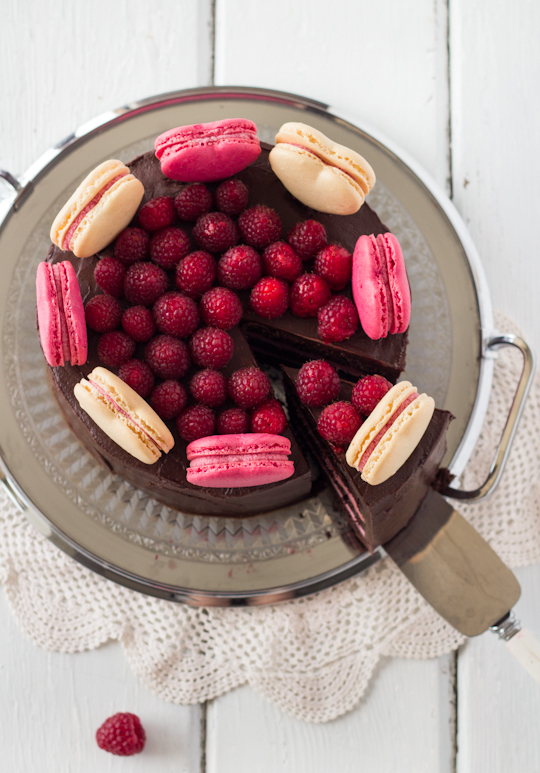
I managed to dig around and find this gorgeous silver serving tray for $20, a slightly cracked cake server for $3 and a lovely old lace doily for just $2. I'm particularly in love with the tray and the etchings on the surface, apparently quite a common item to find in antique stores which is why it wasn't too pricey. It also helped to have the lovely vintage door my husband gifted to me as an anniversary present, which has been my favourite photography surface for the last few weeks (in case you hadn't already noticed).
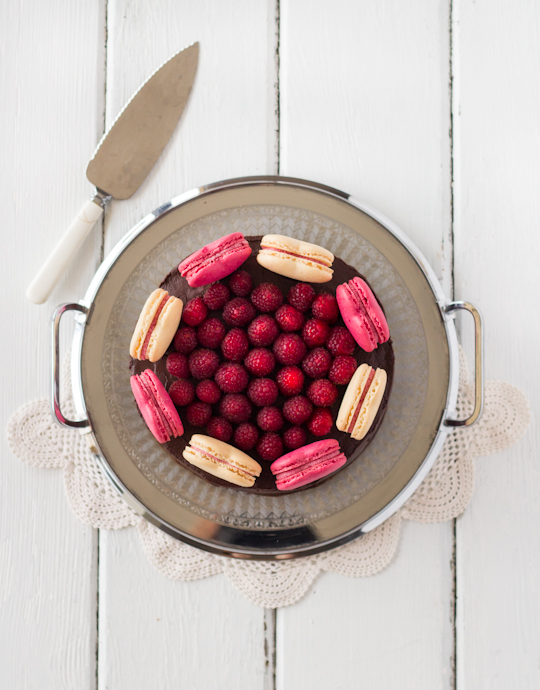
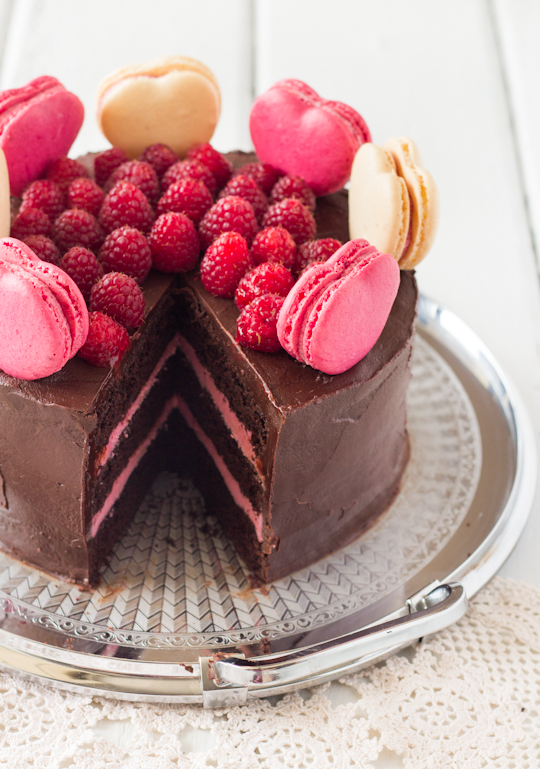
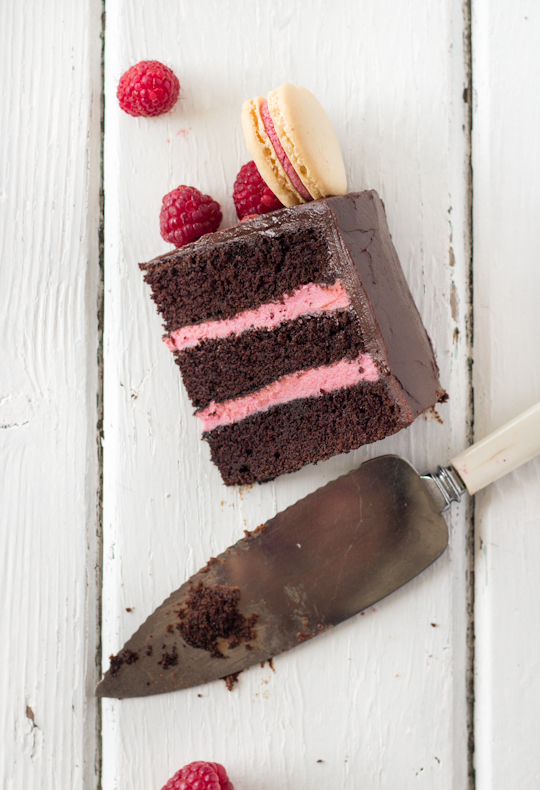
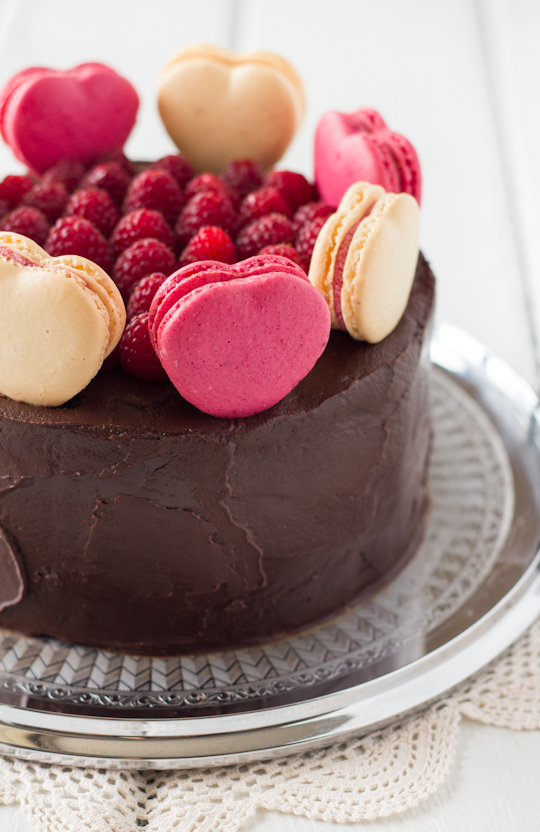
The cake layers are made from one of my favourite go-to recipes; David Lebovitz's Devil's Food Cake recipe. Love that guy, love this cake. I filled the rich chocolate cake layers with a white chocolate and raspberry ganache. It was preeeeeety. And tasted so great that it also made the perfect filling for some heart-shaped macarons. I could not resist topping the cake with more of these macarons, you know how much I love them. I just think that macarons make the perfect cake topper. I especially love how the colour of these ones offset all the glossy brown chocolate. And I splashed out and spent a fortune on fresh raspberries (totally not in season right now), because they are so photogenic on top of a chocolate cake. The cake itself was so pretty I didn't even need the props. But it was fun to play with them anyway.
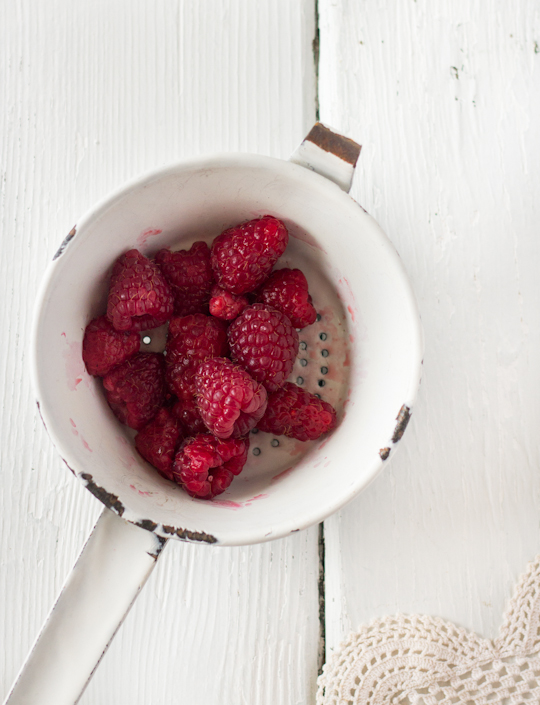
The cake is covered in a rich layer of dark chocolate ganache and is best enjoyed in small portions. The finish is what we baking bloggers like to call 'rustic' (translation: I can't be bothered spending forever smoothing it out perfectly). I actually prefer it when chocolate ganache looks like this, the swirls of chocolate look so luscious and inviting. On a random note; I also picked up this lovely beat-up white enamel colander but it didn't fit into the budget for the challenge so the photo below is me totally cheating.
TIme to stop bombarding you with photos, there were so many that I liked that I couldn't edit them down! I just wanted to say a huge thank you to Amanda for letting me be a part of this challenge. It was SO MUCH FUN and hugely inspiring. It was really great to have a goal to focus on for my weekly baking and I managed to pick up a few props that I will definitely get plenty of use out of. As always, this recipe can be easily adapted from three layers to two, you can replace with filling with other flavours and you can top the cake with other fruits or toppings.
Chocolate Raspberry Layer Cake with Macarons
(Serves 12-16, Devil's Food Cake recipe from David Lebovitz)
For the cake:
9 tbsp unsweetened cocoa powder
1 1/2 cups (about 185g) cake flour (not self-raising, I just used plain flour and replaced 3 tbsp with cornflour/cornstarch, well-sifted together)
1 1/2 cups (about 185g) cake flour (not self-raising, I just used plain flour and replaced 3 tbsp with cornflour/cornstarch, well-sifted together)
1/2 tsp salt
1 tsp bicarb/baking soda
1/4 tsp baking powder
115g (1 stick) unsalted butter, at room temperature
1 1/3 cups (about 300g) caster/superfine sugar (white/granulated works too)
2 large eggs, at room temperature
1/2 cup water + 1/2 cup milk
1 tsp bicarb/baking soda
1/4 tsp baking powder
115g (1 stick) unsalted butter, at room temperature
1 1/3 cups (about 300g) caster/superfine sugar (white/granulated works too)
2 large eggs, at room temperature
1/2 cup water + 1/2 cup milk
Grease and line the base of a three 18cm cake tins (or two 20-22cm tins, if you only have one tin you can split up the batter and bake one layer of cake at a time in the same tin) and preheat oven to 180°C
(350°F) (lower by 10°C for fan-forced). Sift together the cocoa powder, flour, salt, bicarb soda, and
baking powder in a bowl. Using an electric mixer with a large mixing
bowl, beat together the butter and sugar on high about 5 minutes until smooth
and creamy. Add the eggs one at a time and beat until fully
incorporated.
Mix together the water and milk. Stir half of the dry ingredients into the butter mixture, the add the milk mixture. Finally stir in the other half of the dry ingredients until smooth. Split batter mixture between the prepared tins. Bake for about 20-25 minutes, or until a skewer inserted into the centre of the cake comes out clean. Remove from the oven and cool in tin about 5 mins, then place on a wire rack and cool completely before icing. Cake can be baked the night before and stored in an airtight container overnight before assembly.
Mix together the water and milk. Stir half of the dry ingredients into the butter mixture, the add the milk mixture. Finally stir in the other half of the dry ingredients until smooth. Split batter mixture between the prepared tins. Bake for about 20-25 minutes, or until a skewer inserted into the centre of the cake comes out clean. Remove from the oven and cool in tin about 5 mins, then place on a wire rack and cool completely before icing. Cake can be baked the night before and stored in an airtight container overnight before assembly.
(Optional) For the macaron shells:
Prepare heart macarons as per these instructions, but instead of blue colouring and sprinkles I split the mixture in half and coloured half with pink food colouring.
For the raspberry ganache:
(makes enough to fill a three layer cake plus one batch of macarons, feel free to halve quantities if doing less layers or skipping macarons)
Note: Can be replaced with raspberry icing or raspberry buttercream
Note: Can be replaced with raspberry icing or raspberry buttercream
500g good quality white chocolate, finely chopped
300ml pure/heavy cream (min 35% fat unthickened)
125g (1 punnet) raspberries (fresh or frozen), pureed and strained
Place chocolate in a large mixing bowl. Heat cream over low-medium heat in saucepan until just boiling, pour over cream and set aside for 5 minutes. Use a whisk to combine mixture until smooth, then gradually add raspberry puree to taste. Chill until it thickens but is still pourable (take care not to leave too long or it will make it hard to spread). This mixture is prone to splitting as it cools, if this happens just reheat the bowl over a simmering saucepan of water and add a bit more cream. Place one layer of chocolate cake on your cake stand and cover with ganache. Sandwich second layer on top and repeat. Fill macarons with remaining ganache. It is best to chill your macarons overnight to allow the flavour to mature. I left both the cake and macarons in the fridge overnight before covering with the dark chocolate ganache on the day of serving.
For the chocolate ganache:
400g dark chocolate (I used semi-sweet), finely chopped
300ml pure/heavy cream (min 35% fat unthickened)
Optional: fresh raspberries, to decorate
Place chocolate in a large mixing bowl. Heat cream over low-medium heat
in saucepan until just boiling, pour over cream and set aside for 5
minutes. Use a whisk to combine mixture until smooth. Chill until it thickens and just holds its shape but is still pourable. Use a spatula to spread over the outside of your cake. I used an offset spatula to smooth the surface. Place macarons around the border of the top of the cake. Decorate center of the cake with raspberries. Chill cake until ready to serve, remove from fridge at least 30 mins before serving.


I have one of those trays, but never thought of using it as a cake tray! Thanks for the inspiration! :)
ReplyDeleteMy favourite chocolate cake recipe with beautiful styling. Loving it!
ReplyDeleteOMG. Please send a piece to Phoenix, AZ!!
ReplyDeleteThe colours are amazing! Looks so delicious x
ReplyDeleteThis looks amazing
ReplyDeleteYour cakes are always amazing!!! I wish I had the patience for this! Looks completely delicious, I would dive into this cake.
ReplyDelete
ReplyDeletethis is the epitomy of chocolate cake perfection! yum!
That's gorgeous! Like you, I prefer a more rustic look to ganache...love the peaks and waves of chocolate
ReplyDeletethis. is. SO. pretty !!!!!!!!!
ReplyDeleteLoved your cake. It looked so beautiful and moist.
ReplyDeleteBeautiful :)
ReplyDeleteExcellent effort! I love a good doily, though when the cake is as beautiful as that, you really don't need any other decoration.
ReplyDeleteWell done with the challenge. Can't believe you stuck with budget for all those props! Love the cross section of the cake. The colour of the raspberry ganache is so vivid and it's amazing~
ReplyDeleteAwesome! You left me at a loss for words... <3
ReplyDeletelovely! bet you spent more on the ingredients :)
ReplyDeleteThis cake is so beautiful!
ReplyDeleteI'm sitting here with two teenage girls and they both agree this cake looks YUM! :)
ReplyDeleteLooks amazing...I want to eat all!!
ReplyDeleteAmor total!!!
ReplyDeleteThe macarons and fresh berries speak for themselves I reckon. But I do love the tray!! I usually go to Newtown's vinnies store to get some props though that depends heavily on luck. Mind sharing where that 'hidden antique store' is pretty please? :)
ReplyDeleteWhat a beautiful looking cake! The macarons look perfect and so pretty. Love the sound of the raspberry ganache, it sounds so delicious!
ReplyDeleteLooks absolutely mouthwateringly irresistable
ReplyDeleteHow gorgeous! That raspberry filling looks so fantastic and your macarons are adorable!
ReplyDeleteI love I am Baker and found this post from her blog. I don't know how I haven't followed your blog before because everything you make is GORGEOUS. I love, love, love the heart-shaped macarons. Love the way you styled this cake, too! :)
ReplyDeleteThis looks WONDERFUL. I think if I were to make it, I would do a raspberry buttercream rather than a ganache, but this looks amazing as it is. It could be one I make next week for a colleague's last day! xx
ReplyDeleteThis cake is gorgeous, and what a fun challenge!! Lovely recipe!
ReplyDeleteBEAUTIFUL!!! You never cease to amaze me!! and nice work with the styling challenge! bet you killed it!
ReplyDeleteWhat is not to love about this cake, it looks amazing and seriously delicious.
ReplyDeleteI always love your styling and cakes, i must try this one when im baking next!
ReplyDeleteLove the tray as well, but I'm more in awe of your amazing even layers in that cake! Looks so luscious too. Gah!
ReplyDeleteje suis tres impressionnée, c'est un tres joli blog avec de superbes photos! Je suivrai ce blog de tres pres :)
ReplyDeleteAbsolutely gorgeous and amazing cake! Your cakes are amazing :)
ReplyDeleteLove it!!!! Everything is just so beautiful...
ReplyDeleteoh my gosh, it's breathtaking! wow!
ReplyDeleteAwesome!i love the hearted macarons, it looks so pretty :)
ReplyDeleteBlue Velvet Cook Book
This is absolutely stunning. Totally speechless beyond that. :)
ReplyDeletethats a fabulous cake! thank u a lot for the great recipe and more for telling us the measurement in grams :) I'm from Austria, here we don't know anything about cups ;)
ReplyDeletehow much grams or ml is 1/2 cup water and 1/2 cup milk?
ReplyDelete1/2 cup is about 125ml. There'a a link to an online conversion tool in my FAQ page which can help you with any future conversions.
DeleteWill the chocolate on the cake melt when the cake will be in more hotter place?
ReplyDeleteYes, that is why it is recommended in the recipe to keep the cake in the fridge until you are ready to serve.
DeleteI have made so many of your desserts! Not one has ever gone wrong! Loved all of them, so did all of my fellow employees :D
ReplyDeleteThis one was absolutely decadent!
This is awesome
ReplyDeleteThat's an awesome cake!!!! I'm impressed.
ReplyDeleteLovely pictures, lovely mix (raspberry and chocolat), and lovely gadgets (heart macarons)....
Congratulations!!!!!!
beautiful!!!!
ReplyDeleteIs the raspberry ganache a similar consistency to chocolate ganache? Could it be used to cover a whole cake and set like ganache does?
ReplyDeleteYou can try, however you have to be very careful as the raspberry ganache is much more likely to split and have a grainy texture, especially as it starts to cool.
DeleteOMG I made this for my mum on mothers day and it was AMAZING!!!!!! I will admit that I was too lazy to make the macarons though ;)
ReplyDelete~ So, did anyone attempt to make this? So many posts on how yummy it looks, which I agree but I want to know how everyone made out baking it. ~
ReplyDeleteI have had several private messages from people who successfully made the recipe. Here's someone who posted theirs publicly: http://instagram.com/p/fkAxxNNw2x/?modal=true
DeleteHi,
ReplyDeleteI was wondering if you have a foolproof way to make the macrons stay standing?
I was wondering the same thing about the big number one sugar cookie you made.... how do you keep them from falling over?
This is amazing by the way! I have certainly found my new favourite website for inspiration. I am making this for an engagement so I shall let you know how I go :)
xx
Hmm not sure if I have a foolproof way. I usually just have a fairly thick layer of icing so that I can press the macaron deeply into the icing layer to hold it up. That's pretty much what I did with the sugar cookie. I also used some chopsticks to prop the sugar cookie up while I chilled the cake in the fridge to set the icing. Hope that helps! xx
Delete