My first rainbow cake. It was bound to happen eventually. But surprisingly, this is the first time after four and a half years of baking for this blog. Friends would look at me funny and say, "Are you sure you've never made a rainbow cake before?!". I've done rainbow sprinkle ombre cakes and rainbow-shaped cakes but for some reason I never went for the full rainbow cake experience.
I remember the first time I laid eyes on a rainbow cake. It was on Kaitlin's amazing Whisk Kid blog and it blew my mind. Back then I had never seen anything like it and I was completely smitten. I remember thinking to myself that I would probably never have the talent and precision to make anything that perfect. And since then so many others have made equally impressive versions of the rainbow layer cake. It had been done. I remember wishing I could have it as my wedding cake but I wasn't able to get it. Sad face!
But then a couple of weeks ago I had the challenge of coming up with a
crazy birthday cake for my friend Regex Man. It's been getting pretty
hard to beat my previous efforts for his birthday, most of them have
turned out to be some of the most popular cakes on this site including
the mint chocolate chip cake. I finally decided that this would be the perfect time to try my first rainbow cake. Sure it was nothing original but it was SO MUCH FUN. I've learnt so much about assembling layer cakes over the years and surprisingly this cake came together without much stress or mishaps. The important thing to remember; be patient! I baked three layers of this cake one night, three layers the next night and then iced it the morning after. Trying to do everything on the same day would have been exhausting.
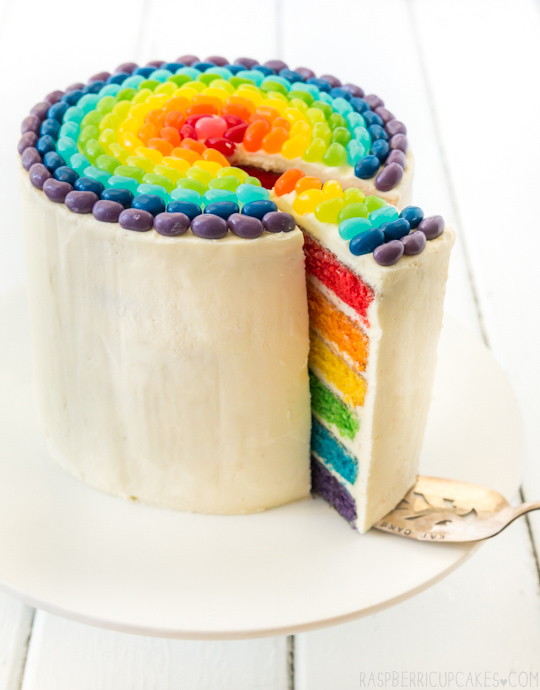
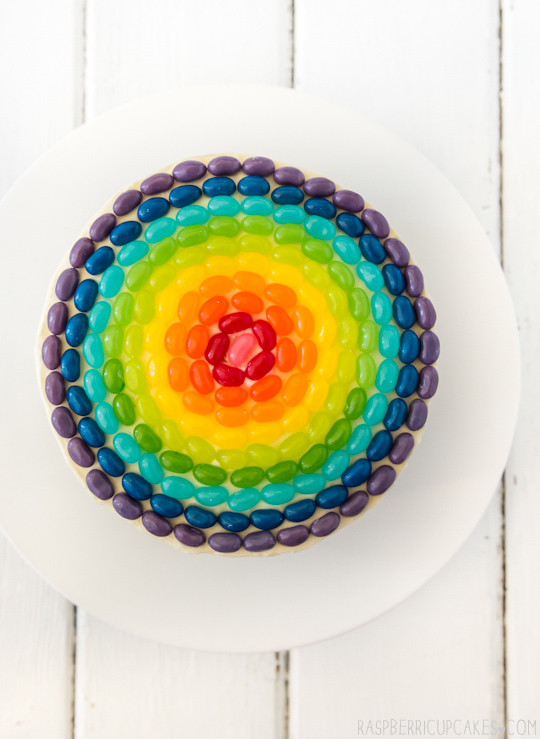
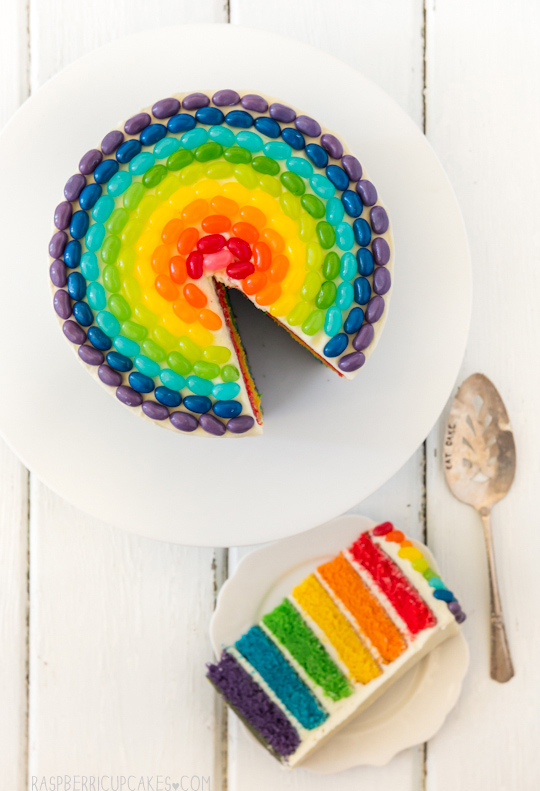
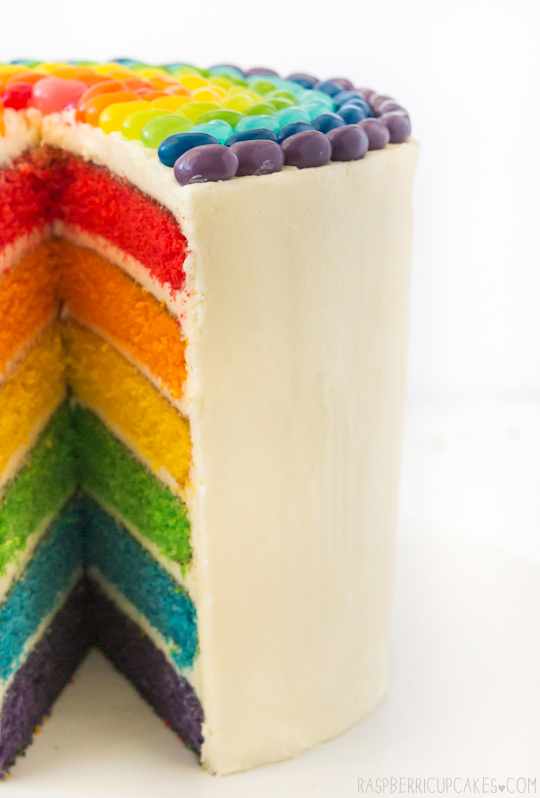
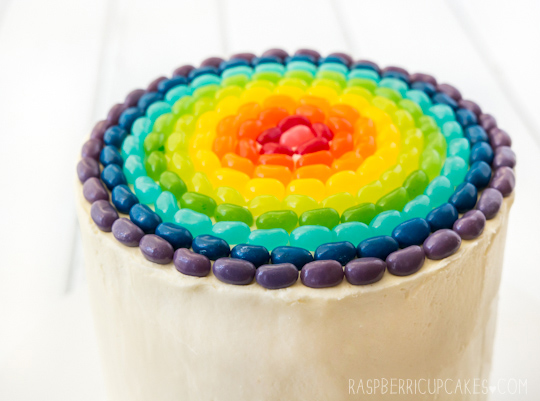
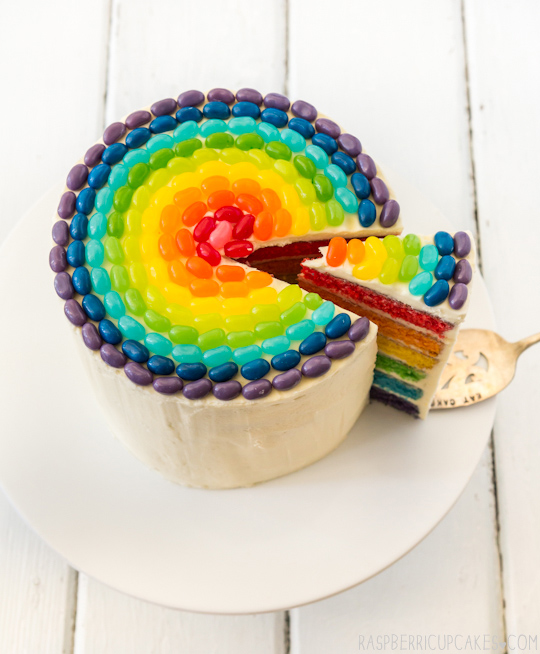
I did have a bit of a disaster when it came to decorating the outside of the cake. Originally I wanted to create this big complicated cake bunting thing by threading jelly beans together but I am so not a crafty person and it turned into a huge ugly mess of wasted jelly beans and string. So I went to plan B and just topped the cake with rainbow jelly beans. You can't really go wrong with that, especially when there is so much going on inside of the cake. I made sure that the colours really popped in the cake layers, I wasn't looking for a half-arsed pale/pastel rainbow, I wanted it to be really intense (It's so intense!) in colour. I used gel colouring because I know you get a really bold colour without having to use huge amounts. If you have a problem with using food colouring then this obviously isn't the cake for you. There's always natural food colouring options but I wanted the full-blown crazy rainbow effect and you can't get that with natural food colouring.
I get a lot of questions about how I get my layers neat and even and icing smooth. I learnt from some great tutorials from other great baking blogs (here, here and here) and it's taken a bit of practice to get better at it. As I said, patience is the key. You need to give your cakes time to chill, they are so much easier to cut neatly if you chill them first. I always turn my cake layers upside down (at the very least the top layer) as it tends to help keep them level when you stack them. An offset spatula will make your life so much easier when you are smoothing your icing. Crumb coating. All these little things make a big difference. I still can't get the edges perfectly straight and even but I've always been a messy baker.
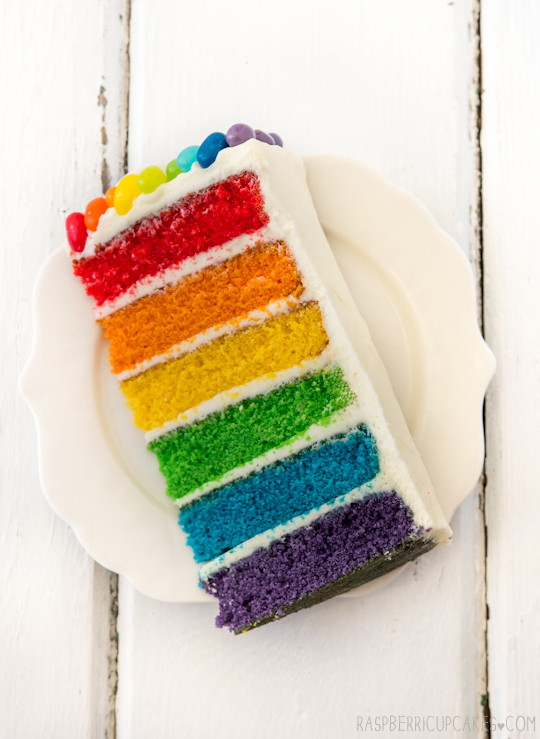
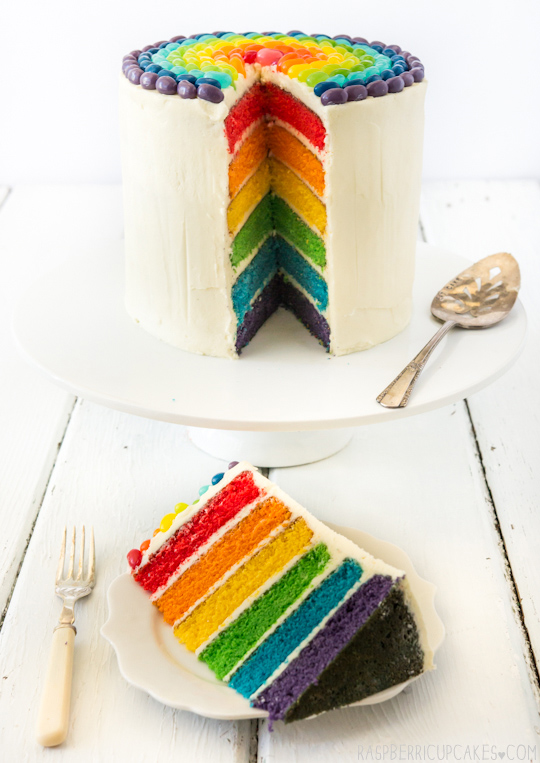
Doesn't it make you happy just looking at it? I was expecting it to be nothing special to eat but I was actually really pleased with the taste. I used my trusty yellow cake recipe, the same as I've used for most of my vanilla layer cakes. The icing is just regular salted butter icing but with lots of lemon juice to help cut through all that sugar. I took extra care this time to make sure I didn't overbake my cakes at all, I took them out as soon as the skewer came out clean. The result was 6 layers of soft vanilla cake that wasn't the least bit tough or dry, even after all the mixing and chilling in the fridge. It was a little tricky to serve the cake as full-sized six-layer slices, so we ended up cutting it up into two layer slices. Obviously I went for a purple-blue piece.
Rainbow Layer Cake with Jelly Bellys
(makes a six-layer 18-20cm cake, serves approx 40)
For the six layers of cake: (divide by 6 if you want to bake each layer individually)
530g (about 4 cups) plain (all-purpose) flour
6 tsp baking powder
3/4 tsp salt
340ml (about 1 1/3 cups) milk
4 tsp pure vanilla extract (if using essence reduce to 3 tsp)
600g (about 2 1/2 cups) sugar (I use caster/superfine but white/granulated is fine too)
340g (3 sticks) butter, softened
6 eggs, at room temperature
Food colouring (I used Wilton gel icing colouring, about 1/4-1/2 tsp per layer)
Preheat oven to 180°C (350°F) and grease whatever 18cm (or if you prefer, 20cm) round cake tins you have (I have 3 so I split the amounts listed above in half and did three cakes at a time. If you only have 1-2 tins you can prepare all the batter ahead of time and bake them one after another but the last cakes might not rise as much. You can also mix and bake one layer at a time, but this is very time consuming.). Line the base of tins with baking paper and grease paper. Combine flour, baking powder and salt in a medium bowl and set aside. Mix milk and vanilla together in a measuring jug or bowl.
Using an electric mixer on low speed, beat sugar and butter in a large bowl until blended. Increase speed to high and beat until pale and creamy, at least 5 minutes. Reduce speed to medium low, add eggs 1 at a time, beating well after each addition. Alternately add flour mix and milk mixture, beginning and ending with flour mixture (I did it by adding 1/4 of of the dry mixture followed by 1/3 of the wet mixture at a time). Beat until smooth, occasionaly scraping bowl with a spatula. Divide mixture evenly into 6 medium bowls (I did this by weighing the batter on kitchen scales to ensure consistency). Gradually mix in colouring until you are satisfied with the colour (gel colours will be more vibrant after baking). Try to avoid over mixing the batter, but it is quite forgiving. Pour batter into prepared tins and bake each layer for about 20-22 minutes or until a skewer into the centre comes out clean and the outside is golden, take care not to overbake or cakes will be tough. Cool in tin for 5 mins and then turn out onto wire racks to cool completely. Wrap in clingfilm and chill overnight.
For the lemon icing:
(Note: I am only guessing at the right amounts here as I had to make extra icing to cover this cake. You may need to adjust the amounts/ratio to get the right icing consistency and volume)
800g (about 6 1/2 cups) icing (powdered) sugar, sifted (or blitzed in the food processor)
400g (about 3.5 sticks) butter (I use salted, add about 1 tsp of salt if you use unsalted)
1-4 tbsp lemon juice (or milk mixed with vanilla extract if you want vanilla icing), adjusted to taste/consistency
Prepare the icing; remove butter from fridge 30 mins before starting and chop into small cubes. In a large mixing bowl, beat butter on high with an electric mixer until smooth and fluffy. Reduce speed to medium-low and gradually add icing sugar until combined, then increase speed to high and beat until very pale and fluffy. Gradually add lemon juice to taste, you may need to add more icing sugar if your mixture is too runny, or more lemon juice or milk if you mixture is too stiff. The icing should be smooth and easily spreadable, but stiff enough to hold its shape.
To assemble cake; remove cake layers from the fridge and use a long shape knife (preferably serrated) to carefully trim the tops of the cake to ensure they are level. Flip your cake layers upside down before assembling. Place the purple layer on your cake plate/stand, spread a thin layer of icing over the top with an offset spatula (I used an ice cream scoop to ensure equal amounts between each layer, about 1 generous scoop for each layer). Repeat with the blue, green, yellow, orange and red layers. Crumb coat the cake and chill for about 15 minutes, then cover the cake with more icing and smooth out surface with an offset spatula. For a smoother finish, run your offset spatula under hot water and dry with a paper towel regularly.
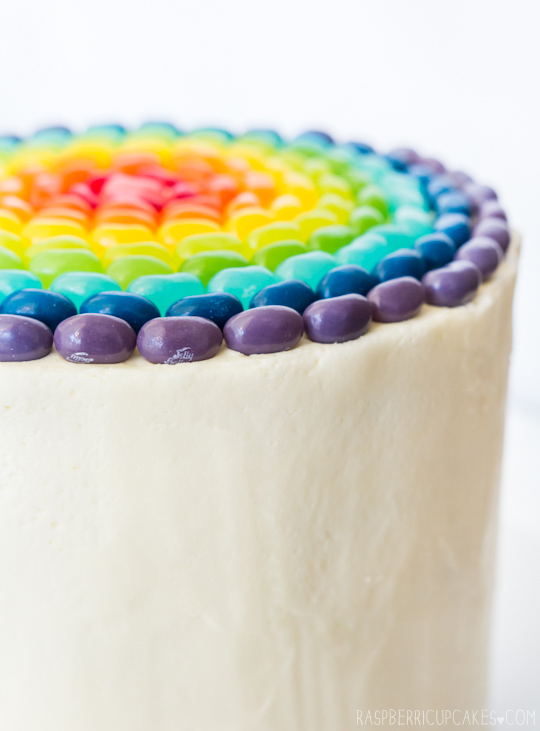
Optional: To decorate; cover the top with rainbow jelly beans, or m&ms or skittles. Or you can cover the entire cake in rainbow sprinkles like this.


It's great starting the week to see something like this. So much happiness. Love the rainbow layer cake and decorations.. and seriously, those layers - amazing!
ReplyDeleteThis cake is so freaking fun!! Love all the colours!
ReplyDeleteFREAKING AWESOME!!!! Best cake ever thanks Steph :-)
ReplyDeleteThis. is. just. GORGEOUS!
ReplyDeletebeautiful cake!! so neat, clean ... you are very talented baker..
ReplyDeleteWhere was this for my birthday?? Wow that must have been a ton of work but it sure paid off!
ReplyDeleteI have made this cake before too but god do I know the pain of icing! I did a rainbow ombre icing for the outside of the cake too (you can find it on my blog if you like, I made it a rainbow party!) and being a messy baker make for more problems!
ReplyDeleteI think the main thing also with neat layers and perfect icing is practice. This give you the excuse to make more right? Hehe
Lovely pictures Steph!
How do you make such perfect cake every time? Wow! It's just amazing, I have no word!
ReplyDeleteOh my goodness! I had never seen the double rainbow video before! My husband and I watched it and just laughed until our faces hurt. The cake is also wonderful too, obviously. :) Thanks so much for sharing!
ReplyDeleteYou've taken the already brilliant rainbow cake to the next level with these oh-so-even layers and lovely decoration. Nice!
ReplyDeleteWooowwww!!!
ReplyDeleteI love ıt...
LOOOKS AMAZİNG,I WANT TO EAT ALL..
ReplyDeleteThis is just beautiful - it's up there with Kaitlin's. I remember seeing hers early on in my blogging 'career' and just being blown away by it - I'm sure yours will do the same for a whole new load of people! Really well done petal. It is perfect.
ReplyDeleteLove this cake!! it´s really pretty!!
ReplyDeleteRegards
Johlene
Flavours&Frosting
Oh my goodness!! This is incredible!! LOVE!
ReplyDeleteThose colors are so vibrant and beautiful. Happy colors:) I'm always super impressed with how neat and precise your layer cakes are, thanks for the tips!
ReplyDeletewaaaaauuuuv I love it. colours is great.
ReplyDeleteOh, this is the cutest thing! I've seen many rainbow cakes, but I love the Jelly Beans on the top of this one! So cute. :)
ReplyDeleteMy birthday is coming up in a few weeks and I think I found my cake! What a stunning creation and lesson in precision. I am in awe.
ReplyDeleteI need to know, do you make your own birthday cake? I usually end up making my own. I used to think it was kind of sad to have to bake your own birthday cake, but now I see it as a joyful celebration of life!
Better late than never!! Perfectly executed, as always.
ReplyDeletePS. I see you watermarking girl :'( but I'm glad those tumblr dorks will now know where to find the original source. :)
Ughhh the watermarks make my eye twitch! And added extra time to photo editing too :( I dunno if I can be bothered doing it again in the future.
Deletekeep watermarking!!! as much of a pain as it is, your cakes are too beautiful and amazing to be stolen by idiots all over the world. :(
DeleteThanks so much for the links on layering cakes - much appreciated! I'm making a four layer carrot cake in a couple of weeks, and previously I've always used wooden skewers (trimmed to the right height) to keep the layers in place. Is this necessary? I'm terrified I'll lose the top half of the cake if I don't do it....
ReplyDeleteHi Jane, I've never used wooden skewers myself but if they work for you I don't see any reason to stop using them! Whatever helps calm the nerves and helps avoid a cake disaster is good in my books :)
DeleteI have tried many of times to make a rainbow cake but this one is beautiful! I love the touch of jellybeans I wouldn't have thought to add though. It looks simply delicious. I must try to recreate this masterpiece! Although it won’t be anywhere as beautiful it'll be worth the challenge!
ReplyDeleteSo freaking cute!! Love the jelly beans atop! Pinned!!
ReplyDeleteCompletely awesome
ReplyDeleteJust letting you know that I have turned your purple ombre sprinkle cake thing into a rainbow cake on many occasions. I had already assumed you'd done such a thing! But this one just looks so amazingly tall that I must try it.
ReplyDeletetwo things:
ReplyDelete1. i can't BELIEVE you even dare to call yourself a "messy baker". you are on crack.
2. i'm really happy that you linked the double rainbow video.
YOU ROCK ALWAYS!! THIS CAKE IS STELLAR AND YOU NEED TO QUIT YOUR DAY JOB!! ;)
Fabulous!!!
ReplyDeleteI want to make this sooooo bad!! One day, thanks for the inspiration!
ReplyDeleteI love how colorful this is! Rainbow cakes are the best :)
ReplyDeleteThis cake has just put the biggest smile on my face. I'm SO impressed by how even your layers are too- mine are never as perfect as that! Oh well- I'll just keep practicing (and I'm sure no-one will complain about the extra cake...!!) xx
ReplyDeleteSteph this cake is amazing just like everything else on here! I was just wondering what kind of mixer you use?
ReplyDeleteMy trusty KitchenAid stand mixer, Lady Mix-a-lot
DeleteThanks for all that link love, Missy! <3 Your cake is beautiful and I'm surprised too that you hadn't made one like this before!
ReplyDeletePERFECTLY stunning, and gorgeous photos! I also love your purple ombre sprinkles cake!
ReplyDeleteGorgeous! You are a master of layered-colored cakes :)
ReplyDeleteWow!!! There are not enough words to explain!! This cake is amazing! I was drawn to this blog when I saw the image of the rainbow cake, as I have been seeing them everywhere lately… But have to say, this is the most beautiful and most creative one I have seen yet! The use of the jelly beans really tops it off and I love how beautiful and clean the icing is. I know how much work would have gone into baking this one, and only wish I had the time to attempt it! However I have also noticed that there are some other equally as creative and beautiful creations on this blog, I think I will be attempting some others that I have seen. However I would also LOVE to have something like this at my wedding... Thank you for the inspiration
ReplyDeleteHi,
ReplyDeleteI am going to attempt to make this cake for my boys birthday party. Just wondering what types of jelly beans you used?
THanks!
I used Jelly Bellys but any brand will do!
DeleteOoh...ahh...yum.
ReplyDeleteYay, Yay, Yay!!
ReplyDeleteThis looks amazing! I have eaten plenty of rainbow cakes (all less good looking than your own) but have never baked one myself because they have always seemed impossible to bake. This recipe however makes it look a lot easier than I thought which is great for a newbie to the baking world. I was wondering however if you could recommend any other type of icing for the cake as I want to try something other than lemon icing.
Once again yay! I can’t wait to try this!
Hi Steph,
ReplyDeletePls check your recipe about the eggs. The other recipes I have seen all call for whites and I made yours with whole eggs because you have more volume in your recipe and I wanted thicker layers, but my first try with whole eggs turned out horrible. second try with only whites turned out fantastic and was a huge hit at my good friend's 40th. -Leanne
Not sure what you're on about Leanne, I make this with whole eggsall the time.
DeleteMade this for my daughters 6th birthday and it was fantastic!!! Followed all of your tips and links and it was beautiful. No one knew what was inside until I cut it - cannot believe it looked just like the picture, I just popped a ring of Crispy M & Ms around the top and the bottom but it looked beautiful. Thanks for the recipe :) Am not choosing something from your site to make for myself for mothers day!!
ReplyDeleteNOW choosing :) not NOT choosing!! Cant decide between speckled egg and brown butter and caramel... decisions :)
DeleteImpressive. I love the simplicity on the outside but when you cut it it takes on a whole new dimension.
ReplyDeleteMade this yesterday for my daughter's ninth. Adorable!
ReplyDelete