Pages

Monday, June 30, 2014

Vanilla Malt Cake with Honeycomb and Maltesers

Vanilla Malt Cake with Honeycomb and Maltesers
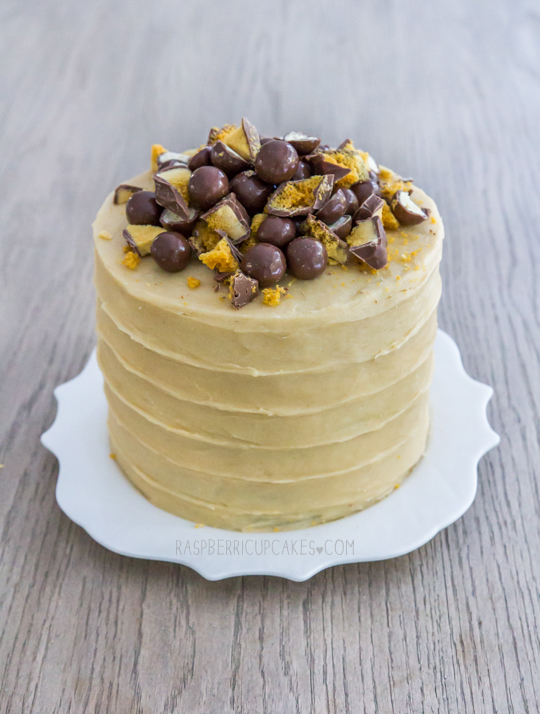
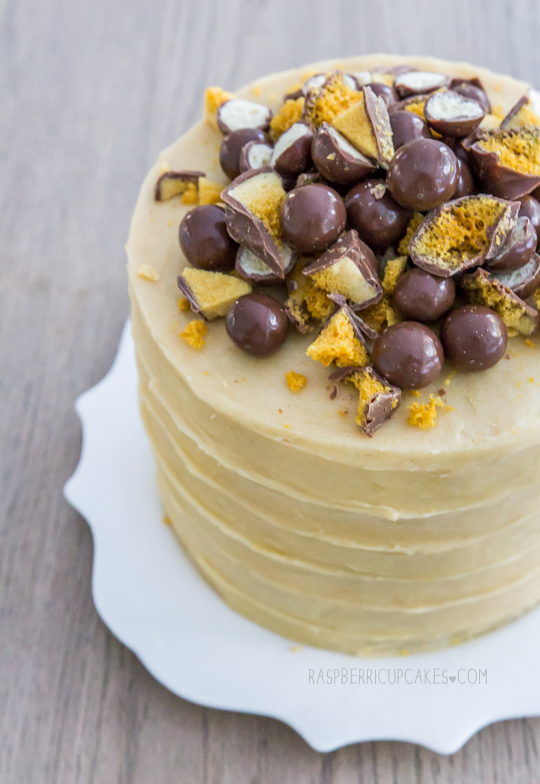
I really do love making super tall cakes. I don't get sick of them. The possibilities are endless and they are always so PRETTY. This particular cake was for my sister-in-law's birthday last week, and I served it on top of a stand full of the macarons that I made in last week's post. Her only request this year was that my macarons be involved in some way and that there were also some of her favourite chocolate bars. Ask and you shall receive! (Apologies in advance for some of the blurry, lazy photos. I had to quickly shoot this as the sun was setting on a weekday.)
Vanilla Malt Cake with Honeycomb and Maltesers
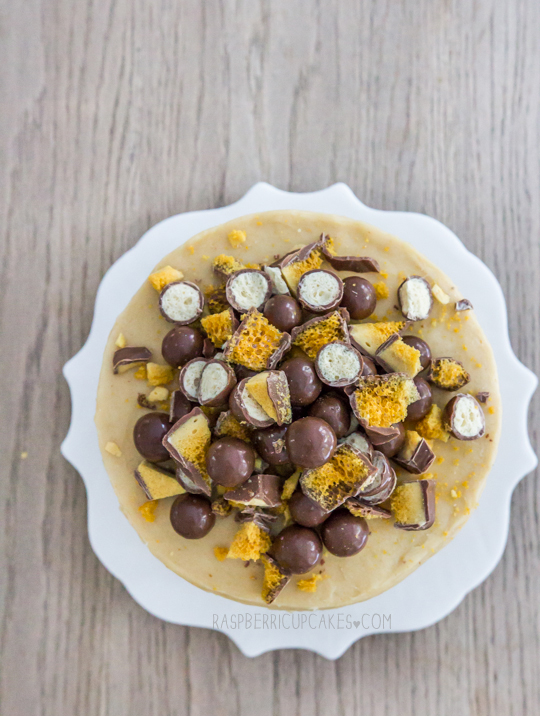
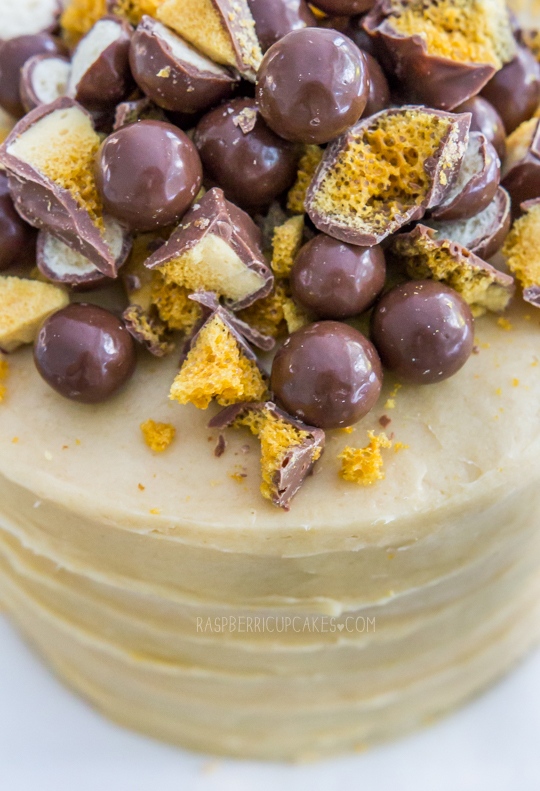
Now the chocolate made things a little tricky since my mother-in-law can't eat it, so to be fair I made sure the cake was piled high with Maltesers and Crunchie but I kept all the chocolate out of the actual cake itself so that everyone could enjoy it. I also added a surprise between the layers of the cake by adding pieces of crushed honeycomb (without chocolate) in the icing (a very delicious trick that I learnt from The Dainty Baker last week while tasting her amazing cake flavours, thanks Rhonda!). If you're interested, there's a crappy iphone photo of the fully assembled cake on my instagram.
Vanilla Malt Cake with Honeycomb and Maltesers
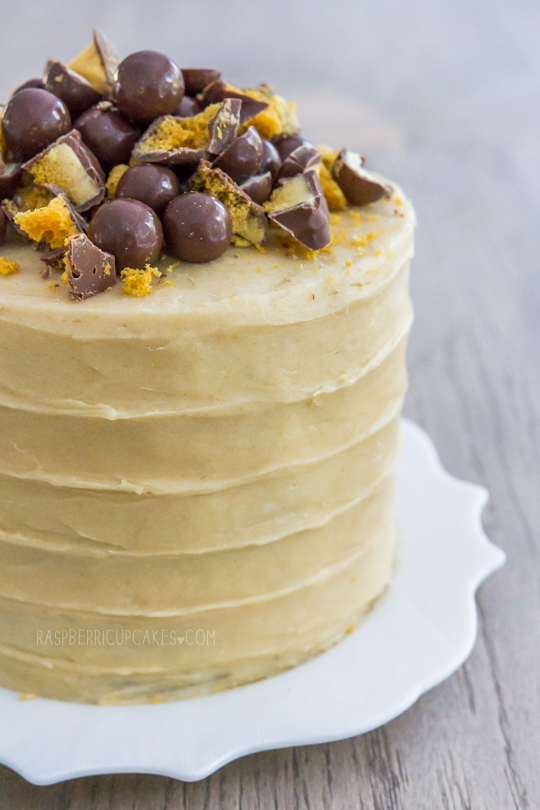
I made my usual fluffy vanilla bean cake, based off the yellow cake from Le Cordon Bleu Complete Cooking Step-by-Step. Somehow, this is the best version I have ever made from this cake. It helped that I had all my ingredients at room temperature, and I took my cake out the minute it was just cooked through so that it was still super, super soft and fluffy even after sitting in the fridge overnight. To match the Vanilla Malt Macarons from last week, the icing was made with malted milk powder, a delicious sweet and salty combination that is perfect for a large amount of icing since it's not overly sweet. I made the mistake of choosing to decorate the side of the cake with that big swirly spiral effect that you get from running your offset spatula around your cake from top to bottom. Once I started doing it, I remembered why I've never done it before. It's bloody hard to do unless you have a handy cake turntable! It was a messy and very slow process, and the cake ended up having a slight lean to it because I was pressing on the sides so hard. It wasn't too noticeable thankfully, and the cake went down really, really well. It's a crowd-pleaser for sure.
Vanilla Malt Cake with Honeycomb and Maltesers
Vanilla Cake with Malt Icing, Honeycomb and Maltesers
(makes a tall 3-layer 15cm (6") cake or a shorter 3-layer 18cm (7") cake)
For the cake:
355g (about 2.5 cups) plain/all-purpose flour
4 tsp baking powder
1/2 tsp salt
225ml (about 1 cup minus 1 tbsp) milk
2 tsp vanilla extract or scraped seeds from 2 vanilla bean pods (I used 1 tsp extract and the scraped seeds from 1 vanilla bean pod)
350g (about 1 & 3/4 cups) sugar (granulated or caster)
225g (2 sticks) butter, softened
4 eggs
  1. Preheat oven to 180°C (350°F) and grease three 15cm (6 inch) (or 18cm (7 inch), cake will be shorter) round cake tins. Line the base of the tins with baking paper. 
  2. Combine flour and baking powder in a medium bowl and set aside. Mix milk and vanilla together in a measuring jug.
  3. Using an electric mixer on low speed, beat sugar and butter in a large bowl until blended. Increase speed to high and beat well until very pale and creamy, at least 5 minutes. 
  4. Reduce speed to medium low, add eggs 1 at a time, beating well after each addition. 
  5. Alternately add flour mix and milk mixture, beginning and ending with flour mixture (I did it by adding 1/4 of of the dry mixture followed by 1/3 of the wet mixture at a time). Beat until smooth, occasionally scraping bowl with a spatula. 
  6. Split mixture equally between prepared tins and smooth top with a spatula.
  7. Bake until a skewer inserted into the centre just comes out clean and the outside is golden, about 35-40 minutes (will vary depending on your cake tin size). Take cake not to overbake or cake will be dry. 
  8. Cool in tins for 15 minutes, then carefully turn out on to a wire rack to cool completely. Keep cakes wrapped in clingfilm and chilled in fridge until you are ready to assemble. Can be stored in an airtight container overnight if you want to prep the cakes a day ahead.
For the malt icing:
400g  (3.5 sticks) butter, softened
400g (about just under  3 cups) icing/confectioner's sugar, sifted
100g (about 1 cup) Horlicks or malted milk powder
1/4 cup milk, adjust for texture
Optional: crushed honeycomb pieces (keep them fairly large (just under 1 cm wide) as they will melt slightly) to layer within cake, Maltesers/malted milk balls plus more crushed honeycomb pieces or Crunchie to decorate.
  1. Place butter in a large mixing bowl and beat with an electric mixer on high until smooth and fluffy.
  2. Add icing sugar, malted milk powder to bowl and mix until it starts to come together, then gradually add milk while beating on high until light and fluffy. I added my milk 1 tbsp at a time until I achieved the desired texture. You want your icing to be stiff enough to hold its shape but smooth enough to be spread easily.
  3. Trim the tops of your cakes so they are level using a long, sharp, preferably serrated knife. Place one layer on your cake stand and use an offset spatula to spread a thick layer of icing over the top of the cake (I used an ice cream scoop to make sure I spread an equal amount of icing between each layer.
  4. Sprinkle a layer of crushed honeycomb pieces over the top of the icing and sandwich with another cake layer. Repeat with remaining layers.
  5. Crumb coat cake and then chill for about half an hour, then cover with remaining icing and smooth with offset spatula. If you want to achieve a spiral/swirl effect with the icing, press the tip of your offset spatula gently into the icing at the bottom of your cake and slowly rotate the cake (this is MUCH easier if you have a turntable, which I did not) and spiral the spatula around the side of the cake. 
  6. Place cake in the fridge until ready to serve. Remove from fridge at least 1 hour before serving to allow cake to come back to room temperature. When ready to serve, decorate with Maltesers and more broken up pieces of honeycomb/Crunchie. Avoid decorating ahead of time as the honeycomb/malt pieces will start to soften the longer they are exposed to air.
Vanilla Malt Cake with Honeycomb and Maltesers

Monday, June 23, 2014

Heart-Inside Macarons (Strawberry Cheesecake and Vanilla Malt)

Heart-Inside Macarons (Strawberry Cheesecake and Vanilla Malt)
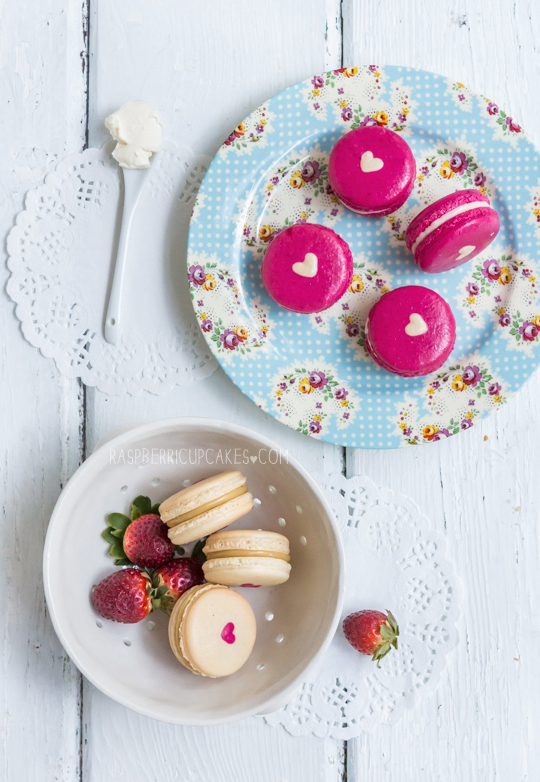
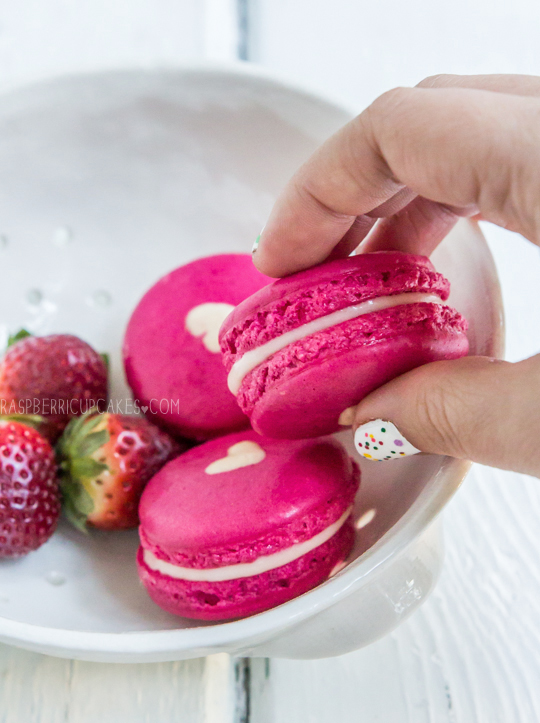
I wasn't even going to blog about these little macarons. I was mayyybe going to photograph them along with the cake that they are going to presented with later this week. I didn't think they were going to deserve their own special post. But I posted a little preview of these on instagram and facebook and so many people were asking questions about them, so I thought I better share the recipe with you guys!
Heart-Inside Macarons (Strawberry Cheesecake and Vanilla Malt)
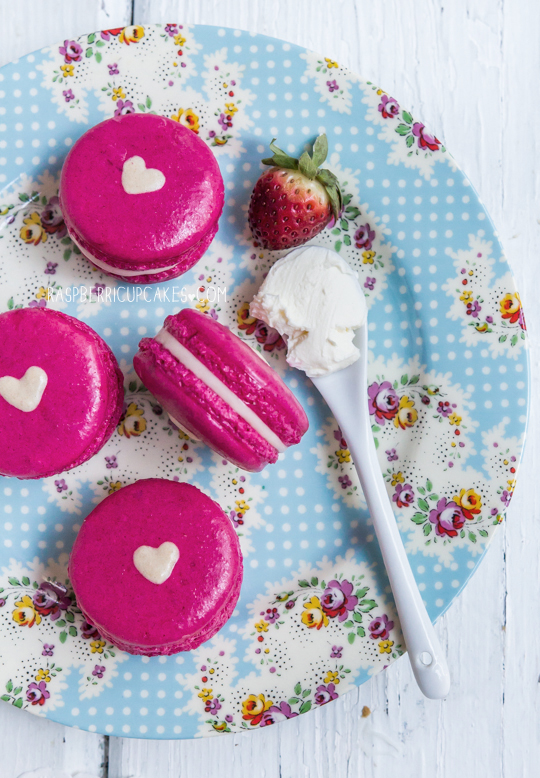
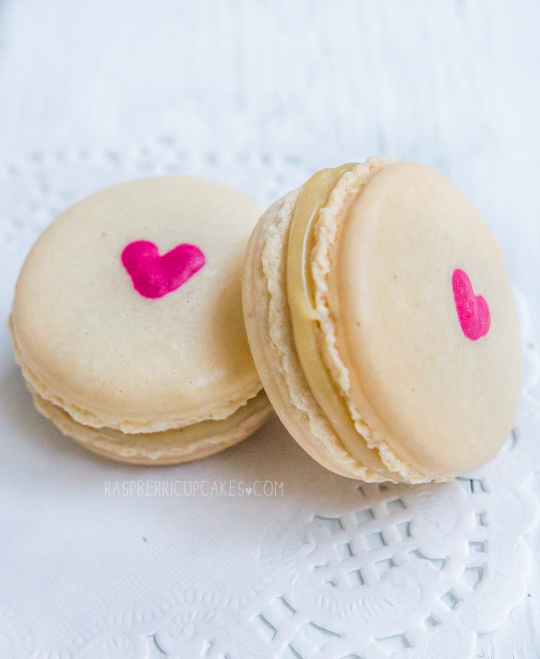
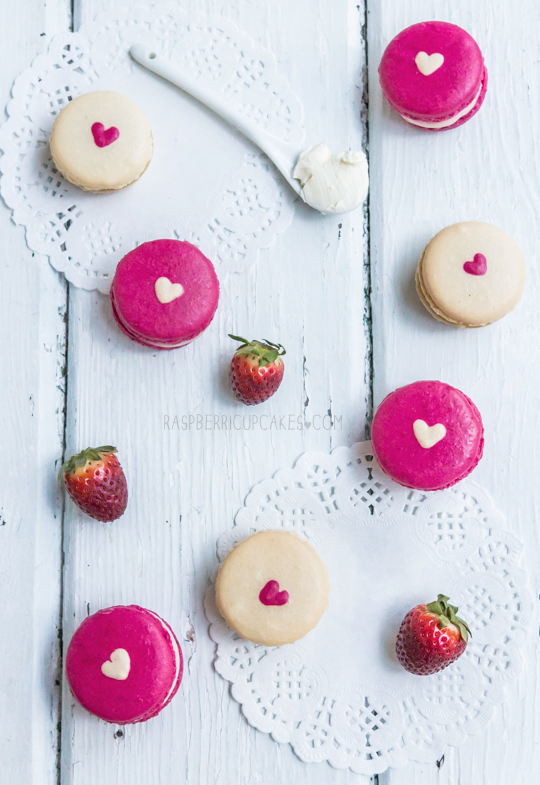
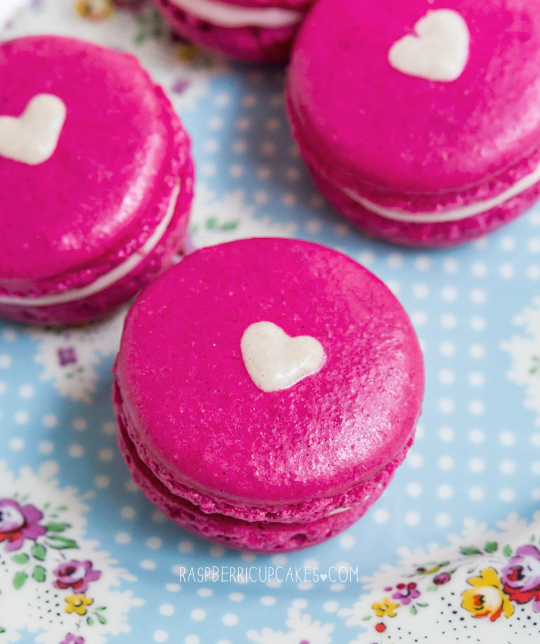
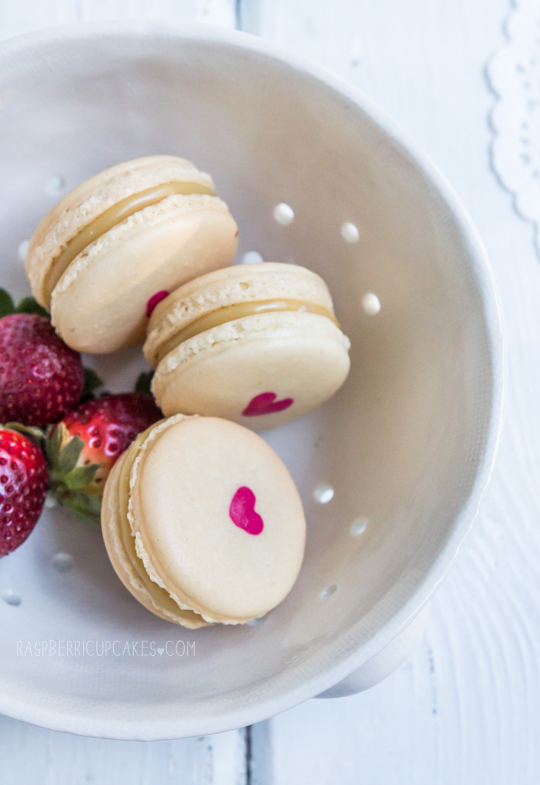
Just a plain macaron with a tiny twist, a teeny tiny heart piped into the middle of each shell. Yes, the heart is also piped with macaron mixture, which I separated from the main macaron batter and didn't colour. I pipe the hearts using pretty much the same piping technique that I use for the full-size heart-shaped macarons that I do all the time but with a smaller piping tip; it's basically just a fat V-shape. You can also use a wooden skewer to carefully clean up the edges of your piping if it messes up slightly.
Heart-Inside Macarons (Strawberry Cheesecake and Vanilla Malt)
As you can see, I made a second batch of macarons with the colours switched around. The recipe below only has instructions for making one batch of macarons, you can choose which colour combination you want to use. The pink ones are made with a Strawberry 'Cheesecake' filling; a strawberry-flavoured cream cheese icing. You can even add some biscuit crumbs to the filling to make it even more cheesecake like if you want. The white ones are filled with a Vanilla Malt flavoured ganache, which is so delicious that I couldn't stop licking the spatula clean after I was done. I've included the recipe for both flavours below, so along with your colour combo you can also choose the flavour you prefer.
Heart-Inside Macarons (Strawberry Cheesecake and Vanilla Malt)
Someone asked me recently how long it took to get the hang of macaron making. It's a hard question to answer, in my mind I still haven't completely gotten the hang of it. I know that sounds silly considering how many macarons I've posted on the blog over the years, but I feel like I'm always tweaking and trying to improve my technique. And I still make mistakes and stuff it up all the time. At the moment I'm having a little trouble with getting my oven temperature right in my new house, so my macarons are turning out a little harder than I would prefer. I'm tempted to switch over to the Italian meringue method just to give me a little bit more room for error, but I'm so used to making them using the French method so I'm in two minds about it. Which method do you prefer?
Heart-Inside Macarons (Strawberry Cheesecake and Vanilla Malt)
Strawberry Cheesecake or Vanilla Malt Heart-Inside Macarons
(makes about 12-15 macarons)
Note: These macarons are a little trickier, if you are a beginner with macarons read up and practice plain macarons first. BraveTart has lots of useful advice and info on the subject
For the heart macarons:
100g (3.5oz) egg whites, at room temperature
1/4 tsp salt
110g (about 4oz) almond meal, at room temperature and well sifted
200g (7oz) icing (confectioner's) sugar
50g (1.74oz) caster (granulated) sugar
Pink food colouring, gel or powdered
Optional: Pure maple sugar to decorate (thanks to The Essential Ingredient for sending me a sample to try!)
  1. Line two baking trays with good quality baking paper. 
  2. Place icing sugar in food processor and pulse for a minute to remove any lumps. Stir in almond meal and pulse for about 30 seconds to combine. (If you don’t have a processor just sift together with a fine sieve.) Sift into a large mixing bowl and set aside. 
  3. Using an electric mixer, beat egg whites and salt in a medium mixing bowl until it reaches soft peaks. With the mixer on high speed, gradually add sugar and beat until it reaches stiff peaks.
  4. Add meringue to your dry mixture and mix together with a spatula, quickly at first to break down the bubbles in the egg white (you really want to beat all the large bubbles out of the mixture, which is easily done by smearing the mixture on the bottom and side of the bowl with your spatula), then mix carefully as the dry mixture becomes just incorporated. At this point you need to separate your mixture into two bowls so you can add the pink food colouring to one bowl. For the mixture that will be piped as small hearts, I separated about 1/3-1/2 cup mixture from the rest of it. Add pink food colouring to one bowl, depending on which colour combination you want to use. Stir both mixtures until it starts to become shiny again. Take care not to overmix, the mixture should flow like lava and a streak of mixture spread over the surface of the rest of the mixture should disappear after about 30 seconds. 
  5. Place the smaller amount of mixture in a piping bag with a narrow (about 2mm wide) round tip for piping the small hearts. Place remaining mixture in a piping bag with a 1cm round piping tip. With the larger bag, pipe circles about 3cm wide on your prepared trays, leaving about 3cm space around each one. Tap baking sheets carefully and firmly on the benchtop a couple times to remove any large bubbles. Then use the smaller piping bag to very carefully pipe small hearts in the centre of each piped macaron shell by piping a tiny V-shape (here is an example video of me piping a larger version, but the technique should still be pretty much the same)
  6. Leave to dry for about 60 mins minimum, until when you press the surface of one gently it does not break/stick to your finger. This will help prevent any cracking and help the feet to form on the macs. (I find the easiest way to do this is to point a fan at the shells, but make sure you stick or weigh down the baking paper first)
  7. Preheat your oven to 130-150°C (265-300°F), depending on your oven (fan-forced ovens may need to be set as low as 100°C, it really depends) . You can place the sheet of piped shells on top of an upside-down roasting tray or another baking tray, for better heat distribution. 
  8. Bake for 20-25 minutes, depending on the size of your shells. Carefully test if the base of the shell is ready by gently lifting one and if it’s still soft and sticking to the baking paper, then it needs to bake for a few minutes longer. 
  9. Remove from the oven and cool on the tray for a few minutes, then gently remove from the sheet and place on a wire rack to cool.
Heart-Inside Macarons (Strawberry Cheesecake and Vanilla Malt)
For the Strawberry Cheesecake filling:
100g (3.5oz) butter, softened
100g (3.5oz) cream cheese, softened
150g (about 1 cup) icing (confectioner's) sugar
2 tbsp strawberry jam
Optional: 1/2 tsp strawberry extrac, a couple of crushed digestive biscuits or Graham crackers
  1. Place butter and cream cheese in a mixing bowl and beat with an electric mixer on high until smooth and fluffy.
  2. Add icing sugar, strawberry jam and strawberry extract to the bowl and beat until combined.
  3. If you find the mixture too runny, you can keep adding more icing sugar until it stiffens up more, you can also chill the mixture in the fridge to help it set slightly before piping.
  4. Place in a piping bag, pipe and sandwich between macarons shells (sprinkle a bit of crushed biscuit crumbs on top of the filling before sandwiching if you want to add the cheesecake crust element).
  5. Place macarons in an airtight container and refrigerate overnight to allow macaron flavour to mature. Serve at room temperature.
(Alternative flavour) If you prefer Vanilla Malt filling:
100g (3.5oz) good quality white chocolate, finely chopped
100ml (about 1/3 cup plus 1/2 tsp) pure (heavy) cream
50g (about 1/2 cup) Horlicks or malted milk powder
1/2 tsp pure vanilla extract
  1. Place chopped white chocolate in a mixing bowl and set aside. 
  2. Heat cream with malted milk powder and vanilla in a small saucepan on medium heat until the powder dissolves and it just comes to the boil. Remove from the heat and pour over the white chocolate. 
  3. Leave for 5 minutes to allow the chocolate to melt, then use a whisk to combine all the ingredients until smooth. 
  4. Chill in fridge until mixture thickens but is still pipable, whisking it every 10 minutes or so. Spoon or pipe between macaron shells. 
  5. Refrigerate overnight in an airtight container to allow them to mature. Remove from the fridge about half an hour before serving so they come closer to room temperature.
Heart-Inside Macarons (Strawberry Cheesecake and Vanilla Malt)

Tuesday, June 17, 2014

Polka Dot Icing Cake with Strawberry & Rhubarb

Polka Dot Icing Cake with Strawberry & Rhubarb
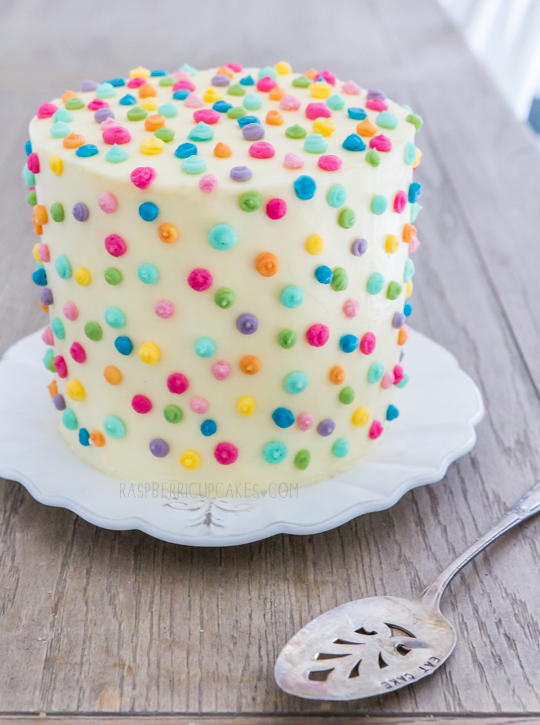
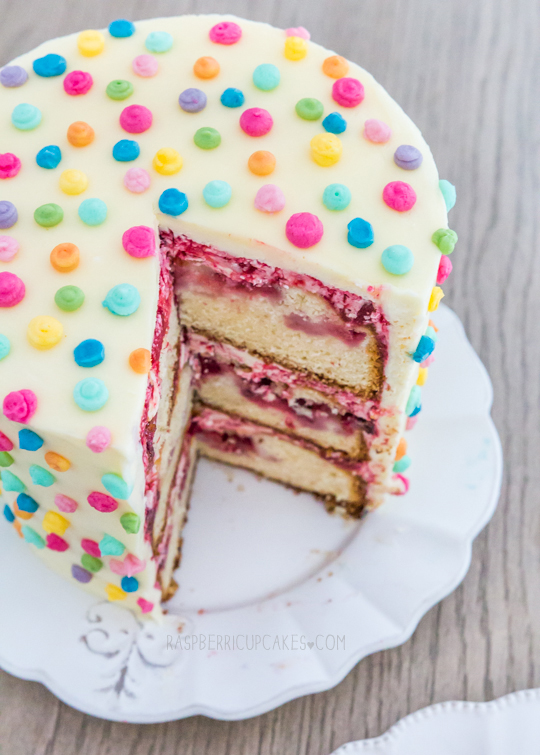
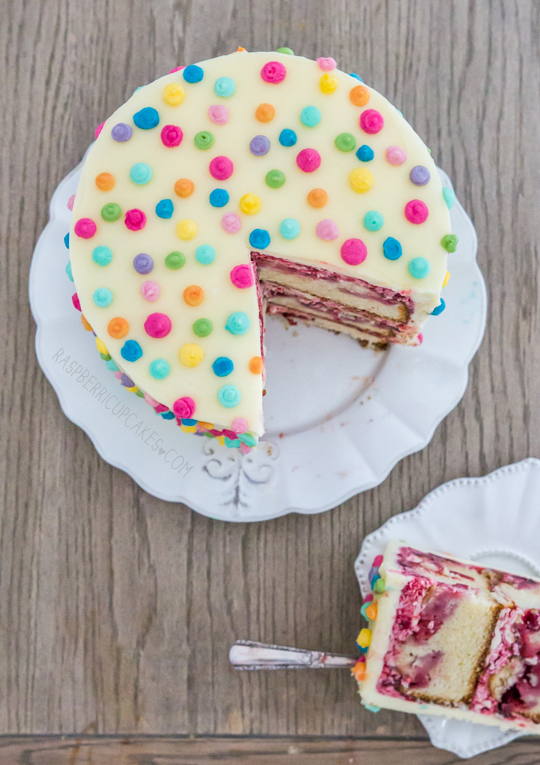
Today is Lisa's birthday! And it only seemed right to be celebrating with cake. Polka dot-covered cake to be exact. With some of our favourite flavours; strawberry, ginger and rhubarb. I may have thrown a bit of brown butter and vanilla bean into the mix too. I couldn't help myself. You might recognise the plate the cake is sitting on from the birthday cake she made me. It has taken me this long to return it to her, I am a terrible friend. But now I can officially dub us the sisterhood of the travelling cake plate. We had to laugh at the people who saw the photo of my cake on Facebook and were shocked that I was presenting her birthday cake with a giant slice cut out of it. If anyone was going to be okay with this, it would be Lisa. She did the same thing for my birthday after all. I guess it's something that only baking bloggers will understand.
Polka Dot Icing Cake with Strawberry & Rhubarb
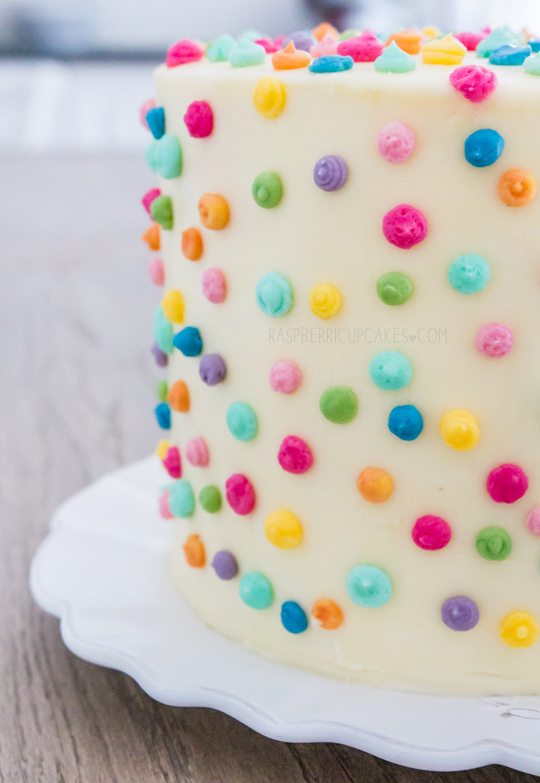
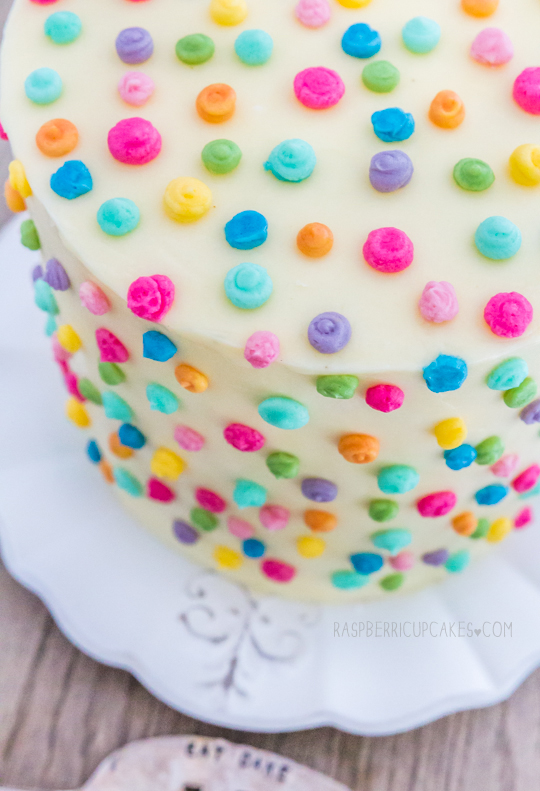
The super adorable rainbow polka dot icing is made entirely of my regular butter icing, no sprinkles or fondant here! I got the idea from the amazing i am baker, I couldn't believe I hadn't thought of using dots of icing to decorate a cake before. Instead of just decorating the rim of the cake, I covered the entire thing with polka dots. As we are both lovers of all things print, I knew she would love it. There was a moment when I only had pink and green dots all over the cake that I was worried it was looking a bit like a pimple and mould covered cake but it got a lot cuter once I added a whole array of coloured spots. So fun! Yeah my whole kitchen was covered in rainbow smears of icing, but it was worth it.
Polka Dot Icing Cake with Strawberry & Rhubarb
The cake is a fresh strawberry cake that I've made several times in the past, it's lovely to eat as you get little pockets of baked strawberry pieces, mixed with the jam-like rhubarb and ginger icing that is sandwiched between the cake layers. I made my cakes in my super small but tall cake tins to achieve that great height on the cake but it will work just as well in a normal sized cake tin, albeit slightly shorter.
Polka Dot Icing Cake with Strawberry & Rhubarb
(adapted from this recipe, makes a tall 3-layer 15cm (6") cake or a shorter 3-layer 18cm (7") cake)
For the fresh strawberry cake:
170g (1.5 sticks) butter, softened
3 cups (about 420g) plain flour
3 tsp baking powder
1/2 tsp salt (if using unsalted butter, add an extra 1/2 tsp)
1 1/2 cups (300g) plus 2 tbsp sugar
2 eggs, room temperature
1 cup milk
1 tsp vanilla bean paste or pure vanilla extract
2 punnets (500g/1 pound) strawberries, hulled and halved
  1. Grease and line three 15cm (6") or 18cm (7", will result in slightly thinner layers) round cake tins and preheat oven to 180°C (350°F). 
  2. Sift flour, baking powder, and salt together into a medium bowl. 
  3. Place butter and 1.5 cups sugar in a large mixing bowl and beat with an electic mixer on high speed until pale and fluffy, at least 5 minutes. 
  4. Reduce speed to medium-low; mix in egg, milk, and vanilla.
    Reduce speed to low; gradually mix in flour mixture until just combined.
  5. Split mixture between the three prepared tins and smooth tops with a spatula. Arrange strawberries on top of batter, cut sides down and as close together as possible. Sprinkle remaining 2 tablespoons sugar over berries. 
  6. Bake cakes for 10 minutes. Reduce oven temperature to 160 degrees. Bake until cakes are golden brown and firm to the touch, and a skewer inserted into a non-strawberry part of the cake comes out clean, about 40-50 mins but timing will vary depending on your tin size (if on top and bottom rack, switch cakes between racks halfway through, baking). Let cool in tin on a wire rack, then turn out. Can be stored in an airtight container for a day or so before icing.
Polka Dot Icing Cake with Strawberry & Rhubarb
For the rhubarb filling:
1 bunch rhubarb (about 200g/7oz, trimmed weight), chopped into 2cm thick pieces
50g (1/4 cup) sugar (or more to taste)
Grated zest of 1/2 a lemon
Optional: 1/2 tsp finely grated ginger
200g butter, softened (Optional: I browned my butter using this method, but you can skip this to save time)
300g (about 2 cups) icing (confectioner's) sugar,sifted
  1. Place rhubarb, sugar, lemon and ginger in a medium saucepan. 
  2. Stir over medium heat until sugar dissolved. Reduce heat slightly and simmer until rhubarb is very soft and sugar syrup is slightly thickened, about 5-10 minutes. Set aside to cool to room temp.
  3. Can be stored in an airtight container in the fridge for several days, until ready to be mixed into filling.
  4. Place butter in a large mixing bowl and beat on high with an electric mixer until smooth. 
  5. With the mixer on low, gradually add icing sugar until combined, then beat on high until pale and fluffy. 
  6. Gently fold rhubarb mixture into the icing (this may cause the icing to curdle slightly, it is easier to avoid if the rhubarb is not too cold)
  7. Place one layer of strawberry cake on your cake stand/plate. Spread a thick layer of rhubarb icing over the top and sandwich with another layer. Repeat. 
  8. Crumb coat cake with remaining rhubarb icing. Chill in fridge until icing sets, at least 1 hour.
For the polka dot icing:
450g (4 sticks. Yes, really. You need extra to make all the coloured icings, especially if you want lots of colours.) butter, softened
700g (about 4.5 cups) icing (confectioner's) sugar, sifted
About 1/4 cup milk, adjust for the right texture
1 tsp pure vanilla extract
Variety of icing colourings, I used Wilton's gel icing colors
  1. Place butter in a large mixing bowl and beat on high with an electric mixer until smooth. 
  2. With the mixer on low, gradually add icing sugar, milk and vanilla until combined, then beat on high until pale and fluffy. You can add more milk or icing sugar to achieve the right texture of icing. You want it to be stiff enough to hold its shape but soft enough to pipe.
  3. Use an offset spatula to cover your crumb coated cake in a layer of white icing. Regularly run your spatula under hot water to achieve a smoother finish.
  4. Split the remaining icing into small bowls and add food colouring of your choice. Place each in separate piping bags with a narrow round tip, or use small ziplock bags with a tiny hole in one corner snipped off.
  5. Carefully pipe colour dots all over the surface of your cake. Keep cake chilled until about 30 mins before serving, then remove from the fridge to allow it to come back to room temperature. Cake can be iced the night before serving.
Polka Dot Icing Cake with Strawberry & Rhubarb

Monday, June 9, 2014

Waffle Macarons with Maple Bacon Buttercream

Waffle Macarons with Maple Bacon Buttercream
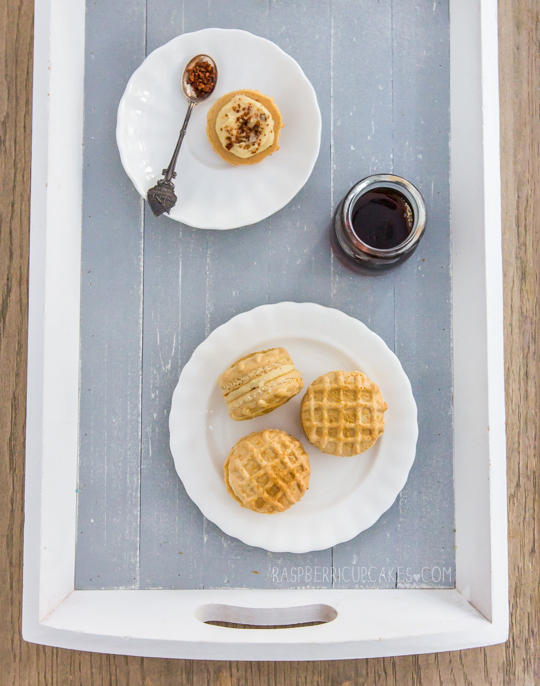
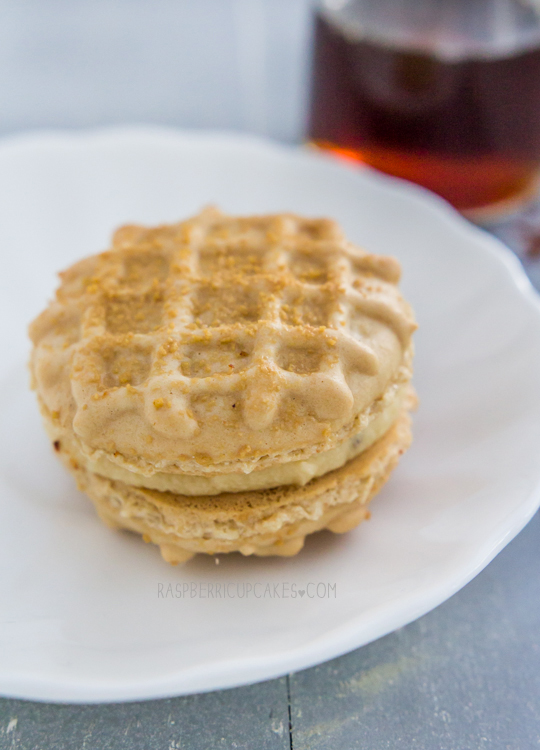
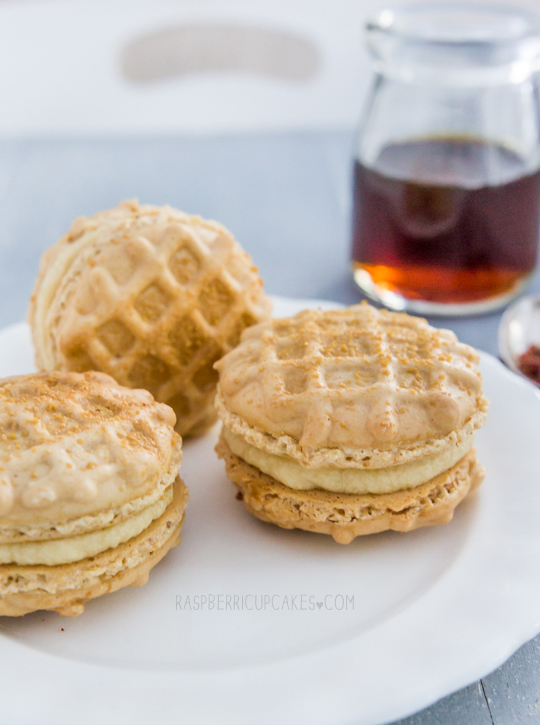
This is what happens when you leave me at home, bored on a long weekend with bacon and maple syrup. Magic! Or weirdness, depending on the type of person you are. If you're like me and believe that bacon is the answer to many problems, then CELEBRATE! This is the macaron for you. Now for those of you who are weirded out by the idea of a bacon-flavoured macaron, just hear me out first. I've been very hesistant to use bacon in any of my dessert recipes (except for this one), and so I only use it when I'm sure it's going to work appropriately well. It really does work this time. If you still don't wanna hear any part of it, take out the bacon and you still have a very cute and tasty maple waffle macaron.
Waffle Macarons with Maple Bacon Buttercream 
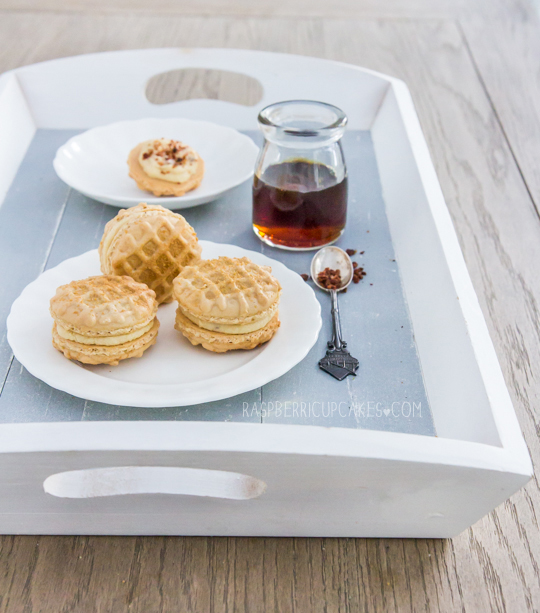
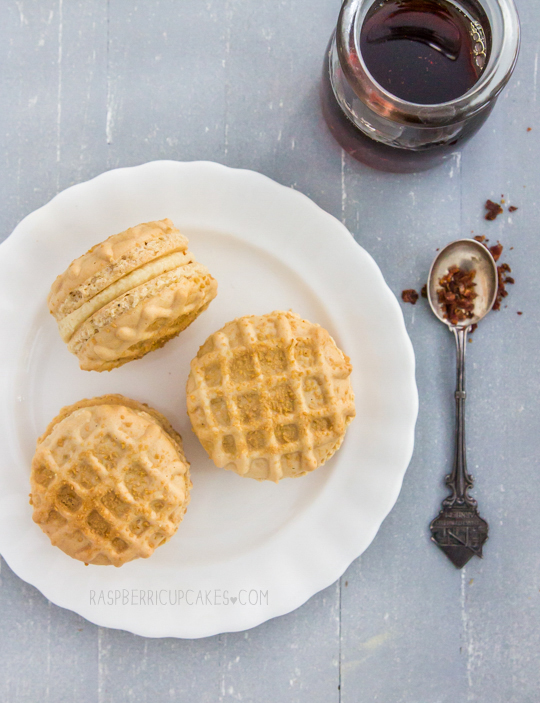
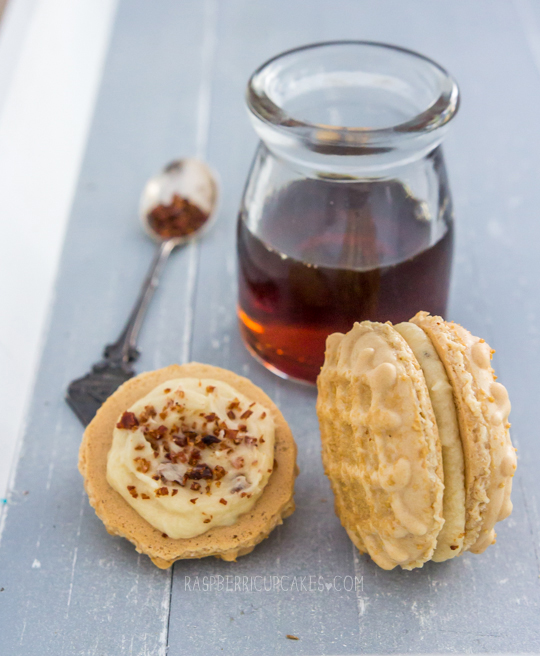
That's right, macarons that look like WAFFLES. And taste of maple syrup and BACON. Yeah! So cute and delicious. When I first had this idea, I was worried about how I would make them look waffley, but it turned out to be very easy. I made some brown sugar macaron shells and piped extra macaron batter over the top in a criss-cross pattern. I also sprinkled some maple sugar over the top of each one to make it extra maple-flavoured.
Waffle Macarons with Maple Bacon Buttercream
The icing that I filled these macarons with is the magical part of this recipe. Who knew that bacon fat would make an icing sing. That's right, bacon fat. I cooked up a big batch of streaky bacon and kept the bacon fat from the pan, cooled it and then whipped it up with the butter. WOW. I know it sounds random and possibly gross, but it totally works. I went one step further and crumbled up some extra crispy bits of bacon up and added it to the middle of the macarons. I love waffles with bacon and maple syrup. I love waffle macarons with bacon and maple syrup buttercream!
Waffle Macarons with Maple Bacon Buttercream
To say that I'm pleased with how these turned out would be a huge understatement. I am thrilled. It's been a while since I've thought up a new baking idea that's worked out exactly (if not better) than I had hoped. Happy!
Waffle Macarons with Maple Bacon Buttercream
(makes about 12 macarons)
For the macarons:
Note: These macarons are a little trickier, if you are a beginner with macarons read up and practice plain macarons first. BraveTart has lots of useful advice and info on the subject
100g egg whites, at room temperature
1/4 tsp salt
110g almond meal, at room temperature and well sifted
200g icing (confectioner's) sugar
50g brown sugar
Optional: Pure maple sugar to decorate (thanks to The Essential Ingredient for sending me a sample to try!)
  1. Line two baking trays with good quality baking paper. 
  2. Place icing sugar in food processor and pulse for a minute to remove any lumps. Stir in almond meal and pulse for about 30 seconds to combine. (If you don’t have a processor just sift together with a fine sieve.) Sift into a large mixing bowl and set aside. 
  3. Using an electric mixer, beat egg whites and salt in a medium mixing bowl until it reaches soft peaks. With the mixer on high speed, gradually add brown sugar and beat until it reaches stiff peaks.
  4. Add meringue to your dry mixture and mix together with a spatula, quickly at first to break down the bubbles in the egg white (you really want to beat all the large bubbles out of the mixture, which is easily done by smearing the mixture on the bottom and side of the bowl with your spatula), then mix carefully as the dry mixture becomes incorporated. Mix until it starts to become shiny again. Take care not to overmix, the mixture should flow like lava and a streak of mixture spread over the surface of the rest of the mixture should disappear after about 30 seconds. 
  5. Place about 1/4 of the mixture in a separate piping bag with a narrow (about 2mm wide) round tip if you want to make the waffle pattern. Place remaining mixture in a piping bag with a 1cm round piping tip. With the larger bag, pipe circles about 3.5cm wide on your prepared trays, leaving about 3cm space around each one. Tap baking sheets carefully and firmly on the benchtop a couple times to remove any large bubbles. Leave to dry for about 20 minutes.
  6. Using the bag narrower tip, pipe a cross-hatch pattern (example) over the top of each piped circle.
  7. Sprinkle maple sugar over the top of each piped macaron. 
  8. Leave to dry for about 60 mins more, until when you press the surface of one gently it does not break/stick to your finger. This will help prevent any cracking and help the feet to form on the macs. (I find the easiest way to do this is to point a fan at the shells, but make sure you stick or weigh down the baking paper first)
  9. Preheat your oven to 130-150°C (265-300°F), depending on your oven (fan-forced ovens may need to be set as low as 100°C, it really depends) . You can place the sheet of piped shells on top of an upside-down roasting tray or another baking tray, for better heat distribution. 
  10. Bake for 20-25 minutes, depending on the size of your shells. Carefully test if the base of the shell is ready by gently lifting one and if it’s still soft and sticking to the baking paper, then it needs to bake for a few minutes longer. 
  11. Remove from the oven and cool on the tray for a few minutes, then gently remove from the sheet and place on a wire rack to cool.
For the Maple Bacon Buttercream:
100g (7 tbsp) butter, softened
1 cup (about 150g) icing (confectioner's) sugar
2 tbsp (about 25g) cooked & cooled bacon fat (can replace with more butter)
1/3 cup pure maple syrup
Optional: crispy bacon bits (I fried up a batch of streaky bacon until it was super crisp, let it cool (and saved the bacon fat drippings) and then very finely chopped up the crunchiest bits).
  1. Place butter, icing sugar and bacon fat in a large mixing bowl. 
  2. Beat with an electric mixer on low, gradually add maple syrup until combined and then beat un high until smooth and fluffy. You can adjust the amount of icing sugar or maple syrup to attain the right consistency, you want it to be stiff enough to hold it's shape but runny enough to be piped or spooned.
  3. Place in a piping bag or spoon mixture between macaron shells to fill them. You can sprinkle a small amount of crispy bacon in the middle of each befor sandwiching.
  4. Place in an airtight container and refridgerate overnight to allow flavour to mature. 
  5. Can be stored in the fridge for several days, serve at room temperature.
Waffle Macarons with Maple Bacon Buttercream

Saturday, June 7, 2014

Salted Caramel Mousse with Caramel Popcorn on DesignSponge

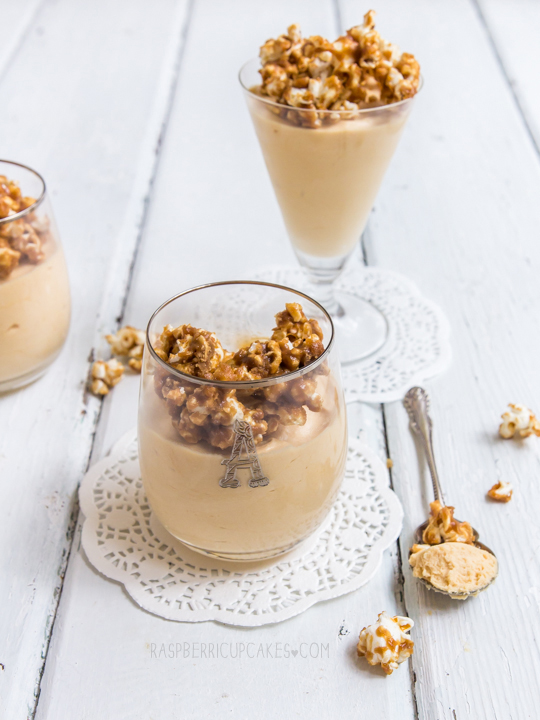
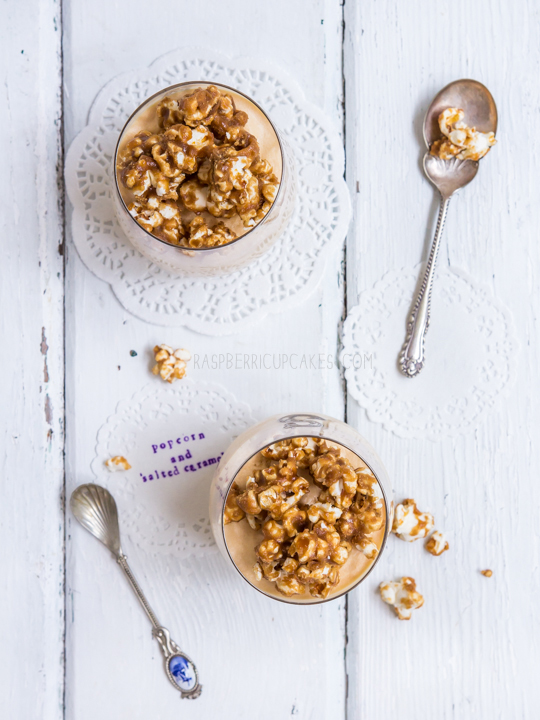
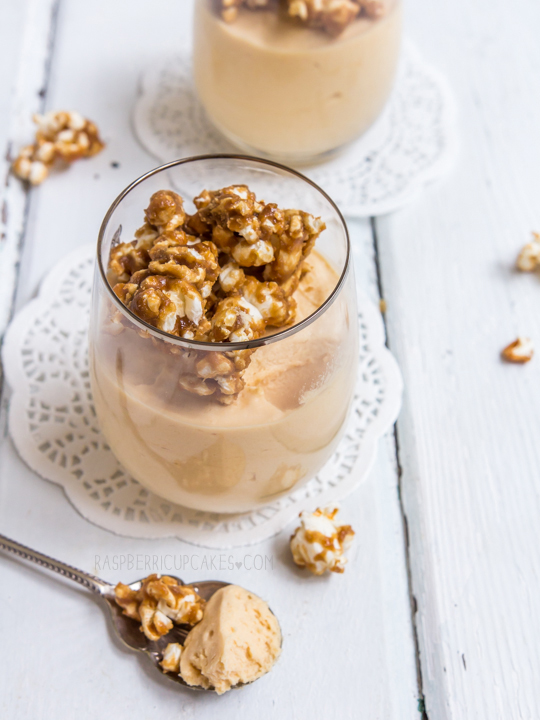
Salted Caramel Mousse with Caramel Popcorn
Hi! I know it's been quieter than usual around here, sorry about that. I'm working on a new recipe for you right now! But I have something a little different to share with you today. I was asked to collaborate with DesignSponge on a fun & easy recipe and there was no way I could say no.
Salted Caramel Mousse with Caramel Popcorn
I came up with a fairly simple recipe for a wonderfully indulgent dessert; Salted Caramel Mousse with Caramel Popcorn. Yes, I'm still stuck on my salted caramel obsession. You're welcome.
Salted Caramel Mousse with Caramel Popcorn
Make sure you click through to Kristina's In The Kitchen With column for more photos and the full recipe. Hopefully we will be returning to regularly scheduled programming soon. I know I promised that last time but I mean it this time!
Salted Caramel Mousse with Caramel Popcorn